Stone is a popular material for finishing building structures of a private house. Such natural decor is difficult to work with, and it is not cheap. Therefore, let's look at how to make artificial stone with your own hands at home to facilitate the process and save on finishing. Read to the end and find out what kind of material this is, its disadvantages and advantages, varieties. We will tell you about the technology of making stone using and without matrices, what it is used for, what types of forms exist for it.
Artificial stone in the interior Source sad-dom.com
Main features of artificial stone
Various materials are used to make stone decor. Their choice depends on the place where the artificial stone will be used. Thus, indoor building structures are often finished with gypsum stone. Facades are usually faced with a material made from a cement mixture and various components.
Additives include materials that make it possible to obtain a relief pattern on the finished decor. For these purposes, stone chips, sand, fine gravel, and so on are used. In production, coloring pigments in dry and liquid states are also used. With their help, stone facing material of artificial origin is given the required shades.
Artificially formed stone decor is cast in special molds or made even without their use. This distinguishes it favorably from materials of natural origin. Professionals, strictly following production technology, create artificial stone with lumpy, smooth, layered, fine-grained and other textures.
Layered texture of artificially formed stone decor Source gesso3d.ru
Making figures from polyurethane foam
Working with complex shapes requires certain skills, so it is better to start with simple spherical or oval figures (gingerbread man, mushroom, decorative boulder).
Decorative boulders can not only decorate a site, but also cover up unsightly household details
Kolobok
For production you will need:
- Styrofoam;
- cement mortar;
- paints;
- gypsum putty;
- polyurethane foam;
- knife or cutter.
- You can create a ball only from sealant, but it is more economical to take something round for the base, for example, a plastic ball. It is covered with foam, and when it dries, the muzzle is cut out, handles are made from foam and inserted with wire.
The ball becomes like a bun - a muzzle and arms appear
A foam bow will decorate the top of the bun
We create the semblance of legs with the volume of foam
After puttying, we rub it with cement mortar and putty again
The bun becomes bright
This is such a funny and bright character
Foam mushrooms
It’s just as easy to make foam mushrooms. Homemade mushrooms will enliven the area and add mood. You can install one figurine, or you can “plant” an entire mushroom meadow.
The mushroom meadow pleases the eyes of both hosts and guests
Borovik
For production you will need:
- plastic bottles and cardboard boxes (frames for the mushroom stem and cap);
- wallpaper glue;
- putty;
- acrylic paint and primer.
- First fill the bottle with sand for stability and cover it with foam in layers, forming a leg that is wider at the base. In the same way, cover the box with sealant (a candy box will do), giving it the shape of a hat.
Using foam, form a stem and a cap on the base.
Place the cap exactly in the center and fix it firmly
Paint the mushroom with acrylic paint
Video: how to make a mushroom from foam
Having mastered simple forms, you can take on more complex and interesting tasks. There are many examples - from decorative flowerpots and realistic animal figurines to fairy-tale characters. Everyone will choose a sample to their taste, or you can try to create something unique.
Photo gallery: examples of other crafts made from polyurethane foam
Advantages and disadvantages of artificially formed stone
Making decorative stone material is a creative work. For professionals with relevant experience, this is an easy process. At the same time, artificial stone has a number of other advantages:
- light weight, which is significantly less than that of a similar natural material, which allows for simpler transportation, processing, and installation;
- the ability to always produce additional volumes of products if there is a shortage of finished material for cladding specific structures;
- real quality control at every stage of production;
- possibility of casting directly at the site where installation is carried out;
- the presence of a smooth back surface, which makes decor installation easier;
- high fire resistance, allowing cladding of fireplaces, stoves and other similar devices;
- availability of components at low prices;
- variety of shapes, colors, sizes, textures.
Different colors and textures of artificial decorative stone Source vitrum-novo.ru
Before you make an artificial stone with your own hands, you definitely need to get acquainted with its disadvantages. Thus, some varieties of this material are manufactured exclusively using complex technologies. Organizing such production requires large financial costs.
Another disadvantage of artificially formed stone decor is that it is less durable than natural material. Although the service life can be 40 years if all rules for the care and maintenance of the lined surface are followed.
Preparatory stage
- remove old finishing material;
- carefully scrape off all the scraps that, one way or another, may interfere with you in the future;
- inspect the wall for cracks and irregularities;
- if you notice cracks, then use a hammer and chisel to make them a little wider and fill the holes with a deep penetration primer - this will help prevent the appearance of always unwanted mold;
- carry out the initial treatment of the wall surface with a primer - it is not necessary to achieve a perfectly smooth surface, since after puttying the priming procedure will have to be repeated;
- if the surface is very uneven and there are noticeable defects, then go over the wall with plaster, and also cover the cracks previously treated with primer;
- to achieve a perfectly smooth wall after plastering, it makes sense to use gypsum-based putty - it is not so rough in consistency and will help make the wall flawless, eliminating those irregularities that plaster, for objective reasons, cannot cope with;
- the final touch is re-priming the surface, this time we are pursuing the goal of achieving excellent adhesion to the decorative material that will be used to imitate brick, the treatment must be carried out carefully, generously lubricating those areas that very quickly absorb the solution.
Popular articles Panel “Mysterious couple” using iris folding technique
How to check if your wall is ready for the next stage? Everything is very simple: run your hand over it - if you don’t feel any obstacles or unpleasant roughness, it means you have successfully completed such a tedious, but still necessary preparatory stage.
Types of artificial stone
Only in accordance with the technology and with strict adherence to the recipe is it possible to obtain high-quality decorative building materials. Today, artificial stone is made using different methods. This allows you to obtain a material that differs in name and properties:
- Reinforced monumental stone made from concrete mortar.
It is produced individually by hand using free forming. Its production is carried out directly at the installation site. This technology allows you to create artificial boulders, granite slabs, and cobblestones.
Artificial boulder made of reinforced monumental stone Source baltiya-garden.ru
The mixture for materials is prepared on the basis of dry sand and cement. During its preparation, the components are mixed 1:3. At the same time, from 2% to 6% of pigment is also added. Its amount is calculated depending on the mass of the mixture. When preparing the solution, polymer-based additives are also used.
- Cement-sand molding stone material used during finishing and construction work.
Before you make a decorative stone with your own hands, you need to get acquainted with its properties. The material has increased resistance to low temperatures and excellent strength. The production of this type of stone can be carried out during the cold season. Typically, the manufacturing process is organized in workshops, garages and hangars.
- Artificial stone material based on gypsum.
Its casting is a simple technology that requires a minimum amount of equipment. Stone production is carried out in the warm season or in heated rooms. In this case, the material is used exclusively for internal cladding, as it is not resistant to temperature changes.
Artificial stone material made from gypsum Source prom.st
See also: Catalog of companies that specialize in finishing materials and related work
The mixture used is characterized by rapid hardening. Therefore, it is prepared in small portions, which are immediately poured into special matrices. Typically, no more than 4 minutes are spent on kneading and filling molds. In the production of such decorative stone, water is used, as well as citric acid to slow down the hardening process. Its amount is calculated depending on the weight of dry gypsum and is 1.3%.
Pigments are also used. Their amount is also calculated by the mass of gypsum and usually ranges from 2 to 6%. When selecting the optimal color option for the finished product, several samples are made, during the production of which different percentages of pigment are added to the mixture.
- Ceramic artificial stone is one of the most expensive facing stone materials.
Its production is carried out under exposure to high temperatures by firing or using the hardening method. The manufacturing process is always carried out in a heated room.
Ceramic stone in the bathroom Source pinimg.com
- Polyester decorative stone material obtained using synthetic substances.
Its production is carried out using hot hardening. Mineral fillers are used to make stone. During its production, a vacuum environment is created, which is required for curing the material. Therefore, production is carried out only in specially equipped workshops.
- Cast decorative stone made of acrylic, the production of which is characterized by cold hardening.
The material is produced using a vibration stand and strictly according to the instructions. Many of its properties are superior to those of other similar stones. In this case, it is possible to change the shape of the acrylic material when exposed to high temperatures and without loss of quality. Its maximum value is 210°C.
On a note! Decorative stone made of acrylic is characterized by the absence of pores and resistance to chemical reactions. It is able to provide a high level of hygiene. Therefore, it is often used in bathrooms, swimming pools, corridors, kitchen areas, terraces and verandas.
Decorative acrylic stone Source sense-life.com
- Liquid decorative stone material on gelcoat.
Its hardness is lower than that of cast stone. The reason for this is the smaller amount of mineral fillers used. Products of complex shapes are made from the mixture. In production, 2 types of composition are used. They differ in components and percentage of filler.
So, the primer composition of the gelcoat is 20%, and the front composition is 40%. The back compound is also used. It consists of a filler to which pigment is added in an amount of maximum 6%. The applied compounds set within 30 minutes, but decorative stones on the gelcoat are laid only after 24 hours.
Liquid stone product Source filigrano.by
DIY artificial rocks and grottoes
In recent years, artificial rocks and grottoes have been increasingly used to decorate garden plots. The growing interest in these landscape elements is not surprising - they give the garden an incomparable mystery, enigma and even a certain fabulousness.
The idea of making artificial rocks has another attractive side: you can make them yourself, and this process will be more fun and creative than labor-intensive, which is why over time it develops into a hobby for many. In addition, creating a rock or grotto with your own hands will not require serious financial investments, and such decor will look very expensive and elegant.
It is worth mentioning, however, that man-made rocks and grottoes are quite large-scale structures, so they are unlikely to be suitable for small areas. It is also necessary that the rock or grotto fits organically into the landscape of your site. Correlate them with the overall design concept of the garden and select the most suitable location for the future structure.
So, let's get to work!
We will create an artificial rock or grotto at the dacha with our own hands in stages, especially since the transition from one technological process to another will require breaks.
The first step is to create a frame structure . The base of the product is made from polyurethane foam, the shape and size corresponding to the parameters of the future rock or canopy grotto.
To ensure good adhesion of the materials, we wrap the base with construction mesh and secure it with ties. Apply a 5-8 cm layer of concrete on top. The frame is ready. Its outlines are the outlines of your future product.
The frame will be much lighter in weight than its natural stone counterpart, so during further processing you will be able to rotate it in a convenient way for work and move it around the site.
At the second stage, we give the product its completed shape . We will do this using a mixture of high-quality cement and sand in a ratio of 1:3 with the addition of natural fillers - fiberglass, ash, wood glue, quartz impurities in arbitrary quantities. Then add water to the mixture, bringing it to the consistency of concrete.
We apply the finished solution to the frame with a spatula, imitating the lines of natural stones, trying to give the future rock an outline close to natural. This will take time and some skills. For more successful practice, you should first carefully examine natural stones to study the plasticity of their lines.
While the solution has not hardened, we form the structured surface of our artificial stone. To create a porous effect, press the sponge onto the wet cement. Grooves, rubbing, and imitation of the effect of erosion made on artificial stone will increase the artistic value of the product.
The next stage in the formation of a rock or grotto will be concrete shrinkage . The process may take about a month and will require patience. Under no circumstances should the structure be dried in the sun; it must be moved to the shade and periodically sprayed with water to prevent cracking.
Finishing work
Now the hand-made grotto or rock needs final finishing. It should be started without waiting for the concrete to shrink. Approximately three days after the product has been left to dry, it is necessary to smooth its surface - using a fine-grained grinding stone to remove all unnatural-looking irregularities.
Preparation for painting is a mandatory stage of finishing work; the quality of its execution will certainly affect the appearance of the product in the future. Dust must be carefully removed from all cracks and irregularities using a clean and dry paint brush. Then the man-made stone needs to be washed and dried.
After the artificial rocks you created with your own hands have dried, you can proceed directly to painting . To do this, you should stock up on water-based aerosol paints, choosing shades that are as close as possible to natural ones - brown, terracotta, yellow, dirty orange, green. It is better to apply paints in several layers, without leaving stains of unnatural color. If you are not satisfied with the result, you can wash off the paint with water and start the process again.
Matrices for decorative stone material
There are different options for how to make a stone with your own hands. However, most of them are based on the use of special forms. Such matrices are available in different designs. There are more than a dozen varieties of them.
Different options for matrices for decorative stone Source twimg.com
Despite the large number of types of matrices, the following types of forms are most often used:
- Polyurethane matrices in finished form, used for the manufacture of small quantities of stones. They are durable and expensive
- Lost wax molds made of clay. They are used when applying wax. With their help, artistic casting and modeling are performed.
- Silicone matrices, which are used in small industries. Such forms allow the stone to be produced individually. Silicone matrices become deformed during operation. This allows you to make only about 10 castings.
Advice! Silicone matrices should be used on a sand bed. The reason for this is their change in shape when exposed to vibration and heat. Before casting begins, sand is poured into the pan, and then the matrix is deepened into it by a third of its height. In this case, be sure to check the horizontal position of the form using a level.
What do we need to make?
The following items are a constant list of available materials:
- Polyurethane foam. It is sold in the form of an ordinary cylinder with a tube, but it would be better to purchase a cylinder with a gun, since it is more convenient and easier to work with;
- A stationery knife with which you can trim unnecessary elements and adjust them;
- Latex gloves that serve as hand protection. It is not recommended to use fabric gloves because they will become unusable very quickly;
- Sandpaper necessary for sanding the surface;
- Brush and acrylic paints, which will become assistants in creating a drawing and decorating a figure made from foam.
To create a frame, you can use a plastic container or a tin can. You will also need rigid wire, hoses, tape (double-sided) and planks. You should always have kerosene or a special cleaner with you, because during work, foam inevitably gets on the skin, and these products will help deal with contaminants that get on it.
It would not be amiss to mention that a garden decoration made on the basis of polyurethane foam is very light in weight, so it is worth weighing it down at the cultivation stage. You can place sand or small stones in a plastic container, the basis of the entire future figurine. The means of fixing the craft will be the wire that will protrude from the animal’s paws.
A simple way to make decorative stone
This option involves the production of artificial stone material by pouring 2 layers of the mixture into a mold. First, 3 parts of sand and 1 portion of cement are combined. Then the liquid dye is diluted with water. Its amount is usually approximately 2-3% by weight of cement. Then water with pigment is added to the cement-sand mixture until a homogeneous mass is formed, similar to thick sour cream.
The prepared solution is poured into the artificial stone matrix. It is only half full. Then the mixture is compacted and evenly distributed by shaking the mold and tapping, for example, on a table or other base on which the matrix is located.
A metal reinforcing mesh is laid on the first layer and the second part of the solution is poured, which must first be prepared without pigment. Then two lines are drawn crosswise on the surface of the mixture. They will improve the adhesion of the material during installation.
After about 12 hours, the hardened stone is removed from the matrix and dried. Then the mold is cleaned, washed and poured again.
Surface preparation
Before applying decorative plaster, the wall needs to be prepared. The surface must be completely cleaned of various coatings and made smooth. Although, no one demands perfect smoothness from you. Be sure to remove all salt bulges and grease stains. Only after this can the wall be primed. This is necessary to improve the contact of decorative plaster with the wall. By skipping this step, you risk getting an unreliable final coating.
In nature, masonry is made up of different sized stones. We will consider the option of laying on a flat surface, without bulges. Stones, just like in natural masonry, will have a variety of sizes. For this we only need imagination, a wallpaper knife and masking tape.
The primed wall must be covered with strips of masking tape. Thereby defining the seams between the stones. Cover the entire wall at once, even if the area of the room is very large and the decorative plaster is planned to be applied in certain portions.
Using this method you can create an imitation of brickwork. Simply tape the wall parallel to the floor with strips of tape to create straight horizontal lines. And then, using masking tape, make future vertical seams. This way you get a lot of small bricks, as if it were real brickwork.
Making gypsum stone
In the production of decorative stone materials, building gypsum is often used. A mixture is prepared from it, the consistency of which should be similar to thick sour cream. When mixing, a pigment of the required color is also used.
The prepared mixture is poured into a silicone mold only up to half its height. The matrix is pre-lubricated with grease. Then a fine metal mesh is laid to enhance the strength of the stone. The mold is then filled to the brim with a mixture that lacks pigment.
The filled matrix is shaken several times so that the gypsum mixture is evenly distributed in the mold. If the curing process occurs quickly, then milk is used during mixing. It reduces the speed of setting of the mixture.
Process of making boulder using wire frame
With your own hands, you need to create a stone frame from wire, fill it with bags, foam plastic, newspapers, cardboard (whatever is at hand) and secure the structure with cement mortar. The frame can be round, oblong, vertical - whatever you want.
The first layer of concrete must dry, after which the future boulder is coated with a more liquid solution. This can be done by hand or with a spatula. At this stage, depressions and bulges are formed that imitate natural stone. Then the workpiece is covered with plastic film and allowed to harden. After which the artificial boulder is turned over and the bottom is formed.
For greater resemblance to natural cobblestone, you can add pigments of warm and black shades. Light ones are added first, then black ones, then sprinkled with water and brushed over. To get the desired shade, you can repeat the coloring several times.
Finally, after complete drying, a sealant is applied to protect against adverse environmental conditions.
Making decorative stone without using a mold
The production of artificial stone material is carried out not only using special matrices. It is also possible to make such decor without the help of molds. This option is very simple. Despite this, it allows you to produce original stones for cladding building structures in a private house.
Before you make an artificial stone without a shape with your own hands, you need to prepare a stencil. It is performed on ordinary oilcloth. Instead, a cardboard sheet of suitable size is often used. The dimensions of future stones are drawn on the selected material.
Although the entire process of making artificial stone decor is simple, it requires time and minimal experience in working with building materials. Therefore, it will be easier for many to purchase ready-made products and hire specialists to install them.
Decorative stone created without using a mold Source samsmogy-remont.ru
The process of manufacturing artificial stone decor is performed as follows:
- Construction plaster is mixed with water in a silicone container. Instead, you can use any container, inside of which a garbage bag is previously placed. Moreover, you can always throw it away after use.
- The stencil is protected with transparent oilcloth.
- The prepared mixture is distributed over the surface of the oilcloth within the boundaries indicated on the stencil.
- The drying gypsum mixture is given the required relief. To do this, use spatulas of different sizes.
- The drying gypsum mixture is divided into separate fragments in accordance with the markings on the stencil.
- The finished hardened tiles are removed from the oilcloth after about 15-20 minutes.
- Tiled decorative material is dried for 1 day.
How to make a mold
Before you start working on the stone itself, you need to make a mold for it. Although you don’t have to do this, but simply buy ready-made ones, making it yourself is not too difficult a task. The mold can belong to one of about a dozen varieties; the easiest one is to make a silicone one - it is the process of its manufacture that will be discussed further.
- First you need formwork. The material for it can be PVC panels, plastic containers and the like. Mark the template with a 1 cm allowance from the edges and cut it out.
- Prepare hot soapy water.
- Apply lubricant inside the formwork (you can use grease).
- Place the sample inside, having also lubricated it first.
- Squeeze out the silicone.
- Soak the brush in soapy water, coat the silicone and press it in, do not forget to constantly foam the water and dip the brush in it. Make sure there are no gaps between the silicone and the surface of the sample stone.
- When you're done with this, all that remains is to use a spatula, also previously soaked in soapy water, to level the surface with it.
The silicone will take a long time to dry: about a centimeter per week, so it’s best to start making molds well in advance. When it dries, the formwork will need to be disassembled and checked to see if there are any cracks. If they are found, cover them with fresh silicone. Using one matrix, you can make about a dozen stones, after which it becomes deformed - so you should immediately calculate how many forms you will need.
Area of use of decorative stone
Thanks to its significant advantages, artificial stone is an ideal finishing material. It is used indoors and on facades, depending on the manufacturing method. In addition, certain types of material are used to manufacture specific products. Let's take a closer look at what can be made from artificial stone:
- countertops for kitchen furniture, which are highly resistant to damage;
- bar counters that are durable;
- sinks and sinks that have an attractive appearance and original design;
- window sills of various sizes and shapes;
- coffee and dining tables;
- stylish and custom mirror frames;
- shelves in a variety of colors.
Stone shelves in the interior Source design-homes.ru
Decorative stone material is used to create wall panels, when cladding steps, railings, and arched structures. The use of artificial stone in the interior and when arranging a garden plot is an indicator of respectability and excellent taste.
Tools and materials for work
Home conditions will not interfere with making high-quality, beautiful decorative decorations for the garden plot. To work with polyurethane foam, you need simple materials at hand. Basic list of tools for making crafts:
- Foam for installation. In cans with a tube or a gun. The pistol is more convenient.
- A sharp painting or stationery knife - trim off excess.
- Protective gloves. It is better to take latex ones, they are more durable than fabric ones.
- Sandpaper for sanding products.
- Paints and brush for decoration.
- Cleaner.
Tools for working with polyurethane foam For the frame of garden figures use:
- plastic bottles;
- cans;
- hard wire;
- wooden planks;
- rubber hoses of different diameters;
- adhesive tape;
- if the frame is slatted, then you will need a nail to connect the planks to each other.
Briefly about the main thing
Artificial stone is a material made from cement and sand. Gypsum is also used. The composition also includes water, dyes, and plasticizers. Ceramic, polyester, acrylic, reinforced and liquid stone on gelcoat are also produced. They are used to create shelves, sinks, furniture items, and boulders.
The material is lightweight, fireproof and affordable. It is made in different colors, shapes and textures. Its durability is less than that of natural stone.
During production, molds are used in which the mixture hardens. Coloring is done during the mixing process or after the tiles have dried. There is a manufacturing option using a lined stencil and without a mold.
Jack of all trades
When all the necessary material is prepared, we get to work. There is no need to hold in your imagination an artistic image of what you have decided to breathe life into. There should be a picture or photograph before your eyes, you should see clearly what you want to get in the end.
The frame can be made not only, as mentioned above, from plastic containers. The product will be more durable if it is welded from thin reinforcement or twisted from thick wire. According to the sculptors, the manufacturing process is simple.
But if you are doing this work for the first time, you need to start from the simple to the complex:
- Try making flat images first: apply a solid spot on cellophane, and after drying, you can cut out the desired figure;
- Then try to make voluminous, small, simple figures;
- The next stage: make larger figures, based on a circle, an oval;
- Next, you can try your strength and talent in making medium-sized frame crafts;
- After all the stages you have completed, consider that you are already a master; proceed to perform more complex work; you have already acquired the necessary skills.
Well, now, to the point.
How to care for the surface
Decorative plaster does not require special care.
Just wipe it with a cloth soaked in water, and if dirty, with a soap solution. If the plaster is coated with wax, then chemical solvents cannot be used.
So, before using a stone, look at the options for its imitation, which have many advantages.
Features of plastering work on the facade
When decorating the facade of a building with decorative plaster, the following features of the work should be taken into account:
- For the facade, you should choose stronger and more wear-resistant materials, since the plaster will be in contact with the external environment.
- It is worth taking into account sudden temperature changes, so before purchasing the mixture you need to pay attention to the main characteristics of the plaster.
- For external walls, it is recommended to use decoration in the form of stones and cobblestones. This coating will create an imitation of real rocks.
- If overheated for a long time, the composition may dry out, which will lead to a deterioration in its properties. In this regard, it is recommended to periodically moisten the composition while performing work.
Is it possible to make an imitation stone without experience?
Most developers who have the energy and time to decorate walls are stopped by the imaginary complexity of decorative finishing. But imitation of natural stone with plasters is not so scary:
- Unevenness is not a flaw. When creating “stone” plasters, there is no need to perfectly level the surface.
- freedom when drawing.
exceptions are imitations of marble: the shine of polished wax reveals any irregularities, tool marks, or grains of sand.
The remaining plastering techniques can be easily implemented by novice builders.
Stone-like plaster: photo in the interior
Before we move on to working with decorative plaster and imitation stone, take a look at what the walls might look like after renovation. Several photos of beautiful interiors and facades of houses.
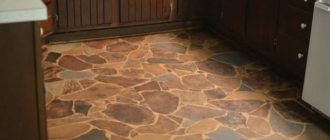
Stone surface imitation technology
Imitation of masonry on a plastered surface is carried out in several ways:
The “Wild Stone” technology involves applying a base to a small amount of surface, then covering it with a finishing coating and imitating a stone surface using a trowel.
After drying, color streaks are applied and rubbed into the surface with a sponge.
The Marmorino technology is based on knocking out rectangular stone boundaries using a chisel on a previously applied and completely dried layer of a special plaster mixture.
The formation of the “Ragged Stone” pattern is carried out in a similar way, only the notches are made not along straight lines, but chaotically.
Applying a relief pattern using special forms that replicate the structure of natural stone.
This form is applied with a little force to the previously applied and not yet set plaster mixture and the profile is squeezed out.
The molds are made from plastic. polyurethane or polymer. They can be in the form of brickwork. natural stones of different sizes and others.
Stone plaster has a wide range of uses. It is used for:
- External cladding of building facades;
- Coverings of basements and foundations;
- Column finishing;
- Decorative design of fences;
- Finishing of interior walls of premises, both completely and in fragments in the form of panels;
- For cladding arches, openings, fireplaces, bar counters and other elements of interior decor.
Creating a stone effect
When we talk about creating a stone effect , we don’t always mean the same thing. Some people think about rough stonework, which is only suitable for facade cladding, while others imagine a beautiful imitation of exquisite natural stone, which is ideal for a bath or corridor. Therefore, it should be understood that stone effect plaster is successfully used for both interior and exterior decoration. In the interior it is excellent for cladding fireplaces, chimneys and various partitions. Particularly beautiful are the appearance of arches, openings, protrusions and other small elements of the room, decorated with decorative stone-like plaster.
For exterior finishing, this method is most often used when working with columns, fences and baseboards. Particularly popular is plinth plaster with a stone effect. You can often see the stone effect on the façade. The choice of places where you can implement your ideas for creating a beautiful stone effect is very large, especially since almost any surface is suitable for such work.
The most popular of them are:
- Brick.
- Concrete.
- Drywall.
- Chipboard.
- Styrofoam.
