Beading can be useful in everyday life, as with the help of these shiny beads you can create products that are useful in everyday life. For example, this also applies to boxes in which you can store not only your jewelry, but also many other small items that you don’t want to lose. Therefore, this article will consider a short lesson on weaving a classic black and white box.
We weave a round box of beads with our own hands in a master class
To work, you will need rings approximately 7 cm in diameter - 4 pieces, one of them for the lid, 3 for the frame of the box itself, beads of several shades and beads. You can make them from wire. The frame rings need to be braided with square strands. It is imperative that the size and shape of all the strands be the same, otherwise the box will have an untidy appearance. The colors of the harnesses can be changed.
Let's look at weaving a square strand for a box in more detail.
First you need to weave a belt of three rows, it should be slightly shorter than required for the girth of the ring. Then close the harness directly on the ring.
We braid all the rings in the same way, with absolutely identical square strands, this is very important. After this we connect the rings together. The connection diagram of two rings is visible in the photo:
We weave in the same way in a circle, all over the ring, leaving gaps of three crosses. To the resulting part of two rings, add a third one, attaching it in the same way. We fill the gaps with beads (for example, “cat’s eye”).
After this, you can begin weaving the lid and bottom of the box. Round parts need to be woven according to the pattern shown below. It is quite popular on the Internet, but for this box it will need to be expanded a little by adding a few rows, otherwise the diameter will be small.
We sew the resulting round parts with “snowflakes” to the bottom ring of the box frame and lid.
After this, you need to sew the legs of beads or seed beads to the ring of the bottom of the box. This is an optional detail, so you can omit it if you wish. Weaving them is very simple, by analogy with the jumpers between the warp rings (one cross in height).
We finish weaving the lid. To do this, we braid another additional row of square rope to the ring. Then we add 1 more flat row (without a rope) of beads to the lid so that it fits onto the box. The box is ready! This option weaves relatively quickly and is suitable for beginner needlewomen.
The original version of this box is made of Japanese beads in one layer. However, those who work with inexpensive Chinese beads may encounter a small problem - the box does not hold its shape very well. This problem can be solved by making parts in 2 layers. This thing looks great. The inner and outer parts can be woven in different colors and patterns to suit your taste, but it will take longer to work. So the decision is yours.
First you need to weave the bottom of the box. This detail is made in a circle using the mosaic technique. In this way you need to make 4 rows of red beads.
Then we weave all subsequent rows with other beads according to the pattern. Those who decide to do the work in 2 layers need to weave a second similar half plus one connecting row.
We move on to weaving the inner wall. The triangle consists of 15 rows of beads, including the first 3, cast on at the beginning. Stepping back from the edge of the 2nd row, towards the 13th row we collect beads using mosaic techniques for the inner wall.
In this master class there are only 28 rows, you can choose any other even number, depending on the desired height of the box.
Mosaic weaving in a circle is different in that each new row will “move” to the right by one bead. At the end of the second row, the needle passes the corner bead of the first row and the first bead of the second. In the third shift there will be already 2 beads from the corner. You need to weave in a circle, but not spirally.
The design of the box between the walls. Usually small triangular boxes hold their shape well. However, for greater reliability it is worth making a white stiffening jumper. After the 26th row of the wall, we collect beads along the perimeter, and two at the corners. This is necessary so that when connecting the walls there is no distortion at the corners. Since we retreat 2 rows from the edge, the white beads will be above the 14th row from the bottom, and at 15 the outer wall begins.
After this, we collect beads for the 27th and 28th rows. This must be done carefully so that the thread does not break. The 27th row will be on the inside, and the white jumper will be on the outside.
At the end of the work, the jumper will be closed by the last two rows, and there will also be a connecting jumper along the edge of the side of the box (purple).
Let's start weaving the outer wall of the box. We collect beads along the 15th row of the bottom (the side connecting one is not involved).
We connect the wall with the jumper by weaving white beads from the 26th row of the outer wall. At the corners, the sequence is the same as when weaving a triangle: the needle goes into a white bead, grabs two more and again goes out into the corner white one.
Now you need to connect the outer and inner walls together; to do this, we collect the last 2 rows with the same pattern.
Let's start making the lid halves. Their size should be 2 rows larger than the bottom. To do this, we collect the 16th and 17th rows and the connecting row along the edge.
To ensure that the lid fits in firmly, we assemble the side according to the same pattern as the walls. We weave it from the 9th row. We perform 4 rows with 1 more connecting row. We start the second layer of the side from the 11th row. Connect the layers together. You need to sew a bead onto the lid, and also attach beads for the legs. The box is ready!
How to store beads without a container?
If it is not possible to store beads in a container, they can be temporarily scattered into small containers. A wide variety of containers are suitable for these purposes. These can be boxes from filmstrips or boxes from photographic film. Bottles for medicines, such as antibiotics, are also suitable for this.
You can also take matchboxes for this. Entire structures with retractable cells are usually made from them. This is a good option, especially for beginners . Its disadvantage is the inability to see the material located in the box-cell.
Cosmetic jars for cream, blush and other things can also be a good place for storage. If you wish, you can make your own book-box with cells from plywood, decorating it in an original way.
Source
Beaded heart box for Valentine's Day
A beaded box can be a good addition to a valentine's gift or a beaded heart. Using this pattern, you can weave a bead box with your own hands.
There are several ways you can do this.
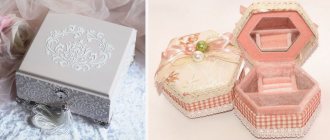
The first method is very simple. Take a transparent plastic box and decorate it with ribbon and beads. Beads can be glued to the box using a glue gun. Here is an example of such a box on this site.
You can also make a box entirely from beads. For example, from squares. Like this.
The principle of assembling such a box is simple but labor-intensive. You need to first weave the cubes, then connect them together. It is described in detail here.
You can weave a box like this from large beads and small beads.
Beaded boxes always look very feminine and elegant. They come in different shapes (circle, triangle, square, heart, etc.) and will be a nice gift for every girl. It is in these boxes that you want to hide your most expensive little things. In this article we invite you to create such a small but very elegant box of beads; the master class will help you complete the task faster. This weaving method is suitable for everyone and even beginners.
Related materials:
Contents Description Snake made of beads Owl made of wire and beads Starfish made of beads Weaving crocodile made of beads Dragonfly made of beads Horse made of beads Bird made of bicones Original frog made of beads Dog made of beads Dragon made of beads Volumetric beaded bear Spider made of beads Bunny made of beads Cow made of beads Lizard from beads Conclusion Beadwork has become...
It would seem that the usual geometric figure is a triangle, nothing special. But everything changes when the material begins to fill the form. And the final appearance of this very form depends on this material. This is what happened with the triangle and its interaction with beads, glass beads and beads. And these are not all the options collected, I hope you will add to the collection)…
A beaded scarf is a very original accessory and decoration rolled into one. Yes, it requires decent design in order to be able to solo in the image, it requires patience in work and perseverance, but what is the result! In fact, you don’t need anything unusual to weave a scarf. All the same beads, glass beads, cutting, beads, needle and thread yes...
This is such a lovely daisy for today. Although it bears little resemblance to the traditional field one due to its multi-layered nature. The master class is detailed and understandable. Let's get a look. We will need one-size beads of two colors and a bead for the core of medium diameter. First, according to this pattern (click on the picture to enlarge), we weave a chain around the circumference of the bead. This chain will serve as the basis for...
Triangular box
The process of making a box from beads can be traced using the example of a master class for beginners who have at least a little experience working with beads.
To create such a box you will need beads in the colors of the rainbow. If you take Chinese beads, then the size of the beads is tenth, and if you take Czech beads, then 6-8. We will also need scissors, needles, fishing line, wire, a diagram and tweezers.
This type of box has a double bottom, so according to the pattern below you need to weave a couple of triangles. One will consist of 15 rows, and add one bead to the other. It is also worth remembering that on a larger triangle you need to collect one bead at the corners.
These are the triangles we got:
Now we must connect them by weaving beads one by one. After we have connected the bottom, we begin weaving the inner wall. On the 13th row, which is indicated by red dots, start casting the first row, which is shown by white dots in the diagram.
We make the inner wall using the mosaic weaving technique, so you shouldn’t be surprised that the rows will move to the right. In the photo, small green dots show the first beads of the first and second row, and also indicate the correct path of the needle.
In total we need to weave about twenty-six rows. Next, you can make a small “bridge” between the walls of the box. It will add some rigidity. It is necessary to string white beads along the entire length of the inner and outer walls, and two pieces at the corners. This is how it should turn out:
After we have woven 26 rows, we need to make two more. And after them you need to make an external jumper. Then we finished weaving the inner wall, we begin to make the outer one. Its weaving begins not from the 13th, but from the 15th row on the bottom.
Next we weave 26 rows again, up to the inner bridge of white beads. Now look at the photo below. It shows the jumper itself, the 26th row of the outer wall and the 28th row of the inner wall. We need to connect the outer wall to the lintel. The location of the needle is also indicated in the photo in red.
We collect two more rows and connect the walls again.
The fourth step will be weaving the lid for the box. We need to weave two triangles again according to the pattern, but the number of their rows should be two more beads.
We sew them together, you can also glue a bead if you wish.
On the 9th row you need to weave a side.
On the 11th row we also weave 4 rows of beads for the side.
Next you need to connect them together.
You can sew three large beads on the bottom.
So our box is ready. By experimenting with bead colors, you can get original colors for the box.
And you can decorate a cute box not only with flowers and ribbons.
Cute hedgehog
You can also make figures of various animals from beads, for example, a hedgehog. We propose to consider weaving patterns for such a figurine.
How to do this kind of work? Looking at the first drawing, you need to weave a hedgehog belt, then according to Fig. 2 you need to make a tummy, and using the diagram in figure 3, you need to weave the back. Then fasten the ends of the belt and put it on the blank. Next, we begin to weave the second part indicated in figure 1. The weaving is exactly the same as the belt weaving pattern; we make decreases as necessary. The nose needs to be woven using the pattern in figure 4, making a smooth decrease. Now you need to sew the eyes and nose onto the hedgehog’s face.
How to make thorns? We string 9 black beads and 1 white, overtake the last bead and insert the thread into the black beads. It turns out a kind of thorn that needs to be attached to the back of the hedgehog. Using the brick stitch technique, make a leaf. And you will get such a cute hedgehog. It will be a wonderful decoration not only for the box, but also for the desktop.
box
Saturday, August 03, 2013 20:45 + in quote book This is a quote from the message world47 [Read in full +
To your quote book or community!]
box
the site is shown in the photo
Read more.
- I liked the post
- Quoted
- Saved
- Add to quote book
Save to links
Beaded heart box for Valentine's Day
A beaded box can be a good addition to a valentine's gift or a beaded heart. Using this pattern, you can weave a bead box with your own hands.
There are several ways you can do this.
The first method is very simple. Take a transparent plastic box and decorate it with ribbon and beads. Beads can be glued to the box using a glue gun. Here is an example of such a box on this site.
You can also make a box entirely from beads. For example, from squares. Like this.
The principle of assembling such a box is simple but labor-intensive. You need to first weave the cubes, then connect them together. It is described in detail here.
You can weave a box like this from large beads and small beads.
Show Control Panel
- Published: Feb 6, 2017
- Shop “Melody of Beads” melodiabisera.ru/?promo_id=193982 5% discount with code fr555 A very beautiful ashtray made from a glass jar tied with beads. I was both surprised and delighted when they ordered me to make an ashtray out of beads