Decorative details stand out and complement the interior. This type of craft, such as a do-it-yourself decorative cage, is becoming very popular today and is in extraordinary demand. Exquisite works carry a light spring atmosphere, comfort and a touch of romance, especially when done with soul. Let's take a closer look at how to make a decorative cage with your own hands.
Progress:
1. Cut 4 strips (I didn’t use thick cardboard)
1 cm wide, the length of regular cardboard.
2. Mark the middle of each strip and fold it with a flower.
3. Draw or download a bird template.
4. Cut out the bird and two wings from double-sided cardboard.
5. Using double-sided tape, glue the wings and attach a thick thread to the bird’s .
7. We move the paper strips apart so that there is approximately the same distance between them, sew the bars of the cage and the holder ring . We lower the strips down and glue them to the lid (I have a toothpowder lid, diameter 9 cm)
.
8. Cut a wide strip of paper, 3-4 cm, and glue it around the lid. The length of the strip will depend on the cover chosen.
9. Decorate the finished cage with flowers and a butterfly.
Let the bird in the cage , made by yourself, bring you joy and good mood!
Children's master class “Curly Bird” What can be made from paper? And you can make anything: vegetables, fruits, birds, animals and much more, as long as you have enough imagination. I suggest.
Summary of a comprehensive lesson for young children. Observing a hamster in a cage. We make grains for the hamster. Summary of a comprehensive lesson for young children. Observing a hamster in a cage. We make grains for the hamster. Objectives: to develop
Summary of educational activities Speech development 2nd junior group “Children in a cage” Speech development Program content Introduce children to the bright poetic images of animals from the poems of S. Marshak.
Master Class. Keychain “Bird for Mom” Description: the master class is designed for children of senior preschool and primary school age, teachers and parents. The craft is done.
DIY decorative cage
Another advantage of a self-made craft over a purchased one is that you can embody your own design ideas, not repeat existing interiors, and create completely new images. What can you use a decorative cage for? Buy
or making it means getting a wonderful candlestick or lampshade for a lamp, a flowerpot for flower arrangements, decoration for gifts or interior compositions.
In addition, such weightless and openwork cells will immediately create the necessary romantic, gentle atmosphere. They are very easy to use for the task of decorating a country house for a birthday or other holidays; such decor is often used at outdoor wedding ceremonies and receptions in an open space. You can complement metal structures with fresh flowers, birds made of fabric, or you can hang them on tree branches, putting surprise gifts inside for guests.
Options for making a decorative cage
there are many, everything is determined not only by the task you set for the product, but also by the material with which it will be easiest for you to work. For example, paper crafts are quite simple and light in weight, which allows them to be used, for example, for the task of decorating a ceiling. You can put sweets and flowers in them for a present; besides, even a child can handle paper cages. But, of course, wooden, and even more so, metal models look much more presentable. Plus, their size can vary from miniature to huge, almost covering the entire wall, depending on how you see the future interior composition in your imagination.
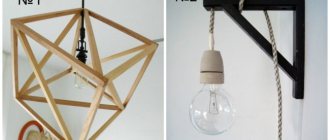
Metal bird house (MK)
Metal crafts look especially attractive and rich. Before making a decorative cage with your own hands, you need to prepare all the materials that will be used in our work.
Components for work:
- design and sketch of a decorative motif;
- The material will be two types of wire: aluminum - about 22 mm thick, auxiliary - 0.9 mm, for example, nichrome;
- plywood sheet – 0.5 cm;
- You will also need a drill, thin-nose pliers and a jigsaw for the job.
1. First of all, you need to draw a cell to get the circumference of the base. We divide the resulting length by 4 - as a result we get the length of the decorative insert structure. Next, we draw out the parameters of the motif and decide on the pattern.
Related article: Army album - memory of service and the best DIY gift
bend two circles from aluminum wire , respectively, the top and bottom of the cage. The pattern elements are connected with additional wire.
3. The pattern motif is bent in a circle, so we get the first part of the decoration. Using a similar pattern, we make the second circle.
4. At this stage, using drawings, we create the upper rib parts of the dome.
5. The plywood base must match the radius of the wire circles. Places for the wire are marked on it with a pencil , then holes are drilled.
6. Next, all the parts are connected . Keep in mind that when attaching the spokes you need to leave a span for the door.
7. You can decorate our cage with any decor. Decorative cages with flowers look especially impressive, they look quite romantic, creating an atmosphere of warmth and home comfort.
Decorative cage in the interior is a fashionable and current trend in design. The variety of shapes and decor allows everyone to choose the most suitable option for themselves, which will favorably emphasize the style of the room and decorate any home.