We have a great tutorial on how to sew a sleep or meditation mask here. Now let’s talk about masks to protect the mouth and nose from infections, which are still relevant in 2022. Since they have entered our lives, you can at least sew them from a material that matches the color of your wardrobe.
As the famous saying goes, “saving drowning people is the work of the drowning people themselves.” In spring, disposable medical masks disappeared from many pharmacies. Meanwhile, this is one of the mandatory items on the list of necessary things to prevent infection, along with maintaining a distance of 1 - 1.5 meters, washing hands, using gloves and antiseptic treatment.
From the site https://www.maskssavelives.org
How else can you protect yourself from coronavirus? Of course, make disposable masks with your own hands from scrap materials or sew reusable masks from fabric that can be washed and ironed. Watch master classes, photos and videos with patterns .
Important!
- Any mask can be worn for no more than two hours.
- Do not touch your face or mask with your hands.
- Remove the mask only by the elastic bands.
- Throw away the disposable mask after use.
- Place the reusable one in a bag, wash it at home in hot water, and after drying, iron it with a hot iron.
COVID-19 insurance online for 1,690 rubles or 3,690 rubles for the whole family (2 adults and all children). The insured amount is up to 2 million rubles. If a virus is detected, they pay from 10,000 to 30,000 rubles. Then they pay sick leave from 2000 to 5000 rubles per day during hospitalization. Buy insurance online
You can track the real situation with the level of infections by city and country on Yandex maps:
Yandex.MapsMap of the spread of coronavirus in Russia and the world
And don’t forget that by wearing a mask, you protect not only yourself, but also others! After all, it may turn out that you are already a carrier of the virus without feeling it...
Rules for making a template for a mask
So, do you need an unusual masquerade mask?!
What, first of all, needs to be done for this? You need to make a so-called template. The production of any chosen mask begins with it. To ensure that the mask fits well on your face and that you feel comfortable wearing it, you need to take measurements. The main measurement is the distance between the eyes, this is necessary for the correct cuts for the eyes on the mask, the other measurement is the distance from the tip (middle) of the forehead (depending on the chosen shape) to the lip line. All these measurements are especially relevant when it comes to a mask for a child.
General scheme for making a mask:
- First of all, we determine the width of the mask by measuring the distance between the temples and recording the size on a sheet of paper;
- Next, you should measure the distance between the pupils of the eyes in a straight line;
- both halves of the mask and the holes for the eyes can be very different: curved, oval, rectangular, the defining circumstance is that the slits must be arranged so that the view is sufficient;
- the bottom of the mask in the central part should not fall below the nose, this condition is met both for the simplest carnival masks and for others that can cover most of the face;
- secure the mask on your head conveniently with an elastic band or ribbon; a stick to hold in your hand is also suitable, but this is for adults.
We have studied the basic requirements. The listed rules will help you make a convenient and beautiful craft. Now is the time to watch master classes on how to make a cool mask from plain paper.
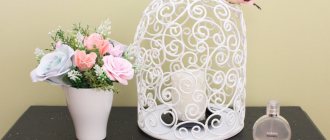
Knitted mask
And to brighten up the need to wear boring masks a little, people are trying to make them original in order to cheer up themselves and those around them. And in this master class, our regular author Anna invites you to crochet a stylish protective mask. This mask is reusable and can be washed.
To knit a mask we will need:
- Yarn "Jeans" white and red;
- Hook;
- Needle.
For such a product it is better to use yarn containing cotton.
The mask itself can be knitted in any color. In this case it is white. We cast on 45 loops.
We knit the first 5 stitches with single crochets. This part of the mask will be on the side and it should be narrower than the main fabric.
Then we knit the next 3 stitches with half double crochets. And another 28 double crochets.
Next, we will again knit 3 half double crochets. And finish the first row with 5 single crochets.
We make 1 air loop. This is necessary in order to unroll the knitting and move on to the next row.
It will be exactly the same as the first one. And then all subsequent rows will be the same. There will be 10-12 of them in total.
Now you need to make loops so that the mask stays on your face. On the sides, where the narrow part of the fabric is, from corner to corner you need to cast on 40 loops. That is, we cast on loops and attach the second end of the resulting chain to another corner.
And the same on the second side. At the same time, we tie the mask with single crochets.
Decorate the mask with red lips.
We cast on a chain of 16 chain stitches and then knit: 1 single crochet, 1 half double crochet, 1 double crochet, 2 double crochets in 1 loop, 1 half double crochet, 1 single crochet.
Then we again knit 1 half double crochet, 1 double crochet, 2 double crochets in a loop, 1 double crochet, 1 half double crochet, 1 single crochet and 1 connecting stitch.
The upper lip is ready.
We collect 16 air loops again. We knit 1 single crochet, 2 half double crochets, 2 double crochets, 1 double crochet, 3 double crochets in 1 loop, 1 double crochet, 2 double crochets, 2 half double crochets, 1 single crochet yarn over and 1 connecting stitch.
The lower lip is also ready.
Sew the sponges to the mask. At the end, you must hide all the threads inside the knitting.
Instead of a filter, you can put a paper napkin inside and change it when necessary. Paper towels or regular gauze in several folds will also work. If necessary, you can sew a pocket on the wrong side.
The crocheted protective mask is ready!
See also: Hat-helmet with visor
Materials for masks
Carnival masks in Venice were exquisite. They were made from expensive fabrics, decorated with precious stones, and trimmed with feathers and fur.
In the modern world, you can find well-established accessories, but papier-mâché variations, lace masks, and pieces made of feathers and felt are very popular. They are for sale, but you can create a stylish piece at home using scrap materials.
What types of masks are there?
One of the most famous uses is medical. However, this accessory has much wider uses. Its scope of application covers the following areas:
- Most often worn to improve protection against the spread of infection. Surgeons use them during surgery to protect the patient. They must cover the nose and mouth. Citizens in this way can significantly reduce the risk of catching a cold or flu.
- Carnival masks are very diverse. Their use is limited only by the imagination of the participants in such events. Here, a large variety of materials and models are used for beauty.
Emphasize belonging to a certain style
- During sports activities, they help to increase the load when performing exercises.
- Sometimes they are worn by those who want to fit a certain image (for example, a bear or other animal). They are suitable for those who want to emphasize their independence or match their chosen style (this may well apply to cyberpunk).
- Sometimes wearing a mask to cover your face is a rule of religion. This applies, for example, to Islam.
- They help hide your identity. In this case, they are made in such a way as to reveal a minimum number of parts.
Modern life sometimes contributes to the depersonalization of a person and the desire to psychologically isolate himself from the world around him. hence the desire to wear a disguise.
Part of the image
Decoration of masks
The mask, cut out and equipped with an elastic band, is not yet ready for the holiday. You need to use all your artistic skills and decorate the mask.
Gouache may be the best option for this. To avoid contaminating the child with paint, the finished product is varnished. The varnished surface is decorated with tinsel, beads, sparkles or rhinestones.
When choosing decor, you should not forget about the gender of the child. For example, bows and hearts would be inappropriate on a boy’s mask. A piping around the edges of the mask or New Year's tinsel is suitable for this.
How to decorate a masquerade mask for a masquerade: ideas, photos
So, your masquerade mask is ready. All that remains is to come up with an interesting decoration for her so that you will be the most irresistible at the masquerade. Here are ideas and photos:
Decorate the mask with tulle and rhinestones Decorate the mask with satin flowers and rhinestones Decorate the mask with lace and rhinestones Decorate the mask with feathers, tulle and rhinestones Decorate the mask with organza and rhinestones Decorate the mask Decorate the mask with sparkles
We decorate the mask with colored fabric. We decorate the mask with colored paper, paints. We decorate the mask with colored paper, feathers.
Photos of paper masks
Halloween mask idea
In stores on the eve of All Saints' Day, costumes of scary characters and horror movie heroes are on sale. They look very realistic: all the skin irregularities, folds and exceptional features that indicate a specific character are visible.
Such additions are made of latex or plaster. From the mass of newspapers, they turn out no less scary. This requires a special manufacturing technology, such as papier-mâché.
It uses old books, tabloids, paste or PVA, greasy cream or film. You can buy the basis for creativity. You can form a blank on the owner’s face.
Master class on creating a carnival fox mask
Using the same technique, you can create a fox mask. A distinctive feature of such crafts will be some details.
In this craft, the animal’s face will be painted in a bright red hue.
- For work, you can use thick orange cardboard or colored paper. You can use a ready-made product template or draw it yourself. In 4 parts we make triangular notches. Carefully glue them together and get a voluminous mask.
- Let's move on to creating the eyes. Here we carefully cut out through holes. They can be made round or almond-shaped. We decorate the borders with bright sparkles. Spread a small amount of glue over the surface of the cardboard base. In the side parts we also make places for attaching elastic bands.
- Let's move on to creating the fox ears. Cut out 2 triangles 8-10 cm long. Make a triangular notch in the middle and glue the two halves. Paint the inside of the ear with pale pink paints.
- Let's start decorating the animal's face. To do this, we use several shades of red. In this way, on the surface of the cardboard blank it will be possible to create a texture reminiscent of the fur of a predator.
Mask of Anonymous (Guy Fawkes)
It is also called “Vendetta Mask” or simply “V Mask”. The head of the Gunpowder Plot, Guy Fawkes, was executed in London in the 16th century. He served as the prototype for the image of the main character in the comic book and film “V for Vendetta.”
After the release of the film, the Guy Fawkes mask, like a portrait of Che Guevara, became recognizable and popular, especially among protesters.
To work you will need:
- white paper or cardboard;
- scissors;
- colour pencils;
- braid or rope (black);
- black marker;
- glue or tape.
Stages of work:
- Draw a general silhouette - an arc at the top, an elongated semi-oval at the bottom. Divide the sheet vertically in half so that the face is symmetrical.
- Make a pencil sketch of the main facial features: eyes (pre-measure the distance between the eyes), nose, lower contour of the cheeks, beard, mouth, mustache, eyebrows. It’s better if you have a picture of Anonymous in front of your eyes.
- Carefully cut out the silhouette.
- Cut out holes for the eyes.
- Color the eyebrows, beard and mustache with a black pencil. Trace all the contours. Lightly shade under the eyebrows and cheeks for volume.
- Draw and paint with a red pencil the circles on the cheeks in the form of blush and lips.
- Attach the ends of the rope to the sides of the back of the mask.
Spider Mask
The portrayal of this character can be approached in two ways. Or interpret him as a gloomy villain, then he will be all black and like a tarantula spider. Muscular hairy legs, a villainous muzzle: frowning eyebrows, bloody fangs... The frame of the spider was made of dark blue isolon. Long, multi-colored jointed legs in different-sized shoes, a blue face with eyes narrowed to the nose and a grinning mouth - and that’s enough - let’s refrain from excessive brutality, after all, this is an old spider.
Old Spider Mask
We will make the remaining insects based on a standard frame-cap. Ant and ant: black – shiny. (I describe the ant mask for the entire face here: https://nonsenspictures.ru/maska-muravya/)
Ant Mask
Let's make the butterfly brighter and don't skimp on patterns.
Characters such as cockroaches can only be designated by red color and mustaches - wings and paws will probably be superfluous. For the bugs, I can suggest a pattern for the wings; here it is important to make the right darts and, of course, decorate them with beautiful patterns.
Cockroach mask
Pattern of a beetle's cap
You can start the performance, and let it be unforgettable for both the actors and the audience.
We made masks and caps with you for the play “Tsokotukha Fly”
Did you like the article? Subscribe to updates on our blog Handykids.ru l
At the same time, read what these insects look like in life:
How to draw a mosquito
How to draw a butterfly
Let's draw a beetle
How to draw a spider
Tags: how to make a carnival mask, how to make a paper mask, carnival masks for children
Making a paper mask
Let's make an accessory for the upper part of the face. Let's prepare:
- thick paper (preferably colored);
- cardboard;
- a simple pencil;
- paints or markers;
- colour pencils;
- glue;
- ribbon for tying;
- decoration elements.
Stages of work:
- Using a ruler, measure the distance between the centers of the eyes in a straight line.
- Measure the distance from the left temple to the right.
- On paper or cardboard, mark the holes for the eyes according to the obtained dimensions. Mark the points for attaching the tape.
- Draw the remaining details. Eyes can be depicted as almond-shaped (“Venetian” masks) or round. The edges of the product can be drawn straight, rounded, pointed or elongated. It is better if the bottom edge does not cover the nose.
- Cut along the outer edges.
- Cut out holes for the eyes.
- Decorate the resulting template. You can use paints, ribbons, feathers, beads and much more.
- Fasten the ribbon for tying.
It is more original to attach the made accessory to a cute hoop or stick instead of strings.
A cap
The last detail of the costume will be making the hat. It is made from a piece of knitted T-shirt. To do this, cut out a strip of material and, wrapping it around the head, sew the edges. It turns out to be a “pipe”, the upper part of which must be pulled together and stitched in the center. To prevent the seam from standing out, the headdress is decorated with leaves. They are made according to the same pattern as for the collar.
Sew them in such a way that the leaves look in different directions. The bottom does not need to be turned up, as the knitwear will remain in good shape for a long time and the edge will not fray. In any case, such a hat will withstand the celebration until the end.
Choose any option from those offered, and your baby will be the most beautiful at the Autumn Festival!
B/W templates of lion faces to get started
“Advanced” masters can draw a template for the future mask on their own, but for novice creators and children it is more advisable to find ready-made stencils in black and white. They can be painted at will not only in original colors, but also made unusual, “fairytale” - blue, pink, gold.
The lion head mask for children is offered in several options:
- attach above the eyebrows, leaving the face completely open;
- dress on the face, partially or completely covering it.
You can select and print a lion mask with a mane or choose the lion cub option. Also among the templates you can choose the “King” of animals with a cheerful, kind or “evil” appearance.
Before you start working on the craft, you should take measurements (with a ruler) on your face, since the mask should be comfortable, and the holes for the eyes should be located in the right places. The face of a child and an adult differ significantly.
Black Raven
Place on your workbench:
- black and white cardboard (high-density paper is fine);
- a simple pencil;
- elastic band;
- ruler;
- scissors;
- glue;
- black felt-tip pen.
Progress:
- Fold the sheet in half and draw a mask with a backdrop for the beak.
- Cut everything along the outline.
- Roll a black sheet of cardboard into several layers and make something like a fringe.
- Use a stapler to attach an elastic band or string to the sides.
- Measure the length of the bridge of your nose, add 2-3 cm so that there is room for attachment. On a sheet of paper folded in half, draw part of the beak.
- Cut out the outline, bend it in half lengthwise.
- To mark the location for the fastenings, you need to make a number of cuts at the top of the beak.
- Apply glue to the cuts and connect to the main part of the craft.
- Bend each element of the feather to give them volume.
- Glue the previously made feather fringe on top of the mask.
- Separately, cut out a number of feathers to place near the eyes.
- If there are small gaps of paper between the feathers, fill them in with a black felt-tip pen.
We strengthen, we formalize
We work with the prepared mask pattern. We trace the cut out paper shape on cardboard and multi-colored sheets and cut it. Durable material will strengthen, details will decorate. We glue everything together.
The dried prototype must be bent into a semi-oval shape and brought closer to the shape of the head. Then it is important to extend the model on the sides. Having fixed the art on the edge of the table, gently pull it towards the edge.
Volume mask
A bright accessory is made from a template with grooves. It is pre-printed and cut out.
You can create a voluminous paper mask with your own hands. Half of the album sheet is folded twice.
From the resulting intersection point they retreat in different directions by 2 cm, then the eyes are cut out. Special cuts are made for the grooves. You need to make a tuck between the eyes with a stapler.
The grooves on the forehead are glued together, and inserts are made on the temples. The bottom edges are brought neatly to the center and glued.
Ears are attached to the workpiece. The cat's antennae are made from fishing line. The product is painted black or gray and decorated with rhinestones along the edges.
DIY fabric masquerade mask for the New Year: instructions
Fabric masquerade mask
Can't find cardboard or paper sheet for crafting? Fabric would be an excellent alternative. Every home has leftovers or unnecessary things that are a pity to throw away. Clean up, get rid of unnecessary things, and at the same time, find interesting fabric in your wardrobe. Let it serve as a handy material in creative endeavors. So, let’s make a masquerade mask out of fabric with our own hands for the New Year.
Everything you need to make the product:
- Fabric (fleece)
- Pattern
- Threads, ribbons of any colors
- Rubber strap
- Stationery scissors, hole punch
- Fabric paints/rhinestones/sequins
Here are the animal patterns:
Template Template Template Template Template Template
Instructions:
- Take the material that will serve as the basis for the future product.
- Cut out two pieces of identical shape and size from this material.
- Sew the resulting elements together using a machine.
- Stitch and turn both parts out.
- Use scissors or a hole punch to make holes for the rubber band.
- Insert the rubber band into the resulting holes.
- Sew along the outer edge again.
Mask in the form of an animal
Decorate the accessory with sequins, rhinestones, or paint it with paints in the batik style, give free rein to your creativity. It turned out very beautiful.
Theater mask
To get a beautiful product, you need to clearly follow the contours of the face. A DIY paper theater mask will be ideal for a person if you choose the papier-mâché method.
You will need several sheets of foil. They are stacked. Then you need to attach the sheets to your face so that they fit snugly. Afterwards the workpiece is cut along the edge.
Undercuts are made on the forehead and chin. The edges of the slots are glued together to create a three-dimensional product.
First of all, old newspapers are finely chopped. Then prepare a solution from PVA glue and water, taking them in equal parts. Pieces of paper are dipped into the mixture and applied to a foil base.
The first two layers must dry. Then another layer is applied. Then the resulting product is painted with acrylic paint. At the final stage, they decorate it and attach ribbons.
Tomato outfit from dad's T-shirt
If dad has an old red T-shirt in his wardrobe, you can use it to make a wonderful Tomato costume for a boy with your own hands. First of all, you need to gather the collar to reduce the neckline, roll up the sleeves on the shoulders and hem them a few centimeters. The bottom of the T-shirt is rolled up and the elastic is inserted. All that remains is to fill the middle with filler. You can use foam rubber scraps, cotton wool or padding polyester folded into several parts.
Fantastic carnival feather mask
A carnival mask made of feathers is a very important and necessary accessory for a magical holiday.
Despite the apparent complexity of making this extraordinary mask, making it with your own hands is not a big or difficult task. If you try, it will turn out like in the photo. You will need certain materials and tools. We tried to put all this data in a list where everything is presented clearly and understandably.
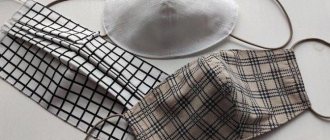
How to sew a reusable mask
Patterns for masks
The patterns can be printed or drawn yourself on a regular piece of paper. To get a life-size pattern without a printer, save the picture to your computer, then open it in any image viewer. Applying the ruler to the monitor, select the desired scale. When the dimensions in the photo match the dimensions on the ruler, attach an A4 sheet of paper to the monitor and trace the contours of the template. This way you will get a finished pattern.
This is a diagram of a standard medical mask with three folds down. You can draw a pattern on a squared piece of notebook paper. This is a rectangle 22 cm wide and 20 cm high. Sew from two parts along the long sides, then tuck the side edges inward, fold three folds down, insert elastic bands and sew the sides.
Pattern for a fitted mask (no seam allowances, add them when cutting). The dotted line indicates the fold of the fabric. It would be good to insert a flexible wire with blunt ends or a strip from a tin can into the seam along the nose, as in the video below.
Before sewing, you can cut out a template from a paper towel, gluing the darts together, and try it on yourself. If necessary, add or subtract the necessary centimeters.
Now the knitted mask pattern from this video:
Mask with a fold in the center
This video shows you how to make a reusable fabric face mask. For it you will need:
- cotton fabric - 2 pieces measuring approximately 22x18 cm (including allowances) or one piece 42x18 cm,
- lightweight non-woven material 20x16 cm for laying inside,
- 2 elastic bands about 20 cm.
Description of work:
- Place the pieces right sides inward.
- Attach non-woven material inside.
- Sew along the long sides of the mask.
- Turn right side out and iron. Fold the sides inward.
- Make a fold in the middle.
- Place under the folded edges of the elastic and stitch.
I inserted a wire strip into the seam above the nose. I had to finish the sides manually, because... My machine doesn't handle such thick layers of fabric.
This is the mask I got. It looks good and fits comfortably on the face. I just didn’t have any non-woven material to sew inside, so the mask turned out to be thin, with two layers of cotton. I'll leave it as a last resort.
Nose mask with replaceable filter
An excellent and understandable video, even for beginners, on how to sew a face mask to your own size. The good thing about the mask is that it fits to the nose and has a “pocket” for replaceable gauze inserts (viscose, paper towels).
I sewed the first two masks using this pattern. They needed:
- textile,
- rubber bands,
- wire clips from packaging (in the video, strips from tin cans are used instead),
- paper towels for filter inserts.
The pattern to fit your size is very simple, almost the size of an A4 sheet. Take a measuring tape and measure the face of the person for whom the mask is being sewn.
- Horizontally - the distance between the temples, the measuring tape passes through the tip of the nose. In the photo it is 22 cm. Add 5 cm to it for the hems.
- Vertical - the distance from the bridge of the nose to the neck. In the photo it is 16 cm, plus 5 cm for hems.
We cut out two rectangles, a small one measuring 16 x 22 cm, and a large one measuring 21 x 27 cm.
For a small rectangle, fold the short sides 2 times, 1cm each, and stitch.
Place the small part on the center of the large part. We bend the upper part by 1 cm, place our flexible wire strip in the center, and bend it another 1 cm.
We sew the top with wire inside. We also fold the bottom part 2 times, 1 cm each. The hems and seams should go over the small part!
Now we bend the side parts 2 times, 1 cm each, leaving a free “pocket” from the inner part, where we will put replacement filters.
We sew the sides.
Take the elastic and use a pin to thread it through the side seams. You can make one large elastic band, which is attached with two strips at the back of the head (so as not to put pressure on the ears). Or the traditional two round elastic bands on the side, behind the ears (this option, of course, is easier to remove and does not spoil the hairstyle).
Insert a filter made of folded paper towels, several layers of gauze or viscose napkins into the pocket:
Our mask is ready:
By the way, I found something else that can be inserted into the top seam for bending along the bridge of the nose - a fluffy wire for children's crafts