Photo: vtus.rf Among all the gifts and souvenirs, postcards occupy a special place. It’s much more pleasant to write wishes in them, such a gift does not oblige you to anything, and they can also be sent to any corner of the world. Some advantages! Yes, and you can make them yourself. Here are 10 simple and beautiful ideas for DIY New Year's cards!
New Year card with applique
The easiest way to make a postcard with your own hands is applique. It can be any thematic applique: snowflake, Christmas tree, snowman, Santa Claus and other winter motifs.
Snowman applique
Let's make an applique postcard for the New Year. Take a white sheet and draw a circle. You can use a compass or circle a glass. Cut out three circles of different diameters. Paint the edges blue with a sponge. Cut out a small blue rectangle with curly scissors. Glue the largest circle in the center. Then, attach the medium and small ones. Glue two red stripes as a scarf. We draw eyes and long arms. We make white snowflakes and glue them to the background. Making an unusual postcard with a snowman is suitable for children 4 years old.
Applique Christmas tree and gifts - step-by-step MK
The next version of the New Year's card is interesting using the origami technique. Let's take three green squares. We make bends along two diagonals. We bend the opposite triangles inward. We bend the right and left corners towards the center. It is necessary to repeat these steps with all squares. When all the triangles are ready, glue the white rectangle onto a blue sheet of cardboard. Place the Christmas tree on the right side of the card. Cut squares and rectangles from colored paper. We glue different ribbons to them and place them on the left side of the applique. All that remains is to add the inscription “Happy New Year!” and your handmade New Year's card is ready!
Ideas for New Year cards with applique
Card with beads
Handmade card made using scrap paper and beads
A postcard made of beads is one of the simplest options for New Year's greetings, which even a child can handle. The card is made in literally 20 minutes, and it turns out so elegant that it will certainly delight grandparents. The list of required items includes:
- scrapbooking paper;
- beads of the same color, but of different diameters (for ease of work, it is better to take beads with a flat side);
- a piece of cardboard;
- glue gun;
- pencil;
- double sided tape;
- scissors;
- a piece of ribbon.
Manufacturing
Step-by-step instructions for making a card with beads
- Step 1: Take a piece of cardboard and cut a rectangular piece. It will become the base of the postcard.
- Step 2: Cut out a rectangle from colored scrapbooking paper. It should be slightly smaller than the cardboard base. Glue colored paper using double-sided tape.
- Step 3. Cut several squares and rectangles of different sizes from colored paper in a matching color. Glue them on top of the card to create an unusual three-dimensional design.
- Step 4. Draw a schematic Christmas tree and glue the beads, starting from the bottom of the drawing. Alternate beads of different sizes, but do not forget that they should be larger at the bottom than at the top.
- Step 5. Glue beads to form a triangle Christmas tree.
- Step 6: Use a utility knife to make a small slit in the side of the card.
- Step 7. Cut a piece of organza or satin ribbon, thread it through the slit and tie it with a bow.
Hand-drawn New Year cards
Hand-drawn postcards look original. For drawing, you can use colored pencils, felt-tip pens, and paints. Even if you don’t know how to draw at all, with our step-by-step MKs you can create beautiful handmade crafts.
DIY watercolor New Year card
Let's consider different options for watercolor works and patterns suitable for postcards.
Beautiful patterns for postcards step by step
It is very easy to decorate a postcard with a simple lettering. On white paper we mark the place where the inscription will be located. Use a pencil to outline the word “merry” and add volume to the letters. Erase all the extra lines and start coloring. Carefully paint over all the letters with different colors. To make the picture more interesting, you can add splashes. We take watercolor with a small amount of water onto a brush and splash it onto the drawing.
You can also draw a simple wreath that will look good on any New Year's card. Using a simple pencil, draw an even circle. On the line we draw five circles, equidistant from each other. We paint them in different colors. Add brown twigs and cover them with green needles.
Another interesting idea is a New Year's garland. Draw a chaotic curved line and three large light bulbs. We paint the line and bases of the light bulbs green, and the light bulbs themselves pink, yellow and blue. Don't forget to leave highlights on the lamps and make shadows on the other side.
Let's draw a Christmas tree. On a piece of paper we show a tree with three tiers. Add brown stump. Draw a yellow circle on the top of the tree. We make a glow by gradually reducing the paint and adding more water. Between the tiers we add colored Christmas balls.
Any card can be decorated with a New Year's print, such as Christmas trees, red ribbons or a simple geometric pattern.
How to draw a New Year's lantern with watercolors step by step
Let's make a postcard using the “wet on” watercolor technique. We build the lantern and outline the branches. Using a wide brush, cover the entire sheet with water. While the paper is still wet, add bright yellow watercolor to the center. You can add a little orange around the edges. Cover the background with blue watercolor. You can sprinkle sea salt on damp paper to create beautiful stains. Draw the outline of the lantern in black with the addition of orange. For realism, we make the flashlight handle fuzzy. At the top of the picture we draw branches. Let's complete the details. The result was a fabulous New Year's card.
Drawing Christmas tree decorations in watercolors - step-by-step instructions
Using a simple pencil, draw three Christmas balls. We make the inscription and patterns. First, paint all the yellow parts. We add green and red colors. Now, you need to carefully cover the entire sheet except the balls with water. Add blue watercolor to the wet paper. You need to let the watercolor spread across the entire sheet. We complete the details with a black pen. The New Year's themed craft is ready.
Ready-made watercolor cards for inspiration
DIY gouache postcard for the New Year
If you don’t have watercolor paints, you can paint the card with ink.
Drawing a snowflake with gouache - master class
Take thick paper and seal the edges with tape. Cut out a snowflake from a notebook sheet. Place it in the center of the paper. We place the sponge in the blue gouache and, using driving movements, cover the entire sheet with gouache. Removing the snowflake. Cover the design with glue in the required places and sprinkle with glitter. We make an inscription and draw stars. All that remains is to fix the craft with hairspray. Making children's New Year's crafts is very exciting, and the work itself can be submitted to a competition.
Drawing a spruce forest with gouache - step-by-step instructions
The following craft can be done both for school and kindergarten. We draw several Christmas trees with green gouache. Cut them out and glue them onto white paper. We make gifts and stars for Christmas trees from colored paper. We make bows from black thread. We attach all the details and your creative DIY postcard is ready.
Ready-made New Year cards drawn in gouache for inspiration
DIY New Year's card in pencil
We make a sketch with a simple pencil. A small still life will consist of sweets, tangerines and gifts. Erase the extra lines and outline everything with a liner. To make the drawing seem realistic and interesting, we will use different shades. Paint the tangerines light orange in the center and darken the edges. We cover the leaves with light green and light green. We draw tangerine branches using different shades of brown. We color the gifts red and purple. We cover the remaining elements with blue and gold. Fill the background with blue, turning into dark blue. Draw shadow areas in black. Drawing this card is quite difficult, but if you put in all the effort, it will definitely work out!
Ready-made New Year cards for inspiration, drawn in pencil
DIY postcard with markers for the New Year
We draw a triangle to indicate where the future tree will be. Create a silhouette of a tree. Add Christmas balls, ribbons and a star. We finish drawing the gifts under the Christmas tree. We outline the picture with a black liner and erase the pencil lines. Color the tree with a green marker. Use a slightly darker shade to highlight individual branches. Paint over the balls, star and ribbons. Add color to the trunk and gifts.
Ideas for inspiration
DIY New Year card with felt-tip pens
You can also draw a postcard with felt-tip pens. The drawing will turn out bright and colorful, but you can’t make mistakes; you won’t be able to erase the extra line!
Drawing a gnome with felt-tip pens step by step
Let's draw a gnome on a New Year's card. To maintain proportions, mark the lines on the sheet. We fit the body and head of the gnome into the central rectangle. A little lower we draw the legs. Add a tall hat, a voluminous head and a face. We finish drawing such small details as stripes on the legs, boots and mittens. We paint the original gnome's clothes red. Add green and yellow elements. A cool gnome is ready for the New Year.
How to draw a polar bear step by step
Let's make a winter bear. We draw the outlines of the bear's body and head. Draw the hat and muzzle. Use a blue felt-tip pen to color the background, and a red marker to color the header. It turned out to be a cute New Year's card.
Finished works
Postcards for kindergarten
In kindergarten, children do not work with sharp objects. Teachers prepare materials for crafts. It is necessary to take into account the age and level of development of children so that everyone can express themselves. That is why, before the start of the lesson, children receive identical balls cut out of cardboard or template Christmas trees. The lesson is necessarily preceded by a story about the essence of the holiday and its traditions.
New Year cards made of colored paper and cardboard
The range of materials that a baby can handle is not very wide. Traditionally preparing for the New Year:
- paper (colored and white) and cardboard;
- pencils, markers, paints;
- glue or glue sticks;
- scissors with safety blades.
You can also prepare more original accessories that will be appropriate for New Year and Christmas crafts - shiny wrapping paper, loose curly glitter. For kids, sparkling works are a piece of a small New Year's miracle.
Ball
Even children from the junior group of a preschool educational institution can make a postcard with a Christmas ball, if a significant part of the work is done according to a template. Kids are not yet able to handle scissors, much less cut out a circle, and it will be difficult to keep track of a large group with sharp objects. The teacher must cut out the main blanks from colored paper or cardboard in advance - the ball itself and the fastening for the lace.
For this set, you can give kids the following decorative elements:
- paper stars;
- small confetti;
- snowflakes and diamonds.
All the children have to do is carefully apply the glue and decorate their ball to their liking. The work will look even more interesting if you use pre-decorated paper as a basis, for example, thick wallpaper in colors corresponding to the holiday. Velvet paper will also work.
Tasks with ready-made balls that just need to be decorated can be varied. Children can be asked to color the same toys with felt-tip pens or using the finger technique, sprinkle with colored semolina on glue or with potato stamps.
Older children will be interested in voluminous New Year cards. Blanks in the form of circles from colored paper can be cut out according to a template - the teacher can additionally show how you can quickly draw a circle using a simple glass. For each of the toys you will need 6-7 blanks and several ribbons for garters.
Technique:
- Around the glass or using a cardboard template, draw and cut out several identical circles. You can take not only simple colored paper, but also wallpaper or pages of bright glossy magazines. This will make your DIY postcard for the New Year even more original.
- We bend each of the circles in half, with the bright side inward. Press the fold tightly.
- Glue the halves of the circles together in pairs. It should look like a kind of accordion. All that remains is to secure the outer halves on paper or cardboard.
At the top of the ball, all that remains is to make a pendant and secure a bow made of paper or decorative ribbon.
The same folding ball can be made into a real original surprise. It is enough to align the axis of the toy with the fold of the postcard. The folded box itself can be tied with a beautiful bow. As a result, when opened, the flat postcard will become three-dimensional - that same little childish miracle will happen.
Children of the senior and preparatory groups of kindergarten can make an interactive beautiful card with a New Year's ball.
To work you will need:
- transparent dense polyethylene - you can cut a thick file for papers;
- confetti, foil or sequins, small figurines of New Year's characters;
- thick cardboard for the base, glue or glue stick;
- tape, ribbons or fancy threads.
The circle that will become the base of the ball must be cut out of transparent material. It is glued to the base like a pocket using tape (the glue does not stick to the film). Decorative materials are poured into the pocket through a small hole, after which the ball is completely sealed. All that remains is to disguise the edges of the tape with glitter or a pattern, decorate the top of the ball with a bow of ribbon or thread, and write a small congratulation.
Herringbone
The easiest way for younger children to make a New Year tree for a competition or for a gift is to assemble it from triangles and decorate it. Kids can be given pre-cut parts and shown the diagram. Senior groups will cope with this task themselves. At the same time, the concept of an isosceles triangle can be carefully introduced to preparatory groups. Assemble the applique with glue on the base. Each child can decorate the Christmas tree to their own taste - add a star on the top of the head, garlands or snowflakes.
An original semi-volume Christmas tree is made from quilling ribbons. Similar ones can be cut yourself from colored paper or replaced with thin strips of bows for gifts and bouquets - such accessories are sold in any hypermarket before the holidays. Such an inexpensive creative idea will allow you to make a card both easily and beautifully - decorative ribbons are made glossy, shiny, foil, which in itself looks impressive.
Technique:
- The tape is cut into equal lengths and fastened in half.
- Lay out the tiers starting from the bottom so that the top ones naturally overlap.
- After the glue has dried, you can decorate the card with a drawing or applique - add small details.
Snowflakes around the main picture can be made from the same finely chopped ribbons, inviting children to exchange different colors of material.
Other ideas for cards with a Christmas tree for children in kindergarten:
How to make a card with a New Year's garland with your own hands
Postcards with images of New Year's garlands are especially popular. And this is not surprising, because even a child can draw it with his own hands! In our MKs you will find two cool ideas for a New Year's card with a garland!
Draw a garland with felt-tip pens
First, we draw a garland. We outline it with a black felt-tip pen. All that remains is to paint it in any colors. This craft can be made for kindergarten.
Glowing garland using crayons - master class
For the next option you will need black paper and colored crayons. Using a white charcoal pencil we outline a curved line and bases for the light bulbs. Cut out the paper in the shape of a light bulb and apply it to the desired location. We paint around the template with chalk. Rub it with a cotton pad. We remove the template and repeat this with all the light bulbs. It turns out to be a cool garland.
Minimum effort - maximum style
You can make an incredibly stylish Happy New Year 2022 card with your own hands in just a few minutes. It looks very noble, and all you need is a plain base for the card, glue and glitter.
Using stationery glue or a glue stick, we draw spruce paws with light, relaxed strokes of a real artist. Cover the entire surface of the card with glitter.
We wait a few minutes until the glue dries completely, shake off the excess - and voila, the postcard is ready. The star on top can be elegantly drawn with a single line using a thin red marker.
Making cards with your own hands is a pleasant and exciting activity. They are incredibly pleasant to make, and even more pleasant to give.
DIY Santa Claus postcard
A postcard with a picture of Santa Claus will also be relevant. You can draw it or make an applique from colored paper.
Application from colored paper Santa Claus step by step
Let's make a postcard with Santa Claus. Cut out the white base. We make mustaches from the same paper. We glue red clothes and grandfather's beard onto the blue sheet. Add the face, hat, belt and head decoration. All that remains is to sign the postcard on the back side.
Application made of white and red paper - MK with photo
Children will really enjoy creating the next version of the postcard. We need to cut out two parts of the beard, the fur for the hat and the hat itself. We attach all the elements to craft paper. We bend the hat and beard. Glue on the eyes, nose and pompom.
New Year's Deer postcard - how to make it yourself
Another option for a New Year's card is with the image of a deer. As in the case of Santa Claus, the deer can be drawn or made in the form of an applique, flat or three-dimensional.
Simple New Year's card Deer for kids - MK with photo
The method of making this deer is similar to the previous one. Glue two eyes, paper horns and a nose onto a white background. The nose can be made from fabric or thread. The funny card is ready.
Applique postcard Deer made of colored paper step by step
You can make funny New Year's reindeers. Let's take two sheets of equal size. Cut out a brown triangle the same length as the first sheet. Glue it onto the blue background and bend the top corner down. Attach paper horns, eyes and nose. You can experiment and come up with your own design for such deer. For example, cut a bow or wrap a garland around the deer’s neck.
DEER on Christmas cards.
Another New Year's character that looks festive on New Year's cards is a deer.
It can also be depicted in a non-standard way, but in an interesting situation. For example, it could be a deer enthusiastically singing Christmas songs, playing the drum, or skating - everything is up to your imagination.
You can choose the simplest silhouette applique of ONLY DEER HEADS on postcards.
Or you can decorate a New Year's card with the silhouette of a whole deer - from antlers to hooves.
DIY New Year's Mitten postcard
Another cool option for a New Year’s card is a mitten card. We have two MKs: a postcard in the shape of a mitten and with a mitten decor.
New Year's card in the shape of a mitten step by step
Fold the red cardboard in half. Draw a mitten and cut it out. You should get a postcard in the form of a folding mitten. We decorate it with fur, leaves and an inscription. The craft can be sent as an invitation.
New Year's card with mittens - step-by-step MK
The next New Year's card will be made in scrapbooking style. We cut out the central part of the card and give it an aged effect. To do this, you can use a sponge and brown paint. Cut out the blue mittens and also cover the edges with brown. We place the printed paper on plain cardboard. Place the white part in the center. Glue the mittens on top. It is advisable to use bulk tape so that the card does not seem too flat. We complement the craft with beads, ribbons and seals.
Materials for postcards
With the development of scrapbooking, the possibilities for artistic appliqué have become much greater; there is special paper with a thematic design, stencils for cutting out elegant frames, a variety of figured hole punches in the shape of snowflakes, bows, hearts, etc.
And multi-colored ribbons, decorative tape with a pattern, woolen threads, beads and sparkles will help create interesting compositions. For the base, use special thick paper for postcards or regular colored cardboard, the sheet of which is folded in half.
New Year's card Snowman
Another idea for a postcard with an image of a themed winter character – the Snowman. Again, the card itself can be in the shape of a snowman, a character can be drawn or an applique can be made.
Volumetric postcard with snowman applique - step-by-step master class
First, you need to draw a snowman. We color it with pencils, outline it with a liner and cut it out. Making a frame with ice patterns. Place it on a blue background and attach a snowman. We decorate the New Year's card with rhinestones, branches and stickers.
New Year's card with a three-dimensional snowman step by step
For this card, cut out three white circles. We glue them onto the blue background using double-sided tape. We complement the New Year's snowman with a hat, snowflakes and a face.
Easy New Year cards with a 3 year old child
The most common option is drawing with children's palms; it looks both beautiful and stylish. And besides, kids like it so much; they are ready to enjoy creative activities for hours, because they are learning about the world. And we are at the same time with them.
You can draw with your fingers, and any New Year's image:
And then decorate with sparkles and cover with shiny varnish.
Using a decorative stapler, cut out snowflakes and use them to create the composition you want.
Here are a couple more stencils for creativity.
Even ordinary lacing for finger exercises can be adapted here, and it will be fun and useful.
If you want, or maybe you are a fan of corrugated paper, or you have it lying around in your stash, use it then too.
You need to fold the sheet into an accordion shape and secure the middle with a stapler. And then fluff it up and glue the ends together or secure them with staples.
Voila, gobbledygook and glue it to the cardboard base where the bend is. Decorate with snowflakes and others and rhinestones. You can also add a sticker.
The next option will not be simple, but not difficult either. You will need scrapbooking elements specifically in the New Year theme.
It can also be flowers and leaves for decoration.
Of course, this requires your imagination and ingenuity, you can make something like this:
DIY Christmas tree card
To complete the ideas for postcards depicting New Year's attributes - a postcard with a Christmas tree. We have two MKs: applique and pop-up.
Application made from ribbons and corrugated paper
We will need corrugated paper and cardboard. We cut colored strips and glue them onto cardboard parallel to each other. Cut out a cardboard triangle and wrap it with satin ribbons. We attach it to the background and decorate it with rhinestones.
Postcard with 3D Christmas tree - step-by-step manufacturing instructions
Let's look at another interesting option for a New Year's card. Divide the paper into strips with a pencil. We bend it like an accordion. Now, let's cut the strips. Fold the white cardboard in half. Place the accordions in the center and glue them. We decorate the card with gifts and snowflakes.
New Year's card made of felt - step-by-step MKs
You can use pieces of felt as material for a New Year's card. It will give the product an unusual look, and working with the material is easy and simple.
Postcard with original felt Christmas tree
Glue the printed fabric onto the cardboard. We make a frame from blue ribbon. Cut out the template in the shape of a drop. We trace it onto green felt. We will need about 25 of these parts. We place them on the fabric, starting from the bottom. Attach a button and rhinestones to the tree. The result is a textile postcard.
Postcard with felt applique “Herringbone”
Fold white cardboard in half. Glue paper with Christmas trees to the front side. Cut out a Christmas tree from felt. We embroider a garland on it. We glue the cardboard on the back side and place the Christmas tree on the card. We decorate with beads, ribbon and a congratulations inscription.
Creative New Year cards. Christmas tree made of ribbons.
You will need:
- colored cardboard
- scissors
- glue
- stickers (in this case in the form of stars)
- decorative ribbons, scrap paper or clippings from bright magazines
1.
Fold a piece of construction paper in half to make the card base.
2.
Cut out a tree trunk from brown paper.
3.
Glue the trunk to the base (in the middle).
4.
Start cutting ribbons of colorful paper into several pieces of varying lengths.
5.
Glue all the pieces onto the trunk (top), starting at the bottom with the longest piece.
6.
Decorate the Christmas tree as desired.
New Year card from foamiran
Let's figure out how to make a simple card with a Christmas ball. We draw and cut out a circle from foamiran. Attach it to the red background and place a bow on top. The New Year's ball is ready.
New Year card made from cotton pads
You can use cotton pads for appliqués on cards. They are perfect for winter crafts: white and airy as snow!
Postcard with 3D “Herringbone” applique made from cotton pads
Take ten cotton pads and roll them in the shape of bells. At the bottom of the blue paper we place four disks. Add three more on top of them. Next, glue two more disks. We place the latter at the very top. We decorate the craft with a shiny star, rhinestones and New Year's snowflakes.
Postcard with three-dimensional applique “Christmas balls” made of cotton pads
For this option you will need liquid glitter. We circle the cotton pads with glitter. We depict snowflakes inside. We place three disks on a blue background and glue bows and ribbons.
Santa Claus made from napkins, paper and cotton pads
To create New Year's crafts, you can use a variety of materials. For example, in today's master class we will make Santa Claus using an openwork napkin, a cotton pad and paper.
To make such a Santa Claus, we will prepare:
- white openwork napkin;
- red paper;
- cotton pad;
- decorative plastic eyes;
- glue stick with scissors;
- pompoms of different colors and sizes.
We will make the face of our Santa Claus from a white openwork paper napkin. But first you need to bend it a little.
Now we need red paper. We place a white openwork blank on it and outline the contours of the future triangle. Then we cut it out with scissors. Glue the openwork napkin onto the red triangle, placing it in the middle and moving it down a little. The red cap of Santa Claus should remain at the top.
We will make a mustache from a cotton pad. But first we cut it in half, and then slightly reduce the resulting pieces.
Glue a mustache from a cotton pad onto our craft. We add plastic decorative eyes to it. Add a red nose, it will become a small pompom.
All that remains is to decorate the red cap. We attach a green fluffy pompom to its tip. We made this Santa Claus from an openwork napkin, paper and cotton pads.
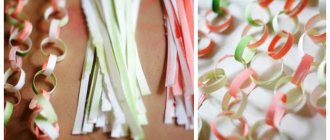
New Year's card using quilling technique - step-by-step MKs with photos
If you want to make an original card for the New Year, we recommend paying attention to the quilling technique. Fancy patterns made from ordinary paper strips will make a lasting impression on the recipient.
Unusual card with applique using quilling technique
Let's make a beautiful New Year's card using the quilling technique. Fold the printed paper diagonally and glue it to another sheet. We roll the corrugated ribbons into circles and form them into petals. We make a flower from six petals. Place folded gray ribbons inside the petals. Glue the flower to the card. Add another flower and folded ribbons.
Card with snowflake quilling
We roll the ribbons into circles with a diameter of 12 millimeters. We bend them with our fingers. We fasten the eight blue petals to form a flower. Glue eight more white ones around. We place the flower on pale blue paper. Add additional elements and an inscription.
DIY New Year's card - step-by-step master class
Cut out two identical squares from craft paper. Let's prepare embossed New Year's stickers in the form of snowflakes, a man or an angel. We cover them with red stamp paint, turn them over and press them onto the craft. We print the person on white paper, cut it out and glue it to thick tape. Glue the craft onto cardboard and bend it. Handmade postcard is ready.
Volumetric New Year's card with a Christmas tree made of ribbons - how to make it yourself
Cut out a triangle for the base of the Christmas tree. We make short strips of satin ribbon. We bend the strips in half and burn them with a lighter. This way the ribbons are held together and do not unravel. We begin to cover the Christmas tree with ribbons. We glue the double-sided tape and lay out the first layer. Place the next layer on top of the first. We continue until the entire tree is covered with ribbons. Glue the tree to colored paper. Decorate the top with a star. Now, let's make a bow from a small ribbon. Twist it around the fork. We pass the right end between the second and third teeth. We wrap it around the central part of the bow. We pull out the end and remove the homemade bow from the fork. We make a shiny frame and glue all the elements. The New Year's craft is ready.
DIY Pop-up card for the New Year
Let’s look at the scheme for making a modern postcard in the “pop up” style, which translates from English as “appear suddenly.” It is necessary to prepare a drop-down Christmas tree. You can make it yourself from a large number of identical parts. Fold the green leaf in half. Glue the Christmas tree into the middle. When everything is dry, paint a gold star on the top and decorate the background with stars. The result is an original 3D craft.
Origami New Year card
Fold the square in half and diagonally. We turn the corners inward. We bend the right and left corners towards the middle. Using scissors, we make equal cuts along the entire bottom of the triangle to create a fringe. Glue three triangles onto a white background. Use a hole punch to cut out holes in the shape of snowflakes. We decorate the Christmas tree with hearts. The New Year's craft is ready.
At MK we analyzed the schemes for making all the postcards. You can use other ideas, for example, depicting New Year's houses, a penguin, making a postcard with a mini clock, or using the decoupage technique. It is not necessary to repeat all the steps exactly - you can add your own edits and then you will get an original New Year's card.
What you need to make a New Year's card
Modern postcards are not just cards made of paper or cardboard with a thematic design and a congratulatory inscription. Yes, the functions remain the same and the wishes for the holiday are still relevant, but the design of the cards itself has undergone changes over time. Now, for greeting cards, which many people make with their own hands, they use a wide variety of materials and techniques. And they are decorated so fantastically that the first postcard dealer, the Frenchman Leon Bernardo, would clearly envy such a variety of them.
To make an original New Year's card yourself, you need different materials:
- cardboard – colored (single-sided and double-sided) and regular;
- paper of various types and textures: colored, for scrapbooking, corrugated, corrugated, velvet, craft, plain white office paper, napkins;
- The most varied fabric is also suitable - from burlap and cotton to silk and felt;
- threads of different thicknesses and textures - thin and thick cotton, floss or iris, wool;
- laces, ropes, ribbons and ribbons, lace and even ordinary twine;
- beads, seed beads, sequins, sequins, glitter, buttons of different colors and sizes for decoration;
- stamps of drawings and patterns;
- chenille wire;
- cotton wool, padding polyester, padding polyester - they are often used for “snow” or to add volume to some details;
- foamiran, plasticine, salt dough.
In general, if you show your imagination, almost anything that is easy to find at home and can be used to create and decorate cards will do.