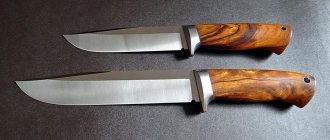
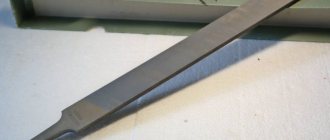
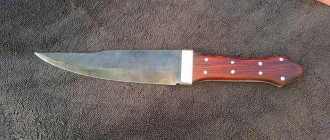
To obtain the necessary characteristics of the future knife, a sketch of it is drawn from a file as a blank on paper. It is better to choose an old tool with a worn notch. High-carbon steel provides the future knife with high cutting performance. The production of such a tool will be inexpensive, and its quality will surpass many factory samples.
Required tools and materials
The process of making a knife involves many difficulties, including the selection of materials. For manufacturing, you need to select a file more than 3 cm wide; it is advisable to look for a Soviet-made tool. The cross-section of the file surface should be flat or diamond-shaped; if the latter is found, this will be the best option, since the shape of the steel is stronger and will withstand loads.
The manufacturing process will require the following tools and items:
- Rivets made of brass alloy.
- Etching is performed with ferric chloride.
- Magnet for checking the degree of hardening.
- To process surfaces you will need sandpaper.
Processing is carried out with a grinder or grinder. You also need to decide on the material of the handle of the future knife. A file knife can have a metal or wooden handle, its weight and purpose depend on this. Before manufacturing, it is worth preparing a sketch of the future product; usually it is drawn on paper.
The process of making a knife from a file
Cutting and primary processing of the workpiece
The fastest way to saw a workpiece is with a grinder with a thin metal cutting disc. If it is not possible to use a grinder, you can use a hand hacksaw for metal
It is important to correctly install the file into the hacksaw. The saw teeth should be directed forward and the hacksaw should cut while moving away from you
Cutting and preparing the workpiece
First, the approximate shape of the knife is cut out using straight cuts. Then the bends are cut out. The easiest way to cut them is with several oblique cuts converging at one point.
It is important to leave an allowance of 2-3 millimeters to the drawn outline. This is due to the fact that when using a grinder, the metal at the cutting site overheats
By grinding off 2–3 mm using a file and sandpaper, you can remove the overheated edge of the metal.
Firing the workpiece
The files are made from U10 steel, which is enriched with carbon; a file made from this steel is fragile and can easily crack under load. In order for the metal to be hard and not crumble when struck, it must be hardened. Usually the procedure is carried out in a special oven, the temperature of which reaches 700 °C.
To harden a knife made from a file, which you made yourself, you can use a regular gas stove.
The combustion temperature on the stove is not high, reaching no more than 300 degrees. To achieve the required heat, you need to use a kind of screen. In the absence of a special thermometer, you can use ordinary table salt, its melting point is equal to the hardening of knife steel.
Knife hardening
Hardening of the file is necessary only in the cutting part. Checking for uniform hardening occurs visually; after reaching the temperature, the knife should be uniformly reddish in color. The product must be kept at maximum temperatures for at least 4 hours. Cooling is done smoothly; if you cool the part right away, it will simply crack. Cooling of the part occurs through a gradual decrease in temperature; heating decreases every hour by a quarter of its initial intensity.
How to harden a knife from a file
After firing, you can begin to form the future product. The workpiece is secured in a vice, the parts are processed with a grinder and all excess slag and layers of metal are removed. The sharpening machine is used with a coarse-grained abrasive wheel. The degree and shape of sharpening is carried out according to the prepared sketch. On the handle compartment you need to drill one or two holes to attach the handle.
After the tool is hardened from the file, it is necessary to treat the entire surface except the handle. A burner can be a tool for hardening, since the temperature is higher and the knife will harden faster. Uniform tempering of a knife from a file will give strength to the future product. The correct hardening of a knife made from a file can be determined with a magnet; if there is no reaction with the metal, then it is suitable for further use. After the process, the metal needs to be cooled, just put it in a bucket of water.
File knife and drawing for it
There is such a thing as metal stress. With this action, the metal crumbles and crumbles. To avoid adverse consequences, it is necessary to heat the instrument in the oven at the maximum temperature for several hours.
DIY Knife From Wood Saw
Do you want to make a unique knife? Do you need a wood chisel or a sharp blade for hunting? Making a good product with your own hands is more realistic. Main. have the skill of working with metal and know what you want.
First, prepare what remains for our client to do with the necessary parts and tools, put them in only one place. Decide what specific material you will have to use. If you need a sharp and strong product, make a knife from a saw.
Take the blank. A wood saw blade for other metals is better suited for this purpose. As a material for the production of a handle for a blade, use wood (any kind, according to your application), textolite, plexiglass.
To get started and make a knife from a metal saw, you need:
- ratfil;
- electronic sharpener;
- electric drill;
- marker;
- ruler;
- sandpaper;
- surface polishing paste;
- copper or aluminum for rivets.
Let's figure out how to make a knife from a saw. Prepare iron sheet for blade production. Draw a blank of the future instrument using a marker for this purpose.
Remember that a knife is considered a cool tool if the length of the blade exceeds 2/3 of the total length of the product. If you incorrectly construct a knife from a saw and it is regarded as a cool tool, expect punishment.
Having outlined the outline of the future product, start cutting out the shape. It is important to draw the shape so that the cutting part of the future product is located in the area of the saw teeth. Due to the layout of the saw, if you make a butt in this place, you will have to do additional work to grind down the unevenness.
Don't start sharpening your knife without practicing. Take an ordinary piece of metal and try to process it. Damaging a piece of iron is not as bad as losing a good piece of equipment.
It is necessary not only to regulate the pressure when turning, but at the same time to monitor the temperature so as not to overheat the iron. High temperatures not only spoil the appearance of the metal.
If the outside does not change, its structure can be seriously damaged: the metal will become much softer and more fragile. A circular saw blade made of poor metal will have to be sharpened more often.
Homemade knife from a circle for a circular saw with your own hands
To check whether the iron has begun to overheat, drop a couple of drops of water on the workpiece. If it evaporates right there, quickly cool the workpiece for the upcoming blade. To avoid possible problems associated with overheating of the metal, place a container of water near the machine and periodically cool the future saw blade.
Having formed the base of the future knife, proceed to the most important and difficult step of the work - removing the slopes. The descent is a surface on the knife that gradually tapers towards the blade. The purpose of the knife directly determines the angle and width of the slopes. Therefore, choose the average value if you want to get a universal knife from a saw.
Before working on the machine, draw the proposed slopes on the iron sheet, using a marker for this purpose. Grind carefully, slowly, so as not to spoil the future knife.
It is recommended, just like in the previous step, to practice on a spare part. The slopes can be symmetrical and lie at the same angle on both sides.
With all this, the blade is not sharpened: leave an indent of approximately 0.25 mm.
To sharpen the blade, use sandpaper. For such purposes, sandpaper of 8-10 hardness is best suited. It is better to sharpen a knife from a metal saw on a wooden block. To prepare an improvised sharpener, take a block and stick sandpaper to it.
Using coarse sandpaper, you will give the blade the desired sharpness, and using a smaller one, you will polish the iron blade one hundred percent.
As a final finishing step, polish the blade. Cover the same wooden block with felt or leather, rub it with GOI paste and polish until you achieve the desired effect.
It is much easier to glue a handle from two cut and prepared pieces of wood, also called plexiglass. It’s easier to make than attaching it to the tail of a knife. Well, you can choose a simple option and wrap the handle with electrical tape, but why try so hard to ultimately spoil the neat appearance of the knife?
knife float made while standing on one leg
And now comes the most important step of the work. Because you will have to drill in the shank of the knife, the blade may simply tear. Therefore, be vigilant and careful.
Steel. hard, but at the same time fragile material. If the pressure is evenly distributed when the saw is in operation, it is impossible to break it. But when spot drilling, the pressure increases, and the metal can simply crack.
Therefore, it is better to drill a hole at low machine speeds and do not even forget to add oil to the drilling area. Under such circumstances, a screwdriver.
an impeccable tool for fulfilling the intended purpose, because it has fewer revolutions, the possibility of breaking the part is not so high.
Having completed the previous step and made holes in the handle, drill the same in the halves of the handle. Make a copper or duralumin rivet. For insurance, you can glue the area where the rivet will be located with glue, but it is better if you have epoxy.
Craftsmen say that a hole can be made without the use of drilling tools. The blade together with the shank is covered with a layer of varnish. Where there is a hole, it is necessary to clean the surface of varnish.
You should place a knife from a wood saw into the electrolyte solution and lower a wire with a negative charge into the container with the workpiece, and connect the positive one to a power source, like using an ordinary battery.
And therefore, such an impact will result in a hole in the metal, although it will not be completely round, but you definitely won’t be able to destroy the blade using this method.
If for some reason you can’t make a knife from a metal saw, you don’t have the necessary material. change it. An auto spring is perfect for making a blade; the metal is softer than that of a saw.
To process such a workpiece, you do not need to use a sharpener, but a metal saw will be useful for cutting out the shape of the blade. Since metal is easier to process, there is an option to adjust the edges of the workpiece with a ratfil.
It will take longer to create a knife using this method, because the processing step involves manual work.
Homemade Japanese Nakiri knife. DIY axe. hand made japan knife nakiri
Making a knife from a saw is a labor-intensive process, but the end result is worth it. By making a knife from a saw yourself, you will get a high-quality and unique blade.
Making the handle
Before making a handle for a product, you should decide on the appearance, materials and shape. You can use any material that is at hand. A wooden handle is considered a harmonious option.
File knife handle
The process includes several stages:
- Selection of materials, it is possible to use different types of wood for a unique design.
- It is necessary to make a bolster, the lower part of the knife. The remainder of a file or other metal is used.
- Wooden pieces are placed on top of each other and glued together with epoxy glue.
- To glue the pieces together better and faster, you need to use a press.
- The excess parts are trimmed with a saw, after which they are processed with sandpaper to the required shape.
- When finished, the handle is varnished for greater preservation; it is possible to use stain to darken it.
It is important to understand that all knives, regardless of category, are considered edged weapons. However, a cutting product whose blade length is no more than 90 cm and whose thickness is more than 6 mm can be removed from the category of edged weapons.
Sharpening is done in the usual way on a grinding machine.
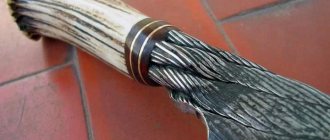
The handle can be made of leather, deer antler or other materials. Installation depends on the form; each type requires an individual approach. The leather belt is tightly placed over the handle area, glued with special glue.
Proper processing
The initial processing of the knife blade is performed with any available tool. Sharpening a knife from a file can be done on a grinding machine, which will speed up the process and make the blade more uniform across the plane. The initial sharpening does not require ideal parameters, since the etching process occurs after it.
Etching the blade in citric acid
Etching occurs chemically using ferric chloride, which can be purchased at radio components or hardware stores. It is necessary to completely lubricate the product with the solution, or lower it into a flat container with it. The process will give the blade a film formed on the blade, which will provide protection and it is highly not recommended to remove it. At home, you can use citric acid mixed with vinegar for etching.
After all the processes carried out to process and produce a knife from a file, it is necessary to carry out final processing. The blade is carefully sharpened on a grinding machine to give it sharpness. The handle is polished with a solution of wax and turpentine or varnished.
Forming the upper part of the handle
The upper part of the handle is prepared in advance for the reason that after gluing the handle to the shank, processing the upper part will be difficult. Also, during the processing process, you can scratch the blade, which is extremely undesirable. Holes for rivets are drilled according to the markings made during the preparation process. A rod of suitable diameter is inserted into them. It allows you to firmly connect both parts of the workpiece and will not allow them to move during processing.
Finished knife handle
Forming occurs using files and sandpaper. At this stage, it is important to remember the permissible dimensions of the limiter and finger recess.
The final processing is carried out using 800-grit sandpaper. Before gluing, all parts must be thoroughly degreased. This can be done with acetone or solvent. Once the degreaser has dried, glue or epoxy can be applied.

