Or even ? So, it turns out, you can’t have a kitchen and not have a refrigerator! Therefore, to prevent food from spoiling, we had to “invent” the refrigerator. The starting materials were:
As a result, the list of materials expanded somewhat:
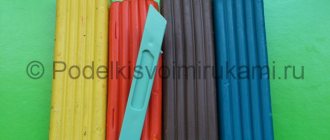
Shoe box - corrugated cardboard from the packaging - baking foil - Moment adhesive gel - a piece of self-adhesive film - white writing paper - scissors - notebook cover - threads, needles, a piece of bias tape - double-sided tape - regular tape - reinforced tape - ruler and simple pencil - stickers - free time and imagination
It all started with a box.
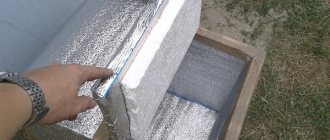
First, we covered the inside of the box with self-adhesive tape. Then, we traced the box and cut out a rectangle from corrugated cardboard, which was then wrapped in food foil: we got the main cooling element of the refrigerator. We put our cooling element into the box: Do you feel it? It's already freezing! 
But a good refrigerator must be spacious and need shelves. Our box fits two shelves, so we cut out 4 rectangles from corrugated cardboard,
glue them together in pairs and wrap them with self-adhesive tape. When the shelves are ready, the question arises, how to secure them? There is nothing complicated - we will use the force of gravity and make sure that the shelves support themselves. To do this, cut out rectangles from corrugated cardboard approximately 1-1.5 cm wide and slightly less than the width of the shelf.
We glue these rectangles in pairs and attach them to the walls of the refrigerator using Moment glue: When the glue sets, insert the shelves. Important:
If you plan to place shelves on the refrigerator door, then the depth of the shelves should be less than the depth of the box.
We made the shelves on the door like this: we cut out the details from the notebook cover:
The future shelves were finished with bias tape along the edges: Using a sewing machine, the following panel with pockets was sewn: Then these pockets were jointly attached to the lid of the shoe box using double-sided tape. The plastic is smooth and adheres very well. And of course, the refrigerator must have a spacious drawer for vegetables and fruits. We made such a box from another box, cutting it in half and cutting off the excess, joining it with reinforced tape for reliability. They covered it with self-adhesive tape and, in principle, the refrigerator was already ready for use. But there is no limit to perfection! Especially when you have stickers on hand! By the way, to keep the door closed, “fasteners” were attached to the top and bottom very close to the corners - rectangles that hold the door closed due to friction. From above it looks like this: And from below there is a longer strip so as not to interfere with the movement of the box: We didn’t have enough self-adhesive to cover the outside of the refrigerator, so the outside of the refrigerator was covered with white writing paper and laminated on top with regular tape. We only slightly modified the door by gluing a snowflake: And is there a refrigerator without a condenser?
The question of how to preserve food and finished products in the hot summer is always relevant. An answer is needed immediately if there is a summer vacation, an outing with tents, a long journey to the dacha or to the village to visit relatives. A cooler bag will help protect food and drinks from the heat. It is quite possible to make such a necessary thing with your own hands.
Blog Search
How to make a refrigerator out of cardboard
Remember when I told you how to make an electric stove or even an entire kitchen out of a cardboard box? So, it turns out, you can’t have a kitchen and not have a refrigerator! Therefore, to prevent food from spoiling, we had to “invent” the refrigerator. The starting materials were:
Article on the topic: How to build a refrigerator into an IKEA cabinet
As a result, the list of materials expanded somewhat:
- shoe box - corrugated cardboard from packaging - baking foil - Moment adhesive gel - piece of self-adhesive film - white writing paper - scissors - notebook cover - thread, needles, piece of bias tape - double-sided tape - regular tape - reinforced tape - ruler and pencil - stickers - free time and imagination
It all started with a box.
First, we covered the inside of the box with self-adhesive tape.
Then, we traced the box and cut out a rectangle from corrugated cardboard, which was then wrapped in food foil: we got the main cooling element of the refrigerator.
We put our cooling element into the box:
Do you feel it? It's already freezing!