The standard audio device placed in the car does not suit all owners. But replacing equipment is associated with compatibility problems between the radio panel and the central trim of the instrument panel. The adapter frame for a 2 DIN car radio allows you to close the gaps formed during installation, and also ensures a neat appearance of the installed equipment. Similar elements are used when installing small-sized players instead of original head units.
Frame for 2 din radio: characteristics and installation
Many motorists know that the radio in a car becomes obsolete the fastest. Technology is developing rapidly, and in two decades there has been a tremendous leap from radios to multifunctional devices capable of playing video and connecting to the Internet. Therefore, those car owners who keep up with the times often face the question of replacing an outdated device with a new one.
Changing the frame
What will be needed for repairs
So, before you begin the repair process, you need to provide power to the device. As you know, car radios do not have a built-in power supply, like a music center, and you will have to provide it.
Note. All experts, as one, will say that using the battery as a power source in this case is not recommended.
The most acceptable option would be a mains power supply, ideal for repairing Chinese car radios at home. Such a unit should be able to provide an output voltage of 12-13 V, and the load current should be within 10 A. On the other hand, the load current may be less, since it is not necessary for the car radio to work at its full power when repairing.
What are the advantages of a switching power supply from a PC?
As an option, you can offer a power supply from a PC. Although you can make a power supply yourself, you will then need to buy a powerful transformer.
Note. The power supply must be from a computer in AT or ATX formats.
- Such a power supply is capable of providing short circuit protection. For example, a short circuit can occur due to accidental reversal or other problems.
- Such a power supply will have the necessary output voltages. Typically, the yellow wire on the power supply is +12V, and the red wire is +5V. These are the very values that are needed in the process of repairing Chinese car radios.
- Also in favor of such a power supply are its light weight and small dimensions. It is known that the computer power supply is compact, and at the same time it has considerable power.
- The supply voltage is provided stably. Having built-in stabilizers, such a power supply, with a current load voltage, never exceeds the normalized level.
Note. It will be useful to know that a voltage output of plus 12 V will have a current load of 10 A or more. It all depends on the power of the power supply. As for the output to plus 5 V, when diagnosing various motors, of which there can be up to 3 in modern Chinese radios, it is indispensable.
This power supply also has a built-in power switch, as well as an LED indicator.
Sound column or speaker
During repairs you will also need some of these components. The active resistance of the coil inside should be 4-8 ohms. You will need a speaker (see How to choose speakers for your car radio yourself) to monitor the sound quality.
Note. It is advisable to use speakers with a resistance of 4 ohms, since modern Chinese car radios are designed for exactly this value.
Other Important Tools
In addition, of course, you will need the following tools:
- Standard multimeter.
- A good small screwdriver designed specifically for disassembly or assembly.
- Narrow-nose pliers.
- Tweezers.
- Soldering iron with a set of necessary components.
Why do you need a transition frame?
Decorative elements are used to integrate the front part of the radio into the central part of the car panel. Adapter frames for 1 Din car radios are included in the equipment package; products allow you to close the gap between the plastic cover and the metal mounting clip. When installing 2 DIN equipment, it may be necessary to install an upgraded trim on the central part of the instrument panel or a special insert in the trim.
For example, Ford Focus cars use an original Sony radio with rounded edges of the front panel. When installing equipment from alternative suppliers, you will need a frame for the radio that will allow the rectangular front to fit into the oval landing window. The element prevents the player from moving during operation, increasing the reliability of the multimedia center.
4.Completion
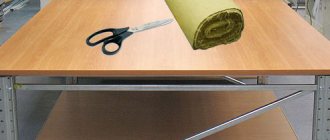
Now you need to give the frame a finished look. There are several options for how to do this. First of all, vinyl or Alcantara cover immediately comes to mind. Carpet is not suitable for this purpose because it is too thick and will become dirty during use. Alcantara is much better, but with vinyl (“leatherette”) everything is generally clear. Don't forget to paint the parts well with primer before gluing the coating.
The second option is painting. This is more difficult, but it can turn out beautifully, especially if you paint it under varnish.
Making your own frame
Before you start making the frame, you will need the following materials:
- cold welding - its volume depends on the dimensions of the frame;
- several pieces of sandpaper - both coarse and fine grain;
- masking tape;
- putty with primer;
- solvent or alcohol, as well as paint (the author of the video is the DIY Auto Maintenance channel).
So, the manufacturing procedure is as follows:
- First of all, you should use masking tape to cover the places where the cold welding will be applied, in particular, in this case we are talking about the dashboard, as well as the front part of the radio. Tape them so that they do not stick to each other. Next, you will need to stretch regular cling film over the pasted tape, and its edges should be secured with tape. Also, you will need to fix a thread in the middle of the audio system itself - it will allow you to dismantle the frame after the welding has dried.
- To avoid difficulties with mounting and dismantling the frame, plastic plates should be installed between the audio system and the installation site. Their installation must be done in such a way that during the application of cold welding these plates remain in the same position and are removed along with the frame. In addition, you will need copper wire, which will be used to reinforce the workpiece. To make the frame as a whole more durable, the wire should be run around the entire perimeter.
- When these steps are completed, it is advisable to check everything again, after which you can begin the procedure for making the frame, or rather, preparing it. To make the blank, you will need to ensure a cooler temperature in the cabin so that the material does not harden quickly .
- When the applied material is hard enough, you will need to carefully remove the workpiece from the installation site. Do everything carefully, without unnecessary effort, otherwise you may damage the workpiece.
- After removing the workpiece, it will need to be sanded to get rid of all excess and accurately fit the outer contours of the frame. Coarse sandpaper is used for grinding; if you accidentally remove excess, you can try to build up a piece using cold welding. For more precise alignment and adjustment of the workpiece, you can use a regular stationery knife. We recommend trying on the workpiece for the seat as often as possible, this will allow you to achieve a more optimal result.
- When the fitting procedure is completed, the workpiece will need to be puttied; to perform this task you will need a special putty for plastic bumpers. The surface of the workpiece should be thoroughly cleaned with fine-grained sandpaper and then degreased. When the surface is degreased, putty is applied in one or two layers, and when it dries, it will need to be sanded again.
- So, when the surface of the workpiece is puttied and cleaned, you can proceed to the final stage. Now the part will need to be degreased and treated with a primer. Moreover, it is better to apply the primer in several layers - 2 or even 3 - this will provide a more even surface texture. Once the primer is completely dry, all you have to do is paint it. It is advisable to choose the paint to match the color of the center console - it can usually be glossy or matte, choose the more suitable option for your car. To make the color more saturated, it is also advisable to apply the paint in several layers, and before each subsequent application you need to make sure that the paint is dry.
- The finished adapter is installed in the center console. It is advisable that there are no gaps between it and the dashboard, otherwise the driver may experience noise or squeaking.
Where to begin?
The easiest way to start is with the original car part, which is located in the place where the radio will be installed. For example, the glove compartment lid on the Mazda 6 panel:
It will be very convenient if you have some kind of standard part that can be sawed and taken as a basis, since it already has the correct shape, fits into place without gaps, and has standard fasteners that can be used in the future.
Or here’s another example of installation on a Nissan 300Z - the owner did not want to put the radio down in its regular place, he asked us to put it up instead of the glove compartment. Its lid was a convenient starting point for making a transition frame:
What to do if you don’t have this part that can be “ruined” - because you can’t get anything back? We'll have to make this base ourselves, because the essence of this work is to fit one surface (the dashboard in this case) to another (the radio) and therefore we need something that goes well with the dashboard as a base.
The base can be made from plywood, fiberglass or plastic (the latter option is less preferable, since polyester resin will then not adhere well to plastic). Making a plywood base can be very labor-intensive, especially if the surface of the dashboard has significant curvature where the radio is to be located. However, if the surface is flat, then it can be convenient to use plywood; it is a cheap and easily processed material.
Making a fiberglass base (read how to make it here) is also a labor-intensive process, so as I already said, using a “native” part as the basis for a future frame is the most preferable option.
How to make a frame
Factory adapter frames for car radios do not cover the entire range of products. To manufacture the element, products of a similar purpose are used, borrowed from other machines. There are structures made of wood or organic glass, which are then puttied and painted to match the color of the car interior.
1 DIN
Making a frame for a 1 DIN radio is used to mount an additional player, while keeping the standard audio device in the car. Before making a frame, you need to decide on the installation location of the future structure. The installation point must ensure that the radio display is visible and the controls are accessible from the driver's seat.
To hold the head unit, it is necessary to make a plastic or iron frame, which is attached to the dashboard or a metal frame located inside. The mounting shaft of the radio is attached to the power part of the structure with screws. After this, you need to cover the plastic of the dashboard with masking tape, since at the next stage the frame body for the 1 DIN radio is formed from sculptural plasticine.
It is recommended to install an old player or a prototype of a suitable size into the socket.
Before application, it is recommended to warm up the plasticine on a warm radiator, then the material is applied layer by layer to the installation site of the equipment. Each layer is pressed tightly against the previous one, which avoids air voids. After forming the basic configuration of the body, it is necessary to cool the material for 2-3 hours, and then a finishing layer of plasticine is applied, which forms the appearance of the structure. The final surface treatment is carried out with fingers dipped in solvent.
After this, you need to cover the instrument panel and seats with covers; the resulting body is filled with polyester resin. The resulting matrix is used to manufacture a finished transition frame, which is then polished and adjusted to the installation site. To manufacture such a product, experience with polyester resins is required, because... If you lack knowledge, you can irreversibly damage the car's interior trim elements. Additionally, the acoustic wiring needs to be improved to ensure the functionality of 2 players.
Several variants
Today, stores offer a large number of different frames for car radios, but this state of affairs does not help. The fact is that the factory panel does not always fit tightly and well, and this, in turn, gives rise to other problems. You have to do the following:
- Or buy a new radio.
- Buy a separate transition frame.
- Make your own homemade panel.
Each of the above solutions has both disadvantages and advantages.
New radio
So:
- When a user purchases, sometimes, an expensive one, and the head unit does not fit into the dashboard, or does fit but is loose, he has to return the model he likes or replace it.
Note. Considering the high cost of equipment, this approach is not entirely justified.
- When making a purchase in a store, you should ask in advance about the sizes. A simple ruler or tape measure will help you avoid mistakes and immediately decide on the choice of a specific model.
Note. Strange as it may sound, such a solution is not always able to solve the problem. The fact is that if the frame stands up, that's half the battle. The car radio will need to fit well with the installation site, and this is not always possible to achieve.
Separate transition frame
So:
- Will provide high-quality and reliable installation. The transition frame is screwed to the car panel, and then the car radio is installed. Today, the most popular types of frames are: a separate frame for a car radio and a separate frame-pocket for a car radio.
- There is not much difference between them. In the first case, you just buy a frame; in the second, you also buy a pocket.
Note. The frame pocket is a special plastic box, open on both sides. On one side, the front panel of the device is inserted here, and on the other, external wires are supplied. Only the price of a frame with a pocket is higher than the cost of a simple adapter frame.
With your own hands
So:
- The third option is considered the most correct, from any point of view: be it financial or practical.
- Such a panel will make it possible to connect a new car radio of any size (1 or ) and type with the car panel.
- Among other things, such a homemade frame will not require any financial investment, because everything can be made from scrap materials.
Purpose
Frames for 2 din car radios
It all started with the introduction of two standards regarding head units for greater convenience. Then it went on and on. Manufacturers of televisions, bot computers and navigators have adopted this technology. As you know, there are two standard sizes today: 1 din and 2 din. The first size implies the following indicators: 178x155x50 mm. As for the second size, its indicators are equal: 178x155x100 mm.
Note. But the depth of the seat is not specified in the standards, but is approximately 160 mm.
So, after two new standards were officially implemented, audio device manufacturers were able to sell their devices to a wider market. Their products were adapted to any car, because at the same time it was possible to provide transition frames.
Adapter frame for 2 din car radio
Below are the functions that transition frames perform:
- They securely and firmly fix audio equipment, which a priori creates obstacles for thieves;
- They simultaneously perform a decorative function, decorating the interior of the car and making the dashboard (see Soundproofing the dashboard of a car is always necessary) more attractive in appearance;
- They allow you to correctly install almost any model of car radio, even in a non-standard place. In this case, no cracks or gaps will remain;
- Due to reliable fixation, cleaner sound of the audio system as a whole is ensured.
Of course, if you compare the transition frame with a regular liner, the first one looks much more aesthetically pleasing. It firmly fixes the radio, does not allow sound to disappear and does not allow distortion to appear. When choosing a transition frame, it is recommended to pay attention to the following points:
- The frame must be made of high-quality plastic;
- The frame must meet the standards, otherwise it will be of little use (gaps will remain);
- It should firmly fix the head unit and fit harmoniously into the interior of the cabin so as not to attract unnecessary attention;
- Installation of the frame should be quick and effortless, but the fixation must be reliable.
Note. Of course, another important criterion when choosing today is the price of the transition frame. A huge number of such products are produced from different manufacturers and their prices may vary.
Let's create a form.
So we have a base, in the form of a native part or a fiberglass base (read about it here).
We have placed the counter part (radio frame, shaft, wooden panel, etc.), which will interface with the radio relative to the base. Now we need to secure this counter part so that it does not move while we create the form. Unfortunately, we don’t have any photos of this stage of making the transition frame, so we’ll use photos of making the podiums; the technology is still the same:
In the photo, a speaker ring is attached to the fiberglass base on the stands. Of course, in the case of making a transition frame, the racks can be taken smaller, but the essence remains.
In the example with the Mazda 6, we secured the metal shaft from the radio to the plastic base with self-tapping screws:
Then we take a well-stretchable fabric and tighten what we get to create a shape. As a fabric, you can take simple women's tights (with a high density) or acoustic fabric (radio fabric). The main requirements for the fabric are that it has good stretch and is thin enough to be well saturated with polyester resin.
If your base is a “native” plastic part, then most likely the polyester resin will not stick well to the plastic, so treat the plastic surface with coarse sandpaper and degrease in advance. It is better to additionally secure the fabric to the plastic, for example with staples from a furniture stapler or super glue, otherwise there is a high probability that after hardening the fabric will fall off the plastic, and we definitely don’t want that.
We carefully stretch the fabric over the parts to form a shape. With some skill you can get very beautiful shapes. Then we carefully impregnate the fabric with polyester resin, making sure that it sticks well to the parts. Here's what it looks like on an example podium:
We wait until the polyester dries and apply several layers of glass mat for rigidity. I recommend using glass mat, because... it takes shape much more readily than fiberglass, and it costs less. Fiberglass fabric is good to use on large and flat surfaces, and in our case, glass mat with a low density, for example 300g/m². There is a lot of advice on working with polyester resins and glass mat on the Internet, so I will not repeat them here. I’ll just repeat once again that polyester resin does not adhere well to plastic, so you need to make it as rough as possible so that the resin has something to hold on to and it is better to secure the fabric additionally with staples or something else. In between layers, it would be a good idea to try on what you get in place in the car, the fact is that when drying, the part may “lead”, and you will have to redo everything. Handle thin plastic frames especially carefully - do not overtighten the fabric.
After you have reached the required thickness (and it depends on what mechanical strength is needed in the end, for example, whether the radio will be attached to the frame), we treat the surface with sandpaper and putty. This is approximately what we should get:
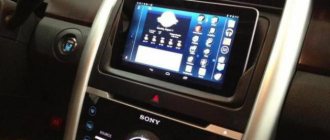
DIY tablet instead of a radio
To fully replace the radio in your car with a tablet, you need to connect the sound correctly. Of course, you don’t have to bother and just synchronize via Wi-Fi. But if you want to turn your gadget into a real on-board computer, you should know some of the features of installing a tablet in a car instead of a radio with your own hands.
Features of connecting a tablet instead of a car radio.
The theory of connecting sound to a car via a tablet
The power amplifier receives an input signal, usually a preamp level signal. Although the MP3 player, mobile phone and tablet can directly control the amplifier (via the headphone jack), they are often connected to the amplifier using DACs with auxiliary inputs, dedicated iPhone type inputs, USB data inputs, etc., and preamp outputs . The Max line output voltage for some devices is around 1 VRMS and is standardized for Android headsets. There the maximum value is 150 mV at 32 Ohms.
How to sell a car profitably: good advice from a reseller
- to Granta;
- Ford Focus;
- Lada Kalina 2;
- Kia Rio;
- VAZ 2110;
- Lada Largus;
- Lada Priora;
- Renault Logan;
- Renault Sandero;
- VAZ 21099;
- VAZ 2114;
- Nissan Almera, etc.
If you have a regular radio, you can easily replace it with more functional and multimedia-rich 2-din equipment.
The manual included with your Chinese radio contains clear and detailed operating instructions.
To make it easier for the user to connect, there is also usually markings on the rear panel of the device for the nodes and required connections.
Practice shows that the main difficulties when installing 2 din arise for those who are engaged in such activities for the first time. Moreover, the most difficult thing is to correctly connect the electrical wiring, find the necessary connectors and combine the new radio with the existing contacts. But if you know the pinout and understand where roughly what is inserted, it won’t be difficult to figure out the connection. And the main element in this matter is a connector called ISO.
It is he who is the main character in the issue of installing a Chinese double-din radio on a car.
ISO connector and pinout
How exactly you will install the new radio in the cabin directly depends on the design features of your car. But all machines in this matter are similar in that an ISO connector is required to connect 2 din.
We are talking about 2 plug boxes (A and B). In some cars, the boxes are combined, but are still divided into 2 sections. Moreover, each section has 8 contacts. The first box or section serves as a power connection plug for the equipment (our Chinese radio), and the second box or section B is used for car acoustics.
Let's start with the first section. It has 8 contacts. The pinout here is as follows:
- 1 contact is not used;
- 2 contact is not used;
- 3 like the previous ones;
- 4 yellow cable is the power cable and goes to the battery;
- Pin 5 in the form of a blue wire leads to amplifiers and an external antenna;
- Pin 6 is an orange cable responsible for the backlight;
- Pin 7 is red and goes to the ignition;
- Pin 8 is painted black and this is our mass.
As you can see, everything is quite simple and clear. It is only important to have instructions and a pinout diagram on hand.
There is nothing complicated about the next block or section B, just like in the case of A.
- Pins 1 and 2 in the form of purple and purple-black go to the plus and minus on the right rear column;
- Contacts 3 and 4 are gray and grey-black. This is the plus and minus on the front right speaker, respectively;
- Contacts 5 and 6 are available in white and white-black. Here we are talking about connecting the front left to plus and minus;
- Contacts marked 7 and 8 are made in green and green-black wire colors. Responsible for plus and minus on the rear left speaker.
Ready solutions
The finished frame for the car radio is produced by the car manufacturer. The product is intended for conveyor installation of the element on cars initially equipped with a full-size radio. An example is the front frame of the Lada Granta Lux car, which allows you to fit a 2-din radio with a rectangular screen. Also, ready-made transition elements are manufactured by small companies. The parts are intended for the integration of head units (from the list of compatible products) into cars.
Multifunctional steering wheel
The name multifunction steering wheel is an abbreviation for the generally accepted term - multifunctional steering wheel. What is hidden under this designation?
As mentioned earlier, all automobile designers strive to make driving a car very convenient. Since modern vehicles have many different gadgets and bells and whistles, which often require switching and adjustments during a trip, the driver has to be regularly distracted by them, which in turn can lead to emergency situations. It was this factor that was decisive for auto engineers in creating a multifunctional steering wheel. They tried to transfer some of the control elements to the steering wheel and save the driver from having to throw the steering wheel and switch all sorts of buttons and levers.
Multifunction steering wheel (multifunctional steering wheel) is a regular steering wheel on which various auxiliary elements for controlling the electrical equipment of the car are located. In modern cars this can be a very advanced technological device.
Where to download the update or firmware
The easiest way to download the firmware for Chinese radios is from the manufacturer's official website. Usually you can choose your native language and understand the meaning of everything that is written. If you see what you need, you need to download the file and save it on a memory card, with the help of which the information will be transferred to the car radio. All that remains is to update functions, programs and options. If nothing suitable was found on the manufacturer’s website, and this, alas, happens, a search will help.
On partner sites, such as, for example, w3bsit3-dns.com there is a lot of news and interesting software for Chinese radios. It wouldn't hurt to take a look here. On w3bsit3-dns.com in the forum section, for example, there is a lot of information about firmware for Chinese radios. Having studied it in detail and carefully, it is easy to find what you need, and most importantly, it is licensed. Here you can find a large number of links for downloading, information, instructions, tips, photos.
Chinese car radios on Android
The universal Android operating system is installed in smartphones, tablets, TVs, and Chinese radios - almost everywhere. In the near future, Android is also planned to be used to create robots and cars. It is well suited for mechanical engineering. Android immediately captivated me with its rationality. It has few competitors today. Such dominance simplifies working with equipment and eliminates program conflicts. But we are not talking about a monopoly. Android easily finds a common language with other operating systems. However, only the firmware that is developed for this operating system is needed.
Connecting radio control buttons via CAN
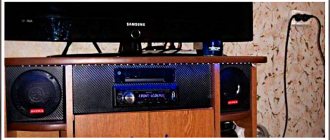
It is not uncommon for standard multimedia systems on cars to fail, especially if they use multi-disc CD changers. The cost to repair or replace such a faulty device can be a large amount. Sometimes it is more expedient to purchase a transition frame and install a modern multimedia system (hereinafter referred to as MS), inexpensive and much more functional.
All that remains is to use the control buttons on the steering wheel to control it. As a rule, many MS (made in CHINA) can easily adapt to standard resistive steering wheel buttons. But according to the standard automotive CAN system there are few of them. We have a 2006 Volvo S60 (similar to the XC70, XC90). Native MC chewed and crumbled CDs, went into convulsions when turned on, and was eventually thrown out into the cold. In this car, blocks of buttons on the steering wheel (each on a microcontroller) transmit information via the LIN bus about their status to the central electronic unit of the car - CEM. And then along the low-speed CAN bus, to the MS and other units interested in sound. As a new MC, the owner chose a Pioneer radio, which has a special input for connecting a remote control:
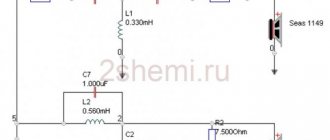
The Internet is full of schemes and solutions for using this input; as an example, I will give the following picture:
Connecting the power wires, ignition, loudspeakers, I think readers are of little interest, everything is at the level of school knowledge, there are even adapter connectors...
Using the tablet, the CANHACKER program, and its CAN-USB adapter connected to the CAN bus on the MS connector, a data packet containing information about the state of the MS control buttons was determined. Required CAN wires - white and green:
We search and write down:
For my work, I have developed and use universal design boards based on STM32, with the help of which you can quickly implement a variety of devices (if the Starline CAN module is not suitable for this). Here is a diagram of one of the boards:
Now all that remains is to program the following algorithm: We configure the board to only listen to the CAN bus at the specified address. From the received data we analyze the selected byte. And depending on its contents, we activate certain transistors to output the correct resistance of the resistor matrix on the board to the Pioneer MS remote control bus. I know that there are electronic resistances and so on. It was cheaper and more convenient for me. I won’t post the whole project, there’s a lot more that has been implemented. I'll attach pieces of code for Volvo. Setting up a CAN filter:
Procedure called when receiving a packet:
And then parsing the received message:
Some data for the operation of the program is stored in a quickly changeable area of flash memory, so that, for example, by connecting the board to a computer, you can quickly change anything without making changes to the code:
Having written all this, I think that I have made life a little easier for other interested people, although understanding someone else’s code is a dubious pleasure. The main thing is not to be afraid. And “it’s better to lose a day, then fly in an hour.” In the end, everything worked as it should. If you have any questions, write, I will correct and supplement as much as possible.
Source
Legal, illegal - intellectual property
Having bought equipment, a person receives all rights to use it for its intended purpose and not for its intended purpose, be it Chinese radios or Swiss watches. It would be a violation of the law to use equipment to harm the image of the manufacturer or to disrupt public order. That is, the owner of the equipment can download and install both licensed and non-licensed software. Any firmware you like can be used.
It is illegal to make and distribute counterfeits, unofficial copies, and modified versions. Even the person who invented this program is the holder of a patent for the invention, the holder of copyright and this is documented, must comply with agreements with the manufacturer using the invention for mass production. If unlicensed firmware is used, the company's service center will refuse free repairs.
Marking of wires and their connection diagram
Almost all car radio manufacturers adhere to the same standard for marking input wires:
There is another connection scheme when the red wire is connected together with the red one. This allows the audio system to operate regardless of whether the ignition key is turned on or off. The only disadvantage of such a scheme is that the tape recorder will always be in standby mode, which has a detrimental effect on battery performance. Its discharge rate can increase significantly.
For the radio output, the following wires are used, going to the speakers. They always come in pairs:
In each pair, one wire will be plain, and the second will have a black stripe. Striped means minus. Carefully read the color scheme of your radio and follow the sequence of wires.
Top manufacturers
Frames for radio tape recorders are made by several manufacturers. Factory products are distinguished by correct geometric dimensions, allowing the part to be installed on a car without additional adjustment. The elements are made of plastic, having a color close to the color of the original interior decoration elements. Factories make elements for cars produced since the early 90s of the last century, which simplifies the procedure for selecting a part for a car.
The company produces automotive electronics and additional elements for installing acoustic components in cars. The production program includes products for Asian and European cars, as well as for Russian VAZ cars. Additional pockets with a retractable tray or cup holders are available; products are mounted instead of standard shelves for small items.
Mounting accessories from Aura allow you to install 1 or 2 Din format radios. Decorative frames are available for the central part of the instrument panel (around the player and the central air ducts of the air conditioning system). Combination products are available for mounting multimedia equipment and a pocket for small items.
AVS elements are designed for cars made in Japan and Europe. The parts are available in several color options, which allows you to choose a transition element to match the color of the car interior. There are parts for 2 Din head units and 1 Din radios with additional trays for storing CDs or small items.
Carav
The manufacturer produces a wide range of parts intended for cars of European, American and Asian manufacturers. The production program includes frames for equipment of 1 or 2 Din standards; there are modifications with a pocket for storing small items.
In addition to rectangular products, frames of complex configurations are produced.
For example, part 11-545, intended for the Ford Ka, allows the installation of a 1 Din radio and has an additional round window for the switch.
Incar
The Incar brand supplies transitional elements, side inserts and additional pockets for passenger cars from European and Asian factories. The products are made of plastic according to samples of the original cladding, which simplifies the installation procedure. For a number of cars, special frames with side plates for mounting are produced (for example, frame 95-7337A for Kia Soul).
Intro
The company produces decorative frames, as well as special rings for installing loudspeakers in standard places. The production program contains plugs that allow you to partially close the installation shaft for multimedia equipment. The parts are intended for cars assembled in Europe, the USA, South Korea and Japan.
Metra
Metra products are designed for Asian-made machines; There are a series of parts for cars of American concerns. The company offers frames with additional pockets. With the help of such elements, the owner can install a 1 Din radio instead of standard 2 Din equipment.
Aprio
The company produces parts for Japanese-made cars. There are only a few types of parts in the production program. Products are rarely found on the Russian market; Due to the limited assortment, it is not among the popular ones.