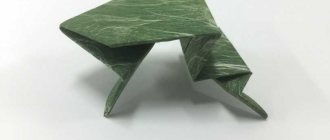
Otherwise! We take out somewhere (you need to know the location) a thick brass tube with a diameter of 6-8 mm, a length of 10 cm. From one end we flatten the tube tightly with a hammer for 3-4 cm. We bend the flattened one almost 90 degrees. We get something like a pistol.
We place pieces of tin inside, heat the bend so that the tin melts and forms a strong plug 1 cm long there. Heat and cool with the barrel facing up.
We find a nail of a suitable diameter (it goes in and out easily), saw off its tip (do not grind the cut area!), insert it into the barrel and bend the rest of the nail almost 90 degrees. When assembled, such a scarecrow looks like the letter “P” with short legs spaced wider than the shoulders. We connect the legs with a ring of tight rubber...
We crush sulfur from 2-3 (no more) match heads into the trunk. We insert a nail and use it to grind the sulfur into powder.
Then we put a rubber band on the ends of the nail and tube - this is a non-working condition. To shoot, we push the nail out of the barrel by 3 cm. The rubber itself will rest it against the wall of the tube. This is already a combat state.
We hold the gun with the muzzle away from us - the thumb is on the barrel, the rest are on the elastic band. As soon as you sharply press the rubber band against the barrel, the nail jumps into the tube, hits the sulfur and - AH! Rumble, rumble!
By the way, increasing the number of matches used does not increase the noise, but it can tear your scarecrow to hell. There - two or three fingers, one or two eyes, etc. and so on. So - be careful!
Source
I do not know this information. If you know the author of the article or are one yourself, please contact me through the “Contacts” page.
A few more articles from the section ""
Homemade pyrotechnic noise entertainment. They existed in several varieties.
1. From a bicycle spoke. A spoke was removed from a bicycle wheel, always in its entirety, with the head attached to the wheel rim. A nail equal in diameter to the head was also needed. To avoid getting lost, this nail was tied by the head to one end of the rope, which should be about a third less than the length of the knitting needle, the other end of the rope was tied to the curved end of the knitting needle, with which it held the wheel axle. They took matches and scraped off the sulfur from them. Then the sulfur was loaded into the head at the end of the knitting needle, a nail was inserted into the head - the knitting needle bent and became like a bow for throwing arrows. The scarecrow was ready. It worked simply - you had to hit the end with the nail with force on a hard surface. The result was a decent pop, much louder than the pop from the caps.
2. From a small tube, 10-15 centimeters long, about 5 mm in diameter. One end of the tube was bent at an angle of 90 degrees, its shoulder was 3-5 cm. Then molten lead was poured into the tube so that even air would not pass through the bent tip. We also took a nail that would fit very tightly into this very tube; it was also bent from the side of the head at the same angle and with the same shoulder size as that of the tube. Finally, an elastic band was needed, mainly from a bicycle inner tube - it was put on the bent ends of a tube and a nail. Operating principle: matches were taken, sulfur was scraped off from them, which was loaded into a tube. Then a nail was inserted and the elastic was tightened. Then it was necessary to carefully pull the nail inside the tube and rest it against the inner wall. The device was cocked and ready to fire. If you squeeze it in your hand, pressing simultaneously on the rubber band and the tube, the nail slides inward and hits the sulfur with force, which is why a pop occurs. The main thing with this device was not to overcharge it, otherwise it could explode in your hands. And some people specially filled the pipe to capacity with sulfur from matches, cocked it and threw it away...
3. From two large bolts and a nut. The bolts were fastened with a nut, and sulfur from matches was placed between them. The device had to be thrown with force against a hard surface with one of the bolt heads.
4. They found a hole in the asphalt where they stuffed sulfur from matches. They placed a nail on top and threw a brick onto the structure.
5. From the details of the game “Crossroads”. We took the keys from the winding machines of the game “Crossroads”, 3-4 feathers from the tail of a dove, a nail (of such a diameter that it could tightly close the most voluminous part of the key) and a roll of wire. The feathers were attached to the narrow part of the key using matches and electrical tape and served as a stabilizer. The nail was cut to approximately 2 cm in length (it was necessary to leave the part with the head) and attached to the key using a lead wire. Sometimes the key was weighted with pieces of lead. Sulfur was driven into the most voluminous part, which was then closed with a nail with a head (“striker”). Application: the scarecrow was thrown up or dropped from a height at the feet of the “victim” and was triggered when the nail head hit a hard surface.
A match shooter from a clothespin was invented back in the days of the Soviet Union. The common people also called him “pugach”. Schoolboys gladly used this “weapon” in their battles. Due to the simplicity of the design and components that are always available, the crossbow was very popular among high school and junior high school students. Everyone knew how to make a scarecrow. This device is compact and can be fired with both conventional and incendiary ammunition. It depends on individual desire. Although shooting fire shells had a more psychological effect, as it also caused physical harm. The effectiveness of such a charge is negligible. Now this weapon has lost its former popularity. To a certain extent, this was influenced by the fact that now clothespins are mostly made of plastic, and wooden ones have a very weak spring. Plus, kids these days are lazy and not particularly hardworking. But there are still true connoisseurs of this simple weapon who would like to know the process of its manufacture. For them, further on we will talk about how to make a scarecrow with your own hands. In the hope that they will pass on this secret to others, as a result of this it will not be lost.
Manufacturing process
Now let's move directly to the question of how to make a homemade scarecrow.
To do this you need:
Disassemble the clothespin itself into three parts. Namely: two halves made of wood and a spring made of metal.
With help you need to finish both halves. It's not difficult to do this. To start, you just need to cut a small groove on one of the wooden halves. Take your time, your fingers are much more valuable than any clothespin. Then divide the other half into two parts.
Then the spring must be pulled back to the indicated groove. This must be done carefully. So that its protrusion fits into this very groove.
Then attach the short piece to the long one. To avoid mistakes when assembling, before making the scarecrow, be guided by the factory grooves. After everything is in place, you need to fasten the elements with an elastic band. That's all. The clothespin scarecrow is ready.
Remember that when secured with an elastic band, said wooden pieces should still move slightly apart. That is, so much so that the upper part makes it possible to cock the spring.
How to make a pugach (match shooter) from clothespins?
Entertainment
09.03.2015
- 914
- 612
- 4 min.
Every grown man was once a child. And the greatest entertainment in those happy times of childhood was playing with friends in the yard. It doesn't matter what the game is, the main thing is to play. What did you play most often? Of course, there were skirmishes, war, partisans and much more - it’s impossible to list everything.
And if there was an opportunity to shoot from something, then this was the ultimate dream of any boy! Slingshots, crossbows and other delights of the boys’ world simply excited the imagination.
And if you blow something up all over the yard, then that’s the height of bliss! What if it is possible to shoot burning matches at a decent distance? It was, as they say now, “The Hit of the Season”! We will tell you about one of the types of boyish fun. It's called a scarecrow.
A scarecrow is a device that produces noise. The main purpose of its creation is to scare someone. In general, a scarecrow is considered to be a children's toy in the shape of a pistol, which, when used with caps, makes a loud popping sound. But there are also so-called “adult” scarecrows - blank cartridges, for example.
However, there are also many ways to make a scarecrow at home. What can this product be made from:
- from a copper tube and a piece of plywood;
- from clothespins;
- from a metal tube;
- from a bicycle spoke;
- of two bolts and a nut;
- from dowels, etc.
The clothespin scarecrow, or, as it is also called, “Matchshooter,” was invented a very long time ago, when the Soviet Union still existed. A whole era of children was amused by this type of “weapon” when they played war with friends in the yard.
The design is so simple, and the materials for its manufacture were so accessible to everyone that only the lazy or those who had never heard anything about it made a scarecrow from a clothespin. Compactness, ease of use and reliability have made the device very popular.
Another feature is that it could fire both regular and incendiary shells.
Nowadays, the clothespin scarecrow is no longer popular. One of the main reasons is that in Soviet times, clothespins were made of wood with a weak spring, but now they are made of plastic.
Another important factor: now children have so much entertainment (the Internet, games, movies) that they are not even interested in doing something with their own hands.
And with the development of the Internet and social networks, you rarely see school-age children playing something in the yard.
However, there are still enthusiasts! It is for them that we wrote this article, in which we will tell you in detail how to make a scarecrow from a clothespin with your own hands. So let's get started.
- The first and most necessary thing we need is a wooden clothespin. It is now difficult to buy it anywhere if they are still on sale. However, don't be discouraged! Many people still use them in their everyday life. I think you can find it if you want.
- We also need an elastic band.
- What tools do you need? A penknife and glasses to protect your eyes.
- The charges that the scarecrow will shoot from the clothespin are paper clips and matches.
Now let's move on directly to the description of what needs to be done to create this miracle weapon.
Disassemble the clothespin into three parts - you should have two wooden bases and a spring.
Using a penknife, you need to process both halves of the clothespin base, which is not at all difficult. First, cut out a gutter on one of the wooden bases. Take your time, otherwise you might cut your fingers! Then divide the other half into two parts.
Now carefully pull the spring back towards the groove so that its protrusion fits exactly into the groove. Then you need to attach the short part to the long one. To avoid mistakes, you should focus on the factory chute. The final stage: when everything fits as it should, you need to fasten all the parts with an elastic band. All is ready! As you can see, making a scarecrow is not at all difficult!
The next thing we absolutely must do is test our creation. This is the most enjoyable stage, isn't it?
Checking for “combat readiness”
When asking how to make a scarecrow, you should take into account that this device must be ready to fire. That is, it is necessary to carry out verification. To do this you need to do the following:
- Pull the top forward. Until the protrusion of the spring is in the factory groove on its surface. When you achieve this, then pull this part back. Until the protrusion of the clothespin is in the groove you made at the bottom of the match shooter.
- Then select a projectile and load it by lifting the top part of this device. In this case, regular matches or metal clips are ideal.
- After this, pull back the spring so that the trigger bar is released. This will result in a shot. That is, the device works.
Imitation pepper spray
The idea is to carry a powder or liquid with you that is easy to spray around you. The best solution is a small plastic bottle (0.33 l) with a sports nozzle or sippy cup. They are closed at the top with a hinged cap - easy to fasten, easy to open.
The first method is with pepper:
- We take a bottle with a sports nozzle (it snaps tightly so that the liquid does not spill in a backpack or bag).
- Fill with table vinegar.
- Season with 1 tsp. black or red ground pepper.
With the help of a powerful jet you can scare away all dogs. But the main thing here is not to get confused and not to grab the “pugach” instead of drinking water.
Method two - with tobacco:
- We buy nuclear shag.
- Pour into a coffee grinder.
- We also add black pepper there.
- We turn everything into dust.
- You can add mustard powder.
- Pour everything into a bottle with a sippy cup or into a plastic jar of cleaning powder (with holes and a closing valve).
Modernization of the device
In the future, you can improve your scarecrow. To do this, you need to glue a fragment of a matchbox with sulfur on it to its lower part. It's not hard to do. After this upgrade, matches will light up when fired. This will add additional efficiency to this device. Also, part of the matchbox can be completely replaced with a piece of sandpaper. However, in this case you will have to insert the matches into the scarecrow backwards. It won't be very convenient. This problem is much easier to solve by lighting a match before firing. In this case, you should not neglect the danger posed by burning shells. Never use them indoors, do not shoot at flammable objects, and it is advisable to wear them while doing so. And of course, never aim at people or animals. The match shooter is capable of shooting at a distance of up to five meters, and sometimes even further.
Bird repeller comparison chart
| Name | Type | How to use | Price |
| Anti-landing spikes | Spikes | Install on a cornice or windowsill | 170 rub. |
| Bird scarecrow | Scarecrow | Install next to a protected object | 1650 rub. |
| Reflective pendant – Drop | Reflector | Hang in the right place/stretch | 150 rub. |
| Scare tape | Reflector | 500 rub. | |
| Repellent eyes | Repellers - “eyes” | Hang in the right place or throw into the pool | 800 rub. |
| Bird net | Net | Use as a barrier | 290 rub. |
| EcoSniper | Sound repeller | Install in areas of unnecessary bird activity | 5650 rub. |
| Balcony Gard | Ultrasonic repeller | 9690 rub. | |
| EcoSniper LS-987BF | 4100 rub. | ||
| Bird repellent gel | Chemical repellents | “Liquid nails”, leave a strip on the cornice | 2200 rub. |
Checking the product
To do this, perform the following steps:
- 1. Pull the upper part forward until the spring ends up with its protrusion in the factory groove. Once you have done this, you must pull this part back until the protrusion of the clothespin is in the groove that you made.
- 2. Now you must select a projectile and load it. This is easy to do: slightly lift the top part. Matches or paper clips are best used as projectiles in this case.
- 3. Then we pull back the spring until the trigger bar is released. After this there should be a shot. If so, hooray! You did everything right!
Additional tips and tricks
- The key to the success of homemade models is their number - the more repellers you place on the site, the sooner the moles will leave it. It would be useful to combine different types and types of homemade “scarecrows”;
- Most repellers are quite noisy. Decide in advance whether you can tolerate constant noise and crackling on the site. If the answer is no, pay attention to ultrasonic devices;
- If moles have been settling on your site for several years, you should worry about protection in advance - in April-early May you can already install several “rattlers”. Mammals will most likely avoid the unpleasant territory without having time to settle underground.
Moles are cute underground inhabitants (All about moles - description, habitat, types and features, read more in the article here), which actually do not harm crops and soil fertility, however, they still need to be gotten rid of. First of all, you should decide for yourself whether you want to spend money on factory devices or install the mechanisms yourself, sacrificing the appearance of the site.
What to do if the device does not work?
The reason may be that the second part of the spring is not held in place. What should be done? It is necessary to deepen the groove in which the spring is held.
You won't believe it, but even such a simple device can be upgraded! Yes, yes, don't be surprised. Now we'll tell you how.
We glue a strip to the bottom of the scarecrow, which we cut out of a matchbox. We cut out a fragment where there is sulfur for lighting matches. As a result of this improvement, the match will light up at the moment of firing.
Chemicals
Already understanding what snakes are afraid of in their summer cottage, it is not difficult to find poisons developed specifically for cold-blooded reptiles. This method of struggle has its pros and cons. Repellents are commercially available. There is a wide range of them, which makes it difficult to choose a specific product. You need to solve the problem by carefully studying the instructions for each drug.
Chemical repellents effective in fighting snakes Source vrednet.ru
So, for example, “Dr. T's 4-Pound Nature Products Snake Repelling Granules only repel rattlesnakes; it is useless against other species. The composition of the mixture is extremely simple. It contains 7% naphthalene and 28% sulfur. One sachet is enough to cultivate two hectares of land. The manufacturer is silent that the expected result can be achieved if the product hits the snake’s sensitive receptors directly. Simply put, it must manage to crawl through the scattered granules. This means that they must be dispersed very tightly.
Any, even the slightest rain can completely neutralize the chemical, so you have to treat the area again and again. Experts do not recommend scattering powder granules near discovered snake holes. This will cause the reptile to be locked up and not leave the house until he dies. Dog owners admit that this chemical cannot harm pets, but if children taste it, they will certainly be poisoned. Therefore, this must be taken into account when choosing this method of fighting snakes.
Products from manufacturers to repel snakes Source i.ebayimg.com
creative firecracker
You will need: plastic pastry syringe, confetti, golden acrylic paint, brush, wrapping paper, scissors, corrugated paper, glitter adhesive tape, thin tape, cotton pad, acetone.
Master Class
- Degrease the syringe plunger by wiping it with acetone.
- Paint the syringe plunger with gold acrylic paint and wait until dry.
- Prepare confetti - circles of colored paper and streamers.
- Fill the squirt container tightly with confetti.
- Cover the top of the syringe with a square of corrugated paper and secure the edges with tape.
- Cover the syringe container with wrapping paper.
- Apply glitter tape along the outline of the container.
- To activate the firecracker: position it vertically and sharply press the piston.
The creative firecracker is ready!
New Year's cracker
You will need: bushes, balloons, Christmas tree rain, scissors, wrapping paper, glue, glitter, stickers.
Master Class
- Tie a knot in the ball and cut off the tip.
- Pull the cut portion of the ball tightly onto the sleeve.
- Cover the sleeve with packing paper.
- Decorate the cracker with stickers.
- Cut the Christmas tree rain into confetti and pour 3 tablespoons into the cracker.
- To activate the firecracker: point the empty muzzle upward and pull back the tail of the ball.
The New Year's cracker is ready!
Pugach – description, Budova, characterization. What does the scarecrow look like?
Scarecrows are close relatives of owls. Although, according to zoological classification, the stench belongs to the family of owls, the species of twitching owls and the genus of scarecrows, we can say that scarecrows are the largest representatives of the family of owls, and the scarecrow The tea is the greatest of the scarecrows and owls. Its growth reaches 75 cm in the middle, and its weight in the middle is about 4 kg.
And the Fraser axis is the smallest arbor, which can weigh up to 44 cm and no more than 815 grams.
A simple fact: among the scarecrows, like the rich comas, there is state dimorphism - the females are larger and more important than the males.
The structure of the scarecrows is thick and flinty, the body shape is barrel-like, it is believed that this is the inheritance of the thick and fluffy plumage that scarecrows have. The legs of the scarecrow are short, but strong, with long and sharp claws of black color, which serve for burying potential wealth.
The wings of the scarecrow are thick, long, their rulers are proud flyers. The wingspan of the krill is 1.8-1.9 m.
The head of the scarecrow is large, wide, has a rounded shape, and is also filled with additional tufts of feathers, which create a stench that is called the “brand” smell of the scarecrow.
The bow of the scarecrow is usually short and strong, black in color, on its tip there is a special hook, behind which the bird produces special clicking sounds.
The scarecrow's plumage is thicker and thicker. The scarecrows may have a rusty-brown or dark gray color. The head and chest are often decorated with dark teardrop-shaped stripes.
The scarecrow's eyes are very large (one might say - majestic), including yellow, bright orange or red. The very eyes of these birds are well-formed, and the scarecrows can thrive well from a large standpoint, but they are as good as night and day. From this point on, the stench doesn’t differentiate the colors at all, the star is black and white.
In addition to a good look, the frightening ones have even more beautiful, hospitable hearing, which is a kind of acoustic filter that allows the bird to filter out unnecessary sounds.
Here’s a fact: the special anatomical structure of the scarecrow’s head allows you to absolutely calmly turn your head a full 200 degrees without fear of twisting your neck.
Working technology in simple steps
- Cut a circle out of cardboard, its diameter should be equal to the diameter of the sleeve, this will be the width of the future firecracker. Glue the cardboard circle onto the blank. The size of the tissue paper should be slightly larger than the cardboard circle.
- Wait until the glued elements dry or speed it up a little by drying with a hairdryer. Thread a wool thread through a needle and attach one of the beads in the center of the circle, on the cardboard side. This will form an element that will contain the confetti inside. Leave a tail of thread outside.
- Coat the base of the sleeve well with glue and glue it to tissue paper so that the circle covers the round part.
- Make sure the tissue paper is completely adhered to the “body” of the cracker.
- Choose decorative paper to decorate the product; colored paper, gift wrapping, even a child’s drawing will do. The size of the rectangle will be equal to the length of the sleeve, and the width will be equal to the diameter of the cut circle. Cut the serpentine and glue it to the edge of the paper with double-sided tape or glue.
- Fill the tube with confetti, bright small pieces of thin paper and foil - whatever you consider necessary for the “filling”.
- Set the half-finished product aside and cut out another circle from cardboard.
- After cutting out one segment of the circle, form a volumetric cone from a flat circle.
- Make sure there is a small hole left at the top of the cone, large enough to thread a thick thread through.
- Drill two small holes opposite each other in the top of the sleeve, thread a thread through them, connect the ends of the thread outside the sleeve, and put a second bead on them. Pull a tail of thread through the base of the cone.
- Using a heat gun, glue the cone to the sleeve.
- Glue the “tongue” to the tip of the thread for decoration and ease of use of the product.
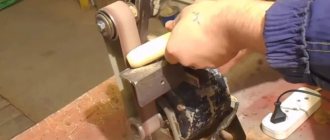
If you don't have a heat gun and you really want to make a firecracker, try melting hot glue. Place the iron with the sole facing up. It is better to use old Soviet models without a steam function; securely fix the unit to avoid injuries and burns. Cut the hot glue in the hot glue gun rods into small portions, at the rate of one portion – one future drop of hot glue. Place them all on a preheated iron, make sure you don't put them in one pile, otherwise there is no point in dividing into doses. When the glue melts, turn off the iron and quickly begin gluing the product. To do this, pick up glue with the tip of a knitting needle and work. Finally, carefully scrape off any remaining adhesive from the soleplate of the iron.
Safety precautions for use
Since the scarecrow's projectile can have a range of up to five meters, never use it at home or in other areas. You should also not aim at other people, children or animals. Also keep the crossbow away from flammable objects
It is highly advisable to wear goggles to protect your eyes when using burning projectiles; caution is a good idea. Happy using!
Pugach
- a simple invention that can make a loud sound. Often guys do these things in the yard to drive away dogs or just to laugh at someone. The design of the scarecrow is very simple, even a school-age child can handle it.
How to make a scarecrow from a tube with your own hands?
For the scarecrow we need:
Tube (metal), size: length 10 cm, diameter - 3-4 cm; - nail, 7-9 cm; - a piece of a bicycle tube; - foil.