Family photos add personality to a home. All that remains is to make paper frames for them using the origami technique to combine them into a decorative panel or tabletop composition. Very often, pictures dear to the heart are stored in an album or phone because no suitable design has been found for them. Origami decor will allow you to do without huge expenses and long trips to the shops and at the same time create something unique, with a fashionable ethnic flavor.
Panel
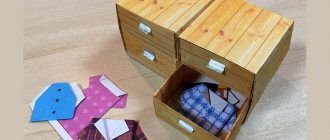
A few sheets of multi-colored designer cardboard - and we have in our hands an excellent material for a collage of children's or wedding photos. The origami frame in this version is very simple, so in a few minutes the whole family can make a stylish panel, enclosing the warmest and most vivid memories in it.
Step-by-step instruction:
For one module frame we use a square, the size of which is determined by the parameters of the photograph. Please note that after folding the product will be reduced in size by half.
In addition to design paper you will need:
- a sheet of corrugated cardboard the size of the future panel;
- scissors;
- glue stick or heat gun;
- photographs of the same size.
- Cut into squares. It is best to select their size on a prototype using an unnecessary piece of paper. When everything is clear with the parameters, we move on to folding. Bend the square diagonally from corner to corner. We unfold and repeat the same action, but from the opposite side. When we open the workpiece again, a cross should form in the center.
- We bend one of the corners to the middle mark. This is the crosshair that we outlined in step 1. Repeat the same action for the other three corners.
- Turn the workpiece over to the reverse side. Fold all the corners towards the center again. We iron the folds well so that they turn out neat and clear.
- We turn the tops of the corners in the opposite direction. Using this algorithm, you can make any number of origami frames.
We crop the photos so that they fit within the perimeter of the square. Opening the frame. We check that the focus of the frame is in the center of the composition and is clearly visible after the origami is folded again. Glue the photo inside.
Using a heat gun, we fix the frame flaps from the back side so that they do not open.
Cut out the base from corrugated cardboard. Glue frames onto it, forming a multi-colored grid.
On the reverse side we attach a loop if the panel is intended for a wall, or a support if it will stand on a table.
Framing for children's drawings
Those who have small children in their families understand what it means to have walls painted with multi-colored crayons, pencils or paints. To avoid constant incidents with this kind of children's activities, as well as to save yourself from washing out walls and furniture, you can create a special frame for the child. The fact is that this will serve as a separate, let’s say, creative corner for the baby, especially since such a picture frame can be hung anywhere.
The frame will not need to be constantly removed to replace the children's painting, thereby reducing the risk of damaging the walls or wallpaper on them.
In order to create such a frame, you will need:
- a sheet of thick paper or cardboard;
- a sheet of plain paper in A4 or A3 format (depending on the desired frame size);
- ruler;
- stationery knife;
- flat screwdriver;
- pencil;
- single hole punch;
- some hard thing, a round template.
The main material will be a thick sheet or cardboard, larger in size than the sheet, on which there will be a children's drawing 25 mm on each side. Next you need to make a marking by drawing a vertical and horizontal line exactly in half. Then place a sheet of plain paper on top and make marks at the intersection of the lines.
Now you need to make the serifs with a compass, but in this case a plastic egg cup is used, since this kind of template has the right diameter. In any case, if there are children in the house, then there will probably be some kind of lid, plate or something else round in shape. Serifs will need to be made on four sides. Then step back a little from the border of the sheet marked with a pencil and push in that place with a screwdriver.
Related article: Elastic closure of loops with knitting needles and needles with photos and videos
Next, you need to cut through the marked drawing with a compass on four sides. Then squeeze out the cut parts in the opposite direction. There is very little left, you need to take a hole punch and make holes for a needle so that you can hang or fix the drawing on the wall.
The frame can be left in this state, or you can decorate it with some kind of decor if desired. Such a frame can be hung with a needle or attached with buttons, horizontally or vertically, as you wish. In any case, if you hang it once, you will only have to remove your baby’s drawn drawings.
Decorative hearts
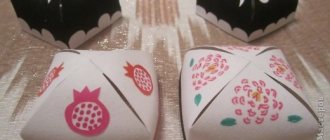
An origami photo frame decorated with hearts is a great opportunity to say: “I love you!” the closest people. To understand how to make such a paper decoration, it is best to watch the video tutorial:
For a frame measuring 7.5x7.5 cm you will need a square sheet of 15x15 cm. From the “heart” modules you can fold a ribbon-hanger:
Or add side triangular supports and place the photo on the table:
To place a photo in an origami frame, it must be cropped to 3.5x3.5 cm. If the photo is larger, the original square of the module will have to be proportionally enlarged.
But the most interesting option is obtained when a volumetric cube is assembled from photo frames.
An origami photo frame decorated with hearts can be a touching gift for Valentine's Day. Especially if you complement it with other similar decor.
Frame made of origami modules – Origamir
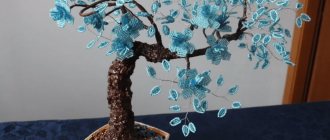
Irina Rakhimova Photo frames using quilling and origami techniques from triangular modules “Floral Fantasy”
Summer has arrived! It brought joy!
- Summer has bloomed with bright flowers!
- Many discoveries await you.
- You will capture
- We will deliver - CLASS!
- To have summer
- With you all year round,
- Insert the photo into the frame,
- Let the people watch!
I present to your consideration my creativity - photo frames. I recently became interested in the quilling technique and am still learning how to construct from triangular modules, but I have learned how to make a base for a frame. And paper rolling is very exciting and cool! The works are beautiful, aesthetic, and practical.
I so wanted to share all my works with you, but I had already given away a lot to friends, and also some of my crafts were sold in 2012 at a fair organized as part of the annual festival “Sholokhov Spring” in the village of Veshenskaya, the place where Mikhail Alexandrovich Sholokhov lived many years and where the world's literary masterpieces were created.
Please appreciate my work.
Photo frame “Cleanliness”
Photo frame "Rosary"
Photo frame “Joy”
Photo frame “Sunny day”
Photo frame “Tenderness”
Also in my collection there are simply paintings made using the quilling technique.
This is my first picture, my debut, so to speak. It's called "Waiting for Spring."
This is my "Flower Fantasy" . While completing this painting, I learned how to create roses and dandelions.
One of my favorite paintings is called “Daffodils” .
Here, perhaps, are all my creations so far. But I won’t stop there, because I still have a lot of ideas in my head that I would like to implement.
Photo frame. Master Class
I present to your attention a new master class on making photo frames.
A photo frame is the simplest thing you can make using modular origami - minimum cost, minimum time and maximum pleasure.
I offer you my version of a master class on making photo frames. You can change the shape of the frame, the number of modules, etc.
- After reading the diagram to the very end, you can watch a video tutorial dedicated to Valentine’s Day, where you can learn how to further decorate the photo frame.
- Watch the master class, implement the acquired knowledge, experiment.
- I bring to your attention a video lesson filmed for Valentine's Day.
- For the frame we will need 31 pink modules, 29 white modules (module size 1/16), an A5 size photograph or a beautiful picture of the same size, braid - about 30 cm, PVA glue and scissors.
- Let's get started...
In this master class, I offered you an idea on how you can make a photo frame yourself at minimal cost.
This frame can be turned into a mobile pendant or a Christmas tree toy. A ball glued together from 6-8 circles of the same size but different colors is hung in the middle on a thread.
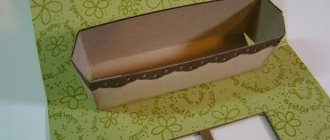
The frame can be assembled from candy wrappers. Select 10 identical paper candy wrappers and cut one side to form squares.
When folding, make sure that the pattern is the same.
- Fold it in half.
- Lift the left corner up. Try to keep the fold line exactly between the corners of the rectangle.
- Turn it over.
- Lift the right corner up.
- The module is ready.
- Make 10 such modules. Insert two corners of one module alternately into two pockets of the other (front and back).
- Close all the modules in a ring. If the frame is glued to the base, then you can assemble the ring without glue. If it will be used as a pendant, then during assembly, lubricate the corners of the module with an adhesive stick.
The frame can be given an oval shape by slightly squeezing the ring on the sides (before gluing).
Master class New Year Origami Frame from origami modules Paper
Source: https://origamir.ru/bez-rubriki/ramka-iz-modulej-origami.html
Square frame
The following diagram is for making a simple and quick origami photo frame. This solution is suitable for a nursery, especially if you use paper with a thematic design. We will need a square sheet measuring 21x21 cm.
Step-by-step instruction:
- Fold the square in half from left to right and from top to bottom. Thus we outline the central axes.
- We bend all corners towards the center.
- Open the folds from step 2.
- Fold the corners to the new lines.
- Let's make one more turn.
- We bend the corners back.
- Ready.
All that remains is to make a stand from hard cardboard or a rope loop to complete the impressive and stylish decor.
Another similar scheme:
Penguin
Also a simple figure to make. This type of origami made from colored paper will be interesting for children.
- It is necessary to position the sheet of paper so that one of its corners is directed towards you;
- Fold the corner of the square to the middle as in Fig. 1;
- Then fold the sides from the top corner diagonally;
- Connect the left side of the rhombus to the right and bend the corners of the rectangles inward;
- Fold the bottom of the figure inward, bend the wings and fold them in the direction shown by the arrows.
All the figures described are easy to make and do not require special preparation. It’s another matter if you want to make a complex origami figure, such as a modular swan.
Scheme of a paper fox in origami style:
Sunflower
Origami flowers are one of the most popular decorative elements. You can also make a photo frame from them. For example, in the form of a sunflower:
We will need: a square with white and yellow sides measuring 15x15 cm.
Step-by-step instruction:
- Let's start from the inside out. We outline the central axes.
- We bend the right and left edges towards the middle.
- We mark the middle of each half of the figure, as shown in the sample.
- We open the upper and lower parts from the inside.
- Flatten it. We get the basic form “Catamaran”.
- We open each corner in the direction of the arrow and press.
- It turns out to be a large square from four small ones. We fold each of them along the dotted lines.
- We open the point from the center upward, as in the basic “Bird” shape.
- We repeat the same action for the remaining three parts.
- We open the figure along the arrows.
- We lower each protruding element towards the center.
- Glue on a cardboard square. We will attach the photograph to it.
Alternative sunflower model:
More complex technique
To complicate the work process, you can make an origami frame. This type of framing will take more time. For this craft you need two sheets of square paper. One sheet will serve as the base, and the other as decoration. It is advisable to use multi-colored paper. So, you need to cut one sheet into four equal parts, and fold the other according to the diagram:
We can go back to the small squares. From them it is necessary to form four identical parts, which will serve as decoration for the frame. Then connect the parts with the main part of the origami, you will get an octagonal frame.
The result will be an interesting origami frame for photos or children's drawings.
Star frame
This origami photo frame made of modules resembles either a star or a snowflake. It consists of two parts - larger and smaller, which overlap each other. Each is composed of 8 modules. For a larger ring you will need squares of 15x15 cm, and for a smaller one - 10x10 cm.
Manufacturing instructions:
Openwork decor for scrapbooking will add elegance to the frame:
On the back of the product there are convenient “pockets” where you can store receipts, business cards and other documents. So the benefit of the model is double: it is both an elegant accessory and a mini organizer.
Models for 5th grade
Ten-year-olds are presented with complex designs, often involving several folding steps. First of all, the emphasis is on classic modular origami - kusudama and polyhedra from several identical parts. You can also make functional products: jewelry, boxes, bookmarks, lamps, wall panels, Christmas tree decorations, and so on.
Simple flower kusudama
Kusudama is a paper ball used as an interior decoration. Previously, it played the role of a hanging sachet and was filled with aromatic herbs to sanitize the air. The simplest kusudama is floral. It consists of 6-petal lilies, assembled in a modular manner.
Similar kusudama made from kami paper with different patterns look very beautiful. You can also use sheets of old glossy magazines, music notebooks or calendars. In Japan, openwork paper balls were considered a talisman and as such they can be given to loved ones and friends.
Step-by-step instruction:
You will need 6 squares of paper of any size - the larger they are, the more voluminous the resulting ball will be. However, the density of the sheets should increase accordingly. The standard size is 15x15 cm.
- We bend the sheet diagonally. This is the basic “Triangle” (“Kerchief”) fold, with which the production of origami figures often begins.
- Raise the right and left corners of the workpiece, aligning them with the top point. We place both halves along the center line. We iron the folds well with a stack or a ruler so that they turn out clear and even. The appearance of the flower depends on this.
- We bend both halves of the top layer of the workpiece to the sides, aligning them with the edges of the figure.
- We open the “pockets” we just made. This technique in origami is called “squash fold”. We lower the upper triangles on both sides down.
We bend both squash folds in half and glue the sides together. It turns out one petal of our lily.
We are producing 5 more similar parts. All that remains is to sequentially fasten them together.
Hot glue or Moment Crystal are suitable for this. To prevent the sides from moving apart, they are held together with a clothespin or paper clip while they dry.
You can make the lily monochromatic by assembling kusudama from several contrasting or nuanced shades. Or add patterned petals.
For a medium-sized ball you will need 12 flowers.
We start the assembly with two halves. We connect 6 lilies. We coat the back sides of adjacent petals on one flower with glue, do the same on the second and apply them to each other exactly, without shifts. Secure with clothespins until dry.
5 lilies form a circle with a common center.
We paste the last one - the sixth one - into the middle.
Connect the two halves and leave overnight until completely dry. If you use a heat gun, there is no need to wait.
Kusudama is ready. Origami balls are often made during the “extracurricular activities” provided by the Federal State Educational Standard in the 5th grade, especially during preparation for the New Year or other holidays. To make the product more neat and decorative, the center of each lily is decorated with buttons, scrapbooking details, rhinestones, and so on. You can add decorative cords and make pendants.
But kusudama flowers are used not only in balls. If you attach them to floral wire, you can assemble an incredibly fashionable bridal bouquet in the “hand-made” style today.
Another version of a very beautiful flower kusudama, indicative from the point of view of geometric constructions. It will require 30 rectangles, measuring 7x11.5 cm. One part represents one module.
DIY paper origami. Craft Basics and Ideas
Crane
The art of creating paper figures by specially folding a sheet appeared in ancient Japan shortly after the appearance of paper itself there and was initially endowed with a religious meaning, and therefore developed in temples and monasteries. This art, later called origami (literally “folded paper”), became widespread after paper became widely available and relatively inexpensive. The popularity of origami in Japan could only be compared with Chinese kites; it has survived to this day, spreading to the Western world along with other eastern arts. We invite you to try your hand at this subtle art, which is actually not very difficult to master, the main thing is practice, study the manufacturing patterns with a sheet of paper in your hands, and very soon there will be no secrets left for you in this matter.
- classic (or simple) - performed by repeatedly folding a sheet of paper to obtain three-dimensional figures, the most famous example is the figurine of an oritsuru crane; - modular origami - composite structures from simpler elements, folded according to classical principles and connected to each other by ordinary folding, without glue;
- kirigami (created using cutting with scissors), kusuda (volumetric structures assembled using threads and glue), aerogi (well-known airplanes with many manufacturing options), “wet” origami (paper is wetted to give clearer shapes), etc. d. - These are modern types, sometimes not very reminiscent of classic origami.
Origami paper patterns
Origami is the art of folding all kinds of crafts using paper. In most cases, the activity does not involve the use of glue and scissors. This trend arose in 610, when the secret of paper making came to Japan from China.
The monks learned to fold figurines, which decorated temples and were used in rituals. In the Middle Ages, this decorative and applied art became an element of the culture of Japanese aristocrats. If you want to master this hobby, this article contains interesting origami paper patterns.
Origami for beginners
This skill is reminiscent of a magic trick - a beautiful figure is born from a simple leaf in a few minutes. The activity does not require large material costs and is absolutely safe even for small children. Origami allows you to create a whole world without special abilities.
This hobby develops spatial imagination, fine motor skills, motor and spatial memory, concentration, communication and gaming abilities, horizons, and creative skills in beginners.
The paper diagrams below will help you make original, unusual toys, gifts, and figurines.
What materials will be needed
Before you start doing origami, you should stock up on the necessary set of tools. First, you should choose paper, preferably office paper, since it is not too smooth and is thick enough for folding according to patterns.
To attach small parts and gluing, you will need a glue stick or PVA glue, and aerosol glue is necessary if you need to glue two different-colored sheets of paper.
The last technique allows you to create interesting crafts using a combination of textures and colors.
You can use a more convenient adhesive mass, with which any part can be easily attached inside or outside the craft, and then removed if necessary, without leaving any traces.
If the craft is made from white paper, then it is then covered with spray paint. Sometimes several pairs of sharp scissors with blades of different shapes and lengths are required. In some cases it is possible to replace them with a cutter.
This tool is necessary for trimming and cutting straight lines. The blade must be sharpened to obtain a smooth, neat cut.
To mark according to the diagram when folding figures, cutting out the base, maintaining a certain angle of assembly, and symmetrically placing a composition based on a panel, triangles, rulers, and protractors are needed.
You will need a mechanical pencil with a replaceable thin lead.
Additionally, needlewomen use ready-made eyes for toys, leftover yarn, ribbons, fabric, beads, seed beads, sequins for decoration, and thread and needle for connecting individual parts.
Paper selection
The result of the work depends on the correct choice of paper, since the entire process of creating origami according to patterns consists of folding and bending. The list below will help you decide which material is better and which is worse suitable for this type of needlework:
- Office white paper is thick, not too smooth, so the modules hold well when connected. It’s better to start practicing origami with such material, since it’s a shame to throw away a damaged model. Its disadvantage is that hairiness appears at the bend.
- Colored office paper - does not turn white when folded, is dense, and is used in modular origami.
- Stickers, note paper - can be painted in different colors, used to create kusudama, in modular origami.
- School colored paper is thin, friable, easily torn, and not suitable for this hobby. It wears off on the folds and white stripes appear.
- Foil paper is durable, does not tear, is used when creating complex patterns, twisted models, and modules. When straightened, the folds remain in tight stripes.
- The pages of glossy magazines are dense, bend well, and hold their shape.
- Banknotes are durable, do not wear out on folds, and are suitable for small modules and making gifts.
- Special paper for origami - sold in sets, with a variety of patterns, can be double-sided, monotonous.
- Rice, papyrus, craft, parchment, tissue, mulberry, silk and other expensive types of paper - each type has its own advantages and disadvantages, allowing you to create interesting crafts according to patterns.
- Drawing graph paper, tracing paper - suitable for first attempts at creating complex works.
Types of origami in pictures
Origami is a great opportunity to keep yourself busy with something interesting, useful, and have fun while developing new skills and abilities. In addition to the classical direction, there are many other alternative techniques:
- Simple origami is interesting for beginners and craftswomen. When assembling according to the pattern, mountain folds are used, when the figure needs to be folded away from itself, as well as valley folds towards itself. The most famous example is the crane fly.
- Modular origami - the product is made from several identical parts, called modules, each of which is folded according to the rules of classic origami from one sheet. The elements are connected to each other by folding into each other, and the resulting frictional force prevents the structure from falling apart.
- Kusudama is three-dimensional origami, where the parts of the figure are not inserted into one another, but are glued or sewn. In most cases, the craft has the shape of a ball.
- Wet folding - moistened paper gives the products expressiveness, rigidity, and smooth lines. This method is used to create non-geometric objects (animals, flowers). For wet origami, paper is suitable; during production, water-soluble glue is added to it to hold the fibers together.
- Aerogami is a simple technique for creating an airplane.
- Kirigami - this technique allows the use of scissors to make figures. Used to create postcards.
How to learn to make animals - diagrams for children
Children's pranks and inability to sit in one place are often due to the fact that the baby has nothing to do, and energy needs to be directed in a certain direction.
Invite boys and girls to do origami, which will calm them down, captivate them, and make them feel like little wizards working miracles. This is a useful hobby that develops attention, patience, artistic taste, and thinking.