Previously, a car could be considered advanced if it had a GPS navigator or even a car radio that could read CDs. Drivers generally try to get rid of these obsolete devices from their cars, replacing them with tablets with touch screens. Is it possible to install a tablet in a car instead of a radio with your own hands? Quite! This is exactly what this article will discuss.
Why even install an Android tablet instead of a car radio?
It's simple: the tablet has a greater range of functions compared to the built-in radio. And in general, standard radios, even in fairly expensive cars, are banal radios and MP3 file players that are installed just for show. The tablet allows you to turn your car into a mobile and full-fledged media center. In addition, even large modern 2 din radios have poor functionality and less convenience compared to a simple tablet. The latter can generally replace a TV, player, GPS navigator and even provide Internet access. True, for this you need to choose a model that supports third and fourth generation networks, but there are many of these on the market today.
The only possible drawback to installing a tablet radio is the procedure itself. If the owner irresponsibly installs a tablet in the car instead of a radio, then there is a chance that the tablet will simply burn or break. By the way, most often drivers break tablets, which simply fall out of their niche while driving through potholes or during rapid acceleration.
Which tablet is right for you?
Choosing the device to use is an important step before installing the tablet in the car.
There are several criteria:
- There is no need to pick up an expensive flagship. Instead of a radio in a car, a mid-priced tablet, and not necessarily from leading brands, is quite suitable. But you shouldn’t buy a very cheap gadget from an unknown Chinese manufacturer.
- The display diagonal should be small, approximately 7-8 inches. This is the size that fits the 2 DIN socket standard. You can get a device with a larger screen, but it’s definitely not worth buying less.
- The display resolution must be at least FullHD. If the resolution is low, then the driver sitting next to the device will easily notice the pixels on the screen.
- Technical specifications may not be the best. Typically, a powerful processor, video chip and large amount of RAM are needed only in games and certain applications. Playing on a gadget built into the car interior is not very convenient, but almost any device is suitable for playing music, videos and surfing the Internet.
- It is imperative to have a slot for a SIM card, otherwise there will be no connection to the Internet. The only exception is the situation when the car has a portable Wi-Fi modem that distributes the Internet.
- It is desirable that the device has a GPS module and GLONASS technology. Both are useful for navigator applications. Otherwise, GPS satellite reception is poor, as it only works via the Internet.
- For radio lovers, I advise you to buy devices with a radio module. But this is not necessary, since if you wish, you can listen to radio stations via the Internet.
A good tablet from Lenovo, the Tab 3 TB3-850M, meets all of the above requirements.
This is an inexpensive gadget with a display diagonal of 8 inches. The gadget supports 4G, GLONASS, GPS.
The amount of RAM is 6 GB, and the permanent memory is 16 GB. The current cost is approximately 10 thousand rubles.
Installation options
Frankly speaking, there are few options for installing a tablet in a car yourself instead of a radio. The device can either be installed in a special holder without touching the car radio, or you can remove the radio and insert a tablet in its place. The last option is complicated, but has its advantages.
If you use holders, then everything is simple. There are many different tripods on the market that are designed for different tablet models. All of them have special suction cups, with the help of which the tripod is attached to any point on the dashboard. The owner can only buy a suitable tripod and install his tablet in it. But it is worth considering that this method of fastening cannot be called reliable. Yes, this is the easiest option to connect the tablet to the radio in the car with your own hands, and many drivers resort to it. After all, the tablet can be easily installed on a tripod, and the charger can be connected to the cigarette lighter.
However, we will not consider this method. Let's focus on the optimal option: installing the tablet in the car instead of the radio, and not in parallel with it.
The Ultimate Tablet Holder: iPad Car Dash
Adding a phone or tablet to your car is an easy way to get the Android Auto or Apple CarPlay experience without buying a new car.
But you can do it better than the standard mount using stationery, magnets or wood. Create your own Apple or Android tablet in your car.
This incredible project demonstrates exactly how to do just that. It's not cheap (an audio amplifier will set you back about $150), but the results are stunning. By the end, you'll have a tablet in your car where your entertainment system once sat.
Installation process
There are 2 ways to carry out the installation: without a third-party amplifier (in this case, the amplifier will be the radio) or with an amplifier. The second method is quite complicated, so we will focus on the first. What is needed for this?
To install a tablet in a car instead of a radio, you will need:
- Regular soldering iron.
- Crosshead screwdriver.
- A small sheet of plastic measuring 30 x 30 cm.
- Electric drill.
- The tablet itself.
- 12 volt cigarette lighter plug.
- External car audio amplifier.
- Thick-walled wire with fuse.
- Audio wires for speakers.
- Mini RCA cable for tablet.
- Insulating tape.
- Epoxy resin.
- Rubber couplings for wires.
- Adapter for connecting speakers.
Video “Review of the most affordable Chinese radio”
The video below provides an overview of an audio system from a consumer, ordered in China for 3 thousand rubles (the author of the video is the DiletantTV channel).
I finally received a new 2din radio based on the Android operating system. The radio is made in China, but is quite high quality. In general, the impressions are twofold. As soon as it arrived to me and I turned it on for the first time at home on the table from the power supply, there was some kind of frustration and a feeling of deception. The thing is that this radio has two “systems”, the first (loads in less than 5 seconds) is a system that allows you to listen to the radio, music from a disk, USB, SD, AUX input, watch TV, use Bluetooth, then there is, so to speak, the most necessary set of functions in a car; the second system is just an Android-based system, but it is turned on with a special button, which I learned about at random (although there are instructions, they are in very broken English and it is difficult to understand anything from it). So the first system turned on for me, naturally I was immediately upset, because it was stated that it had Android. But then, after poking it for several hours and studying each button, I got a feeling of complete delight, because this radio is not just a radio at all , but in fact a full-fledged computer that can be made to do anything, it all depends only on your imagination and the installed software.
The radio has the following characteristics, functions and capabilities:
— Android core CPU: TCC8925 1.2GHz— Memory: 1G DDR3, 4G Flash— External memory: SDHC card (up to 32GB) and USB drive— Screen size: 8 inches, touch— Resolution: 800*480 (WVGA)— Connectivity Wi-Fi module (included) and 3G modem, for this there are 2 USB ports on the back wall of the radio; - Possibility of connecting an iPod; - Has an analog TV tuner (with an antenna (regular “horns” from an old TV) catches more than 10 channels, 7 of them - generally without ripples in very good quality); - Has a full set of RCA outputs, including a subwoofer; - Video input from a rear view camera; - Video input (probably you can make a front view camera or connect video recorder so you can view the footage on the big screen);— 2 video outputs to video headrests;— Plays any audio-video formats (I checked it myself, everything that I didn’t put on a flash drive plays everything);— Reads, you might say any discs (DVD/DVD+R/DVD-R/DVD-RW/MP3/CD/CD-RW);— On the front panel there is a miniUSB input for connecting a flash drive (a miniUSB to USB adapter is included in the kit), as well as two slots SD (one is used to expand the internal memory and install programs with the Android system), the other is for listening and watching music/movies/photos;— The kit includes a GPS antenna, after installing the navigation program (CityGID, ProGorod) and the necessary maps, we get full navigation on the big screen. By the way, searching for a location is almost instantaneous, the signal level is very good, provided that the antenna is “magnetized” directly to the body of the radio itself;— Remote control.
Before I plugged it into the car for the first time, I was afraid of only one thing: that it would play like a Chinese “balalaika” for 1000 rubles. But I was afraid in vain, the sound is at least no worse than the standard radio, and maybe even better, at least it produces more bass.
Connecting and installing the radio
I installed it on the standard brackets as follows: to make it easier, I removed the climate control panel so that I could hold the radio with my hand, sticking my hand through from below; I screwed the standard brackets to the panel and inserted (without screwing) the radio, then snapped the new 2din frame (without deflectors!), adjusted the position of the radio in the frame, and marked with a marker the location of the brackets relative to the body of the radio through the holes where the deflectors should be. After that, I removed the frame and the radio, drilled holes in the brackets and used standard screws (the diameter and pitch of the thread completely matched) and secured the brackets to the body of the radio.
The concept of “Chinese car radio” includes all audio equipment of both local and popular global brands produced in China. Due to the fact that the devices are manufactured under the supervision of specialists from the companies that own the brands, they are certified according to international standards. Therefore, connecting a Chinese 2 din radio according to the diagram in the instructions will not be difficult, and the designation of the terminals does not differ from devices from European or Japanese manufacturers.
Connection
Let's start with the fact that 2 devices are connected to the car: a tablet and an amplifier. The connection is made to the battery using a thick-walled cable. There must be a fuse on this cable, and it (the fuse) must be located next to the battery.
To connect a tablet in a car instead of a radio, you need to make a hole in the engine compartment through which a thick-walled cable will enter the cabin. A rubber sleeve is inserted into this hole to prevent the cable from fraying. When driving, the cable without a coupling will rub against the metal and this can damage it, leading to a short circuit.
Through this hole, the cable connected to the battery through a fuse enters the car interior, where it is connected to the amplifier. Typically, drivers install the amplifier under the seat, and the cable itself is laid under the floor mats.
There should be 2 cables from the amplifier to the adapter. It also comes with a pair of RCA cables that connect to the tablet.
The radio must be removed from its place. The extraction process depends on the car model, but usually there is nothing complicated about it.
What problems may arise
Most machines are equipped with a digital CAN bus. Therefore, simply installing a tablet does not always work. You'll have to find a way to “make friends” with the gadget and the standard amplifier. The easiest option is to purchase a small AZ-FM adapter. It helps to “deceive” the standard system, which begins to see the tablet as a standard radio. But in this case the volume will not be enough. Then you will still have to install an additional “amplifier”. The easiest way is to use any old radio for this. It connects to AUX, then goes to AZ-FM and then to the stock amplifier. But this is too long a chain. In addition, the adapter is not so cheap, about 900-1000 rubles.
Then you can buy an additional amplifier at a radio store. It will certainly work, but the background will appear while listening to music.
Therefore, the easiest way is to disassemble the AZ-FM and resolder the resistance on it. But the background may remain. You can try to unsolder the wires from the tablet and take the mass to different places. But still, additional noise may remain, even if you connect directly to the battery. Then we buy a filter (for the car radio) and the noise disappears.
However, a tablet running on its own OS will not independently integrate with the car system. Therefore, you need to think about how to configure it.
Working with a footprint
Now you need to measure the hole where the radio was previously located. Based on the size, you need to cut a sheet of plastic. Its width and length should be approximately 1 cm greater than the measured dimensions. This sheet of plastic is secured with epoxy resin in place where the radio previously was. You need to secure it at 6 points.
A hole for cables is drilled in the middle of this plate. Then it is advisable to paint the surface of the plastic plate with a suitable color. You need to glue holders to the corners. They are glued with epoxy resin.
After this, the cables are connected to the tablet.
Communities › Useful Tips DRIVE2 › Blog › DIY multimedia system from a tablet
Good day to all. I present to your judgment my work from the BZ. If it’s not the format of our community, I’ll delete it. I hope it is useful to someone. The entry was made from the point of view of a person who does not have extensive knowledge of programming. But everything has been checked, everything works. We will talk about a tablet in a car using the Chevrolet Niva as an example. But the tablet is not just a gadget, but as a multimedia system, instead of a radio. To do this, I had to dig through a bunch of sites, because... My knowledge of computer programs ends with Word. Therefore, may experienced programmers and experienced PC users forgive me, for whom the first part of the blog about working with a tablet will bring a smile - I will write as simply as possible. Of course, it was difficult for me to understand some things according to the instructions on the Internet, so if necessary, write, I will try to explain in more detail to the best of my competence. It turned out like this:
For the tablet to function more or less normally as a multimedia system, I had to solve the following problems: 1. Creating a shell in the tablet like standard multimedia with working buttons + a little automation. 2. Connecting the tablet to the car's speaker system. 3. Installation location and method of attaching the tablet. Let's begin.
Tablet. Working with him. The network recommends and praises Nexus, but I took a purebred Chinese Irbis with built-in GPS (navigation without Internet access will not work without it) purely for financial reasons and after installing everything necessary on it, I want to note that all the functions included in the tablet are performs well. Next, I started installing the shell, as in standard multimedia systems. I created two “desktops” - the main one and the auxiliary one. On the main one (photo 1) I displayed all the buttons I need, including the corresponding applications.
On the auxiliary Photo 2 (it opens like on phones when you scroll to the side with your finger on the screen) I brought out the applications I needed that did not fit on the main screen.
You can draw the shell yourself, or you can take it from the Internet (which is what I did, may the creators forgive me). This is what the blanks look like:
Later I drew a new one myself.
I made the Chevrolet nameplate myself and installed it using Total Launcher on top of the speedometer and Peugeot. Each button has its own application. Here you can see which one you like. I installed Poweramp as a player, navigation - Navitel, mail - mail.ru, left the standard radio, etc. Here, look for whatever your heart desires in the Play Market and install it on the shell.
Now automation. To do this, I used an application from the MacroDroid Play Store. What is it for? So that you can control several functions of the tablet with one action (one command). For example, we pressed the screen lock button, and the tablet, bypassing the lock, turned off all networks, paused the music, and vice versa.
The installation location and method of attaching the tablet are individual. Specific options for the Chevrolet Niva can be found in the BZ. PS. Forgot to add. This particular brand of tablet freezes overnight in the winter and the tablet manages to run out of charge. I easily put up with this, because I use autostart and everything was already working when I arrived. In summer, autumn and spring, the charge was enough for the night without any problems. Although there is a solution to the battery problem, remove the battery and power the tablet directly from an external source. What and how to eat also requires a separate post. Operation revealed one small inconvenience: when the navigator is turned on, to switch the track you need to minimize the navigator, switch the track and expand the navigator again. To solve the problem, I ordered a miracle remote control button from Ali-Express that adjusts the volume and switches tracks. Connects to the tablet via Bluetooth.
Source
Important Features
When installing a tablet with your own hands in a car instead of a radio, you need to consider some important points. First of all, pay attention to the weight and size of the tablet. A large and heavy device will not work, because it is more difficult to install, and when driving on a bad road, it may come off and fall out. Choose a compact and lightweight tablet.
Next are the buttons. It is desirable that the tablet has only one physical button. This will make using the device in the car easier.
How to connect a tablet to a radio
More and more car enthusiasts are interested in how to connect a tablet to a radio or replace it altogether. Indeed, the days of tape recorders are gone. Now is the time for new technologies that will replace radio tape recorders. It's only a matter of time. Still, as long as you have a radio, you can use it together with a tablet or at least use an amplifier.
Sharing both devices
The most popular method when it does not involve installing a tablet instead of a radio. The latter is in its regular place, and the MID is mounted on a suction cup or a special mount. Although there are more disadvantages than advantages, car enthusiasts love this method because of its simplicity. Another factor is time.
- Connection methods:
- AUX;
- PIN 32 and other special cords;
- Bluetooth;
- WI-FI.
AUX
How to connect a tablet to a car radio using the AUX input? To do this, you just need a cord with a Jack 3.5 connector on both ends. One end is inserted into the MID, the other into the radio. On the last one in the settings (MODE) you need to select AUX mode.
Naturally, you shouldn’t expect super opportunities. You will only receive sound. You will have to switch songs on the tablet. There may be interference if you use a low-quality cord. Essentially, the tablet only serves as a source. Pedantic people don’t particularly like this method. The tablet comes with charging from a cigarette lighter or converter, plus an AUX cord.
Bluetooth and Wi-Fi
The option is more optimal. You don't need a cord for transmission, but there are more advantages. For example, the sound quality gets better. Connecting the tablet to the radio is possible if the latter has the appropriate modules. Let's look at the example of Bluetooth.
For normal sound transmission, it is enough to turn on the corresponding module on the car radio.
You need to search for Bluetooth devices on your tablet and connect. No settings need to be made. The gadget itself will understand that it needs to stream audio. And not just from the player, but also from other programs. For example, radio or TV.
In some cases, you need to indicate another login method on the radio. Even though Bluetooth is turned on, another option (USB, for example) may be enabled in the settings.
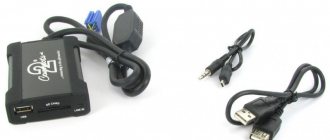
PIN 32-40 and other special cords
Manufacturers often purposefully equip their cars with special cords and adapters for connecting third-party devices to the car radio. These can be cords with a PIN type connector for connecting all Apple products and some models from other manufacturers. So, with the help of special software, the gadget can be controlled using the buttons of the car radio itself. This makes the job much easier and more familiar to ordinary drivers.
Screen, standards support and other criteria for choosing a tablet
The tablet screen should be capacitive, not resistive. Resistive ones are more convenient when working with a stylus. Using a stylus in a car is inconvenient, so you have to press the buttons with your fingers. Also, capacitive screens have higher sensitivity. Needless to say, the tablet should support 3G, 4G and GPS. It is advisable to read reviews of tablets that work best with GPS, because technology support is not everything. Many unsuccessful models often lose contact with the satellite, causing the route to go astray. As for color, it is inappropriate to install a white tablet in a black interior. Although this is a matter of taste.
Before replacing the radio with a tablet, you need to install the Car Home Ultra program on it. This program will monitor various engine parameters, read errors from it and sound signals when unstable engine operation is observed.
Speaker wires must have a shield. Of course, they cost several times more than usual, but with them the driver is guaranteed to hear clear music without interference.
Selecting a tablet and a place to install it in a car
Each motorist makes the choice of a tablet PC himself. Here everything will depend only on the personal preferences of the driver and his needs. Each model has both its positive and negative features. There is only one general piece of advice for everyone: the tablet should not interfere with the driver’s control of the car. Therefore, it must be installed either in a specially designated place (if it exists in the car) or on a special stand.
If you choose a large tablet for a small car interior, it will take up a lot of space and you won’t have a comfortable driving experience. One more rule can be derived from this: a small car needs a small tablet, and a large car needs any tablet, at the owner’s discretion. The lighter and thinner the tablet, the more profitable it is for the motorist.