Preparing your desktop
First of all, you need to prepare your table on which you will work. There should be no unnecessary things on it and every tool should be at hand. Not everyone has their own desktop and has probably already thought about creating one. Making a table is not difficult, but choosing a place for it in the house is difficult. The ideal option is an insulated balcony, on which you can do crafts at any time. I have already written about preparing the table in a separate article and tried to describe in as much detail as possible the entire process of creating it. If you don’t know how to prepare your workplace, then read the following Article. After you have completed the process of creating a table, try to start choosing your future craft.
DIY candlesticks – photo ideas
Next, we invite you to look at a selection of photos where we have collected various examples and ideas for making candlesticks with your own hands. We hope they inspire you to create new masterpieces. Enjoy watching!
Photo: shastebit.ru
Photo: madeheart.com
Photo: cutoutandkeep.net
Photo: pl.pinterest.com
Photo: harrowphotos.com
Photo: rutube.ru
Photo: svoimi-rukami2.ru
Photo: modadekorum.com Photo: pinterest.ru
Photo: teplodom24.ru
Photo: dizajngid.ru Photo: novamett.ru
Photo: pinterest.ru
Photo: livemaster.ru
Photo: za.pinterest.com
Photo: postroysamdom.ru
Photo: winner-light.ru
Photo: housejournal.ru
Photo: hammer-shop.ru
Photo: zen.yandex.ru
Photo: iiam.ru
Photo: skolkogramm.ru Photo: foxum.ru
Photo: pl.pinterest.com
Photo: posudaizkamnya.ru
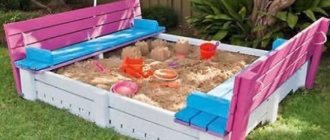
DIY room decor: 15 original ideas
We choose quality material
The main material is plywood. The choice is always difficult. Each of us has probably encountered such a problem as delamination of plywood from the end part and asked the question, what causes this delamination? Well, of course, this is mainly due to low-quality plywood. If this is not the first time you have picked up a jigsaw, then you can select plywood from the remnants of a previous craft. If you are new to sawing and you don’t have plywood, then buy it at a hardware store. Choosing material for sawing is always difficult. You should always choose plywood carefully, often look at the defects of the wood (knots, cracks) and draw conclusions. The difficulty in choosing plywood lies in the fact that no matter how you guess at its defects and shelf life. For example, you bought plywood, cleaned it, translated the drawing and suddenly it began to delaminate. Of course, this has happened to almost everyone and it’s oh, how unpleasant. So it is better to pay attention when choosing and choose good plywood. I wrote a special Article in which all the principles of choosing plywood are described step by step.
Familiar banks
A liter, half-liter jar or mayonnaise container is an excellent choice for creativity. The containers are painted, leaving patterned windows, covered with lace, burlap, thick ropes, and dressed up in knitted “clothes.” In the transparent version, the inside is filled with pine needles sprinkled with snow and salt. A candle is placed in a equipped snowdrift. Colorful berries, colored yarn, and cute trinkets will be useful for decoration.
Another variation is to fill the jar with orange circles in a vertical position, separating the candle from the walls with them. This sunny, mouth-watering composition will not leave anyone indifferent with its inimitable appearance and divine fragrance.
When night comes, stylish items bring magic to the room, and photos of hand-made candlesticks are clear proof of this.
Stripping plywood
We clean our plywood with sandpaper. As you already know, “Medium-grained” and “Fine-grained” sandpaper is used for cleaning plywood when sawing. You've probably seen sandpaper in hardware stores, and that's what we'll need. In your work you will need “Coarse-grained”, “Medium-grained” and “Fine-grained” sandpaper. Each of them has its own property, but a completely different coating, by which it is classified. “Coarse-grained” sandpaper is used for processing rough plywood, i.e. which has many defects, chips, and cracks. “Medium-grained” sandpaper is used for processing plywood after “Coarse” sandpaper and has a slight coating. “Fine-grained” or otherwise “Nulevka”. This sandpaper serves as the final process for stripping plywood. It gives the plywood smoothness, and therefore the plywood will be pleasant to the touch. Sand the prepared plywood in stages, starting with medium-grain sandpaper and ending with fine sandpaper. Sanding should be done along the layers, not across. A well-polished surface should be flat, completely smooth, glossy in the light and silky to the touch. How best to prepare plywood for sawing and which sandpaper is best to choose Read here. After stripping, check the plywood for burrs and small irregularities. If there are no visible defects, then you can proceed to the process of translating the drawing.
DIY wooden candlesticks
Wood is the most beautiful and environmentally friendly material with a natural, individual pattern. It is easy to get it by simply going for a walk in the nearest park or forest. Another advantage of wood is its flexibility in processing, which is why home craftsmen often choose it for making various crafts.
Original candlestick made of bars
One of the simplest ways is to make a candlestick with your own hands from a block, although even a small log, a thick board, or even a crossbar from a wooden mop will do.
It is better to choose a wider block - then the candlestick will be more stable. To work, you will also need a drill and an attachment for making small holes (the diameter must be selected to match the thickness of the candles). To mark the holes, you will need a tape measure and a pencil. Also, do not forget about the decor - the finished product will need to be treated with an antiseptic, as well as painted or varnished or stained (at your discretion).
So, looking at the block, immediately decide how many candles will be located on it, make markings, mark the centers of the holes for the candles with dots. Next, using a drill and a drill, we cut out holes 1-2 cm deep. The depth should be determined depending on the thickness of the log and the height of the candles - for tall wax figures, deeper holes will be required to ensure their stability.
Photo: thesweetestoccasion.com
If the block or board is sanded, you can deliberately give it an aged effect, make small chips, or lightly tap with a hammer to create dents. An almost finished candlestick needs to be decorated - you can paint it, but in order to preserve the appearance of the wood pattern and texture, it is better to treat it with stain and then open it with clear varnish.
Next, let our candlestick dry thoroughly, then install the candles. When preparing for a certain celebration, for example, the Christmas holidays, you can use additional decor in the form of fir branches, tinsel, and pine cones.
Photo: thesweetestoccasion.com Photo: kamuflyzh.ru
Photo: olestnicah.ru Photo: thesweetestoccasion.com
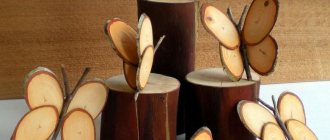
Candlesticks made of birch branches
To make a composition of birch candlesticks, you will need thick branches or a thin trunk. The wood must be cut into pieces of different heights from 10 to 20 cm. On one of the back sides of each block we make a recess for a candle with a special drill.
Since birch bark is quite beautiful in its natural form, you should not resort to coloring it - it is better to treat the product with fungal and insect repellents, and then cover it with a colorless varnish. Next, the logs are arranged in a composition and candles are installed.
Photo: kamuflyzh.ru
Photo: kamuflyzh.ru
Translation of the drawing
For me, drawing translation has always been the main process in my work. I will tell you a couple of rules, as well as tips for high-quality translation of a drawing. Many people transfer the drawing onto plywood not only using a pencil and copying, but also using “Black Tape”, glue the drawing to the plywood, then wash off the drawing with water and the markings of the drawing remain on the plywood. In general, there are many ways, but I will tell you about the most common method. To transfer the drawing onto prepared plywood, you must use a copy, a ruler, a sharp pencil and a non-writing pen. Fasten the drawing in plywood using buttons or simply hold it with your left hand. Check if the drawing fits the dimensions. Arrange the clock drawing so that you can use a sheet of plywood as economically as possible. Translate the drawing using a non-writing pen and ruler. There is no need to rush, because your future craft depends on the drawing.
Preparing the stencil
Keep in mind that drawings, diagrams and sketches for cutting come in different sizes.
For example, to make an interior item, say a shelf, you need to use whatman paper in A1 or A0 format, and to create some toys you can even use an ordinary sheet of cardboard.
Well, then the outline of the product is applied to the surface of the workpiece; during this process it is necessary to maintain the exact dimensions of the drawing.
You can find templates for cutting with a hand jigsaw on special resources, but it is easier to come up with your own ideas using a simple model as a basis and taking into account the type of workpiece.
An individual approach when developing a drawing, template or diagram of a future product is welcome, because it will emphasize the very texture of the wood.
Source pinimg.com
Drilling holes in the parts
As you have already noticed, the parts contain parts of the grooves that need to be cut out from the inside. To cut out such parts, you need to drill holes in them using a hand drill or, as in the old fashioned way, make holes with an awl. By the way, the diameter of the hole must be at least 1 mm, otherwise you can damage the elements of the drawing, which, alas, are sometimes difficult to restore. To avoid damaging your work table when drilling holes, you must place a board under the workpiece so as not to damage the work table. It is always difficult to drill holes alone, so ask a friend to help you in your task.
A brief excursion into history: how candlesticks appeared
A couple of centuries ago, the main source of light in homes was candles. At first they were used without special stands, and only after some time were candlesticks invented. They served as holders for burning wax products. Thanks to them, it was easy to move the candles to another room.
Initially, craftsmen sought to make a reliable object with their own hands, without taking its design into account. Wood, stone and metal were popular materials. Later, people began to introduce a share of art and creativity into the production process. Society began to appreciate the design and beauty of the product itself.
The first candlesticks are quite large in size with a base in the form of a metal tripod or a round stand. At the top of the entire structure there were small cup stands for candles. They had several slots, and their number depended on the purpose of the product. In small rooms, decorative candlesticks with two or three cups were used. In large spacious rooms, more massive light sources were installed.
Accessories from the Renaissance were especially luxurious and chic. The craftsmen made real works of art with their own hands. As a rule, candlesticks were decorated with patterns in the form of leaves, ornaments and various figures. Bronze items from those times can be found in museums and ancient buildings in Venice. During the period of dominance of the Rococo style, porcelain objects were popular. They were decorated with monograms and covered with gold. Drawings of angels, landscapes, etc. were made on their surfaces.
In the 18th century, metal began to be used in the manufacture of candlesticks. It was mostly iron. Such products fit perfectly into the Rococo style. They served as light sources in houses, streets and squares. Precious metals (gold, silver), as well as bronze and brass were also used in production. Later, in the 19th century, durable and inexpensive cast iron became the main material.
There is a second version of the appearance of candlesticks. From Egyptian legend it is known that during a great disaster, a hill suddenly appeared in the air, at the very top of which a lovely lotus flower grew. The bud blossomed, and a flame burned in its center. From him the sun god Ra arose. After this event, the Egyptians began to make candlesticks in the shape of the divine lotus flower. There was a belief among the people that this item could protect people from troubles and misfortunes, as well as impart strength and power.
Articles recommended for reading:
- How to learn fire magic
- Magic amulets and their meaning
- Wiccan magic - the doctrine of the worship of the forces of nature
The product gradually gained popularity in other countries, but craftsmen of different nationalities could use other materials and designs. Thus, in Ancient Greece, candle stands were made of clay, and varnish was applied to their surface for beauty. In other countries, wood, stones, sugar cane and ivory were used for production.
Then the material preferences changed again. The craftsmen made candlesticks from marble and alabaster with their own hands. As a rule, these products decorated the premises of churches and the homes of rich people. After a couple of decades, they began to produce porcelain, crystal, and glass candelabra. The material and external design fit into the fashionable style of those times.
To carry a burning candle, they used special small stands with a handle and a wide tray. Massive candlesticks with several bowls for wax attributes were installed on dining tables and desks. Also at that time, one could find small candelabra placed on dressing tables.
Sawing parts
There are many rules for cutting, but you need to stick to the most common ones. First of all, you need to cut out the internal parts, only then according to the external pattern. There is no need to rush when cutting. The main thing is to always keep the jigsaw straight at a 90-degree angle when cutting. Cut out the parts along the lines you accurately marked. The movements of the jigsaw should always be smooth up and down. Also, do not forget to monitor your posture. Try to avoid bevels and unevenness. If you go off the line while cutting, don't worry. Such bevels and irregularities can be removed using flat files or “coarse-grained” sandpaper.
Cleaning Parts
You should always clean the parts of a future craft carefully. At the very beginning of the work, you already sanded the plywood with sandpaper. Now you have to do a small part of stripping the plywood. Using medium-grain sandpaper, sand the edges of the parts and the back of the plywood. “Fine-grained” sandpaper is considered the final stage of cleaning parts. It is better to clean the front part of the parts with fine sandpaper. When processing plywood, take your time. You can also use a rounded file, which is convenient for cleaning the inside of the holes. Try to ensure that the parts come out without burrs or irregularities.
DIY polymer clay candlesticks
Polymer clay is a material that has unique properties, allowing you to create realistic objects with the smallest details. Various decorative elements, costume jewelry, and flowers are made from it, which have high strength indicators.
Candlestick-lantern
The principle of making a small glowing flashlight from polymer clay with your own hands is quite simple. First you need to come up with a layout, draw all its details on paper and cut out the templates. Now we roll out the material so that the layer is several millimeters thick. Next, apply the part templates and cut along the contour with a knife.
In this case, we are making a lantern house, so we cut out walls with windows, a doorway and a roof for it. When all the parts are thoroughly dry, you can start gluing the structure together using PVA glue.
Next, you need to seal all visible seams with modeling paste, and when it dries, carefully sand the patches. The lantern house is ready! All that remains is to place a small candle in it and enjoy the charming lights.
Photo: montmarte.net
Photo: faceliya.ru Photo: don-vino.ru
Photo: kamuflyzh.ru
Photo: alwariet.com
Photo: faceliya.ru
Pumpkin candlestick
A pumpkin-shaped candlestick will perfectly complement the kitchen interior and create the necessary mood, enlivening the atmosphere. To make it you will need clay in two colors - orange and green, as well as foil, a knife, dry pastels in black and yellow, and a mold for creating embossed leaves.
From foil you need to create the base of a pumpkin with a recess for a candle, and cover it tightly on all sides with orange clay. Using a pencil or any narrow stick, we create relief stripes on the sides - the pumpkin is already quite recognizable. Next, we move on to making leaves: cut off a piece of green clay, press it to the mold and draw out the shape of a leaf with curled edges. So we make several blanks, which we then attach to the pumpkin.
We also form stems from green clay, which we place in random order, giving the composition a delicacy. At the final stage we use dry pastel, creating natural shades. Now bake the composition in the oven, cool and place a candle. A beautiful homemade candlestick is ready!
Photo: rukodelie.usamodelkina.ru
Photo: rukodelie.usamodelkina.ru
Photo: rukodelie.usamodelkina.ru
Photo: rukodelie.usamodelkina.ru
Photo: kamuflyzh.ru
Photo: rukodelie.usamodelkina.ru
Photo: rukodelie.usamodelkina.ru
Photo: rukodelie.usamodelkina.ru
Photo: rukodelie.usamodelkina.ru
10 best ideas on how to decorate a room for the New Year
Varnishing crafts
If desired, you can transform our craft by covering it with Wood Varnish, preferably colorless. Read how best to varnish a craft. Try to choose a quality varnish. Varnishing is carried out using a special brush “For glue”. Take your time. Try not to leave visible marks or scratches on the craft.