Bullfinches made of threads
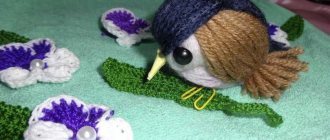
Here you can use multi-colored woolen threads of red, white (or gray), black colors of similar thickness. The Internet describes many ways to form a bullfinch from threads with your own hands, one of which is making it from pompoms or winding it on a cardboard base.
Main stages of work:
- on a cardboard frame 6-8 cm wide you need to wind first black, then red threads of approximately the same volume;
- on both sides along the edges it is necessary to cut the threads and remove them from the cardboard (you get parts of the body of the future bullfinch);
- tie with thread in the center;
- fold the black threads in half, tie both layers in the center again with thread (a tail is formed);
- the same volume of gray threads is separately wound onto the same cardboard, removed from the base and placed across the red threads;
- then you need to form the body of the bird from red and gray threads, following the master class on creating a bullfinch with your own hands, directing the red threads from below, and the gray ones along the top, to the tail;
- You can glue a seed (almond kernel, etc.) in place of the beak;
- instead of eyes, take beads or seed beads.
And when making from pompoms, it is better to take acrylic thread, which will fluff better after cutting the yarn wound on double cardboard rings. Red and black thread pompoms are sewn or glued together.
You can cut out a tail and wings from black paper, a beak-cone from yellow paper, and attach eyes from small blue (white) circles.
Feathered handsome man made of pompoms
The pompom toy is very soft, fluffy, and pleasant to the touch. Practice shows that it is quite durable, withstands children's games and does not fall apart. If you attach a loop to the head, you will get a keychain for keys or for a backpack.
In any case, crafts made from pompoms are not only beautiful, but also useful. You can involve preschool children in the work; winding threads develops perseverance, the ability to bring a task to completion, and exercise patience.
Materials:
- thick cardboard or pompom making kit;
- scissors;
- felt;
- beads;
- Super glue;
- acrylic yarn in white, red and black.
Acrylic thread is suitable for creating toys because it is durable, fluffs beautifully, does not fade under the influence of sunlight, and has a rich color palette.
The bullfinch starts with making pompoms. To do this, follow the sequence of steps:
- Two bagels of different widths are cut out of cardboard. The width of the bagel is equal to the length of the pile of the future pompom and determines its size. For the body you need a ball with a diameter of 5 cm, for the head 2-3 cm.
- Place two cardboard blanks together, take the thread and begin to wrap them evenly around the entire circumference. In order not to lose the initial tip, it is pulled out by 20 cm; it is useful for tying a knot in the finished pompom.
- For the body, a small sector of white thread is wound, a little larger than red, the rest of the space is filled with black thread.
- After sufficient winding, you need to take scissors and carefully cut the thread along the outside. All layers need to be cut off.
- Holding the skein tightly, pull the thread tightly in the center and tie a knot. Do not cut the thread, it will be needed to connect the parts.
- Use scissors to trim the length of the pile, forming an even ball. The body is ready, it has a black base and a red belly.
- The head is made in a similar way, using black and red yarn.
- The head and body are connected using the remaining ends of the working thread.
- A small triangular beak is cut out of black felt.
- The beak and eye beads are glued on with super glue.
To give the bird a finished look, you can cut wings out of felt and glue them to the sides with super glue.
Forming a bird from thread and cardboard
A template for the future craft is prepared on plain paper using a compass, in the center of a large circle you need to cut out a smaller circle (to wrap the workpiece in a circle), the tail, beak, and paws are completed.
The blank is applied to thick cardboard, two such parts are cut out along the contour. One part needs to be painted black, and the second should be left the same, fold them and wrap red threads through the hole in the center of the chest of the product, gray and white threads on the top, i.e. the back of the bird.
Then you need to cut the threads by inserting scissors between the two templates, tie them up and remove the unpainted cardboard. All that remains is to carefully straighten the threads.
Creating a bird applique
You can make it as a postcard or an image on the wall, using cardboard as a base and small pieces of thread. The essence of the work is as follows:
Note!
Crochet mouse - TOP-120 photos of the best knitted items. Step-by-step master class on knitting toys for beginners with simple work patterns
Crochet mouse - DIY knitting patterns. Crochet mouse manufacturing technology + photos of original craft ideas
- DIY bear: 120 best photos of DIY bear crafts made from different materials + step-by-step manufacturing instructions for beginners
- Draw the outline of the future bullfinch on a light cardboard (you can simply print the drawing and trace the resulting template with a pencil).
- Cut woolen threads of selected colors into small pieces (up to 5 mm in length) into different plates.
- Coat the design with PVA glue in parts and sprinkle with pieces of thread, pressing the napkin on top for better gluing, trying to apply the workpiece evenly and not go beyond the outline.
- The legs and beak can be completed with a black marker.
The cute bullfinch craft is ready!
Bed mobile
For couples who have only recently become parents and who want to involve their baby in nature from the very first days, there is an interesting craft idea.
In any children's goods store you can buy a mobile phone for your child, but what if you don’t like any of the models presented? Everything is very simple. Create it yourself!
For the base on which the main part will be held, any stable stick that can be secured to a crib is suitable.
If one has not been found, you can turn to families with whom you are on friendly terms and who have already grown-up children.
We are sure they will not refuse you. But if this variation doesn’t suit you, then look at used products, you’ll definitely find something like that there.
Now let's move on to the main part, the toys that will delight your baby's eyes for several years. The birds are made simply. All you have to do is cut out a shape from black or dark gray cardboard.
Then glue on the red belly, you can even use velvet paper for effect. After this, draw an eye and, folding two accordions from cardboard of a similar color, glue them to the body. Repeat all steps several times.
Attach a rope to all the specimens, tie it to the base, and that's it. The baby will be very happy.
If you don’t understand enough about what animals should look like, then photos of similar bullfinch crafts can be found in any search engine.
Use of rice grains in applications
In exactly the same way, you can paste over a bird stencil with grains of rice previously painted in different colors. Only first the grains must be thoroughly dried so that they can easily stick to the base.
Ready-made crafts can be additionally decorated with a branch of rowan or viburnum or depicted as snow from cotton wool.
Simple paper applications
The simplest and fastest option, suitable for absolutely all children. The main thing is to find simple photo templates of a homemade bullfinch, print it out, cut out the necessary elements from colored paper, for example, and carefully glue these parts onto a plain cardboard base. All that remains is to enjoy the results of your labor!
Volumetric paper bullfinch
To work, you need double-sided black cardboard, some red paper and auxiliary tools (scissors, pencil and glue).
Next, you can use templates or simply cut out a black strip of cardboard, at one end of which cut small strips with rounded ends (the future tail). This strip will need to be rolled up, leaving the tail blank free.
Note!
Crane craft - simple schemes for creating crafts at home with step-by-step photos + original ideas for children
- Do-it-yourself dove: TOP-150 photos of non-standard crafts made from scrap materials. Step-by-Step Instructions for Making a Dove for Kids
Felt mouse: 160 best photos of DIY felt mouse crafts + simple and quick instructions for beginners
And on the sides, glue the cut-out wings of the eyes on a white background, attach a beak, place a red oval chest in front, glue the paws made of black paper, and that’s it, charming bullfinches made of paper with your own hands are ready. All that remains is to place them on a branch or hang them from the loops.
Made from paper base
The simplest version of the work can be done from paper, felt or cardboard. You can purchase blanks from which bird parts of different colors are cut out and fastened together.
When performing such a fake, do not forget about the surroundings and background. To make the craft more lively and interesting, use other types of materials. For example, branches on which bullfinches sit, pine cones, nuts, which will also always remind you of what these birds eat. You just have to show your imagination, and an interesting picture will form itself.
If you choose a more complex type of work, you can make a mosaic. Just take the colors of paper you want and tear them into small pieces. Take the base, make markings with a pencil, and draw the final picture. And stick pieces of paper on it.
Bullfinch made of paper using origami technique
Making very cute birds is not at all difficult if you strictly follow the bullfinch making pattern. And for this you only need colored paper (black and red) in A4 format and beads for the eyes, and scissors to help.
Both papers are folded together in the form of a triangle (the black one should be on top), the excess part is cut off. Then the triangle needs to be folded in half again and then strictly adhere to the pattern of the blanks.
There are two main ways to obtain this craft, and the first is the easiest and is suitable for kids, and the second is more complex, but very beautiful, and can become a worthy interior decoration.
To achieve even greater brightness, you can additionally color the layout obtained in this way with a marker or felt-tip pen, or add or add eyes.
Note!
- DIY bird feeder: the best ideas for making simple and beautiful do-it-yourself bird feeders + master class with photo review
Bullfinch using papier-mâché technique
The papier-mâché technique is based on creating figures from chewed paper. Crafts made from papier-mâché are practiced in classes in kindergarten groups. Working with your hands adds positive emotions, relieves internal instability, and children also like to watch how figures of men or fantasy animals appear from a wet wad of paper.
The following will be useful for work:
- paper torn into shreds, cardboard egg trays, old newspapers will do;
- PVA glue, water, brush;
- scissors;
- Kinder surprise egg, any blank of a suitable shape;
- thread, tape, masking tape.
The job description looks like this:
- Tear the paper material into small pieces and place them in a large container.
- Glue the workpiece with paper and newspaper pieces with PVA glue diluted in water.
- Form a tail and head from a wad of newspaper.
- Glue the tail to the body.
- Wrap your head with threads.
- Attach the head to the body using tape.
- Wrap the workpiece with masking tape and use it to form a small beak on the head.
- Perform another layer, coat the workpiece with paper pulp, which was previously soaked in water.
- Wait until it dries.
- Paint the bullfinch with acrylic paint.
- For the eyes, make small holes and insert beads; you can glue store-bought eyes.
- Cover the figure with matte varnish.
The bullfinch is ready. In this technique it turns out to be especially realistic.
The work of making a bullfinch is not difficult, but painstaking; it helps to instill in the child patience, perseverance, and diligence. We use improvised materials that are found in every home. Children always react with delight to crafts made with their own hands, give them to their loved ones or place them in a prominent place in their home.
Using the quilling technique
This is one of the unusual ways to make a bullfinch bird craft from paper with your own hands. With this method, it is possible to obtain various paintings from prepared rolls of colored paper.
Take paper of the desired colors, cut it into strips and roll it into small round pieces (or you can find ready-made sets on sale).
You will also need to first prepare a wooden or plastic frame and thick paper for the base of the work (remnants of wallpaper will also work), on which the details of the future painting will be attached.
All that remains is to distribute the multi-colored parts according to the template and glue them to the base, achieving a bullfinch.
How to draw a bullfinch with pastels
We choose materials and tools, think over the composition and start drawing - the lesson will help you figure out every detail of the picture! More details >
20 unusual master classes for creativity with children: from paper crafts to filming your own cartoon >Knitting blankets and sewing blankets: 10 warm master classes + BONUS > Knitting mittens: 9 excellent lessons + BONUS how else you can make them >
Subscribe to the Masters Fair on social networks: Yandex.Zen, Instagram, Facebook, VKontakte
Corrugated paper as a craft material
A beautiful bullfinch bird can be made from corrugated paper, pre-twisted into strands. To work, you need paper of three colors, glue and a piece of craft paper for the beak.
You will need 5-7 red and black strips of corrugated paper measuring 50x0.7 cm, and to form the breast, take blue paper in the form of a 15x3.5 cm rectangle. All strips are twisted into bundles like thick threads.
As a result, you need to make black blanks 16 cm long, and red ones need to be longer (25 cm each). The strands are collected into bundles and placed on top of each other in a cross, the red one is bent in half, wrapped with a tie and secured with glue. The same is done with the black beam.
The blue piece is folded in half and rotated 180 degrees (you can put a napkin ball inside for volume). All that remains is to secure everything and cut off the excess length of the strands. They will look good on wreaths and bouquets (can be secured with toothpicks).
What bullfinch crafts can you make?
In fact, there are many options for making these wonderful birds, the main ones being the following:
Bullfinches made of threads
Here you can use multi-colored woolen threads of red, white (or gray), black colors of similar thickness. The Internet describes many ways to form a bullfinch from threads with your own hands, one of which is making it from pompoms or winding it on a cardboard base.
Main stages of work:
- on a cardboard frame 6-8 cm wide you need to wind first black, then red threads of approximately the same volume;
- on both sides along the edges it is necessary to cut the threads and remove them from the cardboard (you get parts of the body of the future bullfinch);
- tie with thread in the center;
- fold the black threads in half, tie both layers in the center again with thread (a tail is formed);
- the same volume of gray threads is separately wound onto the same cardboard, removed from the base and placed across the red threads;
- then you need to form the body of the bird from red and gray threads, following the master class on creating a bullfinch with your own hands, directing the red threads from below, and the gray ones along the top, to the tail;
- You can glue a seed (almond kernel, etc.) in place of the beak;
- instead of eyes, take beads or seed beads.
And when making from pompoms, it is better to take acrylic thread, which will fluff better after cutting the yarn wound on double cardboard rings. Red and black thread pompoms are sewn or glued together.
You can cut out a tail and wings from black paper, a beak-cone from yellow paper, and attach eyes from small blue (white) circles.
Forming a bird from thread and cardboard
A template for the future craft is prepared on plain paper using a compass, in the center of a large circle you need to cut out a smaller circle (to wrap the workpiece in a circle), the tail, beak, and paws are completed.
The blank is applied to thick cardboard, two such parts are cut out along the contour. One part needs to be painted black, and the second should be left the same, fold them and wrap red threads through the hole in the center of the chest of the product, gray and white threads on the top, i.e. the back of the bird.
Then you need to cut the threads by inserting scissors between the two templates, tie them up and remove the unpainted cardboard. All that remains is to carefully straighten the threads.
Creating a bird applique
You can make it as a postcard or an image on the wall, using cardboard as a base and small pieces of thread. The essence of the work is as follows:
- Draw the outline of the future bullfinch on a light cardboard (you can simply print the drawing and trace the resulting template with a pencil).
- Cut woolen threads of selected colors into small pieces (up to 5 mm in length) into different plates.
- Coat the design with PVA glue in parts and sprinkle with pieces of thread, pressing the napkin on top for better gluing, trying to apply the workpiece evenly and not go beyond the outline.
- The legs and beak can be completed with a black marker.
- The cute bullfinch craft is ready!
Use of rice grains in applications
In exactly the same way, you can paste over a bird stencil with grains of rice previously painted in different colors. Only first the grains must be thoroughly dried so that they can easily stick to the base.
- Ready-made crafts can be additionally decorated with a branch of rowan or viburnum or depicted as snow from cotton wool.
Simple paper applications
The simplest and fastest option, suitable for absolutely all children. The main thing is to find simple photo templates of a homemade bullfinch, print it out, cut out the necessary elements from colored paper, for example, and carefully glue these parts onto a plain cardboard base. All that remains is to enjoy the results of your labor!
Volumetric paper bullfinch
To work, you need double-sided black cardboard, some red paper and auxiliary tools (scissors, pencil and glue).
Next, you can use templates or simply cut out a black strip of cardboard, at one end of which cut small strips with rounded ends (the future tail). This strip will need to be rolled up, leaving the tail blank free.
And on the sides, glue the cut-out wings of the eyes on a white background, attach a beak, place a red oval chest in front, glue the paws made of black paper, and that’s it, charming bullfinches made of paper with your own hands are ready. All that remains is to place them on a branch or hang them from the loops.
Bullfinch made of paper using origami technique
Making very cute birds is not at all difficult if you strictly follow the bullfinch making pattern. And for this you only need colored paper (black and red) in A4 format and beads for the eyes, and scissors to help.
Both papers are folded together in the form of a triangle (the black one should be on top), the excess part is cut off. Then the triangle needs to be folded in half again and then strictly adhere to the pattern of the blanks.
- There are two main ways to obtain this craft, and the first is the easiest and is suitable for kids, and the second is more complex, but very beautiful, and can become a worthy interior decoration.
- To achieve even greater brightness, you can additionally color the layout obtained in this way with a marker or felt-tip pen, or add or add eyes.
Using the quilling technique
This is one of the unusual ways to make a bullfinch bird craft from paper with your own hands. With this method, it is possible to obtain various paintings from prepared rolls of colored paper.
- Take paper of the desired colors, cut it into strips and roll it into small round pieces (or you can find ready-made sets on sale).
- You will also need to first prepare a wooden or plastic frame and thick paper for the base of the work (remnants of wallpaper will also work), on which the details of the future painting will be attached.
All that remains is to distribute the multi-colored parts according to the template and glue them to the base, achieving a bullfinch.
Corrugated paper as a craft material
A beautiful bullfinch bird can be made from corrugated paper, pre-twisted into strands. To work, you need paper of three colors, glue and a piece of craft paper for the beak.
You will need 5-7 red and black strips of corrugated paper measuring 50x0.7 cm, and to form the breast, take blue paper in the form of a 15x3.5 cm rectangle. All strips are twisted into bundles like thick threads.
As a result, you need to make black blanks 16 cm long, and red ones need to be longer (25 cm each). The strands are collected into bundles and placed on top of each other in a cross, the red one is bent in half, wrapped with a tie and secured with glue. The same is done with the black beam.
The blue piece is folded in half and rotated 180 degrees (you can put a napkin ball inside for volume). All that remains is to secure everything and cut off the excess length of the strands. They will look good on wreaths and bouquets (can be secured with toothpicks).
Craft bullfinch from felt
To work, you will need pieces of felt in four colors, black threads (“iris” or “floss”), needles, scissors, padding polyester, a piece of ribbon (15 cm), glue and sequins for decoration.
First, a bird pattern is drawn on cardboard (body, breast, wings, feathers, eyes, eye pads, beak). Ready-made templates for felt bullfinch can be taken from the Internet.
Then you need to cut out these templates from felt, alternately applying the cardboard to the material: the chest is made of red felt, the body is made of black, the large wing is made of white, and the smaller one is made of blue felt, black eyes and a red beak, for example, white eye pads for contrast. The main thing is that all the parts will have to be cut out in two pieces.
The body parts will need to be sewn together. Then the inside is filled with padding polyester or cotton wool, a ribbon is inserted in a circle for hanging, and everything is sewn to completion.
The wings and breast are glued on top of the workpiece, then the rest of the parts. Or you can sew the wings and stuff them with stuffing to add volume.
Bullfinch made of cotton wool
The essence of the work here is to form the body of a bird from cotton wool and PVA glue, then drying and painting the resulting pigeon.
To begin with, glue is diluted with water in a ratio of 2:1 in any container. Take a piece of cotton wool about the size of your palm, from which you form the body itself, the head, rolling it into a ball and at the same time forming a tail by carefully pulling out part of the cotton wool (tied with thread).
Craft bullfinch from felt
To work, you will need pieces of felt in four colors, black threads (“iris” or “floss”), needles, scissors, padding polyester, a piece of ribbon (15 cm), glue and sequins for decoration.
First, a bird pattern is drawn on cardboard (body, breast, wings, feathers, eyes, eye pads, beak). Ready-made templates for felt bullfinch can be taken from the Internet.
Then you need to cut out these templates from felt, alternately applying the cardboard to the material: the chest is made of red felt, the body is made of black, the large wing is made of white, and the smaller one is made of blue felt, black eyes and a red beak, for example, white eye pads for contrast. The main thing is that all the parts will have to be cut out in two pieces.
The body parts will need to be sewn together. Then the inside is filled with padding polyester or cotton wool, a ribbon is inserted in a circle for hanging, and everything is sewn to completion.
The wings and breast are glued on top of the workpiece, then the rest of the parts. Or you can sew the wings and stuff them with stuffing to add volume.
How to make a bullfinch from wool thread with your own hands: master class with step-by-step photos
Once everything you need has been found and prepared, you can begin to work.
IMPORTANT! Please note that you can make the bird in any size that suits you best. But keep in mind that in order for the bullfinch to be larger, you will need a slightly larger number of threads. Calculate the proportions in advance so as not to make mistakes when buying yarn.
First of all, cut out a strip of cardboard, one side of which will be approximately 10. It is at this stage that you can determine the size of the future bird. The wider the cardboard strip, the larger the bullfinch will be.
You need to wrap yarn on cardboard. Please note that each color will have its own number of revolutions that need to be completed. This is due to the fact that the color distribution on the bird is naturally not uniform. The same will happen with the craft.
So, you will need to make 30 turns of gray thread, 50 of black and 60 of red. Wind the yarn carefully, laying the threads evenly.
Then we begin to form the beak. To do this, cut an apricot or almond seed in half and place it on a wire.
IMPORTANT ! Choose a wire of suitable length. If it turns out to be too short or, conversely, too long, the craft will turn out sloppy, ugly, and may fall apart within a few hours after completion of the work.
The next step is to cut the threads on one side. To make it clearer, let us explain that the resulting threads should be about 20 centimeters long. Then the black and red ones need to be put together, without mixing them up, and tied with black thread. Make as tight knots as possible to ensure the reliability of the toy.
After this, all the black threads need to be bent to one side and thus tied with a gray thread.
The next stage requires maximum accuracy and concentration. You need to insert a bunch of gray yarn into the existing red protruding “tail” of the workpiece. It is important that the threads do not get tangled or mixed with each other. This will significantly affect the appearance of the product.
Then bend the red threads first, tying a kind of tail, and then the gray ones in the same way.
The finishing touch will be the beak that has already been prepared in advance. Insert the wire into the threads. The bullfinch is ready! This craft will decorate your own apartment, or will be an excellent gift for both an adult and a child.
Bullfinch made of cotton wool
The essence of the work here is to form the body of a bird from cotton wool and PVA glue, then drying and painting the resulting pigeon.
To begin with, glue is diluted with water in a ratio of 2:1 in any container. Take a piece of cotton wool about the size of your palm, from which you form the body itself, the head, rolling it into a ball and at the same time forming a tail by carefully pulling out part of the cotton wool (tied with thread).
Then you need to dip the workpiece in glue from all sides, trying not to wet the cotton completely, helping yourself with a brush. The wings can be formed from wire and then covered with cotton wool mixed with glue.
The product must be dried in a suspended state so that it does not become deformed. Any defects or dents that appear are smeared and glued with pieces of cotton wool, not forgetting to coat the cotton wool with glue on top as well.
After complete drying, it is planned to paint the bird at your discretion with watercolors or gouache. The result was the cutest do-it-yourself bullfinch made from cotton wool with a fairly smooth surface.
Beautiful bullfinch made of beads
For this work, craftsmen advise stocking up on beads No. 10 in four colors, 5 g each (red, white, black and gray) and you will need two black beads No. 6 instead of eyes, as well as 0.2 mm wire of at least 50 cm in length and tools (nippers , pliers).
The technique of volumetric weaving is used here, video tutorials of which can be found on the Internet. Suitable for older children.
Repetition work
This method is suitable for those who are encountering this for the first time. Templates for crafting a bullfinch are quite easy to find on the Internet. Creating using this method is not at all difficult.
You are given several parts of the bird, which you must trace and subsequently connect together. Any material to suit your taste is suitable here. It could be felt, it could be colored cardboard, it could be velvet paper.
Show your imagination and accuracy. Of course, don't forget about the background. Add decorative elements so the birds don't arrive empty-handed.
Plasticine versions of bullfinches
It is considered one of the less labor-intensive ways to make interesting crafts, because plasticine is one of the favorite materials for children of any age category. Here you just need to preheat the material in your hands or in warm water so that it becomes sufficiently pliable.
A sheet of plain cardboard is taken instead of a background, and the future branch and the location of the bird are marked on it. It is advised to start by shaping the bullfinch’s red breast, and only then move on to black (it better masks flaws and shortcomings).
Only then the paws, beak and eyes are formed. This way the volume and naturalness of the product is better achieved. If desired, you can add berries, white snow, etc.
Having familiarized yourself with all the listed craft options, the question of how to make a bullfinch with your own hands is unlikely to remain open. True, you need to decide on the manufacturing technique in order to achieve the desired result, taking into account practice and age capabilities. And then, undoubtedly, the successes achieved will bring satisfaction and complete delight.
Origami bullfinch - simple patterns for children
Origami bullfinches are especially relevant in winter, during the New Year holidays. And not only because they are ideal for decorating a Christmas tree or interior. In Japan, it is customary to bring figurines of bullfinches into the house on New Year's Eve to attract good luck. In addition, winter birds are associated with the divine sage Tenjin - in Shintoism the patron saint of scientists, poets, schoolchildren and students. If you have difficulties with your studies or are “not good” at some subject, it is also worth making a figurine of a bullfinch to overcome difficulties. The effectiveness of the method has been proven by scientists, because practicing origami activates mental activity, thanks to which even the most complex problems are solved much faster and more efficiently.
Flying bird
Children will be especially interested in the origami bullfinch model made from bright wrapping paper. Since we are talking about the New Year holidays, to create an atmosphere of magic, it is not at all necessary to accurately copy the natural color of birds - it is better to stimulate the creative imagination. The flying bullfinch is made based on the model of the Japanese origami artist Fumiyaka Shingu.
We will need a square sheet measuring 15x15 cm. It is better to take paper with a New Year themed design.
Step-by-step instruction:
- Let's start from the inside out. Fold the square diagonally. We place the resulting triangle with its apex down.
- Rotate the workpiece 90°.
- Fold the left side to the right with an indent of approximately 2.5 cm.
- Open the top layer in the opposite direction, shifting it by 1 cm.
- Fold the figure in half horizontally.
- Bend over the top layer as shown in the photo.
- Repeat step 6 on the other side.
- We lower the beak using the reverse fold, forming a characteristic bird silhouette.
These are the New Year's origami bullfinches we make:
You can make a model from paper of a suitable color, with sides red and black:
Sitting bullfinch
In winter, flocks of bullfinches appear in cities, literally “storming” rowan branches. Birds are careful - at the slightest danger they immediately take off and fly away. It is this moment when the bullfinch has not yet risen into the air, but is already ready to rush away, that is reflected in the classic origami figurine. It is most often used for children's crafts, for example, New Year-themed applications.
For the model you will need paper painted red on one side and black on the other. You can glue two sheets of matching shades together and then fold them as one. In this case, for the origami bullfinch it is better to use silence, thin foil or craft.
Step-by-step instruction:
Let's start working on the black side. Fold the square diagonally. We bend the resulting triangle in half to mark the center line and open it. We raise the right and left corners to the top. Next we proceed, focusing on the given diagram of the origami bullfinch:
- Turn the figure with the open part towards you. We lift the lower ends and move them apart. Following them, we fold up the corner indicated by the arrow in only one layer, closest to us.
- Lower the top by about 1 cm.
- We open the “pocket” from the inside and make “mountain” and “valley” folds along the marked lines. Smooth out the sides.
- Move the right triangle to the left along the arrow.
- Fold the top layer along the dotted line.
- Bend the bottom corner. At the same time, fold the left side, aligning it with the protruding reverse side.
- We bring the corner on the left inside the figure. We extend the beak in the direction of the arrow and bend it slightly on the other side. We form a “tuft”.
- The figurine is ready.
By choosing paper with a pattern, we give our bird a Japanese flavor:
Video explanation for the diagram:
Modular origami
A bullfinch made of triangular modules is also an interesting craft. It’s better to start with a simple stylized model that is suitable for any small bird. To get a bullfinch, in the proposed version we replace the blue modules with black ones, and the white ones with red ones. In addition, we will need thin, preferably textured (designer) cardboard for the wings and doll moving eyes.
