New Year's gifts and handmade toys are a popular area of home creativity, because before the holidays you really want to prepare at least small memorable gifts for all your friends, colleagues and relatives. It is unlikely that you will be able to buy so many ready-made gifts - not every budget can support such expenses. But home creativity allows you to make many pleasant surprises with minimal financial investment.
Today, craft stores offer a wide selection of materials - you can buy sets of polymer clay, blanks for scrapbooking, Christmas tree decorations and cards, templates for embroidery or painting. However, you can make unusual toys for the New Year from scrap materials - to do this, it is enough to master the technique of testoplasty or bioceramics. This line of creativity is truly exciting and, what’s nice, requires virtually no additional financial costs.
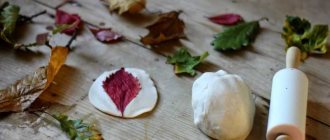
Salted dough is just a godsend for creative people! This material is suitable for a wide range of works, from appliqué to three-dimensional modeling.
These master classes are devoted to how to make a dog from salt dough. The article will discuss different options for crafts, so anyone can choose what they like best - and do it with their own hands.
The basis of a strong and durable craft is properly prepared dough.
Ingredients:
2 cups “Extra” salt; 2 cups wheat flour; 10 tbsp. spoons of sunflower oil; 0.5 cups of water. This is a classic recipe, but it can be varied. Macro can replace hand cream or pharmacy glycerin. You can add 2-4 tbsp to the mixture for viscosity. spoons of wallpaper glue.
After kneading, the dough must be wrapped in plastic (bag, cling film) and put in the refrigerator for an hour or two.
Please note: the dough prepared in this way is not intended for consumption! It is completely inedible and can harm the human body. If you are crafting with a child, you should explain this rule to him before starting work.
The resulting dough should:
- Do not stick to hands or work surface.
- Have a uniform consistency.
- Be tight.
- Strictly keep the form devoted to him.
In order for the dough to acquire the desired color, you can use vegetable juice instead of ordinary water (carrots are orange, beets are pink). Instant coffee gives the material a soft brown tint.
Please note: with this dyeing, the colors will not be bright, and after drying they will turn pale.
Any violation of the recipe or storage conditions of the finished material can lead to the following unpleasant consequences:
- As you work, the dough will stick to your hands, table, and tools. It’s simply not possible to fashion a neat figure out of it.
- After drying, the craft made from dough will begin to crumble and crumble.
- The product will not bake or will not be able to harden properly. It often happens that the top layer of salt dough forms a hard crust, without allowing air into the middle. Because of this, the craft will become vulnerable and break at the first fall.
Possible problems when making the dough
If you didn’t get the perfect dough or figure the first time, you will need to solve one of the possible problems:
- bubbles or cracks that appear after drying the figurine indicate that you dried it too quickly by setting the oven temperature to the wrong temperature. Dry the figures naturally or in a preheated oven, but with the doors slightly open. It is possible that your cabinet heats too intensely or unevenly;
- the paint on the figurine is cracked - most likely, you began to apply colors to the figurine, which did not have time to dry completely. Do not throw away the craft - let it dry in the air, and then remove the paint with fine sandpaper and paint it again;
- It’s impossible to make a massive figurine (for example, a panel) without cracks - the thickness of the dough prevents it from drying. Remember to turn the item over while it is drying in the oven or air;
- a piece of the figurine has broken off - do not rush to throw the craft in the trash. Glue the element using PVA, let it dry, go over the joint with sandpaper and varnish.
Preparing the dough
I will describe the process very briefly; most likely, most of you have an idea about it. Mix regular table salt and extra salt in equal proportions. We do not use iodized salts under any circumstances.
Now add flour, mix everything and start adding cold water. We introduce the liquid in parts, since it is extremely difficult to accurately predict the required amount. Approximately cold water will require ¼ of the total volume of bulk.
As a result, you should end up with a very tight and clogged dough, which is somewhat problematic to knead with your hands due to its density.
Tools and items for creativity
In the process of creating salt dough figures you will need:
- rolling pin or bottle of water (needed for rolling out the dough mass);
- board for sculpting figures;
- toothpicks (needed to make patterns and holes);
- brushes;
- black marker for drawing lines;
- gouache or acrylic paints;
- universal varnish;
- paper and pencil (to make figure templates);
- scissors;
- foam sponge (for painting a large surface);
- glue;
- strings (for hanging figures);
- buttons and beads (for making textured prints);
- cereals and pasta for making rustic-style panels.
Drying figurines
Proper drying provides strength to the product. You can use one of the following methods:
- drying in a warm oven
- the figures are placed on a baking sheet covered with parchment, and then in an oven at a temperature of 60-80 degrees. You need to keep the craft for 1-2 hours (it all depends on its size and thickness); - natural drying
- the figures are placed on a wooden or plastic board and kept in a warm place (without direct sunlight and not on a radiator!). The process is long (4-5 days), but ensures uniform drying, making the figurine strong; - drying with heating and cooling in the oven
- the figures should be placed in the oven on a baking sheet lined with parchment, and the oven should be heated (up to 150 degrees). When the set temperature is reached, the cabinet must be turned off and the figures left in it until they cool completely.
Flat dog
The salt dough flat dog can serve as a keychain, decoration, children's room pendant, wall decor, etc.
This master class will explain how to make a flat dog step by step:
- You can proceed in the same way as when creating a panel - use a sketch and film. But it’s more interesting to sculpt “on your own.”
- We break the image into its component parts.
- We tear off such pieces from the dough that are enough to create one part.
- We sculpt the base - the body. Based on its size, we build the general appearance of the product. The shape of the body must immediately be corrected with a knife or with your hands: tear off the excess, add what you need, smooth out the edges, add thickness, etc.
- We complement the body with other details.
- If you plan to hang this craft in the future, then holes for the thread must be made in advance.
- We dry using a combined method (in air, then in the oven).
- We paint if necessary.
Types of crafts
There are a lot of products of this type. They can be used to decorate your home or as a gift as they look very beautiful. Therefore, these crafts are often prepared for some holiday.
In addition to holiday products, you can sculpt from dough just like that. Entire compositions are obtained, so it is worth knowing what the individual elements look like.
New Year's options
Children will happily take part in creating New Year's decorations. These crafts include Christmas tree toys. The easiest option is to cut out New Year's themed figures, bake them in the oven and paint them. After this, a hole is made in them for the rope. But you can also dream up.
They make a lot of holes in the figurines or decorate them with beads and seed beads (in this case, they should be dried only naturally, without an oven).
Ribbons or sparkles are used as decoration (they are applied after drying to a layer of PVA glue). It is allowed to color the dry dough with markers.
You can make an impression of the child's palm on the test and decorate it beautifully. This toy will remain as a keepsake.
To make such products, you should use your imagination, then you will be able to create original jewelry.
Congratulations on March 8
They are often used as gifts for International Women's Day. The most commonly used types of crafts for this holiday:
- keychains in the form of flowers;
- candlesticks;
- medals;
- pendants, etc.
These items are painted in different colors and decorated with beads, sparkles and beads.
On February 14
The most popular on this day are heart-shaped accessories. From the dough you can make:
- hearts (simple or decorated);
- keychains in the shape of hearts with paws;
- couples of loving hearts;
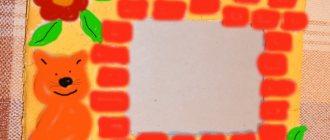
- Photo frame;
- Garlands.
You can decorate souvenirs for this holiday with sparkles, ribbons, and beads. You can also sculpt additional details - they are also suitable as decoration.
Flower shapes
You can sculpt flowers in different ways. Sometimes they are made flat by simply cutting them out of the dough using a cookie cutter. You can make embossed flowers - they take longer to sculpt, but look more attractive.
In this case, flower fragments are sculpted separately and then fastened together. To give the products a natural look, veins are drawn on them. The choice of technique depends on the design.
A flower is rarely considered as a separate product. Most often it is an element of the composition.
Dachshund dog
- Step 1. Take a sheet of cardboard and draw a stencil for the dog. Cut out the template, marking the location of the eyes, nose and mouth, so that you can later refer to the drawing when working with the dough.
- Step 2. Place the dough mass on parchment and roll it out with a rolling pin into a plate with a thickness of 2 to 3 millimeters.
- Step 3. Place the dachshund template on the plate and cut out the blank with a sharp knife. Cut carefully, trying not to tear the paper - then the piece of parchment with the workpiece will need to be transferred to a baking sheet. If you cut the mass on a board, it will be difficult for you to transfer the dachshund to a baking sheet without crumpling the product. As a last resort, use a wide spatula with thin edges and pry the pawl as you move. Scrunch the rest of the dough into a ball - later it will be useful to give the dog volume.
- Step 4. Pinch off a couple of pieces from the remaining dough. Form oval eyes, roll them well in your fingers and, checking the drawing, glue them onto the workpiece so that the dachshund has eyes. Before attaching the eyes to the muzzle, wet the area a little with water.
- Step 5. Wet your fingers in cool water and carefully go over the cut areas, smoothing their edges.
- Step 6. Pinch off small pieces from the lump of dough and form dachshund eyelids.
- Step 7. Using a toothpick, draw an ear, paws, and mouth for the dog.
- Step 8. Tear off a small lump from the dough and form a voluminous ear. Don't forget to moisten the gluing area with water. Glue a lump of dough onto the middle of the future ear and smooth it with wet fingers, stretching it to the edges.
- Step 9. Glue a piece of dough near the dog’s tail and stretch the mass to the sides, giving the back of the figure volume. Add volume to the dog's tail.
- Step 10. Using a toothpick, make strokes that imitate fur, drawing lines from the edges to the center of the product. If the test mixture has dried out by this time, slightly moisten the figure with water.
- Step 11. Dry the dog for several days in the air or in the oven using the methods given above.
- Step 12. Using black gouache, draw strokes that imitate the dog's fur and draw the main lines. Black paint should be used to highlight all the raised areas on the figure. Let the paint dry.
- Step 13. Take dark yellow or ocher paint. Apply it to a foam sponge. Blot all protruding parts of the figurine with the colored sponge. Let the paint dry.
- Step 15. Paint the eyes white and add black dots for the pupils. Write your wish on the figurine.
- Step 16: Cut a small piece of string or twine. Glue with adhesive sealant to the back of the dachshund.
- Step 17. Cover the product with a layer of thick or liquid glossy varnish. Leave to dry. The craft is ready!
Universal recipes
You can find a great variety of salt dough recipes. Each master adds his own additives to them, selecting the desired consistency. The main ingredients for kneading dough are salt, flour and water. Depending on its purpose, its thickness may vary:
- dense dough - for large parts and creating massive panels;
- universal dough of medium consistency - it is convenient to make small pictures and figures from it;
- soft dough - tender and pliable, it is suitable for small elements, exquisite flowers and figurines.
Some needlewomen measure ingredients in grams, others prefer to use proportions in parts.
Thick dough
To work you will need:
- wheat flour - 1 part;
- table salt - 1 part;
- water - 0.7 parts.
That is, to knead this type of dough you need to take one identical measure (glass, cup, tablespoon) of salt and flour and 0.7 of the same measure of water.
Combine the dry ingredients in a deep bowl and add cold water little by little. The dough should be homogeneous and very dense. There will be grains of salt in it - this is normal, don’t worry. Depending on the humidity and quality of the flour and salt, you may need a little more or less water. Therefore, you can’t pour it into the dough all at once.
Medium consistency dough (all-purpose)
To work you will need:
- wheat flour - 1 part;
- water - 1 part;
- table salt - ½ part;
- finely ground salt (extra) - ½ part.
By replacing half of the coarse salt with fine salt, this type of dough becomes more plastic and pliable. It is convenient even for a child to sculpt from such an obedient mass. But this dough is also not suitable for the smallest details and realistic crafts.
Soft dough
To work you will need:
- wheat flour - 1 part;
- hot water - 1/4 part;
- finely ground salt (extra) - 1 part;
- PVA glue - ¾ parts.
Combine salt and flour, then add thick PVA glue and mix. Add hot water little by little and knead into a soft dough. It needs to be wrapped in cling film, allowed to rest and cool. This dough is ideal for complex work. It holds its shape perfectly, preserving the prints and texture created on it. Its quality directly depends on the quality of the chosen glue.
Figures made from salt dough with glue are particularly durable.
They will delight their owner for many years.
- If you plan to color finished products, it is better to use wheat flour, although you can also use rye flour for salt dough.
- You cannot use iodized salt - the finished figures may crack when drying.
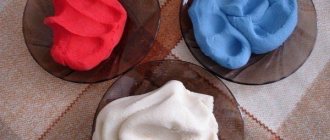
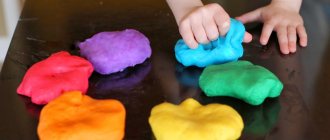
- The dough can be tinted while kneading. For this, food coloring or watercolors are used.
- The finished dough must be wrapped in cling film or a plastic bag to prevent it from drying out.
- A failed dough can be revived. If the dough is too liquid, you need to add a little more flour and knead again; if the dough is too tight, moisten it with water and knead, achieving the desired consistency.
- Do not add fat or hand cream to the dough from which you plan to paint the products - the paint will apply unevenly.
- The finished dough should be stored in the refrigerator for no more than 2 days. It loses its qualities and it will be inconvenient to work with it.
- It is best to sculpt volumetric products on wire or cardboard frames so that they do not fall apart.
- Crafts can be dried naturally, leaving them for a couple of days, baked in a warm oven, or left next to the radiator. It is strictly not recommended to place figurines on the battery itself to avoid cracking.
- It is best to paint crafts with acrylic paint or gouache. Watercolors should not be used: there is a risk of getting wet and ruining the product.
- The junction of the parts must be moistened with water using a brush. This way they will connect firmly and quickly.
- The finished souvenir can be coated with clear nail polish or acrylic varnish. This will protect it from moisture and the paint from fading.
Armed with new knowledge, try to put it into practice.
Volume doggie
- We tear off one piece of dough at a time and sculpt the body, head, paws, and tail one by one. We move from large parts to smaller ones.
- Lightly lubricate the seams between the parts of the craft with water so that the dog does not fall apart later.
- Now you need to let the salted dough dry thoroughly so that the figure is not afraid of falls and temperature changes.
- Let's paint.
Among handicraft lovers, salt dough has long been successfully used as a material for creating flat and three-dimensional sculptures. In general, modeling is traditionally loved by probably all children from a very early age, and many creatively oriented adults are not averse to working with plasticine. However, for a number of reasons, plasticine is not always suitable for children, and for children who can swallow it, it is generally undesirable, unless under the supervision of adults, which is not always possible. But salted dough is an excellent, affordable and practically harmless material. In addition, it has a number of features and is interesting to work with, so modeling from salt dough occupies a special place among popular hobbies.
Let's make salt dough
The tempting and indisputable advantage of this material is its accessibility: you prepare the dough yourself, in the right quantity, and all the few ingredients are available in almost any kitchen - in a pinch, you can run to the nearest grocery store, without having to spend any significant money.
Universal recipes
You can find a great variety of salt dough recipes. Each master adds his own additives to them, selecting the desired consistency. The main ingredients for kneading dough are salt, flour and water.
Depending on its purpose, its thickness may vary:
- dense dough - for large parts and creating massive panels;
- universal dough of medium consistency - it is convenient to make small pictures and figures from it;
- soft dough - tender and pliable, it is suitable for small elements, exquisite flowers and figurines.
Some needlewomen measure ingredients in grams, others prefer to use proportions in parts.
Thick dough
To work you will need:
- wheat flour - 1 part;
- table salt - 1 part;
- water - 0.7 parts.
Combine the dry ingredients in a deep bowl and add cold water little by little. The dough should be homogeneous and very dense. There will be grains of salt in it - this is normal, don’t worry. Depending on the humidity and quality of the flour and salt, you may need a little more or less water. Therefore, you can’t pour it into the dough all at once.
Medium consistency dough (all-purpose)
To work you will need:
- wheat flour - 1 part;
- water - 1 part;
- table salt - ½ part;
- finely ground salt (extra) - ½ part.
By replacing half of the coarse salt with fine salt, this type of dough becomes more plastic and pliable. It is convenient even for a child to sculpt from such an obedient mass. But this dough is also not suitable for the smallest details and realistic crafts.
Soft dough
To work you will need:
- wheat flour - 1 part;
- hot water - 1/4 part;
- finely ground salt (extra) - 1 part;
- PVA glue - ¾ parts.
Combine salt and flour, then add thick PVA glue and mix. Add hot water little by little and knead into a soft dough. It needs to be wrapped in cling film, allowed to rest and cool.
This dough is ideal for complex work. It holds its shape perfectly, preserving the prints and texture created on it. Its quality directly depends on the quality of the chosen glue.
Figures made from salt dough with glue are particularly durable.
They will delight their owner for many years.
Salt dough recipe for crafts
Mix 200 grams of table salt with 2 cups of wheat flour and 2 tablespoons of starch, add about ¾ cup of water and a tablespoon of sunflower oil. Knead all this well. Proper modeling dough does not crumble or stick to your hands, and takes and holds the shape given to it well. During the preparation of the dough, its structure can be adjusted by adding (small portions) water or flour, depending on whether the dough is too thick or runny.
Starch, by the way, is not a mandatory component - it is more needed to create three-dimensional relief figures, although many people add it constantly, regardless of what they are going to sculpt. Once the dough is prepared and forms well, place it in a plastic bag and place it in the refrigerator for a couple of hours.
Salted dough is just a godsend for creative people! This material is suitable for a wide range of works, from appliqué to three-dimensional modeling.
These master classes are devoted to how to make a dog from salt dough. The article will discuss different options for crafts, so anyone can choose what they like best - and do it with their own hands.
The basis of a strong and durable craft is properly prepared dough.
Ingredients:
- 2 cups “Extra” salt;
- 2 cups wheat flour;
- 10 tbsp. spoons of sunflower oil;
- 0.5 glasses of water.
This is a classic recipe, but it can be varied. Oil can be replaced by hand cream or pharmaceutical glycerin. You can add 2-4 tbsp to the mixture for viscosity. spoons of wallpaper glue.
After kneading, the dough must be wrapped in plastic (bag, cling film) and put in the refrigerator for an hour or two.
Please note: the dough prepared in this way is not intended for consumption! It is completely inedible and can harm the human body. If you are crafting with a child, you should explain this rule to him before starting work.
The resulting dough should:
- Do not stick to hands or work surface.
- Have a uniform consistency.
- Be tight.
- Strictly keep the form devoted to him.
In order for the dough to acquire the desired color, you can use vegetable juice instead of ordinary water (carrots are orange, beets are pink). Instant coffee gives the material a soft brown tint.
Please note: with this dyeing, the colors will not be bright, and after drying they will turn pale.
Any violation of the recipe or storage conditions of the finished material can lead to the following unpleasant consequences:
- As you work, the dough will stick to your hands, table, and tools. It’s simply not possible to fashion a neat figure out of it.
- After drying, the craft made from dough will begin to crumble and crumble.
- The product will not bake or will not be able to harden properly. It often happens that the top layer of salt dough forms a hard crust, without allowing air into the middle. Because of this, the craft will become vulnerable and break at the first fall.
Video: “Secrets of making a dog”
Greetings my beloved readers and blog guests!! Once upon a time in the distant past I worked as a teacher in a kindergarten, the work was very interesting, but poorly paid... But today we will not talk about that!! It’s just that anyone who has worked in this system knows that all the materials we use in creative work with children must be environmentally friendly or certified. Therefore, homemade tools come to the aid of purchased stationery. And the simplest means for development is salt dough.
Salt dough has been familiar since ancient times and is still popular in our time, because it is very easy to make, and it is a pleasure to sculpt from such a soft material. And what kind of crafts you get!! Just a sight for sore eyes!! I haven’t worked in the garden for a long time, but at home with my baby we often do modeling, and what was my surprise that not everyone knows how to prepare the dough and what can be obtained from it. That's why I decided to write an article on this topic.
And for variety, you and your kids can make New Year’s crafts from scrap materials and ideas.
First of all, we need to understand the manufacturing process of our safe material. In fact, there are not so many recipes, but I will introduce you to a method that has been proven over the years.
We will need:
- Medium-sized salt - 1 tbsp;
- Flour - 1 tbsp;
- Water -125 ml;
- Vegetable oil - 5 tablespoons.
Manufacturing process:
Take a deep container and mix salt and flour in it. Next, pour in a small amount of water and vegetable oil. Mix well and refrigerate for 2 hours. The play dough is ready. You can leave it this color, and after completing the work, paint it in the desired color. Or you can immediately add natural or synthetic dyes: choose gouache or vegetable juice (carrots, beets), you can also use cocoa.
Dog-panel
A master class on creating panels is not complicated:
First, we make a life-size sketch of the future painting. We draw in detail what we want to bring to life.
Please note: do not make panels larger than A3 format, because salt dough is a heavy material.
After drying, it may simply break under its own weight.
- We place the drawing in a file or cover it with a transparent thick film.
- Place the dough on top of the file according to the drawing in a layer of 0.5-0.7 cm. This way we create the exact silhouette of the dog.
- Next, you need to designate the relief. You can do this “by eye”, or you can use the copying method: place the drawing on top of the dough piece and easily press the contours of the product through the paper.
- At this stage we turn on spatial thinking. It is necessary to determine which parts of the dog are more voluminous. It's like painting a real picture. Eyes, teeth, tongue, edges of the ears, nose - all this rises above the general surface of the figure.
- To form the relief we use toothpicks and a knife. The latter are very convenient for adjusting the shape and removing excess pieces of dough without damaging the product.
Tip: how to make a dog more realistic? To do this, you need to smooth out the transitions between different parts of her body. But for a dog in a cartoon style, you can make all the details of the same thickness, as in a three-dimensional applique.
The following algorithm of actions is as follows:
- Dry the product. When creating a three-dimensional painting, it is better to first dry it in the open air and then bake it in the oven.
- Glue it to the plywood base with superglue. Frame if necessary.
- Paint it. It is better to use gouache or acrylic - these paints are brighter.
- Cover with varnish to prevent the paint from peeling off. This is especially true for gouache.
Flat dog
The salt dough flat dog can serve as a keychain, decoration, children's room pendant, wall decor, etc.
This master class will explain how to make a flat dog step by step:
- You can proceed in the same way as when creating a panel - use a sketch and film. But it’s more interesting to sculpt “on your own.”
- We break the image into its component parts.
- We tear off such pieces from the dough that are enough to create one part.
- We sculpt the base - the body. Based on its size, we build the general appearance of the product. The shape of the body must immediately be corrected with a knife or with your hands: tear off the excess, add what you need, smooth out the edges, add thickness, etc.
- We complement the body with other details.
- If you plan to hang this craft in the future, then holes for the thread must be made in advance.
- We dry using a combined method (in air, then in the oven).
- We paint if necessary.
The dog is the symbol of 2022,
and how we want this animal to bring us good luck. Dachshunds are by nature good-natured and cheerful animals, and in order to attract good luck, we will sculpt this particular breed. And even if such a souvenir does not bring good luck, it will definitely lift your spirits. Make it yourself using this master class, and you will succeed!
To sculpt a dog you will need:
- stacks, toothpicks, knife;
- paper;
- pencil, scissors;
- acrylic or gouache paints;
- brushes for painting;
- universal varnish;
- glue "Dragon";
- a small piece of rope.
For the test you will need:
- flour 2 tbsp;
- kitchen salt 2 tbsp;
- water 1 tbsp.
Master class on making animal crafts for children
And since most of us do little creative work, those who have children try to come up with interesting activities just for them, so that joint activities will be very exciting.
I suggest you, together with your daughters and sons, make this funny hedgehog, look for photo instructions further.
We will need:
- Salty dough;
- Scissors;
- Beads
- Paints.
Manufacturing process:
1. Make a drop-shaped piece from a piece of dough.
2. Make eyes and a nose from beads.
3. Now we will make needles, for this we take nail scissors and make small cuts, lifting them up a little.
4. We perform the next row in a checkerboard pattern and so on until the entire back is covered in needles.
5. Dry the finished toy in the oven. We color the hedgehog at will.
It’s also very easy to make a bird and decorate it with bean seeds; it’s not only easy, but also useful for developing children’s fine motor skills. Watch the video of how this craft is made:
https://youtube.com/watch?v=fN89PqGQxgU
Of course, there are a lot of options, and if you surf the Internet, you can find a whole storehouse of ideas, and your leisure time with your child is guaranteed. I share souvenirs that I personally liked:
Magic fish
Cows
Princess Frog
Mice
Snail
Blue elephant
DIY sculpting of a cheerful dachshund
First you need to prepare a stencil. You can draw a dog, or you can simply print it on a printer. Cut the drawing along the contour. For these purposes, it is advisable to use unnecessary cardboard, this will make it more convenient to cut the dough.
Take all the prepared dough and roll it into a layer 2-3 cm thick. Place a stencil on top and cut along the contour. Excess dough must be removed, crumpled into one lump and used to decorate the dog. You need to roll out the dough immediately on the surface where it will be baked: on a baking sheet, on parchment or foil. Otherwise, it will be impossible to transfer the finished work without deforming it.
From two identical small balls we form oblong dachshund eyes. Wet the base with water and apply the eyes. Also at this stage you need to moisten all sections of the figure with water and smooth them well with your fingers so that they become smooth.
Now we take 2 more identical pieces of dough, half the size of the eyes, and form eyelids. We also make small markings on the entire dachshund. Using a stack we outline the ear, body contours, paws, nose and mouth.
To make the dog look interesting, you need to compact some places and make them voluminous. Roll a piece of dough into an oval and place it in the middle of the ear. We dip our fingers in water and begin to smooth the oval so that the joints are not visible.
We also make the dachshund's protruding backside and tail.
Now you need to use a stack or a knife to make a relief around the perimeter of the figure. If the dough is dry, you can soak it a little with water and make light oblong dents from the edges to the center.
The modeling is finished and now you need to dry the work naturally in the air or in the oven over low heat.
