Flowers in the house can not only become part of the interior, they can enliven almost any room and change it beyond recognition. For these reasons, and also because of the love of living plants, many homes have real gardens. But it’s one thing when flowers sit in completely different pots that are not in harmony with each other and the surrounding environment, and quite another when they fit perfectly into the interior. There are pots of various sizes and colors on sale in stores, but sometimes you can’t find “the right” option. And in this case, the easiest way is to make flower pots with your own hands.
A DIY flower pot will become a true home decoration
DIY flower pots
Features of the pots
A flower pot and a regular flower pot are somewhat different from each other. Typically, a flowerpot is understood as a flowerpot that has a non-standard design. It can be used alone or as a beautiful shell for a pot.
There are no drainage holes in the flowerpot, so it can serve as a decoration not only for the garden or home window sills, but also become a decorative element for bedside tables, shelves, furniture walls, or hang from the ceiling, becoming the highlight of the interior.
Tools and materials
To work you will need:
- Any plastic or glass jar that is suitable in size.
- T-shirts from which you need to weave a thread.
- Scissors.
- Hot glue gun.
Step-by-step instruction
The most difficult thing when making a flower pot with your own hands is learning how to make a patchwork thread, but once you understand the principle of weaving, you can easily cope with this task. A thread made from scraps is suitable not only for decoration, but also for creating a rug with your own hands. Let's get started:
- We cut unnecessary T-shirts into strips about 2 cm wide. We tie two shreds together.
- Place the strips in your left hand. We rotate the top strip away from ourselves, and then wind it onto the bottom strip, but twisting it towards ourselves.
- When the shreds are twisted, put a new strip inside the old one and wrap it in the same way.
- Over time, weaving from scraps will turn into a pleasant, meditative activity.
- Drill drainage holes in a plastic container. After that, we start decorating. Glue the end of the thread to the top edge and begin to wind it around the can.
- We secure the thread with glue at equal intervals. Continue until the entire container is covered.
- Now you can plant plants in the finished flower pot. Instead of thread, you can use any rope.
The photo shows flower pots in eco-style, decorated with jute rope and paints.
Types of flower pots
With the help of flower pots you can add greenery to any room and create an amazing corridor.
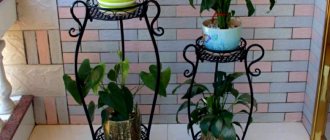
Large flowerpots make beautiful floor decorations for the garden or large rooms.
Smaller pots will take up space on shelves and bedside tables.
The smallest plant houses can be placed on walls or hung from the ceiling, freeing up surfaces and accommodating a large number of plants indoors.
Hanging planters help create cozy green walls, quickly replace plants as they fade, and provide the most comfortable conditions for green pets. Plants hanging from them will help cover up wall imperfections.
Types of weaving baskets from paper tubes
There are many types of weaving. Here are some of them.
- Spiral weaving. The tubes are extended and threaded through the base or racks like one endless vine.
- Layer weaving. Two tubes go around the posts, so that one remains in front of it and the other behind it. At the next stand they change.
- Rope technique. The strips intertwine with the posts and with each other.
Weaving starts from the bottom. It can be a wicker bottom, or you can use cardboard.
- Cut out 2 circles or ovals from cardboard of the required size.
- On one of them, at the same distance, tubes are glued, which will be racks.
- The distance between the posts should be no more than 2-3 cm for strength.
- The second circle (oval) is glued on top, thus covering the places where the posts are glued.
- The stand tubes are bent upward. You can use a saucepan or bucket, which will serve as a mold for the future product.
- We fix the tip of the tube with glue at the base of the stand, and begin weaving, increasing the tubes. Racks are increased as needed.
- At the end of the work, the ends of the tubes of the stand are greased with glue and bent inside the basket.
Plastic buckets
Instead of a bottle, you can take a mayonnaise or ice cream bucket. You won’t have to cut it and sand the top edge, which will significantly speed up the production of an elegant pot. Yes, and there is already a handle for hanging.
Note!
Macrame: diagrams, interesting projects and detailed descriptions of making crafts
- Crochet amigurumi - examples of how to make a beautiful toy with your own hands (75 photos)
- Coffee topiary: step-by-step master class on how to make a small decorative tree from coffee beans
New Year's crafts
For the New Year, you can make an original craft from paper tubes: Christmas tree decorations in the shape of a Christmas tree.
- Corrugated cardboard is used. Christmas tree-shaped blanks are cut out of cardboard.
- Paper tubes are glued onto them horizontally, vertically, or diagonally (as desired).
- All irregularities are trimmed off. It is worth involving children in the making of these crafts. The finished Christmas tree is painted with acrylic (safe) paint.
- Green, gold, silver or any desired by the master.
- And the most enjoyable part of the job: decorate the Christmas tree (by gluing with hot silicone) bows, beads, ribbons, tinsel, and everything that comes to mind.
- Don't forget the loop and you can decorate the tree.
Weaving from paper tubes or paper vines is painstaking and slow work. But creating useful and beautiful crafts with your own hands makes you feel like a master artist.
Unusual flower pots from a bottle
Instructions on how to make a beautiful flowerpot from plastic bottles can be very varied. But one is the most popular. To implement it, the bottle will have to be cut, as in the first option. You just need to use the top along with the cork.
The workpiece is turned over from top to bottom and glued to a strong stand. All that remains is to coat the future flowerpot with paint and place a pot of flowers inside.
For a garden plot, pots made from bottles in the shape of funny pigs, bright bumblebees, unusual cats and dogs are more suitable.
How to choose an idea
Even a simple pot will sparkle with new colors if you decorate it with improvised means. It can be:
- shells brought from a summer vacation;
- gift paper;
- yarn;
- scraps of fabric;
- twine, etc.
When choosing a material, you should focus on the style of the interior. The updated flowerpot should fit harmoniously into it. One of the popular themes is marine. This involves the use of pebbles, colored sand, and shells.
Natural motifs are a win-win option. Here is the largest selection of materials. For the base they use: herbarium, twigs, dried herbs, cones, jute, etc.
To maintain modern interior styles, mosaics, painted eggshells, and animal prints are more suitable.
These are just some of the ideas on how to decorate a pot with your own hands. There is an opportunity to turn your own ideas into reality with a non-standard approach. In this case, the value of the decor will only increase.
Cement plant pots
A unique device for placing pots can be created from cement and a large rag (a piece of tablecloth or towel).
A master class on making flowerpots will show the ease of making such a decoration, and photographs will demonstrate the variety of shapes.
To create an unusual object, you will have to stock up on cement, a container for stirring it, a bucket or any other object that will become the basis for giving shape.
Cement is diluted in a basin and the selected fabric is immersed there for 5-7 minutes, ensuring that the entire surface is hidden in the composition. After the rag is completely saturated, it is taken out and hung on an inverted bucket. You can make the product asymmetrical or add fluffy folds. It all depends on the desire of the creator.
After the cement has completely dried, the bucket is carefully removed, and an unusual vase for a flower pot appears. It can be painted or left in its original form.
Making pots ourselves: options and master classes
Of course, fantasy is fantasy, but without the proper skills and understanding of the process of creating hand-made things, it will not be possible to immediately understand how to make this or that option. Based on the examples below, you can come up with your own pot and bring it to life.
Let's look at the best options for making flower pots
Clay pot
Clay is truly the best option for creating a pot, but to make such a container with your own hands, you will have to master the skills of sculpting from this material. As a rule, to create clay pots you need a potter's wheel and the clay itself . Although you can try to make such a container for a plant using only your hands.
The clay needs to be kneaded well, and then, separating a small piece from it, make a flat cake, getting the bottom for the pot. Carefully make drainage holes in the cake if the container will be used not as a flowerpot, but as a pot. And then you need to make small ropes about 0.5-1 cm thick and a length equal to the diameter of the bottom of the pot with a gradual increase. The first bundle is laid out around the circumference of the future bottom, the second is placed on it, and so on. Once you have a container of the required height, all that remains is to burn it in the oven, and the pot is ready.
Making a clay pot
Cement pot
This option also involves some kind of modeling, but in a slightly different style. A cement pot will have a good level of strength and is quite easy to make.
Step 1. To make a pot from cement, you need to take old curtains (tulle and curtains), and also prepare cement and a blank for the shape of the pot. This could be, for example, an old plastic bucket or another item.
For work you will need old curtains
Step 2. Next, you need to prepare a cement mixture from the cement itself mixed with water. The consistency should be quite liquid.
Preparation of cement mixture
Step 3. Then you need to soak the tulle in this “cement water”, thoroughly saturating it with the solution.
The tulle is soaked in the resulting solution
Step 4. Now you need to take a form for a pot (for example, a bucket), turn it upside down and throw tulle soaked in cement over it. You also need to form beautiful folds of tulle, giving them the same shape on all sides.
The tulle soaked in the solution is draped over the form.
Step 5. The corners of the hanging tulle need to be thrown over the edges of the form.
Overhanging corners are thrown over the edges of the form
Step 6. The inverted container should be tied from the bottom (or from the top relative to the current position of the container) with a piece of braid.
The container is tied with a piece of braid
Step 7. Now you need to coat all the folds and the bottom with the cement mixture, adding a strengthening compound. Can be applied with a gloved hand. After this, the future flowerpot should be left alone for 24 hours to dry.
The cement mixture will dry in 24 hours
Step 8. The dried pots need to be painted with the desired color of paint.
Painting pots after drying
Step 9. After the work is completed and the paint has dried, the flowerpot can be used for its intended purpose.
Ready-made cement pots
Making a simple and elegant flowerpot
Interestingly, a flowerpot may not always be a container. Sometimes it may just be a stand for a regular pot. Let's see how to make the simplest but most original option.
Step 1. You need to make several slats from a wooden block. In this case - 4 8 cm long, 4 9.4 cm long, 4 12.5 cm long, 4 9 cm long.
Reiki that will be required for work
Step 2. Now you need to glue square blanks from slats 8 and 9.4 cm long, using 2 pieces of each.
Example of a square blank
Step 3. Next, you need to glue “legs” to the squares, 2 pieces each. on each side (slats 9 and 12.5 cm - for pots of different heights). One pot should have legs of the same length.
Legs are glued
Step 4. Now you need to glue the second square to the legs. You should end up with a design like the one below.
A second square is glued to the legs
Step 5. After the glue has dried well, the flowerpots can be used for their intended purpose by placing pots in them.
The finished pot looks good
DIY pot decoration
You can decorate a simple and boring flower pot, giving it a completely different look than it had before. To do this you will need tape, twine, newspaper and acrylic paints with varnish.
Step 1. You need to step back about 2 cm from the bottom edge of the pot and wrap the pot with tape. The most important thing is that the adhesive tape fits very tightly at the top.
The pot is wrapped in tape
Step 2. Next, you need to place the pot on a newspaper and start painting its upper part with a brush, up to the tape. The paint is applied in two layers, but the first must dry before applying the second.
Painting the top of the pot
Step 3. When the paint dries a little (and this is about 30 minutes), the tape needs to be peeled off.
The tape comes off
Step 4. Now you need to paint the bottom of the pot with a different color of paint. You don’t have to use tape here, but you need to act carefully so as not to stain the top color.
Painting the bottom of the pot
Step 5. The saucer for the pot needs to be painted the same color as the lower part.
Painting a saucer for a pot
Step 6. After the paint has dried, you need to varnish the pot.
The pot is varnished
Step 7. You need to apply a thick layer of varnish to the area where the two colors meet, and then, until the varnish has dried, you need to wrap this area with twine and tie it with a bow. After this, the pot must be left to dry completely.
A thick layer of varnish is applied to the junction of the flowers. The joint must be wrapped with twine.
Step 8. Now you can put the plants in the pots.
This is what the finished pots will look like
Pots with dough elements
An interesting and original flowerpot can be made by decorating the pot with elements made from dough.
Step 1. First you need to prepare everything you need. This is the flower pot itself, a form for cutting out elements from dough, Moment glue, a toothpick, acrylic paints and a primer mixture. Then you need to knead the dough using 1 cup of regular flour, 5 tablespoons of vegetable oil, a full glass of salt (necessarily fine), a glass of water. The dough must be kneaded until elastic. Can be stored in the refrigerator.
Dough kneading steps
Step 2. Now you need to roll out the dough and cut out decorative elements from it using a mold. They need to be put in the oven to dry. And then both the elements and the pot need to be covered with soil.
Decorative elements made from dough
Step 3. Next, using glue, all the elements need to be glued to the pot in accordance with the selected pattern. When the glue dries, the pot needs to be painted.
Decorative elements are glued to the pot
Step 4. All that remains is to coat the painted pot with varnish, dry it, and the pot is ready.
Painting and decorating the pot
These pots look truly attractive
Pots with a unique psychedelic design
Marbling is also a great way to create a unique psychedelic design.
Pot decor with ceramic shards
Beautiful ceramic shards can also be used
How to Decorate a Flower Pot Using Twine and a Few Buttons
Stages of decorating a pot with twine and buttons
Pot decor with chalk paint
Even a simple pattern (and this is ideal for those who do not know how to draw) can transform an ordinary pot
Decoration with simple geometric patterns
Simple geometric patterns look no less stylish, especially when they are done in black and white.
Painting pots with slate paint
How to paint flower pots with chalkboard paint
Pots covered with fabric
Fabric covered pots look incredibly cozy
Video - Decorating a pot with magazines
Wooden flower pots
A unique home or garden flower bed can be made from an ordinary wooden box. You can ask for it at a fruit store, or make it from leftover boards.
The finished product is sanded and painted, and small pots of flowers are placed inside.
You will get an even more original flowerpot if you fasten ropes around the edges of the box. Such a structure can be hung on a tree or a special bracket on the wall, or fixed on the ceiling.
An unusual flowerpot would be a stump or a thick piece of wood. To create such a unique product, you will have to hollow out the middle, place a pot of flowers there or fill it with soil and plant a small plant.
You can braid an ordinary pot with light soft branches, turning it into a unique basket. And ice cream sticks will decorate a fairly large pot. Instead of sticks, you can use colored pencils; they don’t even have to be adjusted to the same size. The asymmetry of the craft gives it additional charm.
Large wooden blocks will be used to make a beautiful lattice planter. Nails or screws will help connect individual elements, and bright colors will complement the decoration of an ordinary pot.
Decorating a pot for a gift
A neat indoor flower is a great gift idea. An ordinary bouquet will last only a few days, but a houseplant will delight the eye for much longer. Ingenuity and available tools will help give the gift a festive look.
Option 1: Corrugated paper
A sheet of paper is cut to the size of the pot. A flowerpot is placed in the center. Next, with both hands, the package is collected into a bundle or folds of the correct shape are formed. To fix it, use a satin ribbon or jute. It is appropriate to attach a small card with a short wish and congratulatory words to the string.
Option 2: scrapbooking paper
Such packaging emphasizes not the beautiful pots, but the plant itself. A small note combined with jute completes the overall decor style.
Option 3: Kraft paper
Popular packaging material is ideal for disguising the pot. It is available in different colors, textures and sizes. Combines harmoniously with jute, satin ribbon, colorful cards.
You can also decorate home pots with paper. It is highly durable and inexpensive.
Fabric plant pots
Burlap, felt, and felt can also become an exquisite decoration for a flower pot. To do this, you will need to cut out suitable blanks and sew them together.
Sometimes such pots are left without a bottom, so the fabric will retain its attractive appearance longer.
Requirements for homemade pots
The most important requirement for homemade interior items is strength. The walls and bottom of the flower container must withstand the load of soil, expanded clay or other type of drainage.
There are a number of requirements for hand-made products:
- It is necessary to make several drainage holes in the bottom to drain irrigation moisture.
- Special strength requirements are imposed on hanging models - flowerpots.
- The volume for planting ornamental crops is calculated in such a way that the roots of the plant can develop freely, grow in depth and to the sides.
- The materials used for independent work must not contain toxic impurities. Similar requirements apply to compositions for decoration.
- When working, you should use those materials and forms (for example, for pouring concrete, gypsum), on the walls of which there are no signs of pests or mold. Colonies of pathogenic fungi that remain undetected can cause the death of an ornamental crop.
Sufficient attention is paid to external decor. This can be painting, pasting with various materials, beautiful modeling using plaster, dough, cold porcelain.
Unusual flowerpots
Old unnecessary things can also play the role of a unique home for plants. Most often they become old buckets, pots or basins, but unnecessary teapots or graters will look no less interesting.
Such crafts can even be placed on the kitchen table; they will not take up much space, but will add summer charm and natural beauty to your home dining room.
Flower pots made from an old suitcase or an unnecessary bedside table will look beautiful and unusual. They just have to be additionally protected from moisture.
For a small room, you can make a flowerpot from a thick book or a stack of unnecessary magazines.
Original flower pots can be made from any material, the main thing is to come up with a placement and beautifully design the future craft. Photos of non-standard flowerpots are intended to help in choosing.
Preparing paper vine
The work is not difficult, but labor-intensive. First of all, you need to prepare the starting material: paper tubes. You can use newspapers, magazines, old notebooks. The most convenient paper is newsprint.
- You will need a knitting needle and PVA glue.
- The paper is cut into pieces.
- The size depends on the size of the product you decide to make.
- It should be a rectangle with an aspect ratio of 1:4 or 1:5.
- The thinner the paper, the larger the sheet can be. The size is convenient for work: 5(10)-25(35) cm.
- Place the knitting needle on the corner of the paper strip at an angle of 45 degrees and twist the knitting needle into the paper.
- Glue the edge of the twisted tube and remove the knitting needle. Leave the glued tubes to dry.
- The finished tubes are obtained with one narrower tip and one wider one.
- We use this difference if it is necessary to increase the length: we lubricate the wider end with glue and insert the narrow one.
It is important to let the glued parts dry.
- For some products, flat tubes are used. To do this, apply pressure with a ruler or pencil along the prepared and dried tubes, “ironing them out.”
- You can paint the tubes before starting work, or you can make a craft and then paint it.
- After painting, the paper becomes waterproof and more durable.
- For painting, you can use acrylic paint, and if this product is intended for the garden, you can use paint or enamel used for painting wooden products.
- It is more difficult to work with, but it forms a film that protects the paper from water.
