Usually an electroscope is made of two strips of gold foil in a glass container, rarely available and usually not available to ordinary students. In this article I will tell you how to make an electroscope at home from scrap materials. An electroscope is an instrument that allows you to detect electrical charge, it is easy and simple to use.
General information about the device
In everyday life, you can often encounter such a phenomenon as electrification. It arises as a result of certain actions with two dissimilar objects. This can be friction, pressing, winding, splitting. As a result of such actions, from a physical point of view, there is a violation of intra-atomic equality due to the redistribution of negatively charged particles - electrons.
Electrostatics is the study of the distribution of electric charges. It is believed that Thales of Miletus was the first to discover the ability of substances to interact with each other after friction. He found out that if you rub wool on amber, the latter begins to attract various small bodies, for example, pieces of paper, dust particles. At that time, the Greek philosopher could not explain the nature of the phenomenon.
In 1600, William Gilbert began studying this phenomenon and introduced the concept of “electricity.” And 63 years later, Otto von Guericke created a device with which he discovered that bodies can not only attract, but also repel. Further experiments confirmed his experiment. So, in 1733 Dufay divided electricity into two types:
- glass;
- resin
A device that allows not only to observe the interaction of elementary particles, but also to evaluate their significance, was designed by the French engineer Charles Coulomb. His meter, assembled in 1784, was quite sensitive and was called the “torsion balance.” The design of the device consisted of an insulated rod suspended on an elastic thread in a transparent closed container. A scale was marked along the diameter of the flask, and the thread was attached to the sphere. By bringing various electrified objects to the ball, the engineer determined by what amount the rod was deflected.
Coulomb's scales were subsequently improved. Instead, today they use precision electronic devices with logic chips. But before their invention, devices such as the electroscope and electrometer appeared. These are fairly simple devices, most often used in educational institutions to explain the interaction of charges.
Charging the electroscope
The presence of electrical charging of the device is required to determine the nature of the impulse of the object under study, where the equipment is brought. If the charge of the electrometer is not first known, then it will not be possible to determine whether the load on the body is the same or opposite.
Before the equipment can be charged, it must be in a neutral state—with the same number of electrons and protons inside. Therefore, before charging, it is necessary to place the device on the floor and connect the electrometer to ground, this way you can ensure neutrality of the device’s load. Equipment can be discharged by touching it with a metal object.
There are several ways to charge the device before testing:
History of creation
The first report on the invention of the electroscope was written by the physicist and doctor William Gilbert, who worked in Great Britain during the reign of Elizabeth the First. This scientist is also the “father” of electromagnetism due to his major contributions to science in the 17th century. He created the first device in 1601 to deepen experiments with electricity.
The first device, called a versorium, was a structure in which a metal needle rotated freely on a special pedestal.
The configuration of this device was very similar to a regular compass, but it did not have a magnetized needle. Its ends were visually different from each other. In addition, one end had a negative charge, and the other had a positive charge.
The operating principle was based on impulses that arose at the ends due to electromagnetic induction. That is, taking into account which side of the needle was located as close as possible to the object, the reaction of the end was to be repelled or attracted to the object.
At the beginning of 1783, the famous Italian physicist Alessandro Volta created a condensation electrometer with increased sensitivity for determining electric charges.
But the greatest successes were achieved by the astronomer and mathematician from Germany Johann Gottlieb, who invented the gold leaf device. The design of this device resembles the design that is used today. The equipment had a glass bell with a steel sphere on top. In this case, the latter was connected by a conductor to two thin gold sheets. The plates were connected or diverged taking into account the approach of an electrically charged object.
General information and brief operating principle
What is an electroscope and why is it needed? This device is capable of detecting existing electrical charge. This simple device can determine its presence, even if the charge is very weak. How to make an electroscope at home so that it is not inferior in quality to factory types?
In order to create a quality item, you need to understand how it works. The basic principle of operation of the device is that similarly charged bodies will mutually repel each other. This is a fairly simple and well-known law among people working in this field. Since the device will be homemade, either pieces of foil or crepe paper will be used as bodies. How to make an electroscope at home from foil and a few other elements?
DIY making
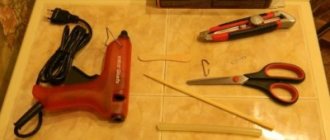
Making your own simple electroscope is quite simple. The required parts are easy to purchase and assembly is very quick.
Necessary materials:
First you need to cut a copper wire about 25 cm long. One end of it is bent in the shape of a spiral. It will play the role of a sphere of electrical charge receiver. This step is important because the helix facilitates the transfer of electrons from the object being studied to the electrometer due to its large area. Make a hole in the cork and thread the wire through. Make an L-shaped bend at the bottom.
Cut two foil plates into a triangle approximately 4 cm long. The main thing is that these slats are the same. Make sure they are large enough so that they do not touch the inside of the jar. The plates are attached to the wire through two previously made holes in the foil.
You need to try to make the sliding of the slats as smooth as possible. Close the jar carefully with the stopper so that the triangles are not damaged and do not spoil the assembly.
Both plates must be in contact with each other when sealing the container. If there is no connection, then you need to change the bend of the wire until the lamellas touch each other.
How to make an electroscope
For a home electroscope you will need a wire or nail, foil, or any transparent glass vessel. It is best to take a jar with a lid.
Sequencing:
- It is necessary to make a hole in the lid into which a nail or wire will fit. To do this, you can use a sharp knitting needle, an awl or a thin drill.
- The lower part of the wire or nail must be bent into the shape of a hook and inserted into the hole in the lid.
- A strip of papyrus paper or foil is placed on the hook of the nail or wire.
- To make the electroscope more sensitive to the smallest charges, you need to twist the free end of a nail or wire into a snail or make a ball of foil.
- Afterwards the jar is screwed on with a lid. The electroscope is ready for use.
To check the functionality of the electroscope, you need to bring a charged object to the open end of the device. For example, it could be an electrified comb. At the same time, the petals of the foil in the jar should rise. You can hang the work by touching your finger; the pieces of foil should also be repelled, as an electric charge flows through the body.
What is this for??
Electroscopes are used to determine whether a body is electrically charged and to distinguish whether it has a negative charge or a positive charge. Currently, electroscopes are used in the experimental field to clearly demonstrate with their help the detection of electrostatic charges in electrically charged bodies.
Read also: Why do you need reinforcement mesh?
Some of the most important functions of electroscopes are as follows:
— Detection of electrical charges in nearby objects. If the electroscope reacts to the approach of a body, it is because the latter is electrically charged.
— Distinguishing the type of electric charge possessed by electrically charged bodies by judging the opening or closing of the metal plates of the electroscope depending on the initial electric charge of the electroscope.
- The electroscope is also used to measure environmental radiation in case of presence of radioactive material due to the same principle of electrostatic induction.
- This device can also be used to measure the amount of ions present in the air by estimating the rate of charge and discharge of the electroscope in a controlled electric field.
Today, electroscopes are widely used in laboratory settings in schools and universities to demonstrate to students at various educational levels the use of this device as an electrostatic charge detector.
Principle of operation
An electrometer is an instrument that is used to detect static electricity around objects, using the bonding effect of internal thin metal sheets due to electrostatic attraction. A static field appears on the outside of an object due to friction or load occurring.
The device is intended to determine the presence of a type of charge by transferring electrons from highly charged areas to discharged surfaces. In addition, taking into account the reaction of the plates, this makes it possible to determine the magnitude of the electrical impulse of the object. The sphere, which is located on top of the device, is the charge receiver of the subject of study.
When an electrostatically charged object approaches closer to the device, it will receive the same electrical charge from the object. That is, if you approach an object that is positively charged, the same charge will be transferred to the device.
If the electrometer already had a known electrical impulse, the following may be seen:
The metal sheets in the device must be light in weight so that their mass can balance the effects of electrical rejection forces. So, if you move the subject of study away from the device, the polarization in the plates decreases and they become in a natural position (“closed”).
Operating principle of an electroscope
At home, you can repeat the simplest version of an electroscope, which was previously very popular. It consisted of two gold foil strips suspended from a metal rod in a glass flask.
There was a ball on a metal rod to which various objects were brought. If the object was charged, then the gold leaves diverged. For example, negatively charged particles moved from an object to a metal rod, and then along it they reached sheets of foil. Thanks to the lightness of the latter, they easily responded to minor charges.
If you give the electroscope a charge and then touch the rod with an uncharged metal ball, the leaves will be drawn towards each other. This occurs due to the fact that part of the charge is removed by an external object. If you take a ball of even larger diameter, the leaf will be attracted even more strongly.