Recommendations for making flowers from cotton pads.
Most people don’t even think about the fact that such a personal hygiene item as a cotton pad can be an excellent material for needlework. With this seemingly simple thing, you can effortlessly make crafts that will become an original interior decoration or a gift for family and friends.
The best part is that in this case the person will not be required to have any special skills; the main thing is to show a little diligence and patience. And if, in addition to all this, you turn on your imagination, then in the shortest possible time you will be able to admire the most realistic flower bouquets made from cotton pads.
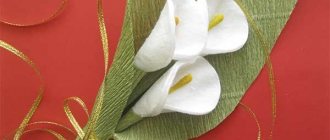
Callas from cotton pads: master class
Callas from cotton pads
Master class on making flowers
I would like to say right away that, although in the master class posted a little higher, it is recommended to put a ready-made calla lily bud on a cocktail tube, if you wish, you don’t have to do this.
If in the future you plan to use them to create an applique, you can paint the ear stick green with paints or paste it with plasticine.
Recommendations for making calla lilies from cotton pads:
- Prepare cotton pads, ear sticks, glue, scissors and a yellow marker
- First of all, we begin to make the stamens of our future flowers
- To do this, take and paint as carefully as possible one side of the ear stick with a marker.
- Next, take one cotton pad and place the pre-made stamen on it (it should lie exactly in the center)
- Lubricate the lower part of the cotton pad with glue and glue the bud, trying to give it a characteristic shape
- We wait until the glue dries and place a cocktail tube on the protruding part of the stamen
Yes, and remember, if, after connecting the opposite parts of the cotton pad, you were unable to immediately give the bud the desired shape, then wait until the glue dries, and then turn the workpiece inside out. This will help make the top of the flower a little rounder.
Wire flowers
There are different technologies for creating flowers from wire with your own hands.
Flowers made of wire and nylon
For example, you can make nylon flowers from unnecessary nylon tights and wire.
The technique for making nylon flowers is not at all complicated, but you can create real floral masterpieces. For example, a phalaenopsis orchid, which cannot be immediately distinguished from a real one!) A wonderful decorative element for both home and office!
MASTER CLASS ON THE TOPIC DIY nylon flowers or giving a second life to nylon tights
Flowers made of wire and nail polish
Another handy means of creating wire flowers is regular nail polish.
A flower frame is made from wire, then nail polish of the desired color is selected.
It is better to use fresh varnish with a thinner consistency so that it flows from the brush.
The varnish is applied to the edges of the petals formed from wire. After the varnish has dried for the first time, you can apply additional layers of the same color or, for example, cover it with glitter varnish on top.
To prevent the polish from dripping onto one side of the flower, secure the stem vertically in a scouring pad.
Olga Lazarchuk reveals in her master class the features of making flowers in this way:
A light floral arrangement with a four-leaf clover and a ladybug is sure to bring good luck!
If you don’t have time to care for ordinary flowers, then your windowsill can be decorated with such a bright yellow daffodil.
A comb with delicate flowers will be a worthy decoration for your hair:
You can create an original decoration with your own hands - a bright pendant in the shape of a rowan branch. Be original and unique!
Flowers made of wire and floss
Ganutel is a technique for making flowers from wire and floss.
To create such a flower you will need:
- wire
- floss of different colors
- scissors (nippers)
- pliers.
We make a spring from wire: we wind a thin wire around a long round object, for example, a pen rod or a simple knitting needle.
From the resulting spring we form the petals and leaves of the flower. Next, we begin to wind floss threads in a certain order onto the resulting flower frame. We connect the resulting flower details!
This process of creating flowers can be seen more clearly in the master class by DIANA Bilohorka:
You can even create such airy beauty from hard wire and soft threads!
How to make a rose from cotton pads?
Recommendations for making roses from cotton pads
If you want your rose to be as close to a living flower as possible, then you will have to work hard. The first thing you will have to do is paint the future petals. Since it is very difficult to paint cotton wool evenly, using a brush in this case is undesirable. Therefore, it will be better if you dilute gouache or acrylic paint in water and soak cotton pads in the resulting solution.
After they are saturated with paint, they will need to be laid out on a flat surface and wait until completely dry. If you still want to use a brush to paint the petals, then first starch the cotton pads and only then start painting them.
Recommendations for making roses from cotton pads:
- Prepare the disks as we taught you a little higher
- Then take one disk and twist it into a tight tube
- After this, wrap it with a second disk, but not so tightly
- Adjust the disc so that it visually resembles a rose petal
- Repeat the manipulation until you get a lush bud
- Next, take a needle and carefully sew all parts of your flower
- If desired, decorate the core of your craft with a pink bead
Christmas tree
In anticipation of the New Year holiday, it is important to make themed crafts and new toys. You can ask your child to make a simple Christmas tree using the appliqué method. To do this, an adult draws a simple outline of the future Christmas tree on a sheet of paper with a pencil. The child’s task is to glue cotton pads inside the space and paint them with green paint. Additionally, you can decorate the Christmas tree with shiny sequins or fragments of bright candy wrappers.
The same principle is used to make a snowman. You can decorate a room with children's compositions. This will improve the mood of the household and the child, who will proudly show his creativity to guests.
An interesting Christmas tree is the one whose branches are formed by halves of soft round balls. Moreover, the halves can be placed on the sheet in different ways. A similar game with geometric shapes develops spatial thinking. A child can easily cope with such a craft, and the result will delight with its originality.
Another version of the New Year tree involves painstaking work. The result is a cozy beauty that decorates the New Year's interior of the house. Materials you will need:
- a lot of cotton pads;
- PVA glue;
- a sheet of thick A3 paper or larger (depending on your wishes for the size of the tree);
- hardware pins.
The master class includes the following steps:
- Draw a circle on a sheet of paper with a compass, the radius is equal to the height of the future Christmas tree.
- Divide the circle into four hours, cut out one part.
- Roll the paper to form a cone with a sharp tip.
- Glue the edges together and wait for it to dry.
- Prepare cotton pads. To do this, fold each round piece in half, then in half again. The resulting figure is fixed with a stapler at the base. Use your hands to straighten the folded discs a little, giving them volume.
- The prepared round pieces are attached to a cardboard cone with pins.
The resulting Christmas tree is decorated with artificial snow, garland, beads, and sequins. A traditional star, prepared in advance from foil, is placed on the tip of the tree. There are many photos of crafts made from soft rounds published on the Internet on thematic resources.
Cotton pads are great for creative activities with children. The round shape allows you to create unusual crafts, involving the whole family in fun work.
Snowdrops made from cotton pads: photo
Recommendations for making snowdrops from cotton pads
Creative idea #1
Creative idea #2
In principle, even a small child can handle such a craft as a snowdrop made from cotton pads. Since in this case you will need to make an applique, all you need to prepare is glue, scissors, colored paper and a green marker.
So:
- First of all, draw a snowdrop template
- It is advisable to do this on cardboard (this will make it easier to transfer the outline onto a cotton pad)
- Next, attach the template to the disk and circle it with a marker
- Cut out the snowdrop along the lines, taking care so that no marker marks are visible on the finished flower.
- Make snowdrop stems and leaves from colored paper
- Take cardboard of the desired color and use glue to fix all the components of the applique on it.
Chamomile
The simplest flower. Kindergarten teachers should take note of the master class.
What you need for the craft:
- cotton pad;
- glue;
- scissors;
- colored paper.
How to do:
- Fold the disk in half and make five equal cuts not all the way to the end.
- Unfold and glue a circle of yellow paper in the middle.
Such daisies are suitable for panels or decorating other products.
Chamomile from cotton pads: photo
Chamomile from cotton pads
Figure No. 1
Figure No. 2
In order to make chamomile from cotton pads you will need the following materials:
- PVA glue
- Thick green and yellow paper
- Cotton pads
- Bamboo sticks
So:
- First, cut out two perfect circles from cardboard
- Set the yellow one aside, and make a cone-shaped piece from the green one.
- Then lubricate it with glue and start placing cotton pads on it
- Place them in such a way that each next element overlaps the previous one with one side (Fig. No. 1)
- Once the entire bottom of your flower is filled with decorative material, place a yellow circle on top of it
- Wait for the glue to dry and place the bud on a bamboo stick
If you do not want to make a cone, then you can glue the cotton pads to the circle, slightly bending their lower part. How to do this correctly can be seen in Figure No. 2. Yes, and in this case it is best to starch the cotton pads in advance. This must be done so that the finished chamomile does not lose its shape after some time.
DIY calla lilies. Master class with step-by-step photos
DIY calla bouquet
Master class “Bouquet of calla lilies”
Author : Ermoshina Tatyana Vladimirovna, primary school teacher, Municipal Educational Institution “Gymnasium No. 7”, Podolsk Description: I present to your attention a master class on making flowers from cotton pads and bamboo sticks. This material is intended for children of senior preschool and primary school age; it will be useful for technology teachers, primary school teachers, kindergarten teachers, after-school teachers, and additional education teachers. Purpose: interior decor, gift. Goal: to promote the artistic, aesthetic and creative education of children, the development in children of a sense of beauty, positive emotions and a sense of joy from the work done. Objectives: to give children the opportunity to learn how to make calla flowers from cotton pads, to develop fine motor skills in children, perseverance, accuracy, and imagination. The interesting, unusual form of the structure of the calla flower could not go unnoticed, and so a beautiful legend appeared about the origin of calla lilies on earth. S. D. Costa will now tell you a legend about a flower, About how calla lilies appeared on earth.
A cruel, Indian deity's daughter fell in love, because it's an everyday matter. She fell in love with a brave and courageous young man, Who lived in a simple ordinary tribe. Having learned about their love, he made his daughter invisible, But still she came down from the mountains to her beloved. The young man only felt that she was next to him, the string of his soul again sounded with longing. He collected flowers and sewed a blanket, And he covered his beloved with it in the evening, But he saw only her silhouette, And he began to cry, trying to find the answer to fate. The father, seeing this, took pity on him, and returned his daughter’s former face. In the place where the blanket fell, the whole clearing was covered with new flowers. The Calla flower is considered an unusual flower due to its unique shape and is one of the most beautiful flowers due to the fact that it has many shades of color. In addition to white, in nature there are stools in shades of purple, orange, pink, green and yellow. Callas are known by other names: mini-calas, arum, tubular. You and I will make white calla flowers from cotton pads. For work you will need the following materials and tools:
- cotton pads; - bamboo sticks; - corrugated paper; - corn flour or semolina; - millet; - PVA glue; - scissors; - flower pot; - Styrofoam. Preparing the pedicels: - carefully grease 1.5 - 2 cm of bamboo stick with PVA glue, sprinkle generously with corn flour and leave to dry; - again, lubricate the sticks with glue over the dried cornmeal and sprinkle with millet, forming an inflorescence in the form of a cob with your hands. The peduncle with inflorescence is ready! Preparing a flower petal: - fold a cotton pad in half and cut it, giving the shape of a petal; - glue a petal onto the finished peduncle;
— wrap a strip of green corrugated paper in a spiral around a bamboo stick until the end;
— carefully cut out a sheet of green corrugated paper according to the template (it is desirable that the corrugated paper be thick);
- glue the finished leaf to the peduncle.
The flower is ready. Preparing a flower pot: - cut a circle out of foam plastic along the diameter of the flower pot;
- wrap the foam with corrugated paper; - decorate the pot itself with corrugated paper. Insert the finished flowers into the pot, fixing them in foam.
Calla lilies can be used as decoration and as a gift. I offer some decoration options.
Give each other joy and gifts made with your own hands! I wish you all success!
We recommend watching:
DIY flower made from cotton pads Daffodils made from cotton pads DIY brooch made from cotton pads DIY roses made from cotton pads. Master class with step-by-step photos
Similar articles:
DIY Mother's Day gift in kindergarten
Calla lilies made of plasticine
Calla lilies made from salt dough. Master Class
Cotton pad lilies
Cotton pad lilies
Lilies, like other crafts of this type, can be made quite simply. You need to start making a flower by preparing templates for the petals. You can do them in a completely standard way. So, take cardboard, draw a petal of the required size on it (be sure to keep in mind that you will be applying it to a very small piece of material), and then carefully cut it out.
If you are not very good at drawing, but at the same time strive to achieve maximum realism, then just find a suitable template on the Internet. When it is ready, you can proceed directly to making lilies.
Manufacturing recommendations:
- Cut out the base of your future craft
- Roll a small ball out of plasticine and attach it to the base
- Using the template, cut out the required number of petals
- Attach each petal individually to a match
- Insert the resulting blanks into a plasticine ball.
- When the flower is ready, attach a stem to it
If you want your lilies to be as beautiful as possible, then try making them in several stages. First, attach the largest petals to the ball, and then the smaller ones, and at the very end, cover the middle of the craft with the smallest ones. If you do everything correctly, then visually your flower will look like a water lily.
Lily
You can show both kindergarteners and schoolchildren how to make lilies. They can handle it.
What you will need for the craft:
- wooden stick;
- cotton pads;
- pencil;
- cardboard;
- glue;
- scissors;
- plasticine;
- matches.
What do we have to do:
- Draw a petal of suitable size on cardboard and cut it out. It is worth considering the size of the round wool wool.
- Using the template, cut out the required number of petals and glue each one separately to a match.
- Roll a medium sized ball from plasticine. This will be the core of the flower.
- Insert matches with petals one at a time, forming a flower.
The bud is ready, now you can attach a stem from any suitable material of your choice.
Daffodils made from cotton pads: photo
Daffodils made from cotton pads: photo
Flower elements cut from painted and starched cotton pad
In principle, a daffodil can be made in several ways, but no matter which one you choose, remember that this flower has a rather unique core. Therefore, if you want to make the most realistic craft, then make it not from a yellow cardboard circle, but from pieces of corrugated paper.
In order to make the core, you will need to take a strip 5 millimeters wide and cut it into small pieces. And when your daffodil is ready, you will need to drop a little glue into its center, and then carefully place the shredded paper on it. As a result, you should have an airy and fluffy core.
First way:
- Make a template and cut out petals using it
- Next, cover the thick paper with a tinted base.
- Place three petals on the base and connect them with glue
- In the gaps formed between the petals we again lay out three blanks
- Cut out the leaves and stem of the narcissus from colored paper and glue them under the flower
Second way:
- Cut out the required number of petals according to the cardboard template
- We make a cardboard base from thick paper
- Using glue, attach the petals to it
- We wait until everything dries and fix everything on a paper or wooden stick
Flowers from disposable spoons
Disposable plastic spoons can also be used to create flowers.
You can make a dahlia like this from simple white spoons:
Spoons can be used not only in white, but also in bright colors, this is especially true when creating tulips.
When creating flowers from, you can use spoons of different sizes and colors:
To create these decorative water lily candle holders, some of the spoons were painted with gold spray paint. White and gold water lilies next to each other look very stylish!
In addition to all kinds of paints, you can decorate spoons using decorative glitter and glue:
DIY Gifts and Crafts Ideas offers a tutorial on creating a bright spring bouquet of tulips from disposable spoons:
You can create a spring flower bed of snowdrops using white spoons, drinking straws, plasticine and colored paper. We connect the petals (white spoons) and stems (drink tubes) of snowdrops to each other using ordinary green plasticine. We cut out snowdrop leaves from colored paper. We make yellow stamens from plasticine.
Using thermal treatment (lighter flame, candle), spoons can be melted and deformed into a petal of the desired shape. After this, paint the petals in a suitable color and assemble a flower bud. It is convenient to use spray paint. Such flowers can even be used in making jewelry.
Using the same principle, you can make such a gorgeous rose. You can learn all the secrets of its manufacture in the master class.
Author - Elena Epifantseva
Tulips made from cotton pads
Template for making a flower
Blanks for a bud
As for the tulip, it is best to make it according to the same principle as the snowdrop. That is, first make a template, cut out blanks that imitate a tulip bud, and then use them to create an original picture. If, as a result of your work, you want to get a flower that can be used to create a bouquet or topiary, then do it a little differently. Cut out not only the bud, but also the stem and leaves of the tulip from cotton pads and reinforce the resulting blanks with cardboard.
Glue two tulips together, after inserting a bamboo stick or cocktail tube between them. Yes, and remember that in this case it is best to stain the cotton pads before you start doing anything with them. If you try to paint them after the tulip is ready, then it is highly likely that the paint will not apply evenly. We told you how to paint wheels correctly at the very beginning of our article.
Tulip
These easy-to-make tulips will not take much time.
What do you need:
- cotton pads;
- glue;
- dye;
- scissors
- cocktail tube.
How to do:
- Cut a tulip bud from the disk, divide it in half and paint it.
- Glue, securing the flower to the tube.
For realism, you can add a piece of colored paper.
Dandelions from cotton pads
Dandelions from cotton pads
Although such a craft seems very simple at first glance, there are still some nuances in its manufacture. Firstly, in this case it is best not to use standard colored paper to make the stem and leaves. If you want your dandelions to visually look like real ones, then this part of the craft is best cut out of corrugated paper.
Secondly, when fixing the cotton pad on a cardboard base, you should make sure that it does not get very wet. If it turns out that it is heavily saturated with glue, then you will not be able to fluff it up even after it is completely dry. Therefore, it will be better if you apply glue to the disc pointwise.
So:
- Cut out the bottom of a dandelion from paper
- Carefully glue it onto the cardboard base
- Apply glue to the disk and also fix it on paper
- Let it dry a little and then remove the top of the disc
- Lightly fluff the dandelion with your fingers
Lilies of the valley made from cotton pads
Application of lilies of the valley
If you want to make a lily of the valley from cotton pads, then first of all stock up on a stapler and thin but strong wire. First you will need to make some kind of triangle out of decorative material, and then fix it with a stapler. After the blanks imitating a lily of the valley bud are ready, string them on a wire (you can also use thread).
If you want to achieve greater realism, then take small scissors and cut out characteristic teeth on the blanks. After such a unique garland is ready, all you have to do is attach a stem to it and decorate it with green leaves. They can also be cut according to the drawn template. You can also make lilies of the valley using applique. You can see how to do this correctly in the figure located a little higher.
Mimosa from cotton pads
The first method of making mimosa from discs
The first method of making mimosa from discs:
- Prepare a thick base onto which you will later stick the mimosa sprig
- Dye the cotton pads yellow and dry them thoroughly.
- Cut out the leaves and stem of the mimosa according to the template and glue them onto the cardboard base
- Cut the cotton pads into small pieces (preferably triangular)
- In the spaces between the leaves of the future mimosa, apply a thick layer of glue and sprinkle it with yellow cotton pieces
The second method of making mimosa from cotton pads
The second method of making mimosa from cotton pads:
- Cut a thin strip of paper
- Leave one part of it whole and cut the other into strips.
- Lubricate the whole part with glue and screw everything onto a bamboo stick
- Make a couple more leaves this way
- Fold the cotton pad into a triangle and cut off the sharpest part of the resulting workpiece
- Fluff it with your hands and string it on a wire
- Wrap the resulting garland around the stick and fix the finished leaves on it
Carnations made from cotton pads
Carnations made from cotton pads
If you are not particularly persevering, but still want to surprise your family with your skill, then make a carnation in a quick way. To make such a craft, you will need cotton pads, scarlet corrugated paper, wire and a large dark-colored bead. So, take corrugated paper and cut out a round piece from it, the size of which exactly matches the disk.
At the next stage, take scissors and cut sharp teeth on all the elements. Next, all you have to do is string them on a wire, alternating cotton pads with corrugated paper. Decorate the top of the finished craft with a bead. Such a flower can easily be fixed on a wooden or steel stick, or you can glue it to a canvas and use it to create a very beautiful panel.
Sakura made from cotton pads
Sakura made from cotton pads
If you think that making a sakura flower from cotton pads is very difficult, then you are deeply mistaken. All that will be required of you in this case is to achieve a visual resemblance to a living flower. The same corrugated paper will help you do this, but this time you will have to find a decorative material of a delicate pink color.
You will need to cut out a small circle from it (it should be about three times smaller than the cotton pad itself), fold it into a cone and secure everything with a stapler. You will need to do the same with disks. At the next stage, you will need to carefully fluff the upper part of all the blanks, and you can insert the pink center into the upper part of the sakura bud.
If you do everything correctly, you will end up with a craft similar to what can be seen in the picture located a little higher. Yes, it doesn’t have to be glued to cardboard. You can quite easily find a beautiful twig from any fruit tree and fix the finished buds on it.
Willow made from cotton pads
Sakura made from cotton pads
Willow made from cotton pads
In order to achieve visual similarity between cotton pads and willow, you will have to chop it into small oval pieces. It is this material that will be used as the main element of the finished craft. As for how and where to attach it, there may be options. If you want to make an applique or panel, then you will need to glue a piece of brown rope onto a piece of paper or simply paint a twig with ordinary paints.
Next, all you have to do is glue the cotton blanks onto the applique correctly. How to do this correctly is described in the picture. If you want to make a more realistic willow with your own hands, then you will have to put each piece of cotton pad on a wire, and then firmly fix everything on the branch.
Topiary made from cotton pads
Topiary made from cotton pads
If you want to really surprise your household, then make a very beautiful and delicate topiary from cotton pads.
So:
- First of all, prepare a creamy mixture from water and dry plaster and pour it into the container in which you plan to install the lower part of the topiary
- When the plaster has set a little, insert a stick into the very center of the container, on which you will subsequently fix the decorated ball
- Take a foam ball and cover it with cotton flowers (roses are best for this)
- You can put them on glue or on sewing pins
- When the top is ready, carefully place it on a stick in a container with plaster
- If desired, you can additionally decorate the topiary with beads and satin ribbons
Bouquets of flowers as a gift for mom made from cotton pads: photo
As you probably already understood, cotton pads are an excellent material for needlework and, if desired, even a small child can use them to make a nice present for his mother.
Below we bring to your attention several beautiful pictures that can inspire you and your child to further experiment with this pliable material.
Creative idea #1
Creative idea #2
Creative idea No. 3
Creative idea #4
Flowers from egg trays
Egg trays are one of the waste materials for handicrafts. Usually, egg containers are thrown into the trash, not knowing what beauty can be created from them! Hand-made flowers from egg trays will decorate your home interior, photo frames, wreaths, mirrors, etc.
To make these flowers you will need:
- egg trays (cardboard and plastic can be used);
- brush and paint (gouache, acrylic);
- scissors;
- glue;
- wire.
We cut the egg tray into separate sections, after which we use scissors to form the petals of your future flowers from each section. The height of such blanks may vary. We paint the resulting petals with paint, preferably in two layers. Further, depending on the type of flower you are making, one blank can be inserted into another, forming a bud. We fix the elements of the resulting flower with glue.
The materials and process of creating flowers from egg trays are discussed in detail in MK Handicraft Masterpieces:
We bring to your attention the most common types of flowers from egg trays. But remember that you can come up with the flower shape yourself!
The process of creating a rose from an egg tray
Tea rose
The pride of the flower world is the narcissus
Tender cosmos
Wonderful pink cyclamen
The frame of the summer wreath is also made from egg trays. A similar wreath can be decorated with daisies, cornflowers or pansies.
You can even make a small floral masterpiece from plastic egg trays!
For example, snow-white roses from plastic containers in combination with pearls and decorative gypsophila form such a delicate bouquet.
Decorative moss or fern, as well as red ribbons and beads will add brightness and festiveness to a Christmas wreath made of plastic roses.
For details on creating flowers from plastic containers, see this master class.
A personalized flower on the table will please a colleague or your loved ones:
Let's see how you can turn a simple photo frame into an exclusive one:
A simple mirror decorated with flowers from trays will look more interesting and sophisticated.
Chic mirror decorated with lush peonies
You can create an interior floral arrangement using flowers from trays in pastel pink tones in combination with dried natural roses and simple thin twigs!
Using LEDs, you can decorate the interior of your home with a flower garland.
Or make a flower lamp:
