The process of making an airplane using a rubber motor with your own hands
First about materials and tools. Everything is as accessible as possible here. So for the fuselage of an airplane, a stick for sushi, wings from a cardboard box, a pencil for component assemblies, one paper clip and one for fastening the corrugated packaging for fastening to an elastic band, a cotton swab as a bearing, an elastic band as a source of energy are suitable. Hot melt adhesive will be used to connect the parts, an ice cream stick for the propeller, as well as threads will be useful for more firmly fixing the joints.
We can start making our plane using a rubber engine. The first step is the most technologically advanced operation, the manufacture of the propeller. In order to shape the curved blades, hold the stick over hot steam using pliers.
Next we bend it and cool it. The result is a propeller for our future aircraft.
Now we cut out the wings and tail from cardboard. You can choose the geometry yourself, the one that you think will most confidently keep the plane in flight.
We glue the wings and tail with glue to the sushi sticks.
It's time to think about implementing a rubber motor. For this we need a pencil. We cut off a couple of elements from the pencil, about 2-3 cm, and spread it lengthwise. We take out the stylus.
In the first one we put a paper clip from the corrugated packaging.
. and in the second a plastic tube from a cotton swab.
We first cut the tube from the central part of the stick. We put the separated halves of the pencil back together and fill the parts installed in them with hot glue. Let's start making the propeller assembly. We take a paper clip, pass it through the plastic tube in the pencil and insert it into the hole in the propeller. Next, slightly bend the edge of the paper clip and fill everything with hot glue.
Now you can install a pencil with a paper clip from a corrugated container onto the frame closer to the tail, and the propeller assembly opposite closer to the bow.
In this case, it is necessary to clearly measure how the rubber band can twist so that it does not tear, ensures optimal twisting and does not tear out the elements of the rubber motor. For reliability, it is better to attach the rubber motor units to the stick using thread. Now all that remains is to install the rubber band, twist the propeller in the desired direction, which is important, and launch the plane.
In this case, the plane will not only glide due to the initial inertia, but also due to the fact that the propeller will pull it.
This is a simple children's craft you can do with your children so that you can not only make an airplane together, but also lay the foundations for the operating principle of propeller-driven airplanes. After all, flying an airplane with and without a rubber motor will clearly show the difference in flight range. Well, in addition to popular science information for the child, we would like to wish, first of all, positive emotions during the assembly and operation of the aircraft.
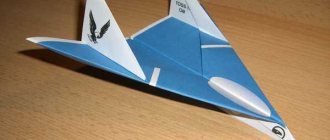
I present to your attention my simple air glider, with a rubber motor, made with my own hands from scrap materials. The guys and I actively made such gliders in my childhood, so I actually decided to repeat what had been long forgotten. It's very exciting.
What I used:
- thin strip (for old windows)
- plastic bottle
- fishing gum
- glue
- pen refill
- paper clips
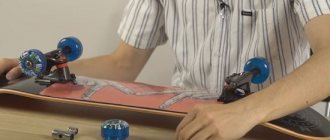
Cut out blades from a plastic bottle. Next, glue them to the toothpicks.
From pieces of the lath and empty paste from the handle we form a seat for the screw. We fix it with thread. We make the blade holder from a paper clip.
Also, from a paper clip, we make a hook on the back side of the rail. We attach an elastic band to it and pull it between the screw and the end of the rail. Cut two wheels from a piece of foam padding. We also make a chassis from wire.
We also cut out the tail and wing flaps. We attach it to the glider.
The next stage is the wings. The main thing is to correctly design these moments, otherwise, in case of incorrect weight distribution, it will either fall on the tail or on the propeller. What is not good.
That's all. The glider is ready. Thank you for your attention, watch the video for more details.
GENERAL INFORMATION ABOUT RUBBER
What is rubber and how is it obtained? The raw material for rubber is the sap of the tropical Hevea tree. In air, it turns into a thick elastic mass called rubber. Although rubber has the properties of rubber, it has a high residual elongation and is not thermally stable - at a temperature of about 50-70 ° C it turns into a sticky mass. Hevea does not grow on the territory of our country, but there are rubber-bearing plants such as kok-sagyz, the juice of which also turns into a rubbery mass.
To obtain rubber from rubber, a few percent of sulfur is added to it, as well as a small amount of other components. The resulting mixture is heated to a temperature of 140-145°C. In this case, sulfur molecules bind together individual large rubber molecules in the form of threads. After cooling, the mass acquires thermal stability and new mechanical properties. This product is called rubber. Since currently the industrial need for rubber is great, and the amount of natural rubber is insufficient, scientists have developed industrial methods for producing synthetic rubber from widely available raw materials. This method was proposed by the Soviet scientist Academician S.V. Lebedev. Synthetic rubbers have high mechanical properties, but they are inferior to natural rubber, which has higher energy characteristics. The best types of rubber for models, for example, Pirelli (Italy), are made from natural rubber.
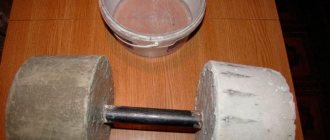
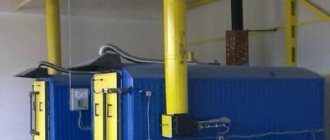
Rubber mixed with sulfur without heat treatment (vulcanization) is called raw rubber. Vulcanization of raw rubber is usually carried out in ovens or vulcanizers.
Rubber, when interacting with organic solvents (kerosene, gasoline, benzene), absorbs these substances, increasing several times in volume, while losing strength and elasticity.
Rubber glue is a solution of rubber in gasoline, so its use for gluing stressed rubber products is unacceptable. Dissolves rubber and mineral oils derived from petroleum. Vegetable oils of animal origin, as well as fats (castor oil, fish oil) and glycerin do not have a harmful effect on rubber. Special grades of rubber have been created that slightly absorb organic solvents, which have almost no effect on their mechanical properties. These types of rubber are called gasoline and oil resistant. In modeling they are used when operating compression engines. For preservation, the rubber is sprinkled with talcum powder.
Rubber is oxidized, especially in the sun, by atmospheric oxygen. As a result of oxidation, hard compounds are formed on the surface, which, when stretched, leads to the formation of cracks and rupture of the rubber band.
How to make a rubber-powered airplane in 30 minutes
Airplane on a rubber engine
Hello to all fans of making flying model airplanes! We bring to your attention instructions for making a model airplane using a rubber motor .
Materials for making an airplane
In order to make a rubber-powered airplane you will need:
- One bamboo barbecue stick.
- One toothpick.
- Three rubber bands (it is advisable to use a Hungarian rubber band, as it is more elastic).
- Two sheets of A-4 paper.
- Two paper clips.
- Scissors and pliers.
- Threads.
- Ballpoint pen refill.
- PVA glue.
We make an airplane using a rubber engine
- Make a propeller holder from paper clips
The paper clip that will hold the screw
and a hook for hooking the elastic. Tie them to the fuselage (the base of the plane - a long bamboo stick). To prevent the thread from coming undone, coat it with glue.
Paperclip tied to the fuselage
Paper clips attached to the fuselage of an airplane
Fold a sheet of paper into four
After drying, cut out an airplane wing from it (length 22 cm, width 4 cm in the middle, 1 cm at the edges).
Cut out the tail
Attach a paper clip to a toothpick
Draw the propeller blades
Glue the blades to the toothpick
Glue a piece of paper to the bottom of the wing
For a better understanding of the entire process of making an aircraft, we suggest watching the video “How to make an aircraft using a rubber motor .
We advise you to look at our other materials:
We will be grateful if you click on the social buttons!
Source
Do-it-yourself rubber-powered airplane
The first place that novice pilots—children, that is, those who are thinking about it, but are still not sure for sure, and at that age are not yet capable of it—start their flights, with toy airplanes. The simplest option would be a paper plane, you can simply fold it and launch it, it will float in the air like a glider. We discussed this option in the article “How to fold a paper airplane.” More advanced versions are capable of slightly assisting themselves in flight. So, for example, an airplane is on a rubber tire, where the potential energy of a twisted rubber band is capable of turning the propeller, which pulls the airplane forward. This option is already known to many adults who, as children, assembled such an airplane with their parents. Now it’s your time to pass on the experience to the children, showing them how it is done and on what principle the aircraft operates on a rubber tire. And in order to make it easier for you to navigate and not really rack your brains over what to use for production, we suggest that you read our article - a cheat sheet.
REPAIR OF RUBBER ENGINES IN THE FIELD CONDITIONS
After starting the model, the rubber motor must be carefully inspected in a slightly stretched state - in this case, cuts in the rubber bands are detected. If the cuts are not large and are less than 0.2 the width of the rubber band, then use scissors to cut out the place with the cut. This delays the tape breaking.
Before the next start, check again the place where the cut was. If it appears again and is about half the width of the tape, then such a tape should be cut in this place and tied again. Rubber threads are usually tied together by two people. The technology for executing the nodes is indicated above.