In every person's life there are people whom you remember with warmth and gratitude. Ask your child if he would like to give his teacher a gift for the holiday, and he will answer in the affirmative. Sweets and bouquets are too banal. But crafts for Teacher’s Day will be just right.
Even sweets can be decorated in a non-standard way, and the teacher will remember them for a long time. However, there are still a lot of ideas on how to surprise a teacher on his professional holiday.
Bouquet of daisy girls and dandelion boys
It’s not difficult to prepare a “bouquet of students,” but the class teacher will be pleased. Cut out a daisy from colored paper and glue a photo of the child in the middle. Such a flower is attached to a stick or wire and placed in a pre-prepared pot.
There should be as many flowers as there are students in the class.
On a note! Instead of soil, you can put office supplies in the pot - erasers, sharpeners, etc.
These are essential items for a teacher.
Coffee heart
You will need: coffee beans, paper, wire, thread, glue, cardboard, jute thread, sponge, iron can, brown paint, ice cream sticks, decorative elements - flowers, ribbons...
Master Class
- Fold a piece of paper in half and draw half a heart, then cut it out.
- Trace the heart on cardboard and cut it out in 2 copies.
- Wrap 2 pieces of wire in paper and glue to one heart. Repeat this process for the second heart.
- Glue cotton pads in several layers between the hearts to make the design three-dimensional.
- Cover the entire heart with cotton pads and wrap with thick thread.
- Color the heart.
- Glue the coffee beans in 2 layers.
- Cover the jar with popsicle sticks.
- Wrap the wires with jute thread.
- Stick the coffee tree into the sponge, then place it in the pot.
- Decorate to your taste.
The coffee heart is ready!
Office cake - a practical craft for Teacher's Day
You can form an original cake from the necessary things. The basis is taken from a package of office paper and wrapped in colored or crinkled paper. Candies are attached in a circle using a glue gun. All this is decorated with lace braid.
You can prepare this cake by placing notebooks and other office supplies in a box. It will be very original!
How to draw a card for a teacher - step-by-step drawings
I'm sure almost every child loves to draw. So it is worth directing this love in the right direction, so to speak, for his benefit, in his creative development. Then you won’t have to think about gifts for teachers!
What will your baby draw? Let's help him make a card with a globe and flowers!
Draw a circle (using a compass).
Under the circle, the oval is a stand. It is connected to the circle.
A line passes through the center of the circle.
We connect the edges of the line with a semi-arc that goes around the circle. We draw this semi-arc as a double one.
Oceans and continents can be drawn very accurately, or approximately (we hope no one will be offended and the children’s drawing will not lead to political conflicts)))
The globe is ready!
The preparation for autumn chrysanthemums looks like a stump - there are many rings in a circle; and rays extend from the middle to the edges.
Using this blank, you can make the inner layer of flower petals small, at the distance of the smallest circle. Then the petals will become longer and longer. The very last ball of petals runs along the edge of the circle itself.
All that remains is to paint the picture and sign the postcard!
Of course, you can draw other details. For example, a ruler, or the words: “Happy Teacher’s Day.”
Or you can draw a scientific owl.
Here's another option with an owl.
Here is a detailed tutorial on how to draw an owl.
You can add bouquets of roses, or daisies, or lilies.
It’s also not difficult to draw a book, especially if the process is divided into several stages. First, let's draw a vertical line. Next, draw two rectangles.
Next we add several pages on each side. The next step is to draw a semicircle from below.
Let's draw the cover. All that remains is to paint. The scroll is also very easy to draw!
There is a sea of ideas on how to arrange these drawings. By the way, remember we cut out autumn leaves from paper? So, they can also be used for a postcard or wall newspaper for Teacher’s Day.
Homemade case for scissors
If you give your favorite teacher practical handmade crafts for Teacher’s Day, he will be only too happy. One of these gifts could be a self-sewn case for scissors.
Important! The fabric must be thick so that the sharp ends of the scissors do not damage it.
It is desirable that the material be of bright colors. You should fold the fabric into a triangle and stitch one of the edges.
Beautiful DIY cards for Teacher's Day
The best way to congratulate your teacher on the holiday is a beautiful handmade card with warm wishes. For a female teacher, making such a craft is not difficult - delicate flowers, decorations in the form of beads, bows, ribbons, and you will already have an unusual work.
To make it easier to choose the right card for your favorite teacher, look through many options. You can also make a beautiful card for your teacher using a sample. You will still get your own original version.
Box-box with opening lid
The outer surface is designed in the form of a school magazine.
Further work is as follows:
- Buy a sheet of penoplex foam at a building materials store; it is used to insulate walls. The thickness is approximately 2 cm.
- It is used to cover the box and its interior.
- The outer and inner parts are decorated.
- The end of the box is decorated with flowers, autumn leaves and candies. They are attached to toothpicks and inserted into penoplex.
- It seems that the magazine is slightly open, and a bouquet is hidden in it.
- Sweets or other gifts are placed inside the box.
Holiday Posters
It is customary in almost all schools to hang wall newspapers and posters for the holiday. Making such paper crafts for Teacher's Day is not difficult, but they once again allow teachers to feel their importance. The main emphasis is on the imagination of students. Posters can be painted, in the form of a collage, with applications made of colored paper, dried flowers, beads, ribbons, lace, etc.
The design with patterns using the quilling technique looks beautiful. Autumn symbols are yellow leaves, which can be painted or glued to a poster.
Pencil holder
This stand can be decorated with coffee beans. Another option is to make a topiary and some pencil cups. The base will be a foam ball.
It is painted brown. The ball is placed on a sushi stick and covered with coffee beans.
The workpiece is inserted into a pot, which is filled with plaster.
Now prepare several glasses, of different sizes. They are decorated as desired - with ribbons, crepe paper, lace, etc. The finished cups are glued together and placed on a plasterboard stand.
The stand is also decorated. Voila - the pencil holder is ready!
creative indoor flower
You will need: a pot, polystyrene foam, skewers, artificial grass, glue gun, candy bars, chewing gum, gift cards, etc...
Master Class
- Glue sweets, chewing gum, cards to the skewers.
- Place the foam in the pot.
- Place artificial grass.
- Insert the skewers with the sweets into the pot, arranging them to your liking.
The creative indoor flower is ready!
Candy stand
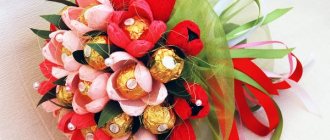
You can give sweets to your favorite teacher so that he will remember it for a long time. Flowers are made from corrugated paper, with candies placed in the middle. The finished flower is placed on a stick.
On a note! Organza or silk ribbon is used as decoration.
To make a stand, take the tubes that remain from toilet paper, paper towels, cling film, etc. The stand itself can also be decorated with candies in the form of sticks or tubes and tied with a ribbon on top.
Topiary miracle tree as a gift for a teacher
To make this creative Fourth of October gift for a teacher, prepare a small flower pot, a wooden stick, a piece of paper, decorative stuffing, a foam ball , scissors, and a glue gun. All kinds of office supplies are suitable for decoration: buttons, paper clips, small pencils, clothespins for documents, a small bell. You can also use decorative scissors and a paint brush as decoration.
To begin, crumple up a sheet of paper and place it on the bottom of the pot.
Glue a wooden stick to the paper ball and place decorative filler in the pot.
Carefully place the foam ball onto the stick to create a hole. Apply glue around the hole and attach the ball to the top of the stick.
Let's start decorating a gift for the teacher with our own hands. We glue pencils, attach buttons, secure paper clips and clothespins, and tie twine with bows.
The final touch is to glue a bell to the topiary and decorate the craft with scissors and a brush.
Now this cute handmade gift can be given to a teacher for the Fourth of October or any other holiday.
Congratulations card
Before you start making a postcard, you need to decide on the material. Also count how many teachers need crafts for so as not to offend anyone.
There are many ideas for making cards. If the child is small, then you can make an applique. Older children are able to master quilling or scrapbooking techniques.
You can use cardboard as a base material, and colored or corrugated paper, buttons, beads, rhinestones, lace, ribbons, etc. for decoration. Everything will depend on the imagination of the child and his parents.
DIY postcard ideas for Teacher's Day:
- Bouquet inside a postcard. To do this, you need to cut out several flowers and glue them to each other, and then to the middle of the card. The basis is colored cardboard folded in half.
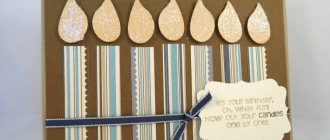
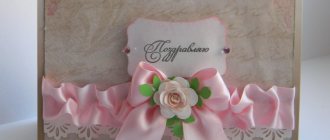
- Postcard with flowers. For it you will need designer cardboard, which can be purchased at the stationery department. Make flowers from colored paper or buy blanks. Such souvenirs look original.
- Postcard in the form of a bouquet with flowers. For this you will need an openwork paper napkin. From one or two, make a triangle reminiscent of flower packaging. Make flowers with twigs and leaves from colored paper. Glue a bead to the center of each flower. Ready.
- You can make a postcard in the shape of an owl, a symbol of wisdom. First, an owl template is made from paper. The parts are transferred to colored paper and cut out. The wings are glued separately, they will close.
- Volumetric postcard. 3 squares are cut out from album sheets and painted with watercolors. You need to choose autumn colors. After this, each square is folded diagonally and then accordion-style. After this, the squares are unfolded, a corrugated base is obtained, 2 squares are folded in half and glued on both sides to the third. Externally, it resembles an autumn leaf, which is glued to a pre-prepared postcard made of colored cardboard.
- You can use plasticine to make a postcard. First, pieces of plasticine are spread on cardboard, then individual parts are molded in the form of letters, flowers, leaves, etc.
Postcard using quilling technique
The main consumable material here is narrow strips of quilling paper. Their color depends on what kind of application we will lay out on the paper. To make a gift we will need:
- A sheet of white or any colored paper in A-4 format. You can take any pastel shade (cream, sand, light green, pale yellow, etc.).
- Quilling paper red and green 3-5 mm (for creating an applique of a bouquet of flowers). The shades of the buds can be changed at your discretion.
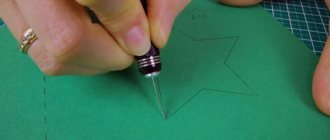
- Quilling hook (or just an ampoule from a writing pen, slightly cut at the end by a blade to 3-5 mm).
- PVA glue.
- Stationery scissors.
- A template for a congratulatory inscription or a sheet of colored paper in a contrasting shade with the base.
- A simple pencil and a ruler.
We do all the work like this:
- First, take the base sheet and fold it in half. Inside on the right you can immediately draw thin lines to write a congratulation.
- Now on the title side of the postcard we subtly, barely noticeably, draw straight intersecting lines. This will be a template for the stems of the future bouquet. It may consist of 3, 5 or 7 flowers. Try to place the lines at the intersection so that they have an angle of at least 45 degrees with each other at the top. This will make it more convenient to arrange the “buds” of flowers.
- Afterwards, onto the drawn lines we glue strips of green quilling paper along their entire length. The lower ends can be cut at an angle to make them more graceful.
- The next stage of work is the production and fixation of buds. They can be done simply and quickly. Take a strip of paper of the desired color (red, yellow, orange, etc.). Insert one end of it into the hook and begin winding the entire strip.
- Once winding is finished, remove the paper from the hook. We have a peculiar snail. It can be made looser (loose, transparent) or denser. Optional.
- Lubricate the remaining free end of the paper strip with glue and fix it to the “bud” so that it does not unwind.
- Lubricate the lower part of the twisted bud with PVA glue and press the quilling figure onto the base sheet onto the already created stem. You should end up with one flower bud per stem. Make all the following flowers in the same order and stick them in random order.
- Now you need to make leaves on the stems. We form them from green strips of paper according to the same principle as buds. Only after the snail circle is ready, it is slightly compressed to form a pointed oval.
- We attach all the “leaves” with PVA glue at the bottom of the stems throughout the bouquet.
- Finally, use a strip of quilling paper in a contrasting shade to make a bow and glue it to the intersection of all the stems of the bouquet.
- At the bottom of the postcard you need to stick an oval or other shaped template on which the inscription “Dear Teacher”, etc. is written in calligraphy.
Tip: flower buds on a card can be made of any shape and size. This way the bouquet will look more lush and beautiful.
Interesting: DIY wall shelf
Flower vases
The teacher will definitely like this gift, since the vase is necessary on the school table. A plastic or glass bottle is suitable for the base of any homemade vase. It can be painted or covered with paper.
Various items are used as decoration. These can be colored threads, old beads, colored stickers, pieces of fabric, sequins, bright buttons, etc. You can buy a beautiful indoor plant and decorate a flower pot.
A beautiful congratulatory inscription, mathematical formulas, historical dates, or simply a declaration of love to your teacher will look original.
There are many ideas for DIY gifts for Teacher's Day. Each person can have their own ideas and fantasies, using which they can create an original souvenir. Such attention will be especially pleasant for teachers!
