Share this article:
Master class: New Year's endless card.... Not much time is left before the long-awaited New Year holidays, which we always look forward to with special trepidation. These holidays are always filled with mystery, gifts, surprises and very pleasant impressions, which then inspire us for the entire previous year.
In some families, preparations for the New Year begin a couple of months in advance, since everyone needs to think through the New Year's menu, decorations for the house and the New Year's table, choose the color scheme for your outfit, prepare a bunch of different gifts for family and friends, in general, there is a lot to do, one might say. , so you need plenty of time.
Traditionally, we congratulate everyone, of course, with New Year's greetings, which we write in a greeting card. To have something to remember for both you and your loved ones, it is advisable to make a gift with your own hands, leaving pleasant memories from the process, and your loved ones will receive a pleasant and warm surprise that will remind them of you.
A New Year's card will look incredibly beautiful if it consists of four spreads that complement each other and are endless congratulations. This card is also called endless, because no matter how much you unfold it, the congratulations do not end.
Video “Master class” Transformable postcard “Travel to the Planets”
Natalya Mustyats
Video “Master class” Transformable postcard “Travel to the Planets”
Master class on creating a transforming postcard “Journey to the Planets” for Cosmonautics Day.
As the title suggests, our work will be dedicated to Cosmonautics Day.
We bring to your attention a master class in which we will tell and show you how to easily and simply make an interesting transforming postcard .
To work you will need colored cardboard, glue, a simple pencil, a ruler, scissors, colored pencils, paints, crayons (in general, whatever you like best, and of course a good mood!
To work with the application, you will also need a template, which you can download from the link under the video .
Together with Mary Poppins and her guest Veronica, we will send our astronaut on a flight through the solar system, and maybe to another galaxy! Who knows?
This is our first work in this area, our very first video master class . We hope you enjoy it and try to make a similar card with your children .
It’s always interesting to make something with your own hands, and at the same time study the planets and try to draw them. You can also fantasize and come up with some of your own, unique and mysterious planets , and maybe even get to know their inhabitants. Everything is limited only by your imagination!
Try it and we are sure that everything will work out for you!
Didactic game “Flight to the Planets” Hello, dear colleagues. Today I would like to present to your attention the author’s game “Flight to the Planets”. The game is made using a scrub set. Didactic manual “Transformer rug” Today I would like to present to your attention our wonderful TRANSFORMER Rug. Based on new requirements for developing subject-spatial. Photo report “We will go into space to distant planets!” On the eve of Cosmonautics Day, the children of the preparatory group and I decided to plunge into outer space and worked in various non-traditional ones. Multifunctional transforming cube Video Didactic manual “Transforming cube” The manual is intended for working with children of the senior and preparatory groups of kindergarten. Done. Non-standard equipment for sports entertainment “Travel to the Planets” When preparing for sports entertainment, the need arises to produce attributes based on the theme of the holiday. I would like to present you something unconventional. DIY postcard for the holiday of February 23rd. Master class “Postcard “Car” Purpose: as a gift, decorating the interior of a room for the holiday - Defender of the Fatherland Day. Goal: make a postcard with your own hands.
Volumetric postcards using scrapbooking technique
Scrapbooking is the art of decorating photo albums, but its techniques are also very popular when creating cards.
Using Kirigami elements, using the Scrapbooking technique, you can also make a three-dimensional postcard with your own hands. We cut out and fold “steps” from scrap paper for the “pop-up” candles on the second half of the card. Glue the candles and glue the resulting blank onto the base of the card.
You can make a simple but original greeting card from scrap or colored paper. We cut out the candle flame and decorate it with sparkles, then glue it to 2-sided tape. We glue the second part of the candle with glue. The congratulation itself can be tied or glued to an elegant satin ribbon. Simple and original!
A postcard made from paper of a different texture will look completely different)
By placing each element of the card on top of each other, again using double-sided tape, you can create such a voluminous, bright cake!
Let's take a look at Tatyana Sadomskaya's master class on how to easily make a voluminous, delicate postcard using the Scrapbooking technique using ready-made pictures.
To create such a postcard, Tatyana used:
- scrap set ScrapBerry's “Favorite Pet”
- scissors
- thick cardboard
- glue
It is better to use scrap paper with a large number of miniatures that can be cut from a single sheet, as well as colored stamp prints and chipboards.
Before creating a postcard, you need to decide on its plot in order to choose the color of the base of the postcard and its “characters”. In this case, the basis is paper with a calm beige print, and the components of the plot are cut out of it: kittens, a puppy, flowers, a crown on a pillow.
Next we work with the base. It is necessary to make markings for cuts on the front side.
Don’t forget to decide before starting this work what will be in the foreground and what will be behind it!
In our case, we put the larger kitten in the foreground, this will enhance the feeling that it is closer than kittens with a dog.
We make the necessary cuts. The result is a design with “steps”. We glue leaves of arbitrary size onto the resulting “steps”. These leaves imitate a wooden fence.
Next, we gradually glue our elements, starting from near to far. We start from the foreground and glue the kitten. We glue it onto beer cardboard, because it gives additional volume and casts a shadow. Using the same principle, you can glue several other elements, for example, balls and flowers. When the inside is ready, glue it to the base of the card.
We also decorate the outside of the card with an elegant floral print.
For greater elegance, decorate the elements of the card with sparkles (use glitter).
Original master class.
For inspiration, check out this masterpiece 3D cake card:
Transformable holiday card
Master class for teachers and parents on how to make an unusual toy gift with their children.
Children are happy to make postcards as gifts for their parents and are always happy when adults like the result of their creativity. At such moments, it is especially clear to preschoolers that loved ones value a gift made with their own hands from the heart and with good thoughts. I want to tell readers how to make a voluminous, transformable and entertaining postcard.
This master class for parents of preschool children in our kindergarten and teachers contributes to the organization of a future creative workshop for children to make gifts for their family and friends for various holidays and events. Using the techniques presented in the article, teachers will be able to create teaching aids that are attractive to preschoolers.
It is better to organize the production of a transforming postcard individually or with a subgroup of children of no more than 3 people. It is better to carry out this work in a group during the morning reception of preschoolers or in the evening outside of class. This is due to the need to assist children in performing new actions with paper. Parents can successfully make such a card with their child at home.
Handout
: sheet of thick A 4 white paper; images on the theme of the holiday, flat scans of a three-dimensional postcard, scissors, rulers, pencils, erasers, glue, felt-tip pens.
Preliminary work
: making a flat scan of a postcard. When making a postcard, we will bend the paper in different directions, so we will mark all the fold lines with dotted lines according to the sample. We draw lines and measure the distances between them using a ruler.
The shape of the development, its dimensions and all the distances between the fold lines are shown in the figure.
The part of the development to the right of the vertical line ZhZh2 will help connect the opposite parts of the structure. It is indicated by shading. Triangles are also marked with hatching, which will subsequently be smeared with glue to assemble a three-dimensional figure.
When the scan is ready, we make copies of it in the required quantity.
Detailed description
1. Cut out the layout of the postcard along the outer contour.
2. Carefully press through all the lines on the development using scissors and a ruler to make it easier to fold it along the intended lines.
3. We bend the development inward along the following lines: DZH1, VZH2, AE1, A1G1, A1B, A2D, B1ZH, G1ZH1.
4. Bend the development outward along the vertical lines: BB1, BB1, GG1, DD1, EE1, ZhZh1.
5. After bending before gluing, we give the three-dimensional figure a shape and “assemble” it. Now it looks like a snake, consisting of three segments.
6. Apply glue to all the shaded triangles, very carefully glue them from below to the corners: A2B1B1, B1G1D1 and D1E1G2.
7. Apply glue to the shaded trapezoids located to the right of the LJ2 line. We connect the opposite sides of the volumetric snake along the lines AA1A2 and ZH1ZH2, insert the trapezoids inside the resulting gap and glue them, pressing well. The result is a shape that can bend in different directions and form four hexagonal surfaces, each of which is made up of 3 separate diamonds.
8. Carefully sketch out drawings of military equipment on these surfaces.
9. Color the drawings with felt-tip pens.
The toy is ready! If you change the designs, it can be given as a gift on different holidays. In addition to being a gift, a transforming figure can be used in games to reinforce children’s ideas about shape, color, seasons, natural phenomena, animals and their babies, letters, numbers, as well as to develop attention, memory, thinking and speech. In this case, the pictures can be replaced with stickers, having previously cut them to place them on 3 diamonds.
Let's imagine some game exercises with a three-dimensional postcard.
Name a piece of furniture.
On the edges of the transformer there are conventional images of pieces of furniture of different shapes: an ottoman - a cylinder, a corner cabinet - a triangular prism, an armchair - a pyramid, a bedside table - a rectangular prism. I suggest that children use the name of the volumetric shape to find and name the corresponding piece of furniture on the transformer.
Find the number.
There are numbers on the edges of the transformer. I name a couple of numbers, and the children find a number that represents the number that consists of the two named.
What's the same color?
Various colors and shades are applied to the edges of the transformer. I propose to name plants, their flowers and fruits by association with color.
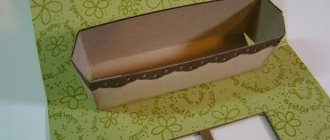
Making the base of an endless card
To begin with, we cut out two 16x16 cm squares from scrapbooking paper (at this stage it is better to choose paper of soft colors, without a large pattern, so as not to get too colorful). We cut each of them in half, we get 4 blanks 8x16 cm.
We measure another 4 cm from each of the short sides of the workpiece, draw a line along the short side with a creasing machine and bend the workpiece. You can, of course, do without a creasing machine, but using one will avoid creases and make the work more accurate. The workpiece should bend freely in both directions.
Now we fold our blanks so that the pattern is combined, while the cut between the blanks for one large square should go vertically, and for the other - horizontally. We coat the corners with glue or glue them with double-sided tape and glue the base of the card.
MK transformable postcards from Marina Volkova
So, let's get to work. Since the most used format is A4, I made the diagram for this format.
I took a beige watercolor sheet and marked it.
We take scissors in our hands and cut as in the picture below. We received the postcard base and 4 inserts.
We take the base of the postcard, a ruler (preferably an iron one) and an old pen that is no longer writing at all and “draw” all the vertical lines of the base with it. This way we outline all the folds.
Now we take a knife and cut all the horizontal lines along the ruler.
We bend the card along the folds as in the picture:
Now we take the stripes and weave them through one exactly as in the picture.
The first stripe is in place. We take the second one and do the same thing in a checkerboard pattern as in the picture.
The second stripe is in place. We insert the third one.
Well, the last stripe took its rightful place.
Our postcard template is ready. Here's what you can do with it. It almost turned out to be a book. This is the main form for its transformation. But while she is white, it is very difficult to understand anything.
You can close the book and use it in this form as the basis of a postcard.
You can twist it like this:
But as I already said, while she is white it is difficult to understand anything. Therefore, let's move on to its design. Here's all I need:
If it's a trick, then how can there be no cards? I found beautiful maps on the Internet. Since the field is 4 by 4, I took Aces, Kings, Queens and Jacks. I reduced them to the required size, printed them on a color printer, cut them out and pasted them onto the front of the unfolded base. This is how cute it turned out!
We repeat the same with the right side.
Woo-a-la! And the cards disappeared! Before us are again white squares.
This is where I had to tinker. I looked for the necessary pictures on the Internet and inserted them into frames. According to the plan, these pictures were supposed to be prediction cards. But there are no such people! But will that stop me? Made them myself: Love! Happiness! Good luck! Well, everything else in addition. This is how it turned out for me:
Do you think that I covered all the fields? But no! If you unfold the postcard into its original form and turn it over, you will find another white 4 by 4 field. I decided to design it like this. I took a picture measuring 132mm by 132mm and cut it into 16 equal squares. And then I simply glued them onto each white square in accordance with the picture. The main thing here is not to confuse! And carefully look where the bottom and where the top of the postcard is!
It's time to design the front of our card. I found very beautiful card backs on the Internet and printed 2 of them. The Lady's Card is a separate story about her. Basically, when I saw it on a postcard, I was so delighted with this idea that thoughts began to stir in my head and the idea of this postcard was born. I paste the card with the back onto the postcard along the top edge with the entire surface. But I smear the Lady card with glue only on the right and bottom parts and glue it, aligning it at the bottom. If you remove the knife, it's a postcard.
DIY endless postcard scheme
So, we will need 4 rectangles of paper measuring 6x12 cm. I used watercolor paper as a basis, because...
In the future I planned to cover the postcard. If you decide to use scrap paper, then use double-sided paper. STEP 1.
Each of the rectangles will need to be bent, so we draw fold lines (with a creasing stick, a non-writing pen, a crochet hook.) along the larger side in the middle, i.e. if you place the rectangles vertically, but you need to draw one vertical line in the middle and two horizontal lines at a distance of 3 cm from each edge). So we bend all 4 parts.
STEP 2.
We take two parts, combine them as shown in the photo,
Glue it with tape or apply glue (as you like).
We take another part and place it horizontally, matching the upper corners,
The postcard is ready. All that remains is to decorate. If you want to cover the card (as in my case), then (with these dimensions) you will need to cut out more
I got this postcard
Source