The simplest technique for making a paper briefcase is “cut and glue”
Before you start origami, you can consider a simpler manufacturing option. To do this you will need colored paper, glue and scissors. Additionally, you can use a stapler.
How to make a briefcase with your own hands from paper using the simplest method:
- Take 2 identical parts of any shape and any size. Cut off a third part from one of them.
- You can immediately glue the two parts together on three sides - you get a flat briefcase. You can add volume to the craft: cut thin strips according to the size of the sides. Fold them like a small accordion and glue them between the main parts.
- The part that protrudes must be folded to the size of the smaller side. This is how the portfolio lid is formed.
- To close the product, you can cut 4 identical strips. Loops are formed from the two, which are glued under the movable lid. The other two are glued to the movable lid.
The last stage is decorating the finished product.
For children
To make a children's fancy paper bag, which is presented below, you will need:
- multi-colored paper.
- scissors.
- stapler
Related article: How to make a travel bag from old jeans
Stages:
Cut the leaf in half.
Twist a cylinder from one part and fasten it with a stapler.
Make the cylinder flat by folding the folds inward on each side, 2 cm wide.
Cut a rectangle from paper of a different color so that it covers both parts and the bottom.
On the other side draw a flower. Then fold the paper in half and cut out the flower only on top.
Unfold the product with the flower. Cut out circles from white paper for the center and glue.
Attach the flower to the bag. Then cut out the strap and glue it.
Another version of a children's bag is made according to a template.
Manufacturing stages:
- Redraw the template onto cardboard.
- Make markings for handles and contours for folding.
- Cut out the workpiece.
- Bend the cardboard several times at the fold points.
- Form the bottom and walls.
- Glue each element. To do this, you can use regular glue or a glue gun.
- Decorate your bag with your favorite cartoon characters by printing them out or cutting them out from a magazine.
Shape and design options that may give you a good idea
Before making a briefcase, it is important to choose a design and shape. Using paper, it is easy to recreate any color and style.
You can create the following options:
Read also: Sew a dress in retro style
- Square, round, rectangular briefcase.
- The design may resemble a classic business briefcase or school backpack.
- You can check out fastening options from famous bag designers. Try to reproduce similar accessories.
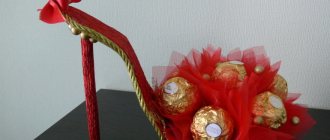
Thematic briefcases are especially popular, as they fit perfectly into the image and theme. You can make a product in the shape of a heart, a coffin, or a bird. In this case, the work will take longer, and you need to carefully carry out each stage of creation.
Beautiful cards in scrapbooking style for February 23
Scrapbooking cards always fascinate me. But, unfortunately, I am not yet able to do this myself. For those who like to craft in this style, I suggest you look at the options for beautiful postcards for February 23rd.
You can make an envelope for our beloved men
Many different details make such cards massive and brutal.
Needlewomen also sew details along the edges and decorate cards with them. It turns out very beautiful and soulful.
You can try making lighter cards. They look like multi-layered appliqués.
Cool and funny postcards in the form of stars and calendars will also not leave the male half indifferent.
Methods for finishing such products
Having decided how to make a paper briefcase, you can think about ways to decorate this product. There can be a huge number of options, since the paper base is easy to process:
- Sequins, beads, and stones can be glued to the surface.
- Using threads that are attached by laying out a pattern on a surface greased with PVA glue.
- Fabric applique is an ideal option for a cardboard product.
- You can paint it with stained glass glue and sprinkle it with sparkles.
- The surface can be covered with fabric or satin ribbons.
To create a bright and attractive craft, it is worth using several options within one product.
Elementary model
It’s good when mom is a creative person who has almost limitless imagination and knows how to sew, knit and cross-stitch. What if she can barely hold a needle or knitting needle in her hands?
In this case, we suggest making your own backpack for a doll from a matchbox. To do this you need:
- office glue;
- scissors;
- colored paper;
- satin ribbon;
- various sparkles, beads, stickers and other decorative elements;
- Matchbox.
When everything you need is at hand, you can start creating:
- Take out the inner box.
- Cover the base with colored paper.
- Cut out the valve.
- Glue the straps.
- Decorate the product as you wish.
Master class “Cardboard Briefcase”
Valentina Korobkova
Master class “Cardboard Briefcase”
Cardboard briefcase. Master Class
The boys and I are getting ready for Graduation in full swing. briefcases to dance , but we don’t have that many. And we decided to make them from colored cardboard .
Such briefcases can also be used as an attribute for theatrical performances and the role-playing game “School”
.
To work we will need:
— a set of colored cardboard ;
Collecting your favorite doll for school
When September 1 is approaching and your child is about to go to school for the first time, there is a lot of hassle and anxiety associated with this moment. Parents are rushing around to buy school clothes, all the textbooks and stationery. Children curiously look at and admire beautiful notebooks, pens, paints, putting them in a new fashionable backpack.
Make getting ready for school a real holiday for your child. Girls of early school age continue to play with dolls with pleasure.
To make your daughter or granddaughter look forward to September 1st with joy, invite her to play out this scenario with her favorite dolls. Let the girl collect a Barbie, a stuffed bunny, or any other toy for school. You can help her prepare all the necessary supplies by making them yourself.
DIY cardboard doll briefcase
To know how to make a briefcase out of cardboard, you need to use a minimum of imagination. In this case, you can use ready-made blanks. For dolls, a regular box of matches left over will do.
Product execution diagram:
- Divide the 2 parts of the box.
- Cover the top part with cloth or paper.
- Prepare two pieces of ribbon that should be tied all the way through the decorated part.
You will get a beautiful backpack that will transform any doll. This option can be a decoration for a children’s pencil case with stationery.
Robot made from a tin can with a magnet
We make our own paper Christmas angels using templates
Exciting games for children's development can be played using empty tin cans. Small magnets, bolts, bottle caps and other devices are also suitable.
What elements can you use to make interesting robot crafts yourself? The child will be delighted with this. The main part of the craft is a tin can. Various body parts will be attached to it.
To easily change parts on the body, attach magnets to them with glue. When a child wants to take something, all they have to do is bring a small jar to the object, and everything will be magnetized to it.
If you provide a creative child with the necessary supply of material for experiments, he will be able to make a wide variety of robots. All you have to do is be patient and you can get to work.
Funny robots - crafts are ready! With such toys, children will be enlarged by them for a long time.
Backpack for a Monster High doll: master class
We will need the following materials and tools:
- Sharp scissors.
- Long ruler.
- A simple pencil.
- A doll of a certain size.
- Thick fabric, you can take fleece.
- A piece of paper, preferably in a checkered pattern , will suit the pattern well.
We draw a pattern; it should contain the following things:
- Two rectangles. Front and back wall.
- Two rectangles for the walls on the side.
- Rectangle for the bottom.
- Two large rectangles for handles.
- Valve.
Volumetric sword with pixels
There are tons of videos showing in detail how to make a sword. But first you need to understand the technique and essence of the work.
For this creativity you will need:
- white Whatman paper;
- checkered notebook;
- ruler;
- pencil;
- paints;
- glue;
- scissors.
Although it will take a lot of time to make a sword from Minecraft, the result will be worth it. Now follow the instructions and create your own sword from Minecraft:
- We take a sheet of paper in a box from a regular notebook.
- We draw a small sword along an oblique line, following the cells.
- We shade the handle and blade along the edge.
- We outline the project with a colored (red) felt-tip pen.
- We take a sheet of Whatman paper, make a drawing and calculations.
- Now we transfer all the cells of the details (pixels) in the required quantity to the second sheet of whatman paper, increasing everything in size.
- We connect the two sheets with paper clips and cut out the sword blade from the second sheet.
- We make corner cuts with stationery scissors along the edge - for folding.
- We cut out the handle and process the edge in the same way.
- We bend the edges of the paper, creating half the volume, and apply glue to them.
- Now we connect the parts of the parts, we get a three-dimensional sword.
- On the finished structure, we draw out the cells on an oblique and paint each one in the desired color.
- We are waiting for the product to dry, and we are going to surprise others with a brand new, beautiful and absolutely safe weapon.
How to make a backpack using origami technique
The technique is quite simple and is done in several steps.
The basis
- You need to take a sheet of A4 size paper and place it in front of you. A strip 1 cm wide is measured on the right. A fold is made along the marking line.
- The sheet must be folded in half so that there is a clear fold exactly in the middle.
- The strip needs to be glued to the opposite side. It turns out to be a kind of “pipe”.
- On one side of the resulting “pipe” you need to measure the middle. To do this, you need to connect the opposite corners, and lightly pinch the resulting fold line.
- We bend the corners to the marked line and draw along the folds of the resulting triangle. It needs to be lowered and the fold line clearly marked.
- The workpiece must be turned back. All fold lines must be well marked.
- The “pipe” with the resulting folds needs to be opened and carefully pulled by the middle so that a rhombus is formed.
- We divide it into three equal parts, located at the same distance from the center of the workpiece.
- We raise the bottom corner to the resulting line, after which it is glued.
- We perform the same manipulation with the upper corner. It comes down and sticks.
- We bend the right corner of the diamond to the center line, then the left. We straighten the corners. The result is a package.
- We put our hand into it and carefully straighten all the corners.
- We hide the sides in the resulting package.
- We make a fold of about 4 cm at the top of the bag and draw a semicircle with a pencil. The excess is hidden inside the semicircle and lowered. This will be the flap of the backpack.
Straps
The next step is the straps. We also make them from colored paper. You need to cut pieces of paper to the required length and bend them several times along the entire length. Then glue it to the backpack.
ADVICE. The resulting backpack can be beautifully decorated with appliqués, a pocket can be made, and patterns can be drawn on the edges of the straps and lid.
Another version of origami is presented in the following diagram.
Backpack for toys and dolls
Today we will continue to create the image of a Teddy bear. One of the main attributes of a travel bear is considered to be a backpack. And today we will look at how to sew a backpack for toys and dolls.
We will need the following materials:
- Small piece of leather.
- Sharp scissors.
- Big needle.
- A simple thimble.
- Tools for installing grommets and rivets.
- Eyelets (four pieces) and one rivet.
- Different threads.
- Bottom 4.5 * 6.5 cm (the corners of this part will need to be cut off)
- Main part (8*19 centimeters)
- Valve (to do this, circle the bottom part and cut 1.5 cm in length)
- Two straps (16*06 centimeters)
- Handle (3.5*0.6 cm)
- Two ties (they can also be made from ribbons or laces)
So let's get started. On the main part we will install eyelets at intervals of three centimeters. (First we need to outline their location, for this we will find the center, take steps to the right and left of 1.5 cm, then from these marks we will take two more steps of three centimeters). On the main part we sew the seam on the side, at the same time attaching the ties. There will be four layers of leather in the places where they are sewn in; stitching them is not so easy, so it’s better to take a thimble for the job! And remember that leather will not tolerate mistakes, so work hard and create every stitch well.
We sew in the bottom, sewing in the straps together at a distance of 2.5 cm from the seam in the middle. Sew the handles to the top of the backpack. Sew on the valve. Let's install the rivet.
That's all, the Teddy backpack is almost done, all that remains is to decorate it.
Now let's look at a small nuance . Some people make a bowl of coffee. So, coffee does not give good results. Therefore, it is better to paint the backpack with tea. To do this, place our product and a mesh spoon with tea leaves in a saucepan with water. Bring all this to a boil, let it cool and dry everything. The result will please you very much. The only negative is that the backpack may become stiffer. But the most important thing is that you will be able to achieve a fussy effect, and that’s exactly what we wanted! After all, our traveler has been in business for a long time!
You can make such an interesting backpack for toys and dolls with your own hands! Just remember these subtleties. We hope our master class will help you!
Good luck with your work! And let creativity bring happiness !
Step-by-step manufacturing instructions
- We cut out the resulting parts and transfer them to the fabric.
IMPORTANT! Don't forget to allow allowances of 0.4-0.5 cm! Otherwise, the product will turn out smaller. We do not make allowances on all parts: we leave the straps and handle without allowances.
- Sew the sides of the base together to form a cylinder. Sew the bottom to it with the seam inside. You can also sew it with the bottom seam facing out, this will add originality to the product . Afterwards, be sure to turn the resulting part inside out.
Advice . It is better to sew parts together using an overcast stitch or a backstitch stitch.
- We make a decorative stitch “back with a needle” along the edge of our lid. To make the wrong side look neat, glue a lining of a different color to the lid . Sew the lid to the base. We attach the straps and the handle with cross stitches at an equal distance from each other. If desired, you can make decorative seams on them.
- We sew in the lining. To do this, cut out the base from the knitwear, sew a side seam, sew the resulting cylinder inside out to the backpack and sew the bottom.
- We take two identical pieces of woolen thread and stretch them from different sides of our accessory. Cut off the excess. Attach beads. We glue Velcro onto the base and lid so that the backpack closes without any problems.
The doll backpack is ready! It is suitable for both Barbie and other little friends of the child. I am sure that you will get equally beautiful accessories for your pets!
Master class Craft product Beginning of the school year Origami Origami briefcase Paper
I propose to make the following briefcase using the origami technique for a significant event for everyone:
We need: 2 sheets of colored office paper in different colors (if we want to make a combined briefcase) and a glue stick:
We boldly cut out a square from one sheet, but with the other we do it differently: you need to leave a seam allowance of 1 cm wide (for me it’s on a blue sheet):
Place a sheet of paper underneath so as not to stain the table, and glue the sheets together:
We fold the combined rectangle in half along the long side (find the middle), fold the corners towards the middle, as in the photo:
fold the right and left corners as in the photo:
Now we fold the right and left sides towards the middle:
Fold the top and bottom sides towards the middle:
Now we put the blue and lilac parts together (as if we were closing a book). Which side is on top does not matter. We received a wallet with two pockets, you need to reach into the pocket with your hand and pull out one corner (what color is up to you)
I pulled out the blue corner:
The future portfolio has two branches:
It sits well on the table:
Let's start decorating. From the remaining piece we form the basic shape of a “door”
Sides to middle:
And in half (I glued it)
I cut the flap to the required length and stick it on the briefcase:
I fold the clasp according to the same principle, only this time:
Good day, dear residents of the Country! There is very little time left before the start of the school year, so I suggest you quickly put together an origami briefcase like this as a gift for a teacher or student.
The size of the finished briefcase is 10.5 by 8 cm. You can put a postcard or money in it (you can do both - there are two compartments). The briefcase is based on the origami “Wallet” pattern. The kids and I long ago figured out how to make combined wallets in class, but today I figured out how to turn a wallet into a briefcase. I will be glad if the idea turns out to be useful to someone else. Happy folding!
We draw easy crafts-cards for February 23
For those who like to draw, we suggest making a card using paints and a wax candle. It turns out to be a very interesting effect. Even from the manufacturing process itself, the children will get a lot of pleasure, because it is so magical when an invisible inscription suddenly begins to appear. I am sure that when such a gift is presented to dad or grandfather, the child will eagerly want to share the process of this magical transformation.
But we will not limit ourselves to this. Let's also see how to draw tanks, planes or ships. After all, all this can also be captured on a postcard. Perhaps the child would just like to color the finished template? Then save the coloring pages and print them for your child. So, let's start drawing easy crafts and postcards for February 23rd.
In order to make an inscription on a sheet of paper, which will subsequently appear from the paints, we take a simple wax candle. You can take not only white. For example, a pink or blue candle will leave a small mark on the paper and the strokes of the letters or design will be visible.
Use watercolor paper that has a good weight. Otherwise, a simple landscape sheet may shrink when interacting with paints.
We draw lines along which we will place the letters and, pressing hard with wax, we write, draw and draw what you want. Be patient, because what you will display will not be immediately visible. But this is where the magic lies.
Let's get down to the most important thing. We put thick paint on the brush or, at best, gouache.
Wow! Everything that we have written can now be easily seen thanks to the magical stroke of a brush with paint. And where the wax remains, the paint simply does not linger and disappears.
Just as we work with paints and not colored paper, we will also draw and paint stars. Thickly and brightly coat the watercolor sheet with scarlet paint and wait until it dries completely.
We draw stars on it, cut it out and glue it to our card. Incredible! This is how you can have an interesting time using familiar things in an unusual way.
I also present to your attention step-by-step pictures on how to draw and decorate a star. Take note. Even if you have never drawn before, nothing is impossible. Practice on paper. Draw first with a pencil, and then use multi-colored pens, felt-tip pens or paints to design the card.
Children love to draw tanks or airplanes. How to do this? The guys just know that. But adults sometimes wonder. I offer you several options on how to draw a tank:
How to draw an airplane:
How to draw a ship or sailboat:
This is how you can make a beautiful homemade postcard. All details are drawn and painted by hand.
I really liked the idea of giving dad a postcard in the form of a vehicle. It could be a car or an airplane. But the most interesting thing is that the windows or portholes can accommodate the whole friendly family, including grandparents.
Or just draw the Russian flag, flowers and write congratulations.
For young artists, I offer several coloring options to choose from. Or the guys can draw the proposed pictures in their own way.
Tags
from paper from paper from paper. from paper we cut out a sheet of paper and yellow paper we cut out blue paper we cut out brown paper we cut out of paper ready from paper. How to make a school one How to make a school one to make school briefcases we will make folds to make ourselves. How to make ice cream a school bag from a school bag from a video master class master class Video master class a guitar was made a guitar was made step-by-step master classesLand of Masters Masterishka
step by step red material read toys answers