What is plastic chocolate for?
Decor for a cake made of plastic chocolate.
A mass in the form of elastic dough is used to make decor for cakes, pastries and other sweets. Plastic modeling chocolate is harmless and pleasant to the taste. This is its advantage over mastic.
Plastic is a good material for modeling various decorative elements. Small themed figurines, flowers, coverings and much more are made from it.
The resulting chocolate masterpieces are used to decorate confectionery products. The mass is prepared according to different recipes.
Mastic is made from dry or condensed milk. Plastic chocolate is more difficult to prepare. Working with mastic is easy and convenient. But nowadays many chefs prefer chocolate plastic. It is elastic, easy to sculpt, and retains moisture for a long time.
How to make flowers, figurines and other decor
“Modeling chocolate” - modeling chocolate is very convenient for making three-dimensional figures, monograms, flowers and leaves on cakes and pastries. They even put flowers on long Chinese sticks and make entire gift bouquets.
Rose petals can be made by flattening plastic balls with your fingers. Lotus and tulip petals are formed using spoons of different sizes.
We sculpt figures, leaves, monograms using special culinary molds and tools. It is convenient to cut parts using metal molds with thin, sharp edges. Imprints for leaves can be obtained well using silicone molds, double-sided. Several colors are obtained at the same time when molds are used. A wide, thin layer of sculptural chocolate can be used to cover an entire cake.
The principles of working with this composition are the same as with edible mastic and ordinary children's plasticine.
All figures from the sculptural composition, after being placed on a cake or in a bouquet, freeze and retain their shape well. The result is unique, solid decorations that are also edible.
What kind of chocolate can I use?
For special occasions and children's parties, you want the table to look attractive. Beautiful edible figures will help you do this.
For chocolate modeling, any chocolate that is prepared with the addition of cocoa butter is suitable. For example, milky, dark or bitter. It's a matter of taste. But it is better to choose a quality product.
Instead of chocolate, if desired, use industrial glaze. It is sold in confectionery departments in the form of thick tiles and figures.
Glaze
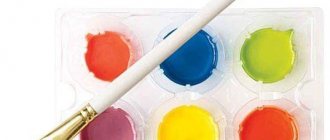
White chocolate dyes well into other colors. The dough can be given the desired color in different ways. Dry food coloring is the cheapest. They need to be diluted in water and then added to the dough. The color saturation will depend on the amount of dry matter.
The gel dye is very easy to use. Just add a few drops to the dough and you will get the desired color. Cooks also use fat-soluble dyes in granular or liquid form.
Water-soluble dyes should not be used. If a child is prone to allergies, then the best option is to paint the product with carrot, beet and other juices.
The white sweet confectionery product is the most capricious. At high temperatures it “floats”. Therefore, it is better for novice cooks to use dark chocolate.
It is convenient to wipe dirty hands with a dry cloth. Experienced cooks also advise using thin medical gloves.
Colorants not suitable for chocolate
To ensure a beautiful and uniform shade of chocolate glaze and its glossy shine, you will need the right choice of dye. There are some dyes that are not suitable for coloring chocolate. These include compositions based on alcohol or water. Their combination with foods that contain fat is unacceptable. Otherwise, water droplets will form on the surfaces and the color will appear in spots.
Gel-based dyes, which do not contain fatty additives, provide a truly smooth surface with uniform shade.
When choosing a coloring for chocolate, you should prefer high-quality products produced by trusted manufacturers, which are popular with experienced confectioners. In this case, flawless painting is ensured with an even, rich tone.
Is it possible to eat plastic chocolate?
It happens that the figures on a cake or other sweet products are made of inedible material. Plastic chocolate is eaten with great pleasure, as it is delicious.
Plastic chocolate decorations
Food colorings are used to make mastic, but sculpted chocolate does not contain them.
Of course, if a person is allergic to some components, then he should not harm his health. There are different recipes for making such a product. For example, if you have an allergic reaction to honey, it is replaced with syrup.
Safe composition dyes
Skilled master confectioners are able to fashion peonies, daisies, and tulips from plastic chocolate. They produce original decor not only with an intricate, complex shape, but also with an unusual color.
The master of his craft colors the modeling mass with natural and safe synthetic dyes. Various components are used for this.
- Food coloring in powder form is pre-dissolved in clean water. White is added to the dough at the last stage of kneading.
- A few drops of gel coloring are added directly to the dough, kneading it well.
- Fat-soluble dyes are mixed with the main composition of the dough. These dyes come in liquid and granular forms.
- Natural juices from tangerines, carrots, beets, and strawberries are used to decorate children's cakes and pastries.
It is not possible to paint sweet plasticine figures with water-soluble food paints. Bright shades of figures, monograms, leaves and flowers are best achieved by coloring white chocolate dough.
In order to better master the subtleties and nuances of stucco decoration, we recommend watching the master class of Grandma Emma and other experienced housewives.
Recipes for making plastic chocolate
To prepare plastic chocolate for modeling, use recipes with different ingredients. The process of preparing the mass is short, but it should sit for a day at home or in the refrigerator. The molded mass should not be kept in the sun.
The classic recipe for plastic chocolate is this:
- white chocolate or chocolate icing – 455 g;
- glucose – 120 ml.
Melt the chocolate and warm the syrup a little. Mix everything quickly and wrap in film. Don't get the plastic too hot, as hot chocolate is not good for the job.
Chocolate plasticine is made quite quickly. It will take no more than half an hour to prepare. But the resulting mass should be kept at room temperature or in the refrigerator for 24 hours. You can't keep her in the sun.
You should not sculpt from such material in a hot room, otherwise the figures will not retain the desired shape. The best temperature is below 20 °C.
Properly prepared mixture molds well, does not crumble, and dries quickly.
Painting instructions
This process includes the following steps:
- The white tiles are melted using a micro-oven or water bath. The chocolate should not boil.
- The chocolate glaze is poured into a clean container when it is planned to be painted in one color. Or the chocolate is divided into 2 or more containers (if you need to paint it in 2 or more colors).
- Adding a small amount of dye.
- Mix the resulting mass with a plastic spatula. In case of dull color, add a small amount of colorant.
- Pouring colored ganache into molds or using for decoration.
Molding chocolate paste
You can make paste at home.
It requires the following ingredients:
- chocolate – 500 g;
- glucose syrup – 250 g;
- water – 15 ml.
It is better to weigh the ingredients on an electronic scale. If the proportions are observed, the modeling mass will have the desired consistency.
The chocolate needs to be melted and the syrup heated at a temperature of approximately 40 °C. Mix these two ingredients until hardened. Mash a small part of the mixture until the cocoa butter separates - it should drip.
The mass in a special container is placed in the microwave. It needs to be checked every half minute until it softens. Add water to the hot mixture and stir. Leave the paste in a plastic bag until it cools completely. Plastic chocolate is ready for making shaped products. The decorations made will delight you with both taste and harmless composition.
The syrup is easy to make yourself. To get 100 g of syrup, you need to boil glucose in tablets or powder in the amount of 64 g with 36 g of water until dissolved. Towards the end of boiling, add 1 tsp. glycerin. This syrup can be stored in the refrigerator for several months.
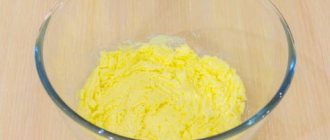
Ingredients for molding chocolate paste
Dyes that are suitable for chocolate
Chocolate is often used in the confectionery industry as a decoration. It is used to make icing for cakes, various figures and candies. One color is often inappropriate. For this reason, this product is painted in different colors.
There are different types of dyes used to color chocolate. They are available in all candy stores.
- Gel-type ones are the most popular. Available in a wide range of colors. Prevents changes in chocolate texture. Dissolve completely, no lumps remain. Gels are easy to use. To paint with this dye, you only need to add the required volume of this composition to the glaze, then stir thoroughly.
- Dry - added with preliminary dilution of the powder in a small volume of vegetable oil to a homogeneous mass. When dry dye, undiluted with oil, is added to chocolate, the texture of the latter may change and become grainy.
- Mother-of-pearl kandurin prevents mixing with chocolate. This dye is used for the finished surface of a chocolate bar or for the inside of the mold where melted chocolate is planned to be poured.
- Fat-soluble - used in pure form. The main substance of each such composition is vegetable oil. To color chocolate, you will need to add 2 drops of colorant to the melted product and then stir.
Natural dyes , in addition to fully realizing their functions, have useful substances in their composition. The raw materials for these powders are plants that have the properties of pigments. The following powders are available:
- Tea: matcha (green and blue) and hibiscus. To obtain a colorant, the dried leaves or flowers of these plants are ground to a powder state.
- Powders obtained from freeze-dried fruits, such as mango, kiwi, cherry, raspberry, etc. Due to the specifics of manufacturing these dyes, many useful substances are retained in their composition.
- Dyes for which vegetables are used: pepper, tomato, beets, pumpkin, spinach. Certain parts of vegetable raw materials are dried and ground into powder. The original smell and taste are preserved.
- Powder of plant origin from beets, barley or black carrots. Obtained from the squeezed juice of vegetables. Provides good pigmentation of chocolate. There is no strong taste.
- Coloring chocolate black is possible using powder obtained from bamboo charcoal.
- Turmeric can be used to make chocolate yellow.
Matcha-chocolate Turmeric-chocolate Raspberry-chocolate
Chocolate molding paste
To prepare the pasta you will need:
- black and white chocolate – 50 g each;
- liquid glucose – 30 ml;
- pink food coloring.
Another recipe from French confectioners:
- chocolate – 340 g;
- glucose – 125 g;
- syrup from sugar and water – 25 g;
- cocoa butter – 25 g.
Take water and sugar for the syrup in equal proportions and heat until completely dissolved. Melt chocolate with cocoa butter and cool.
Mix all ingredients thoroughly. Wrap the modeling mixture in cling film for 60 minutes and then leave in the refrigerator or cool place for 24 hours.
The chocolate mass turns out to be plastic, and it is very convenient to sculpt products from it. It’s better to take it in small portions so that it doesn’t get too windy.
What is the “dough” for?
First of all, confectionery “plasticine” serves as a decorative decoration for freshly prepared baked goods. With its help, a novice pastry chef can create flowers, themed figures, patterns, and also use the mixture as a coating.
“Edible plasticine” is convenient to work with. Confectioners very often replace mastic with the elastic mass presented. It does not take on a crust, and also has a pronounced chocolate taste, which sets off sponge cakes so well.
By the way, confectionery plasticine can be used not only for decorating cakes. You can use it to decorate cupcakes, shortbread baskets and cupcakes.
Recipe for plastic chocolate with honey
Honey and chocolate
For the recipe for plastic chocolate with honey you will need the following ingredients:
- chocolate – 100 g;
- honey – 30 g.
Melt the main product, mix with honey until smooth and leave for a day. Any honey will work for white chocolate. Many housewives recommend mixing dark chocolate only with liquid honey.
Any figures are made from the molded mass, after first kneading it to the consistency of plasticine. For example, rose petals, cartoon figures, cars and much more.
What ingredients are used?
The easiest way to color is white or milk chocolate. Ready-made elements or complete figures are used by confectioners as decorations for pastries and pies. It should be taken into account that dark chocolate is less susceptible to coloring, since pigments are already present in the product.
Experienced confectioners know that it is impossible to get by with just one color or shade when working. There are several types of dyes that are used to create sweet masterpieces.
The most common are gel dyes. Their advantage is that after applying chocolate to the surface, there is no change in texture. This allows you to create the perfect treat. The gel base is completely soluble in water, which helps in creating glazes or even pouring. In this case, the question of how to color white or milk chocolate has a very simple answer - you need to thoroughly mix the coloring substances in the glaze.
Rules for storing modeling chocolate
At home, it is recommended to store plastic chocolate for modeling in the refrigerator, wrapped in cling film. It should not be placed in the freezer, as at very low temperatures the structure of the product changes.
If it is not possible to put the mass in the refrigerator, then choose the coolest place in the apartment. Vacuum packaging is required, otherwise the molded mass will become hard. Long-term storage in a warm room will cause the product to age and change its taste.
During modeling, the chocolate mass should only be in a dry container.
How is it recommended to store chocolate plasticine?
It is recommended to store the modeling composition in vacuum packaging or wrapped in two layers of cling film. Maintain temperature conditions: from +4 to +20. This could be a kitchen cabinet or the top shelf of a regular refrigerator.
The mixture of honey or glucose syrup with icing cannot be hidden in the freezer compartment, where the temperature is below -18. Blast freezing changes the structure of plastic chocolate.
Sculpture paste should also not be stored in a warm place for a long time. The mass begins to age and loses its taste. May turn gray and lose shape.
How to soften sculpted chocolate after refrigeration
Heat the sculptured chocolate in a water bath
Preparing sculpted chocolate for use after storage is quite simple. The necessary pieces of mass are separated and crushed by hand. The bulk mass can be briefly placed in the microwave. However, it is best to do this in a water bath. The container with the mass is placed in a larger container with hot water. Heating continues until the desired consistency of the mass. Steam, rather than water, is considered more professional for melting.
If the mass is very frozen, then let it lie at room temperature for half an hour in its packaged form.
So, in order to make decorative products from plastic chocolate, you need to choose your own recipe and enjoy the process and the result.
Basic mistakes of newbies
This dough is quite easy to prepare. Suitable for both beginner pastry chefs and home use. However, for the first time you may encounter some problems:
- If the mass crumbles
, then put it back in the microwave for 10 seconds and knead it. During subsequent preparation, add more glucose syrup to the composition. The problem may also be with the expiration date. If stored for more than three months, it loses its working properties. Choose only fresh ingredients for the dough. - If it becomes hard
, you need to heat it in a steam bath and add more syrup left over from cooking. Place everything out again, wrap it in film, and leave it for a day at room temperature. - is “grainy”
- when preparing the composition, you should not knead for a long time and thoroughly. The mixing process stops when the mixture is added to the syrup. As soon as the ingredients have become completely homogeneous, wrap the mass in film and let it rest. - Does not hold its shape
- the problem may lie in the proportions (little/too much syrup), temperature conditions (too hot), or lack of time for stabilization. - Too much oil when reheating
- the mixing process may not have been at the same temperature. The problem can be solved by reheating the components under the same conditions. - It melts when sculpting
- for plasticity, the ideal temperature is 18 C. Heat from your hands, direct sunlight - all this can negatively affect the consistency of the product. Sculpt should only be done in a cool room. And in the summer only near an open window, or under the air conditioner.
With corn syrup
Plastic chocolate for confectionery modeling, the recipe of which includes corn syrup, is perfect for people with allergies to bee products.
Composition of ingredients
To prepare a plastic mass using corn syrup, you need to select the following products:
- 460 g white chocolate;
- 180 ml corn syrup.
Step-by-step cooking process
Follow the steps to prepare the plastic mass for chocolate decoration:
- Dissolve the chocolate, broken into pieces, over boiling water.
- Pour the heated syrup into the melted chocolate, stir with a spatula so that the texture does not separate.
- Form a flat cake or sheet from a homogeneous plastic mass and wrap it in several layers of film.
- In order to begin to form decorative elements, the chocolate dough must be allowed to stabilize for 20-24 hours.
Compositions of chocolate roses - step-by-step lessons
The most popular chocolate flowers are roses. They look gorgeous and are quite simple to make. Craftsmen make roses from white or colored plastic chocolate so finely and accurately that they are almost impossible to distinguish from real ones.
Amazing Birthday Roses
The manufacturing process occurs in the following stages:
- Before work, you should hold the finished chocolate mass in small portions in your hands to soften it, then you need to roll out the chocolate layer quite thinly and cut out the petals.
- You can shape the petals using your fingers, stacks or toothpick.
- Finished items must be placed in the refrigerator to harden.
- Combine the cooled elements using melted chocolate mass, starting from small petals to large ones.
- In this way, buds, opened flowers and leaves are formed.
- Assemble a bouquet of chocolate roses using skewers. Pack in gift paper.
Basket of tea roses
The making process is similar to forming a bouquet on skewers, with the difference that the roses are placed in a basket made of cookies and chocolate. Such a tasty and beautiful gift will delight any woman on her birthday, March 8, Teacher's Day and any other professional holiday.
Heart for my beloved
Chocolate flowers laid out in the shape of a heart will be a direct proof of love and appreciation. And if you roll out plastic chocolate thinly, you can cover it with a cake made in the shape of a heart, which, in turn, can be decorated with beautiful edible flowers made from colored chocolate mastic.
Chocolate holly leaves
100 g chocolate (dark, milk or white) Preparation: 30 min Cooling: 15 + 30 min
- Chop the chocolate with a saw blade and temper. Wipe the holly leaves along with the petioles with a damp cotton cloth and dry thoroughly. Dip the tip of a clean, dry brush into the tempered chocolate. Gently shake off excess chocolate. Holding the leaf by the stem, “paint” the underside of the leaf from the middle to the edges, being careful not to get the chocolate on the other side of the leaf.
- Place the chocolate-covered leaves on a sheet of baking paper. Place in the refrigerator for 15 minutes to allow the chocolate to set. After removing from the refrigerator, apply a second thin layer of melted and tempered chocolate on them in exactly the same way.
- Place the leaves back in the refrigerator for 30 minutes. Take them out one at a time and, holding the petiole with two fingers, peel off the chocolate “leaves” from them, carefully pulling them upward.
In the same way, you can cover the leaves of laurel, orange, lemon, ficus, gardenia or camellia with a layer of chocolate. Artificial plastic leaves can be used for this purpose. Depending on the type of sheet, apply the chocolate to either the smooth side or the veined side.
How to Apply a Layer of Chocolate on Candies and Other Sweets
400g chocolate (dark, milk or white), melted and tempered. Preparation: 15 min.
- Place a candy or other similar product intended to be coated with a layer of chocolate on the tip of a fork. Carefully dip a fork into the melted and tempered chocolate and remove, holding it over the chocolate for a few seconds to allow excess to drip into the bowl.
- Gently run the underside of a fork around the edges of the bowl of melted chocolate a few times to thin the bottom layer of chocolate coating. Place a sheet of cooking paper on the board. Place a fork on it and use the tip of a knife to slide the chocolate-covered product off the fork and onto the paper.