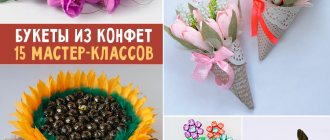
Lush tulle bows and miniature satin bows are found everywhere in our lives: they decorate hairstyles, gift boxes, holiday tables, children's clothes, belts, and hair accessories. The scope of application of these decorative elements is expanding every year, and at the same time, the interest of adults and children in the peculiarities of their manufacture is growing. Learning how to make an elegant ribbon bow with your own hands is not at all difficult, even if you have no experience. There are a lot of ways to tie a cute accessory; choosing the right one depends on the size of the product and its future purpose, the characteristics of the material from which they plan to make the bow, and the availability of additional tools at hand.
History of origin
This art form originated in Japan several centuries ago and belongs to geishas who wore jewelry along with the traditional, festive outfit - a kimono.
In the original it sounds like kanzashi, in Europe it was transformed into Kanzashi. These are original, bright, spectacular crafts from which they make hairpins, bags, and dresses.
It is based on the technique of assembling ribbons according to given patterns of individual elements and arranging the parts into a whole composition, attaching them to hairpins, pins, and a felt base.
Bows made of satin ribbons, assembled with your own hands, look beautiful, impressive, highlight the hair color, support individual strands, and fix the hairstyle.
Handicrafts are suitable for both adults and children. Working with fabrics and ribbons of different textures develops tactility, a sense of taste, and the ability to combine materials of different densities and colors.
Do-it-yourself bows are a good opportunity to replenish your own wardrobe, make a pleasant surprise for your friends, and acquire additional income, since hairpins and decorations made from ribbons are very popular and are in great demand.
Twisted bow
To create such a product, you will need ribbons that are the same width, but their lengths should be different.
- You can use three to four ribbons, but if you want to create a large bow with your own hands, then you need to take more material.
- They are sewn together using a sewing machine or by hand in the form of an infinity sign.
- One is inserted into the other, and the center is closed with a piece of material, but its edges must be processed.
Material for production
In the photos of bows and flowers presented on the site, you can see what crafts can be made from. The basis is:
- Thin, soft fabrics. Organza, tulle, silk, which are distinguished by a clear structure and amazing tints;
- Satin ribbons. The material is used in different widths: 2.5 cm, 5 cm, 7.5 cm, 10 cm, and other sizes if necessary. The color scheme is limited only by the author's intention. Serves as the main material for making crafts;
- Lace, narrow, wide, gathered several times. Transparent lace makes beautiful DIY satin ribbon bows even more attractive, colorful and graceful;
- Decorative braid used to decorate bows.
Satin bow with lace
Take a wide satin ribbon 4 cm and the same piece of lace, braid or organza, but twice as thin. Cut two identical fragments 20-22 cm long and place the lace on top of a wide ribbon. Sew the edges together to make two rings and melt them from the inside with a lighter. Place one loop on top of the other, straighten the folds and secure the bow in the center with a bead or button.
Photo: joy-jeans.ru
Overview of satin raw materials
Ready-made satin ribbons are one of the most affordable materials and are available in a wide range; products made from it stand out for their beautiful appearance, style and variety of shapes.
High-quality, inexpensive samples can be purchased at sewing stores. Different types of ribbons, braid, lace, and knitted elements are useful in needlework.
Finished materials with processed edges are easy to use, quickly assembled into the necessary parts, and require minimal costs for fixing with glue or threads.
Using a sticky thermal fabric that glues two edges together is not practical since the products often have a curled shape. It is better to give preference to ordinary cotton threads.
Satin is a rather soft, smooth material with an even texture and a reflective effect. Pleasant to the touch, the material requires certain skills when forming elements for bows from satin ribbons with your own hands. To work with it, pins are used to fix the position and folds.
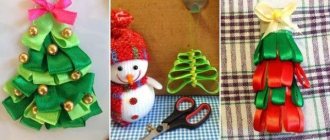
Instructions: make a complex fluffy bow
If you think that the bows listed above are too simple, and your soul requires complex and beautiful designs, pay attention to multi-layer bows.
- We tie several layers of tape around our palms.
- We intercept the resulting rings in the middle with a ribbon and tighten them into a neat knot.
- We straighten the rings and make them look like flower petals.
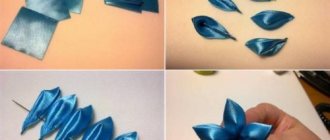
It's simple. By choosing different colors, you can create different varieties of flowers. So, a pink and red ribbon will make a rose, but the yellow color will help create an excellent association with a daisy.
When using a thin ribbon of organza or any other thin fabric, you can easily create a complete allusion to a flower using threads. Grab the edges of each petal to make it look more like a real flower.
A complicated version can also be assembled. To do this, take several ribbons of similar shades. Distribute future flower petals in several tiers. We wrap the color around two fingers and tie the ribbon.
Then we take the next color - we take three fingers. We continue to do this until we are satisfied with the result. Now the complex bow is ready. Handicrafts will definitely ask about it and ordinary people will be surprised.
Assembling a tool box
The site presents step-by-step photos of making bows from ribbons with your own hands, which can be mastered in a couple of lessons. Tools you will need:
Note!
DIY hair bands - ideas for decorating homemade rubber bands + step-by-step instructions for making them yourselfDIY shadow theater: step by step how to do it at home! 175 real photos
DIY photo frames | How to make a simple and beautiful photo frame as a gift or for yourself from scrap materials
- Scissors;
- Needles, threads of different sizes and colors. You will need several spools of thread of different colors, since the kanzashi technique is based on modeling jewelry using a needle and stitching the elements;
- Tweezers. An assistant who helps when working with small parts;
- Lighter. Fire prevents threads from falling out from cuts of ribbons and fabrics by sealing the edges. You can use matches, a burning candle, or work over the open flame of a burner;
- Glue gun, Moment glue. Used for gluing parts of a composition;
- Base for crafts: hairpins, elastic bands, hoops, clips, combs;
- Decorative jewelry: beads, beads, fastenings for the core, children's themed decor.
Workshop on sewing a headband for a girl with a fabric bow
You can make a fashion accessory from a piece of unnecessary fabric or damaged clothing, pleasantly pleasing yourself or your child. This master class will tell you step by step how to sew a beautiful headband with a bow on your head from an old knitted or cotton T-shirt.
You will need:
1) Unnecessary T-shirt;
2) Centimeter tape;
3) Scissors;
4) Needles and threads.
Stages of work:
1) First of all, you need to measure the head circumference, then cut out two identical rectangular pieces of fabric, which should be 10 cm longer than the child’s head circumference.
2) If the size of the T-shirt is suitable, it is enough to simply cut a strip of fabric, the width of which will be equal to 10 cm. In this case, the ends are already fastened, but if separate pieces were cut out, they must be sewn from the inside out to each other.
3) Turn the workpiece inside out and sew the long sides, leaving a small hole so that the product can be turned right side out. We straighten the part and iron it thoroughly.
4) Next, fold the workpiece in half and mark a distance from the fold equal to half the circumference of the head. Along a straight line in this place we make a simple line.
5) The headband itself is already ready, all that remains is to form a bow from the remaining tails of the fabric. But first we make a jumper from the same material. We straighten the ponytails in different directions and wrap a jumper in the center, securing it at the back.
Basic elements
For those who want to master the technique of creating jewelry and bows from ribbons, there are various instructions and diagrams on how to make kanzashi. They describe in detail, step by step, the process of creating petals, flowers, and bows. The finished decoration consists of individual elements assembled by hand.
The basic ones include: voluminous, round petal, sharp petal, double petals, voluminous leaves, flat parts, complex ones using several materials at the same time.
How to make a complex element
- Fold the square piece of tape diagonally.
- Form a small square from the resulting triangle, bending the ends.
- Fold in half, forming a complex petal with a bridge in the middle. Glue the edges.
- In this way, by overlaying square on square of different colors, you can get multi-colored complex petals.
Rep ribbon bows
- For the top bow you will need 6 pieces of ribbon 8 cm long, 3 pieces on each side. Fold the first segment into a petal, attach the next segments from the back to the middle, bend the segment away from you and apply, folding the edges of the segment together, forward - you get a lush bud.
- Trim the edges of the pieces and pin them with a needle or clamp. Make the second half of the bow in the same way, sew one by one and pull it off.
- For the bottom bow you will need 3 pieces of 16 cm in length. Fold the pieces in half, marking the middle, attach the edges to the center and pin with a needle, attach the next piece to the middle and so on until you get a triple bow.
- Next, you need to pin it with a needle so that it does not fall apart and stitch all the layers in a row. After that, both bows need to be glued and secured with an elastic band or a hairpin, and secure the elastic band with a piece of tape.
Make the middle from the same piece of ribbon as in the bow, fuse the folds along the two edges in different directions so that a fold is formed in the center, attach to the bow and glue only the edges so that the center is not flattened.
How to form leaves
- You can make a leaf using the flat element technique, giving the edges a wavy shape with fire.
- Make a blank of green ribbons 2.5 cm wide and 10 cm long.
- Fold the piece in half and cut it diagonally with a soldering iron (you can use a burner.
- Unfold and iron. It turned out like a cup with a sharp top.
Ribbon bows without fastenings
Classic bow
A very simple but beautiful little bow that you can make in minimal time.
Manufacturing process:
- Take a small silk ribbon of any color. Make small loops on different sides and place the loops over your index fingers.
- Then insert one loop into the other and tighten the ribbon
- Wonderful, cute decor is ready!
Bow to decorate a gift
Now you can make a very beautiful and elegant bow yourself for this or that occasion and decorate any gift with it.
Manufacturing process:
- Hold the ribbon with your thumbs and forefingers and form it into a ring.
- Continue making the next rings, collecting all the resulting turns on your fingers.
- Then tie the middle of your bow with a thin ribbon (separate piece)
- Remove the twists from your fingers and straighten the bow.
Elegant bow
A beautiful and discreet bow made of grosgrain ribbon.
Manufacturing process:
- Cut two small strips from the ribbon, depending on the size of your future bow. Fold them into rings and place them on top of each other, crosswise, as in the photo.
- Then in the middle, horizontally to our bow, you place the third piece of ribbon, folded into a ring. Apply some glue to the middle and sew the three pieces together.
- Then cut a piece of ribbon a little longer than the previous ones, and the second piece will need the same length, but with processed edges, as shown in photo No. 5.
- Turn your bow over and add a little glue to it and place a piece of ribbon with the edges finished.
- We drip glue on top and wrap our bow in the middle with the second piece, as in the photo.
Don't miss: How to crochet a double crochet
Voila! The elegant bow is ready.
Two-color bow
A beautiful, two-color bow in which you are free to choose different ribbon colors.
Manufacturing process:
- Take a satin ribbon 2.5 cm wide. You will need 6 pieces of such ribbon, each 11 cm long. You need to take a separate ribbon in the middle, 5 cm long and 1 cm wide. You will also need a glue gun, two pieces of felt, rhinestones, safety pins or sewing pins, a regular needle and thread.
- Cut the required lengths and fold one piece of ribbon as shown in the photo, securing the fold with a sewing pin.
- Then we turn our piece of tape over and turn its edge to the left.
- We make another turn and secure it with a needle. We sew our petal and tighten the thread. The edge of the petal can be fixed with glue.
- We continue to make petals, three of one color, three of another.
- Then we glue 4 petals, 2 pieces on each side, onto a piece of felt using a glue gun. Then glue another petal in the middle of each side.
- The center of our bows should be wrapped with a thin piece of ribbon, glued, and rhinestone decor should be glued on top.
Volumetric bow
An original decoration that is perfect for a girl in kindergarten or first grade.
Manufacturing process:
To begin, we make 5 roses from satin ribbon. To make a rose, take a piece of ribbon 50 cm and 5 cm wide. Fold the ribbon in half and make four folds at one edge and secure with thread. Then we make one turn outward, then a second and fix it with thread. We continue to make the third and fourth turns, after which we fix them again with thread. Then follows the fifth and sixth curl, fix it with thread. We make the subsequent seventh and eighth turns using the same technique, but we try to make the bend a little lower than the center of the previous turn. We fix the turns with thread and continue making turns using the same technique until the end of the entire tape.
The last turn, the end of the ribbon, should be folded downwards and sewn with thread. The tip of the tape should be melted so that it does not crumble. Then we glue a circle of felt to the bottom of the rose, on which we make two cuts for inserting an elastic band into it. We glue the circle only around the circumference, without applying glue to the middle.
Then, using a decorative elastic band 24 cm long, insert the rose through the holes in the felt. Then we take a wide satin ribbon measuring 5 cm in width and 24 cm in length (4 pieces). We fold one circle from two pieces and exactly the same second one. We secure their ends with thread, and then sew them together in the center, forming a bow. We wrap the middle of the bow with a thin ribbon and attach a large rhinestone to the middle if desired.
Don't miss: How to sew a collar yourself at home
Then we secure our elastic band with threads and glue a bow to it.
Master class on making hair clips from ribbons
Step 1. Cut the blanks for the petals. One flower will require 30 pcs. large rectangles, 7 cm long, 20 pcs. small ones, 5 cm each. Process the edges.
Step 2. Make voluminous petals from blanks. Divide the rectangle into 3 parts: fold one third perpendicularly, fold in half and glue. Do this with all the blanks.
Step 3. Assemble the elements into a flower. On a felt circle with a diameter of 4 cm, glue large petals one next to the other, pressing them to the base. The second tier is formed from smaller petals. The third and fourth tiers are glued with the base to the middle, forming a lush flower.
Step 4. Glue the leaves to the wrong side of the felt, distributing them evenly in a circle.
Note!
DIY bird feeder - interesting ideas on how to make it quickly and easily from scrap materials- Do-it-yourself cold porcelain: the best options for porcelain products, step-by-step instructions and recipes for making it yourself (photo + video)
- DIY curtains - types of curtains, choice of materials for sewing and design + step-by-step instructions and simple patterns for beginners
Step 5. Decoration.
Step 6. Using a glue gun, glue the finished dahlia to the hairpin. The hair decoration is ready.
Kanzashi flowers open up the wonderful world of handicrafts.
Making using the kanzashi technique
Kanzashi is a Japanese technique for making fluffy ribbon bows. In the East, this method has been known since the Middle Ages and has remained virtually unchanged. Asian needlewomen decorated clothes and religious objects with elegant flowers made from ribbons.
Now the art of kanzashi is very popular in Russia and Western Europe. Bows made from satin fabrics made using this technique can be used to decorate hairpins, gift wrapping, children's and women's outfits. A ribbon flower will look good on the lid of a craft box or other small items.
Hairpins in the shape of a flower
This is the simplest work using the kanzashi technique. The finished product is glued to a metal base for a hairpin. You can use additional decor - gold or silver cord, rhinestones, sequins. Step-by-step algorithm of actions:
- Cut colorful strips of fabric into squares.
- Form them into multi-layered triangular petals.
- Glue each piece together and give it a rounded look.
- Connect all the elements one by one to make a flower.
After this, the finished craft is decorated, focusing on your own taste. You can place a small figurine of a bee or butterfly in the center for decoration. Dangling pieces of colored cord will add a playful touch to the product.
Another elegant option for making a bow from hair ribbons:
- Form five petals from blue squares.
- Gather each of them into a fold and “blind” a flower.
- Make two green leaves and glue stamens to them.
- Attach this decor to the flower from the wrong side.
Next, the resulting structure is fixed on a hairpin. A cabochon is placed in the middle of the flower. This accessory goes well with a white or blue dress.
On discharge from the maternity hospital
A lush rose sewn using the kanzashi technique can be used to decorate a baby's overalls. For boys, all shades of blue are traditionally chosen, for girls - red, pink, orange. Creating an original decoration is not at all difficult:
- Cut a strip of narrow ribbon into 6 pieces 14 cm long.
- Burn the edges with a lighter to prevent them from crumbling.
- Fold each piece in half and connect them to each other alternately.
- Attach 6 more blanks in the second tier.
- Make several petals from silver or golden cord and form the third row.
Next, the center is decorated: as an option, small beads are glued there. You can attach the craft to the overalls using a glue gun.
To create accessories that will decorate a newborn’s clothes, you need to choose hypoallergenic materials. You should not purchase a ribbon of a bright, saturated color to create a bow; it is likely that it was made using harmful dyes.
Cut strips from different ribbons Burn the edges Fold each piece of ribbon in half and secure it Connect the petals to each other one by one
Attach the second row Form the required number of tiers Add decor
Glue a felt piece at the bottom and insert a ribbon
Ready product
Decorative decoration for school
We suggest making bows for school with your own hands. They look elegant and democratic on your hair, have a simple elastic fastening, match any hair color, are quick to put on and securely fix your hairstyle.
The description shows the classic color scheme. You can use your own ribbon colors.
To create an elegant hairpin you will need:
- White satin ribbon 5 cm wide. The total length is 140 cm, it is cut into rectangles of 10 cm;
- Blue satin ribbon 2.5 cm wide and 70 cm long. Choose rich, dark blue shades, they make the composition more contrasting and stand out well on the hair;
- Sewing kit: needles, pins, scissors, threads, measuring tape;
- Decor: rhinestones, buttons for decorating the middle;
- Candle for finishing edges.
Small fluffy bows
If you need voluminous, lush, but at the same time small and not very bulky bows, you can make them yourself from a thin satin ribbon. One bow requires four pieces of 10-11 cm each, but you can add more petals for volume. They also make, for example, beautiful decorative flowers.
Fold each piece in half and fold the edges down to create a kind of “house”. Bend over the triangle, secure it with pins and carefully use tweezers to fold the sides towards the middle. Fold it, roll it into a “rose” and sew two parts together - this will be one side of the bow. All that remains is to connect both together!
Photo: pinterest.ru
Master class with detailed description
Step-by-step instructions on how to make bows from ribbons, in an accessible form with pictures and detailed descriptions, make it possible to assemble such a wonderful hair decoration with your own hands.
Step 1. Preparing the material. Mark the tapes and cut them into pieces. From white make 4 rectangles of 10 cm, 11.5 cm, 13 cm. From blue - 3 rectangles of 22 cm.
Step 2: Forming the base. Lay out a corner from the white pieces. The stripes are longest at the bottom, smaller and smaller at the top. Everyone has the same angle. There will be six cuts in total.
Step 3. Make a bow. Bend the corners of the cuts on each side. Fold each side of the three pieces in half and bend them towards the middle. Get a figured square. Secure each step with pins. Sew along the bottom corner, moving 2 cm from the edge. Apply the seam in an arc from one edge to the other. Cut off excess ribbons and process the edges over fire. Unfold the ribbons.
Step 4. Fold the blue pieces in half, sew, and place them together in a herringbone pattern as shown in the photo. Secure the middle with threads.
Step 5. Place blue and white bows together, sew, and decorate the middle. We use a decorative button as the central detail. Sew on an elastic band. The school bow is ready.
Multilayer bows
You will need three types of satin ribbons of the same color or similar shades, but of different widths (for example, from 0.5 to 4 cm). Cut the widest ribbon into twelve pieces of approximately 20-25 cm each. Fold the edge to the mark at a distance of 9-10 cm and fold it back - this is how folds are formed in this bow. Fold the free edge in the opposite direction on the other side and make the same petal out of it.
Sew a fragment at the base, pull the thread, carefully trim off the protruding tails and repeat for the remaining sections. From the cut corners, use curved tweezers to form double petals and glue the edges together with a lighter.
Place the narrowest tape and a medium-thick tape on top of each other, as in the diagram. Cut them together into eight fragments 7-8 cm long and fold them into regular petal loops. Before you start assembling the bow, cut out a small circle of felt or other dense material - about 3 cm in diameter.
Place half of the large petals on a thread and pull them into a ring, and then glue the remaining ones on the back side. The next layer is voluminous petal loops, which can be alternated with sharp single-layer leaves. You will need the petals from the scraps to decorate the center and finally form the bow.
Photo: dobrodeja.ru
How to decorate a dress: 10 simple and stylish ways