Many graduates of schools or universities around the world wear a special uniform to receive their diplomas. This is a square academic cap and a loose cloak-hoodie. This outfit serves as a uniform; all pupils and students look the same. In different countries, a cap with a square base is called differently. For example, in Australia it is called trench, angular. In England it is often called Oxford.
What is the name of the academic cap and gown in the USA? Cap and down. Some compare the origin of this headdress with the ancient biretta of Catholic clergy. Others believe that the origin of this shape of the cap has Turkish roots. They wore yarmulkes with the Koran tied on top.
Previously, only representatives of the highest caste - masters - wore the academic cap. Now all students wear it. Many schools have begun to imitate the tradition and wear items of clothing such as a cape and cap, even to elementary school students at graduation.
In the article we will look at how to make an academic cap with your own hands, what is needed for this, what parts this headdress consists of.
Components of a cap
The simplest version of the product includes the following elements:
- a headband that is worn on the head. May be rectangular in shape or with a triangular bend on the forehead;
- square top surface;
- a tassel made of yellow or red yarn;
- a thin ribbon to which, in fact, the tassel is attached to a square base.
Making an academic cap with your own hands consists of cutting out elements and joining them together.
Square cap
An unusual version of the cap, which fits tightly to the head and has a visor.
- Fold the newspaper in half and then into a quarter to locate the center line.
- Open it up and make a triangular roof.
- First fold the rectangular strips into 2 halves, then bend them.
- Turn the model over and bend the edges from the sides towards the center of the model.
- Let's fold regular triangles in both corners.
- We bend the triangular roof and tuck it in.
- Open the model and align it to form a square.
- Rotating, bend the corners, open.
- We turn 4 corners. The result is a hat in the shape of a box.
How to make a headband
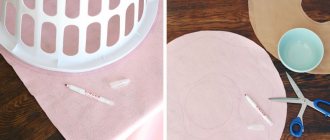
The first option for making the rim of an academic cap is to cut out a black rectangle. It is better to take thick cardboard. If you don’t find exactly a black sheet, then you can take any other one and then paint it black. This option for making the rim, in addition to the rectangle itself, also has an additional height for cutting fasteners. This is a strip 2 cm high, which is cut into separate segments, the corners of each of them are cut off.
This is necessary so that it is convenient to attach the square base of the academic cap. Before cutting, use a flexible meter to measure the circumference of the head and add a couple of centimeters to the fold of the paper. You can fasten the ends either with PVA glue or with a paper clip using a stapler.
Lesson #1: Top Hat
You will need a regular plate, pencil, scissors, glue and thin cardboard. This is a classic version of creating a hat, based on it you can come up with your own ideas.
1. Cut the cardboard intended for the top of the hat into two strips of the same width (note that their width determines the height of the cylinder).
2. Measure the circumference of the child's head, divide the resulting number by 2, and you will get the required length of each strip. Make an allowance of about 2 cm on the glue line, and cut off the excess cardboard.
3. Glue the two fragments overlapping along the transverse side. You will get one long strip of cardboard.
4. Next, roll the strip into a cylinder with the colored side facing out, and glue its transverse edges overlapping.
5. On the conditionally lower side of the cylinder, make cuts about 2 cm deep, located at a distance of 2 cm from each other. Then set the part aside for a while.
6. Lay out the cardboard on the table intended for the brim of the hat. Place a regular soup plate on it and trace its outline with a pencil. Then place your cylinder in the center of the circle and circle it too. Cut out the resulting “donut”.
7. Return to the cylinder. Place it on the table with the cuts facing down and apply a little glue or a piece of double-sided tape to each.
8. Place the donut onto the cylinder and press down until the glue sets.
Bottom view:
9. If you want to hide the gluing areas, cut out another circle and glue it to the bottom surface of the margins.
10. Decorate the hat with a contrasting paper ribbon and you're done:
Video lesson
Below we provide a visual video with which you can easily make such a hat:
Another way
You can make the rim of an academic cap using another method. The circumference of the head is measured and a strip of paper 10 cm wide is cut out according to the measurements. Don’t forget to add a couple of centimeters to the hem. When connecting the parts together, in this case you can use separate thin strips of paper or attach the base with tape from the inside so that the fasteners are not visible from the outside.
You can also cut out a square base from two parts and make strips for fastenings on the bottom. But we’ll look at this later in the article.
Classic newspaper cap
A classic version of a neat cap, worn slightly to the side.
To make a cap, it is better to take a square from a newspaper with a side equal to the volume of the head plus 1.5-2 cm.
- Fold the newspaper in half.
- We bend each of the resulting rectangles in half to the center.
- Then we fold part of the paper from the edge of the newspaper to the resulting fold line again.
- We bend the upper corners into a triangle into the center of the model. We lift up the bent part of the newspaper from the edge.
- Turn it over to the other side and bend it left and right along the fold lines. The result was a square with folds.
- The bottom edge needs to be folded over the folds, then straightened.
- Decorate as you wish with stickers.
How to Create a Tight Square Base
It is best to make it from two parts. The lower part is a square in which a hole is cut with the diameter of the prepared rim. It needs to be further reduced by about 1.5 cm. This circle is first cut out with scissors, then cut into separate segments and the corners of each are cut out on one side and the other. Then all the parts are bent inward.
To connect the rim and the square base, you need to smear these inwardly curved strips with PVA glue and attach them to the inside of the rim. Then a second similar square warp is cut out and attached to the first one with a hole. As a result, not a single fastener will be visible and the square base will be firmly attached to the rim.
Square graduation cap made of paper
How to make a square graduation cap out of paper?
In Europe, this headdress is called The square academic cap, graduate cap. A graduate cap with a square top and tassel (some called a "confederate cap") and a "master's cap".
We don’t wear them and are usually used for staged events - mainly at proms. It is clear that sewing such hats for an entire class for the sake of a few minutes on stage is irrational. You can also glue them from black cardboard. Therefore, let’s formulate the topic of today’s post as follows: How to make a square graduate cap from cardboard (or paper) with your own hands.
I will make such a hat for you from thick wrapping paper, I will come up with a method right along the way. My “graduate” is Manyasha (that’s what I called my mannequin of a human head))). We need to adjust the hat to the size of her head. For me, for example, hats are needed much more, and, in addition, the hairstyle must be taken into account. This is all to ensure that you do not automatically copy the sizes.
Let's start with the walls (crown). I take a strip of paper about 60 centimeters long and about 15 centimeters wide. Here the question may arise - why is it so wide? But because if we need the hat not to lie on the crown of the head like a pancake, but to be held by the fact that it is pulled over the head, then - yes - the height of the crown should be quite considerable.
I bend one edge - about 2 centimeters, cut it quite often and glue it - it turns out to be a two-layer bottom edge of the cap. Why was it cut? – And then, because you have to give the head an oval shape, it’s better if the inner layer is not rigid.
Now I measure out 10 centimeters, draw a line, fold the remaining strip over from the other edge and cut it very often. And I try on Manyasha - so, the total length of the strip for her is 52 centimeters.
I glue it and try it on the head again, press it into shape, it turns out to be an oval cylinder. Wow! That’s right – not a circle, but an oval. I put it in the middle of a square sheet and trace the oval from the inside with a felt-tip pen.
I cut the hole a little larger, that is, not exactly along the outlined line, but stepping back 1 millimeter to the edge of the sheet.
I put this square sheet with a hole on the cylinder and check if it fits.
Everything is fine. Now you need to design the top of the cap. I apply a square with an oval slot to a large sheet of paper, circle it and figure out what indents to make.
Perhaps 3 centimeters will be just right. Corners will need to be cut. I fold the edges along the lines.
While he waits, we will glue the walls and the bottom surface of the cap. I thickly coat the edge of the oval with a glue stick, quickly put it on and glue the bent cut edge.
Again I try on Manyasha - everything is fine, it’s not distorted. I smear the edge of the square with glue and carefully glue it to the curved edges of the top blank. I prefer to act this way - I apply glue not to the folds and flaps, but to the surface to which they are glued.
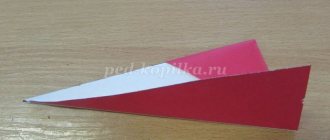
Well, the hat is assembled. Now the last detail is the brush, I will also make it from paper. Judging by pictures from the Internet, the tassels are usually long, and the cord is attached to the center of the cap.
I take a narrow strip of paper, fold it in four and glue it together - this is a “lace”. I cut a strip of paper 10 centimeters wide into a fringe and roll it into a roll - a tassel.
By the way, with a tassel, not everything is so simple - here is a quote from one forum about these same graduate caps: By the location of the tassel on a confederate cap, you can recognize the academic degree: if it is on the right, then in front of you is a student, if on the left is a certified specialist. Upon receipt of the diploma, a ceremony is held to transfer the tassel from one half of the hat to the other. What subtleties!
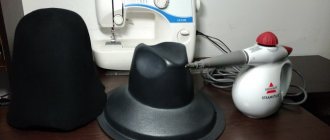
I made this master’s cap out of paper only to show the manufacturing principle itself. But I needed to make one for a performance and the question arose - how should I paint it black. There was no black A3 cardboard on sale, and you couldn’t make porridge with A5 sheets from children’s craft kits. So what should you do? Buying a can of black nitro paint or a can of acrylic spray just for one cap is somehow unnecessary. I decided to try covering the hat with relatively inexpensive black lining fabric. But in the store I saw an amazing material - non-woven fabric - and the issue was resolved. I cut the cardboard hat to approximately the same dimensions, but covered each piece with non-woven fabric; it fits on a glue stick like it’s natural! It turned out like this:
Now I’ll weave a tassel from a black shoe lace and - go ahead, my homemade master!
Marina Novikova told you how to make a square graduate cap with your own hands from paper.
Read more about fake paper hats:
Kokoshnik and paper crown
Tags: props, paper hats
Making a brush
An academic cap must have a tassel. It is mainly made from threads of yellow or red yarn. How to make a brush can be clearly seen in the photo below.
You need to cut a piece of cardboard to the desired size. Then tightly wind many turns around this base. From above, the end of the thread is threaded with a needle under the turns of yarn and a strong double knot is tied. The cardboard is removed and the upper part is wrapped with thread several times. After tying, the knot with the end of the thread is pulled through the inside of the tassel from top to outside. You can then attach the product to the academic cap directly at this end.
Scissors are inserted into the inside of the turns of yarn and a cut is made with the tension of the threads downwards. If the edges are not quite even, then use scissors to carefully cut off the irregularities.
Ordinary cap
In order for the product to turn out neat, it is better to make fold lines along special pencil marks.
- First, we outline the fold lines so that the work turns out neat. We fold the rectangular spread of the newspaper along a larger diagonal to mark the fold line, first on one side, then on the other. Then fold the newspaper in half to mark the center fold line.
- Now let's get to work. Fold the newspaper diagonally to form an isosceles triangle.
- Now we fold the corners up along the intended fold line so that we get a square.
- Fold the corners in half again, then in half again to mark the fold line.
- Then we fold the corner along the intended fold line so that the edge sticks out outside the model.
- We do the same on the arc side. The result was a square with the edges of paper sticking out on both sides.
- Now we take the opposite corner and fold one layer to the center of the square, leaving about another 1 cm of layer for the rim.
- We turn up the rim.
- Turn the model over to the other side. Fold it in half corner-to-corner.
- We unfold the model and hide the bottom corner inside the cap.
How to attach a tassel to a square base
When cutting out a square for a hat, before gluing it on, it is advisable to immediately determine and indicate the center point. To do this, draw diagonals under the ruler, connecting opposite corners with a simple pencil. The center of the square will be located at the intersection of these two lines.
To attach the tassel, you need to use an awl to make a hole in the marked center. Crafts made from threads can be attached either to the end of the yarn or to a thin satin ribbon. It is threaded through the hole from the inside and a knot is tied. It’s better to make it double so that the tape doesn’t come out through the hole. From the outside, the ribbon is pushed inside the tassel with a needle with a wide eye and a knot is tied.
If the tassel is simply attached to the end of the thread, then it can be strengthened by making turns in several layers of yarn. A braided braid made of threads will look beautiful.
As you can see, making an academic cap is not at all difficult. If desired, all elements can be sheathed with black fabric on both sides. Then the parts are simply sewn together with a needle and thread.
Pioneer cap
A cap of a slightly modified shape that can be worn not only on the side, but also in the middle of the head.
- Fold the newspaper spread in half and fold it over to mark the center line.
- We bend the corners of the center line towards the center of the model.
- We bend one layer from the bottom up and up again.
- Turn it over. We bend one side on the side about halfway, then the other too. We bend the bottom edge of the model along the bottom edge of the rim.
- We unfold the cap and bend the small corners from below to the intended line.
- We fold the paper up again, then up again.
- We turn the model over. We first bend the large corner down and then hide it.
Elegant cap
- Fold a rectangular newspaper sheet in half lengthwise to mark the center fold line of the larger side.
- Then unfold and fold in half widthwise.
- We fold the corners on both sides towards the center and iron them with our hands.
- We bend the rectangular strip from below towards the center of the model 2 times.
- We turn the model over and do the same on the reverse side.
- Turn the model over and bend the corners to the center bend line.
- We straighten the corners and bend them in the other direction - up along the resulting fold lines.
- When folded, bend them towards the center of the model and tuck the edges under the rim.
Hair accessory
You can make small original cylinder hats. Used as hair decoration, as children's hairpins, when decorating topiary and homemade dolls. For the body you will need a piece of thick cardboard, a round (cylindrical) cardboard base made from cling film or toilet paper. The diameter depends on the desired size. You can use any fabric, preferably soft (to create waves). The parts are connected with hot glue. Decorated with flowers, bows, rhinestones, “pearl” beads, and accessories.
Where is a Panama hat useful?
If you think about it, this homemade headdress can be used in many ways. Thanks to our article, you will be able to make a panama hat out of paper and understand in what cases it is appropriate. For example, you can wear it during repairs; it will be especially useful when carrying out painting work. If you feel that the sun is too hot on the beach, and you left your hat and umbrella at home, this product, made from improvised materials, will again come to the rescue. When spending a long time outdoors (for example, at the dacha or fishing), a paper panama hat will also not be superfluous. And if you approach the manufacture of the product creatively, for example, fold it out of colored cardboard and decorate it beautifully, it will turn into a stylish accessory for a children's (and not only) party.
Cap - cowboy hat
An original headdress that has a concave brim and looks like a cowboy hat. We will need two complex square sheets of 50 by 50 cm. The larger the squares, the larger the finished product will be.
- Fold the newspaper in half. Then fold it in half again on the other side.
- Unfold the newspaper and use a ruler to mark 4 cm to the left and right of the center fold line.
- We bend the corners so that 4 cm to the left and right of the fold line from the fold line remain free.
- Next, you need to move your hand inside the folded corner of the newspaper and bend it along the bisector.
- Let's do the same on the opposite side.
- Turn the model over and bend the corners along the fold line.
- We turn the model over. Fold the bottom corners of one layer of newspaper toward the center.
- We turn the model over again and bend the corners from the bottom to the center on this side.
- Now we fold the side strip to the center by about 2 cm and bend it again.
- We turn the model over and do the same on the opposite side.
- Let's open the model. The result was a cap.
- We bend the corners on both sides and straighten them.
It is important to press very hard when folding the paper so that the model holds its shape well.
Hat with brim
It won't be that difficult to make a hat with a brim. Moreover, the detailed diagram will become clear to school-age children.
Let's describe the entire algorithm for creating a hat.
- Take any newspaper and make a square piece out of it. Bend this sheet in half, and then in half again so that the bends are outlined;
- Then unfold the paper so that you are left with a double rectangle. Tuck the hidden corners inward, but do not connect the folds along the edges;
- Open the last folds from the inside and press a little along the entire workpiece. Turn the workpiece with the wrong side up, following the fold lines, bend the edges towards you, and then fold the “sides” here on all sides;
- Straighten the hat, press it down a little and you can wear it for an evening walk.
Master's cap, confederate cap, bonnet; how to sew
To make it you will need: a 5 liter plastic bottle and red fabric (50 x 150cm), cardboard.
1. Cut a strip 10 cm wide from a plastic bottle, roll it into a ring, and secure it with a paper clip. Place the ring on the child’s head and select the diameter so that it fits well on the head.
2. Trim the excess plastic, adding an allowance of 1 cm to the resulting diameter for overlapping fastening.
3. Measure the length of the resulting strip (L).
Part A - band. Fold the piece of fabric in half lengthwise with the right side facing inward. Cut, leaving an allowance for cross sections of 1 cm and an allowance for the longitudinal section of 10 cm.
Sew the cross sections to make a ring. Press the seams. Place a strip of plastic into the band, select the exact size of the ring, and fasten it with a stapler. Try on the band, pull the fabric at the top to make a hat. Trim off excess fabric.
Part B - upper part. Cut out a rhombus from cardboard, cut out two pieces of red fabric according to the pattern, fold them right sides inward, sew the seams, leaving one side free. Insert cardboard, fold seam allowances and sew by hand.
Brush Description of work, see here
Sew the tassel to the top of the hat. Sew the upper part to the band by hand.
The material was prepared by Lyudmila Orlova, especially for the children's portal "Sun" Published on December 20, 2007
For personal use only! Republication in other publications is prohibited!
Source
Cap - Chinese cap
We make a square sheet of newspaper. Fold the sheet in half and unfold it.
- Then fold it in half on the opposite side.
- Bend the edge of the paper about 2 cm.
- We turn the model over and bend it on both sides to the center bend line.
- Then we bend the corners from the top layer of paper diagonally across the rectangles so that they look beyond the edges of the model.
- Bend a strip of paper from the bottom towards the center.
- We straighten the cap and press down the upper part.
Cap-shaped cap
A cap with a visor that covers your head well.
- We fold the corners of the newspaper, smoothing the folds well so that the cap holds tighter.
- We wrap the strip from the bottom twice towards the center. The result is a headband.
- Take the sharp edge at the top and place the corner under the rim.
- Turn the model over and fold the newspaper on the sides to the center fold.
- Fold the strip from the bottom in half towards the center. Then we fold the corners towards the center and hide them under the rim.
- We unfold the cap and tuck the corners at the top under the rim.
Simple cap
The easiest way to make a cap from a newspaper in a hurry.
- We make a square from a newspaper sheet and fold it in half.
- We bend the corners of the model, grabbing approximately 1/3 of the length of the side on both sides. 1/3 of the side of the square in the middle remains free.
- Bend a strip of paper at the bottom of the sheet towards the center by about 2 cm.
- Turn the model over and bend the corners to the center by about 3 cm.
- Then we bend a strip of paper from the bottom of the model towards the center along with the folded corners.