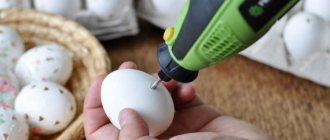
Eggshell decor is one of the simplest types of decoration. With its help, surfaces acquire a mosaic texture, and paints will help to depict original designs. Eggshells are used to decorate bottles, flower pots, candlesticks, jars, vases and even furniture. The material is combined with pasta, cereals, salt and accessories. Any novice decorator can handle this type of decoration. It does not require any special skills or special tools, and the basic material for creativity can be found in every home, because waste from eggs usually goes straight into the trash. Let's take a look at a couple of master classes and pick up some simple but original ideas.
How to prepare shells for needlework
To begin, the shells are thoroughly washed in a soapy solution. As you know, colonies of dangerous bacteria can flourish on the surface of eggs, so do not skip this important step when working with the material. Soap can be replaced with alcohol or another disinfectant liquid. Some people prefer to boil the shells in boiling water for 10-15 minutes. Heat treatment will also perfectly disinfect the surface of each piece. During washing, any film that may remain is removed. Then the shell is laid out on a piece of clean cloth or napkin and dried thoroughly. The finished material is crushed by running a rolling pin or glass bottle over it several times. There are several ways to attach the shell to the surface being designed:
- In the first case, a layer of glue is applied to pre-degreased glass, plastic or ceramics. It is “sprinkled” with crushed shells or the container is “dumped” in them. Then the resulting mosaic is pressed against the surface with a sponge to secure it better.
- For another method you will need tape. The shell is glued onto it. A layer of glue is applied to the prepared surface, and tape is attached on top. Now you need to wait for the fastening agent to dry completely, after which you carefully remove the adhesive tape.
- The third method is perhaps the most time-consuming. Glue is applied to the surface and shell “shards” are attached to it manually one by one. The process will take a lot of time, but the pattern will not be random, but will correspond to the author’s idea.
It doesn’t matter at all what color the shell is; in most design “recipes” it is subsequently painted over.
Decorating a flower pot
The decor of the flower pot is made in two versions:
- Complete surface coverage with shell;
- Partial application of pieces.
To begin with, the pot is first cleaned of dirt and dried. For complete coverage, its entire surface is coated with glue. Then the shells are attached. After drying, a layer of paint is applied on top. It is better to use acrylic or tempera, as they adhere better to the surface, are not afraid of water and fade more slowly. You can apply another layer of paint to the dried layer using a shaped stencil or create a design yourself. Secure the layer with varnish. For partial decoration, the pot is first painted in the desired color, and glue is applied only to those areas where the shells are planned to be placed. Most often, they are made into horizontal stripes of different widths or primitive geometric patterns. The pieces are glued to the surface of the pot, allowed to dry, and now the original window sill decoration is ready.
“Plant” designs look organic on flower pots: blossoming buds, maple leaves, bouquets.
Options for decorating glass containers
The technique of applying shells to the surfaces of jars, vases and bottles is no different from the design of other ceramic and glass objects. Some people prefer to give the pieces the desired color ahead of time. For these purposes, they are placed in a container with dye and allowed to dry. To secure it, the shells already glued to the bottle or jar are additionally coated with varnish. This step is resorted to in cases where the natural color of the material does not harmonize with the overall composition, and paint cannot be applied on top, since the decor becomes the final chord in the work. The vases are additionally covered with voluminous satin flowers, buds made of felt pieces, bows, beads and lace. Colored pasta of interesting shapes and coffee beans in combination with shells would look appropriate on the surfaces of “kitchen” spice jars. Rows of twine are added to the bottle decor, which is used to wrap the container. You can also glue real spikelets or blades of grass onto the surface, which are covered with paint on top.
Homemade candlestick
This original homemade thing will become natural in every home. Recycled egg shells can be used as the base for mini candle holders.
It's not difficult to make such a thing. You just need to light the candle. Carefully pour the liquid wax into the shell. To obtain a beautiful shape, you need to divide the egg shell into two equal parts. It would be great if they were painted in a bright color.
Decor of flat objects
When decorating plates and coasters, eggshells will act as a background onto which a design will subsequently be applied. If you don’t have a brush, then stencils and napkins for decoupage will come to the rescue. The shell can be glued to the entire surface of the plate, randomly filled with it in individual areas, or only the border can be made in relief. The technique of combining textures is also used, when one area is filled with shells, and the other with small beads, cereals (buckwheat, rice) or salt. The technique of partial volumetric visualization looks original: in the picture some element goes beyond its scope. For example, in a rural landscape with a cozy house, a fence is made of wood and glued to the surface of the saucer on top of the image. In “natural” paintings, real blades of grass, twigs, pine cones, leaves or dried flowers are glued to the surface.
If the surface of the stand or plate will decorate the city landscape, then the shell, painted gray, will be an excellent imitation of stone pavement.
Decorative bottle
It’s not difficult to make a similar decoration for your home from eggshells. The first step is to prepare the bottle. It must be perfectly clean, so all remnants of paper and glue are removed from it.
You need to gradually glue pieces of napkins onto a dry and grease-free surface, then lay out a mosaic of shells on it and cover it with napkins again. Finally, a thin layer of primer is applied. The craft should dry well. If desired, the egg shell can be easily painted in any color.
Eggshell furniture decor
Decorating furniture with shells is usually done partially. A “solid” relief background on large surfaces may slightly lose its color. However, this material perfectly imitates snake skin. Natural finishing of furniture items costs incredible amounts of money, so shells are an option for creating original decorations that will be indistinguishable from the original at first glance. The registration process may be delayed due to the specific processing of the base material. Each piece of shell will have to be processed separately. To do this, you will need tweezers, which are used to manually bite off the extra millimeters from the edges to give them the round shape characteristic of reptile skin. Gluing the shells will also take a long time, since in this case the degree of similarity to the original depends on their location. Dye tones are selected in accordance with the natural skin tone of the reptile. First, apply a light shade to the entire surface and allow it to dry completely. Then a darker color is dripped onto each “scale”. Eggshells are used to decorate any surface: from traditional wood to plastic. Shelves, cabinet fronts, coffee tables and lamp stands designed in this way look original.
Frame
Small shells can be used to decorate a regular photo frame, giving it a unique appearance. The shell particles are glued to a store-bought glass frame, or to a homemade one made from thick cardboard.
If you liked the ideas for making crafts from natural materials, go for it! Everything will definitely work out!
Decoupage and shell
Both of these techniques are organically combined. There are two ways to combine:
- A part of a napkin with a picture is glued onto a pre-primed surface. Regular PVA glue is best suited for this. After the image has dried, a layer of adhesive is again applied around it to hold the shells. For reliability, they are pressed with a toothpick or sponge. After the surface has dried again, it is covered with paint.
- First, the shells are glued to the glass or plastic. After drying, prime the embossed surface twice with a sponge. It is necessary to go through several times to thoroughly paint over all the gaps and gaps. After drying, the picture is transferred using the decoupage technique.
The result is almost the same, the only difference is the sequence of steps for decorating the surface. You can decorate anything your heart desires in this way: plates, photo frames, pots, boxes, jars, mirrors, plastic and glass bottles.
