Outside, the golden season of autumn is in full swing, which means it’s time to decorate everything that surrounds us in autumn style. Decorations in the autumn style include: topiary made of autumn leaves, paintings depicting yellow leaves, autumn bouquets, autumn decorative wreaths, window decoration, etc.
In this article, the News portal “Vtemu.by” has prepared for you another good option for interior decoration - an autumn garland. And it is best to make the garlands proposed in our article in the company of your beloved children.
Autumn garlands made of paper garland of leaves, step by step
Multicolored Materials:
- Ready-made leaf templates
- Marker
- Glue
- Scissors
Progress:
- Print the recommended template.
- Bend in the required place and cut out the leaf along the contour.
- Draw veins on the sheets using a black marker.
- Connect the leaves together using the cut holes. Glue to each other for strength.
Made from wax crayons Material:
- Maple leaf stencil
- Wax crayons
- Knife
- Tracing paper
- Iron
- A thread
- Towel
Progress:
- Print out a sheet stencil.
- Make wax shavings using a knife and crayon.
- Place fabric, tracing paper, shavings on the ironing board, and another sheet of tracing paper on top.
- Cover everything with a paper towel and run a warm iron.
- When the shavings melt and cool, place a stencil under the tracing paper and cut out the leaves.
- Secure the finished leaves with thread.
Accordion Material:
- Scissors
- Colored paper
- Pencil
- Glue
- Corrugated paper brown
- Rope
Progress:
- Fold the A4 sheet in half.
- Using a pencil, draw the outline of half the leaf.
- Cut out the leaf with scissors.
- Unfold the piece of paper and fold it like an accordion.
- Bend the accordion in half, with the long ends facing each other.
- Cut brown corrugated paper into strips, roll the strips into rolls.
- Glue folded corrugated paper where the sheet is folded, lubricate it with glue and fasten both ends of the sheet.
- Having made many similar leaves, make a garland from them and secure them on a rope.
How to make a garland, panel or curtain from fallen leaves
Similar garlands of artificial autumn leaves look great at some distance from the wall, around flat chandeliers and lamps in the center of the room, and also as curtains in doorways. Another similar garland can be hung over an unused large dining table right up to the surface of the table, so that it conditionally divides the tabletop in half along its entire length. Colorful fabric leaves cascading down from the ceiling create the most breathtaking, magical fall look.
You will need : - Artificial (you can try real ones - see below) autumn leaves of different colors and preferably shapes - made of fabric; – Sharp scissors; – Strong (silk or silk-like) threads in a pale autumn shade (any from the palette, preferably beige or muted gold - more inconspicuous); – Large needle; – Stationery, or craft, or hot glue (any transparent glue after drying that will not damage the fabric); – Mastic for posters (for mounting on the wall it is safe for wallpaper and whitewash – “Poster putty”), wall staples, small suction cups or any other point-based method convenient for you for hanging light things from the ceiling (not required if you are hanging a garland like a panel on wall - you can use a wooden beam for the upper base of the panel, on the chandelier itself, or nail a garland to the door frame at the top); – Roulette; – Decoupage glue as needed and desired (for real leaves).
1. We buy sets of artificial leaves in supermarkets for handicrafts, home and garden stores, or various RuNet stores. You can also purchase easily disassembled garlands. Choose leaves from fabric of any density, perhaps with small plastic parts, or even plastic or plastic-coated. But the last 2 options are not suitable for curtains, because they will severely scratch the skin and cling to hair and clothes. So, if this is a garland, we cut ourselves a lot of individual leaves with small cuttings.
You can try to work with real leaves, but they are too fragile when dried, and when strung “living” on a thread, they will quickly curl into dull rolls and turn brown. Here you can try experimenting with decoupage glue, covering it in 2-3 layers (drying each layer completely before applying a new one) all sides of the leaves, both “live” and dry (very carefully so as not to damage), then you MAY have something it will work with real fallen leaves. But natural leaves, of course, are also not suitable for curtains.
2. Using a tape measure, measure the distance from the ceiling to the desired length of each level of the garland, write down the data obtained. If you decide to hang a garland over the festive table, it is optimal that it ends 30-45 cm before the tabletop, so as not to get into the food and not interfere with the guests’ communication. Don’t forget that the garland should not hang above lit candles or close to them - it will start a fire!
3. Cut the required number of threads (depending on the thickness of the garland) according to the lengths obtained in step 2. The color of the thread should be such that it practically disappears visually when suspended with leaves. When threading the needle, leave a short tail of at least 10 cm, since such a thread slips out of the needle very easily during this type of work.
4. On each thread, depending on its length, we string 4-5 leaves through the center of the latter. Try to immediately determine the point approximately in the center of the sheet where it will be suspended in a balanced manner. Change the distance from the upper end of the thread to the first leaf and between the leaves on the threads so that your garland does not end up looking monotonous with wide stripes of empty “holes” along its entire length.
In the place where the thread comes into contact with each leaf, apply a drop of suitable glue from below (under the leaf) so that all the leaves are more or less securely fixed in place. Before lifting and hanging the garland, leave it on the table overnight until the glue has completely dried.
5. If, in order to hang it, you have to move the finished garland to another room, take your time and be careful, because the leaves get tangled VERY easily, and they are not fixed well enough on the threads so that they can be quickly and easily untangled. It is best to pack each individual thread with leaves in a separate bag, large envelope, or roll it in wax paper before moving it around the house or, especially, transporting it to another building.
6. We fix the garland on the ceiling in any convenient way. The easiest and most harmless thing (for the ceiling - it will not leave any traces behind and is easily removed) is to use the modern mastic described above in the list (you can buy it on eBay): it is pinched off from a block, rolled into a ball and the upper tip of one thread is placed in it with leaves.
7. Then the ball with the tip of the thread is simply pressed against the ceiling - and that’s it! It will hold on! Do not forget to make equal large spaces between the threads, because leaf fall is not very dense. But you can use any other method of attaching to the ceiling. By the way, remember that suction cups fall off pretty quickly from almost any surface, even if there is almost no weight on them.
After hanging about 4-5 strands, step away from the garland and check if you like how it is distributed in space. In the photo below, 20 garlands of the same length are hung. Once hung, cut off any ends of the string that hang down after the last leaf on each garland. And if there is a purely aesthetic reason, you can cut some of the garlands even higher, cutting off the last 1-2 leaves.
Add-ons:
– At other times of the year, instead of autumn leaves, you can use artificial pink petals made of fabric or snowflakes;
– If you have a certain frame hanging above the dining table (with lighting, dishes, etc.), it is easiest to hang such threads on the frame;
– No matter how hard you try, a couple of threads from the garland will still get tangled and/or damaged. This is life, accept this fact with universal calm, and unravel the threads VERY slowly and carefully!
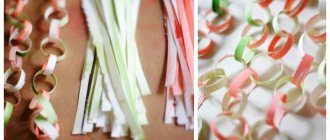
Corrugated paper garland, step by step with photo
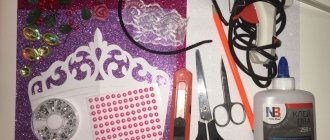
Materials:
- Corrugated paper
- PVA glue
- Scissors
Progress:
- From two rolls of paper of different colors, cut a piece 3-4 cm wide.
- Glue the ends of the rolls together according to the picture.
- Throw one strip over the gluing area and level it out.
- Fold the second strip in the same way.
- Continue criss-crossing the colored stripes.
- Glue the ends of the ribbons along the bend.
When unfolded, the garland will look like a two-color accordion.
Garland of paper flowers, step by step master class
Material:
- Thick colored paper
- Scissors
- Simple pencil
- Glue
Progress:
- Draw a semicircle on paper with a simple pencil and make markings for the petals.
- Glue the resulting flowers into cones; from three blanks, assemble one whole flower by gluing smaller buds into the largest one.
- Draw a spiral on green paper. It must be cut using scissors.
- Straighten the spiral and glue the flowers to it. The garland is ready.
DIY paper Christmas garlands, step by step
From figures Material:
- Paper
- Scissors
- Ribbon
Progress:
- Print the finished New Year's figures on a color printer.
- Cut using scissors.
- Fasten them together by threading tape or using glue.
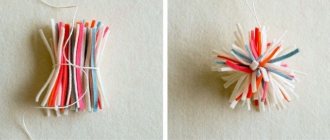
Garland "Christmas trees"
Material:
- Corrugated paper
- Scissors
- Threads
- Glue
Progress:
- Green corrugated paper must be folded in several layers.
- Make a fringe of even strips, cutting not all the way with scissors.
- Fold the middle, as in the picture, fix it with glue, making a ring.
- Thread threads into the ring.
- Cut out yellow stars from paper and glue them to the Christmas trees.
- Decorate the Christmas tree garlands with red toys-circles made of cardboard, gluing them to the Christmas trees.
Origami Garland Material:
- White paper
- Scissors
- Stapler
- Glue
- Ribbon
Progress:
- From sheet A4 you need to make lanterns and Christmas trees, according to the picture.
- Use scissors to adjust where necessary.
- Secure the products with a stapler and glue.
- Alternately string the Christmas trees and lanterns onto the ribbon.
for the new year
Making Christmas garlands is fun and exciting! To make a beautiful and original garland you will need small candle lamps, narrow tinsel and a couple of jars of paint - special for glass or regular acrylic. The light bulbs are dipped one at a time in paint and dried on a cardboard stand (the bases can be wrapped in cling film to prevent them from getting dirty). Then the light bulbs are glued to the tinsel in a chaotic manner, and the unusual Christmas tree garland is ready!
Making another Christmas tree garland is also not too difficult - the main thing is to stock up on a template. For printing, you can use colored paper at once, or you can make one general template and copy it onto paper of any color. Printed or redrawn templates must be cut as shown in the diagram and strung on bright twine.
Printable template (click on image to enlarge):
A garland made of felt balls looks very cozy and very Christmas-like. You can do it together with your child - you just need help. In order to make such an interior decoration, you will need felt balls. No, not even that - A LOT of felt balls.
Making them is quite simple - take some wool for felting in your palm, wet it under the tap, and then lightly roll it into a ball. Add foam or soap and continue rolling. When the ball starts to form, you need to apply a little effort.
If the wool is acting up, try changing the water temperature several times - after a couple of changes from cold to hot water and back, the fibers begin to fall off. The future ball must be thoroughly rinsed from soap. The ball is ready when it becomes hard.
Make a lot of these balls - they can be the same color (then it is better to take a contrasting thread for stringing) or different shades, and then just string them on a thread and a needle, and your cozy winter decor is ready. By the way, you can decorate a Christmas wreath on a door or a New Year tree with these balls.
Well, I’ve infected you with my handicraft enthusiasm and you already want to make all kinds of garlands from flowers, felt balls, flags and other things? Then it's time to see what other decors are available.
A DIY festive garland for a wedding can be not only solemn, but also very cute - like this country-style flower garland.
Use your imagination - use the materials you have at hand. These can be scraps of colored paper and scrap sheets, scraps of beautiful fabric and thick film, beads and buttons, sequins and feathers, old light bulbs and even small wooden clothespins - holiday decor can be made from literally anything!
The current season can give you some ideas for decorating your home. Take, for example, the rich autumn hues of fading but still living leaves when designing your next project.
Garlands are the easiest way to liven up a space and incorporate natural elements into your decor. Make pine cones, leaves, fruits and flowers all work together to create stunning designs on your bedspreads and walls.
Here are some homemade garlands from around the Internet for your attention, dear guests of the Design Museum!
Ideas for beautiful garlands
Choose high-quality material, do everything slowly and in the end you will get wonderful decorations for your home in the form of garlands. A home that is decorated with your own hands automatically becomes cozy and filled with goodness.
From felt
It is very easy to make a garland with your own hands from felt.
For this we need:
- colored felt (it is better to take pure shades);
- lace, ribbon or braid;
- sharp scissors;
- sewing machine (or thread and needle).
A DIY felt garland is made like this:
We cut out the elements of the future garland - these can be geometric shapes and simple symbols.
We sew a garland of flags with our own hands or using a sewing machine.
We sew a ribbon on both sides - the birthday garland is ready!
If you already have a flat garland, and now you want to make voluminous New Year's garlands, then you will like the butterfly garland.
Making this original Christmas tree garland is very, very simple:
- we cut the blanks (you can use diagrams - you can download them for free, you can cut them by eye);
- we collect bow ties - we sew a large rectangle with thread across it, pull it together, tighten the knot and close it with a small jumper;
- we string the butterflies on a thread or a beautiful cord; you can also use twine or ribbon for the garland;
- straighten the butterflies - your DIY wedding garland is ready!