Shiny Crown
You will need: shiny cardboard in purple, cherry and white colors, a crown template, scissors, a stationery knife, PVA glue, a glue gun, a simple pencil, a hairband, decorative elements - lace, shining stones, rhinestones, flowers of different shades, stamens, leaves ...
Master Class
- Draw or print the crown template on A4 sheet, then cut it out.
- Transfer the template to glittery purple cardstock, then cut out the crown blank.
- Cut out circles of glitter cardstock and glue them to the stones as shown in the image.
- Glue the lace to the bottom of the crown.
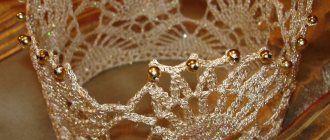
- Glue rhinestones to the openwork top of the crown.
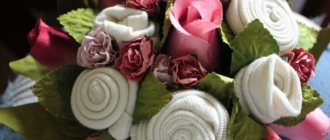
- Glue a row of flowers onto the lace, alternating them by color.
- Glue the stamens and leaves next to the flowers.
- Glue sparkling stones to the center of the crown.
- Glue the crown to the headband.
The shiny crown is ready! The video captures the incredibly sparkling brilliance of the shining crown.
DIY shiny crown for New Year 2022
Luxury crown
You will need: wooden board, soldering iron, 2 medical clamps, rosin, soldering flux and fat, lead-free solder, soldering iron cleaning sponge, glue gun, instant glue, gloves, wire, dishwashing liquid, towel, headband, filigree, combs , metal ovals, decorative elements - crystals, Swarovski stones, beads of various colors and sizes.
Master Class
Follow safety precautions when working with a soldering iron!
- Plug the soldering iron into a power outlet and prepare the clamps to avoid getting burned.
- Apply flux to the surface of the rim.
- Soak the solder in rosin and apply to the rim. Pass the soldering iron tip like a brush.
- Try the filigree on the rim, mark the points, then apply fat to these places.
- Prepare the filigree for soldering. You need to solder them in three places - the places of adhesion to the rim, picking up solder and applying fat by touching the tip.
- Prepare all filigree in the same way.
- Mark the center of the bezel, rest the filigree, secure with a clamp and solder it. It is worth noting that the solder between the rim and the filigree should melt and flow, then let it cool for about 20 seconds before removing the clamp.
- Solder the remaining filigree around the circumference of the rim. It is worth noting that the side filigrees must be attached to the rim and to each other.
- Solder the ridges to the rim on both sides.
- Solder the filigree to the back of the metal oval, remembering to apply grease to the contact points. Make 5 of these blanks.
- Press one piece with clamps, apply fat and solder to the center of the crown. Solder the remaining blanks around the crown in the same way, adjusting the height of each part, creating a smooth transition.
- Rinse the crown base thoroughly with dish soap, then dry with a towel.
- Make decorative branches from wire and beads as shown in the image.
- Hot glue the crystals to the base of the crown.
- Glue twigs, stones and other decor to your liking, filling the entire crown.
The luxurious crown made of metal and stones is ready!
Lilac
The base is a plastic bottle wrapped in glitter paper, and the front is decorated with rhinestones in the shape of shells or sequins.
- Prepare a 5 liter bottle and draw the outline of the top part on it, first measure the baby’s head. The volume of the head should be equal to the length of the resulting shape and bottle.
- To make it look beautiful and without alterations, draw the outline for the first time not with a permanent marker, but with a proofreader or pencil, and only after correcting mistakes with a marker. We want to reassure you, even if it didn’t work out the first time, it’s okay, because the front part will be decorated and the flaws will be hidden.
- We cut out the edges and make sure that they are 1-2 mm larger than the contour, because By running a lighter along the edge, we will make the edges less sharp and dangerous for the child.
- We cover the inside with shiny paper, this can be wrapping paper or from gift bags. We do this using tape, a hot gun, or whatever superglue we have on hand. Remember about double-sided tape, it will stick perfectly to the plastic and hold the paper.
- We glue the sequins using a hot gun or superglue, applying from bottom to top so that the bottom layer overlaps the top.
- We decorate the lower part with matching tinsel. For better fixation, use a stapler; it will speed up the fastening process and the staples will not be visible, because she's brilliant. Double-sided tape will also work.
- To make sure the structure is strong, turn it upside down before trying it on, let it dry for several hours so that the glue sets everywhere, if you used it.
This crown is suitable for a queen or a mermaid, or maybe a butterfly or a queen. It all depends on the chosen color of the suit and the mood of your beauty.
Crown on the rim
You will need: shiny pink foamiran, white felt, tulle, crown template, wooden skewer, scissors, glue gun, Moment-Crystal glue, superglue, ruler, white threads, needle, headband, pieces of textile elastic, 7 rhinestones.
Master Class
- Print and cut out the crown template.
- Trace the template with a skewer on the back of the foamiran, then cut it out.
- Make a slit as shown in the image so that the crown can be assembled.
- Gather 7 small pieces of tulle onto a thread and attach each of them with superglue to the back of the crown.
- Apply Moment-Crystal glue to the side of the crown to which the tulle is attached, then glue it to the white felt and cut it out.
- Assemble the crown and secure the joint with glue.
- Use a glue gun to glue the rhinestones to the top of each crown tooth.
- Measure the rim and glue a strip of foamiran onto it, 3 cm longer and a few millimeters wider.
- Cover the ends of the headband with textile elastic.
- Glue the crown onto the headband, slightly away from the center.
The crown on the headband is ready! I recommend watching the video master class!
Crown on the rim. Master classes on Podarki.ru
Crown for a boy
You will need: felt, glue gun, stars, pompoms, scissors, ribbon.
Master Class
- Cut out blanks for the crown from felt.
- Glue them together.
- Glue pompoms, stars and ribbon.
The prince's crown is ready!
Lace crown
You will need: wide lace ribbons, scissors, a centimeter, PVA glue, a glue gun, spray cream, gloves, wax paper or film, a glass, rhinestones and crystals, glitter.
Master Class
- Measure your head circumference and cut the lace.
- Put on gloves, pour glue into a container and wet the lace.
- Place the lace on wax paper and leave to dry for several hours.
- Paint the lace.
- Decorate the lace by attaching rhinestones and crystals using a glue gun.
- Hot glue the ends of the lace together to form a crown.
The lace crown is ready!
Add-ons
Following the instructions given, you will make a skeleton costume, but Koschey the Immortal is not just a skeleton. The image of this fairy-tale villain can and should be complemented with accessories that will contribute to the instant recognition of the character.
Sword
In fairy-tale films, Koschey appears armed with a two-handed sword. The length of this weapon should be up to the owner's chin. The easiest way to make it is from wood, for example, from an old ski:
- Using a hacksaw, cut out the hilt of the sword, which should be 3-4 times the width of the owner's palm.
- Reinforce the cross guard with screws or self-tapping screws.
- Paint the weapon with gray or black paint or cover it with foil.
If you don’t have skis, you can use a board of the appropriate size or a piece of cardboard, cut out and painted in the appropriate colors. This option is not particularly desirable because such a sword will be fragile and will bend or break easily.
Crown
Koshchei’s crown is not always golden. She is often depicted as being made of some more “villainous” metal, such as iron, or silver to fit into the overall black and white palette. Therefore, it is better to paint it silver or gray metallic, or even “wet asphalt”. The crown itself is easiest to make from cardboard, but it will be short-lived and may warp under the influence of paint. So it's better to use papier-mâché :
- First, using a centimeter tape, the circumference of the head of the future Koshchei is measured, then a scan of the crown with teeth is drawn on a piece of paper of the appropriate length. Make 10-15 of these paper crown patterns.
- Bend one of them, glue it into the shape of the finished product and coat it with office glue, then begin gluing the next layers. If you want to make a crown with convex angular “Gothic” elements, you can glue them on top when the main shape has dried.
- Then the crown is painted golden (silver) or covered with foil.
Wooden crown
You will need: a thin wooden board, a pencil, a knife, paper clips, a bucket and a saucepan, hot water, glue.
Master Class
- Mark the links (teeth) of the crown on the tree.
- Cut them out.
- Fill a bucket with hot water and soak the wood in it for 10 minutes.
- Fill a saucepan with hot water, remove the crown from the bucket and place it in the saucepan for 10 minutes.
- Drain the water and leave the crown in the pan overnight until completely dry.
- Glue the ends of the crown together, securing them temporarily with clamps.
- Remove the clips and decorate the crown to your liking.
The wooden crown is ready! I recommend watching this video!
DIY: handmade beaded
