New Year's toys made of felt
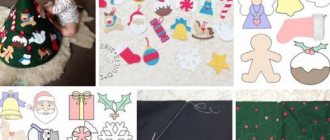
To make a felt craft, you need to follow several step-by-step steps.
Bright flashes:
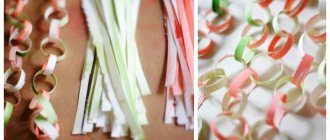
- Using a ruler, mat and cutter, cut multi-colored felt strips measuring 8x0.5 cm.
- Measure a thread about 20 cm long.
- Place cut beige trims on the thread, and place ribbons of other colors on top.
- Pull the strips tightly with fiber and secure with a knot.
- Fluff the pieces of felt like a ball, and tie the two thread ends together.
Valenok:
- Draw on the cardboard the contours of the felt boot and a long, narrow strip for the eyelet.
- Transfer the pattern to the fabric and cut out 2 identical parts (preferably red).
- Separately make templates for snowflakes and Christmas trees.
- Sew decorative elements onto one of the large parts and then sew them with another cut piece.
- Attach a loop.
Christmas trees:
- Cut 2 identical triangles from green felt.
- Sew multi-colored pieces of braid onto one of them, wrap the ends and sew to the wrong side.
- Sew the 2nd piece to the decorated part. Leave an unsewn edge at the bottom.
- Stuff cotton wool inside and sew it up, insert a brown trunk.
- Instead of ribbon, you can sew sequins or colorful buttons.
- Attach a loop of thin ribbon on top.
Feathered handsome man made of pompoms
The pompom toy is very soft, fluffy, and pleasant to the touch. Practice shows that it is quite durable, withstands children's games and does not fall apart. If you attach a loop to the head, you will get a keychain for keys or for a backpack.
In any case, crafts made from pompoms are not only beautiful, but also useful. You can involve preschool children in the work; winding threads develops perseverance, the ability to bring a task to completion, and exercise patience.
- thick cardboard or pompom making kit;
- scissors;
- felt;
- beads;
- Super glue;
- acrylic yarn in white, red and black.
Acrylic thread is suitable for creating toys because it is durable, fluffs beautifully, does not fade under the influence of sunlight, and has a rich color palette.
The bullfinch starts with making pompoms. To do this, follow the sequence of steps:
- Two bagels of different widths are cut out of cardboard. The width of the bagel is equal to the length of the pile of the future pompom and determines its size. For the body you need a ball with a diameter of 5 cm, for the head 2-3 cm.
- Place two cardboard blanks together, take the thread and begin to wrap them evenly around the entire circumference. In order not to lose the initial tip, it is pulled out by 20 cm; it is useful for tying a knot in the finished pompom.
- For the body, a small sector of white thread is wound, a little larger than red, the rest of the space is filled with black thread.
- After sufficient winding, you need to take scissors and carefully cut the thread along the outside. All layers need to be cut off.
- Holding the skein tightly, pull the thread tightly in the center and tie a knot. Do not cut the thread, it will be needed to connect the parts.
- Use scissors to trim the length of the pile, forming an even ball. The body is ready, it has a black base and a red belly.
- The head is made in a similar way, using black and red yarn.
- The head and body are connected using the remaining ends of the working thread.
- A small triangular beak is cut out of black felt.
- The beak and eye beads are glued on with super glue.
From paper and cardboard
For paper decorations, you can use any paper with different weights, even unnecessary printed matter.
Cardboard balls:
- Old thick magazines or bright candy boxes are suitable for the material.
- Using a compass, draw 21 identical circles on the cardboard, then cut them out.
- Bend each circle 2 times. in half on both sides.
- Bend the workpiece, after which the center of the part will be visible.
- Bend the circle again in one direction so that its edge passes along the marked center.
- Bend 2 sides in this way, you should get a triangle.
- Cut out the resulting triangle in 1 circle, this will be a template.
- The resulting stencil must be applied to the remaining round blanks, outlined and bent their edges outward along the contours.
- 10 cut out parts should be glued into strips in turn: 5 down - 5 up.
- Form a ring from the resulting strip and connect it with glue. This will be the basis.
- Divide the remaining 10 molds into 5 pieces. and secure it into a circle with adhesive. There will be 2 caps.
- Glue the bottom and top caps to the base.
- Attach a loop.
Corrugated Christmas tree:
- To base the winter beauty, you need to make a cone rolled out of cardboard. Secure its seam with glue or tape.
- In order for the workpiece to be stable, the internal conical space should be filled with some material.
- Cut strips of 10x3 cm from green corrugated paper.
- Twist each strip in the middle and form a loop, pressing with your finger.
- Attach all prepared parts to the cone with glue, starting the process from the bottom tier.
- The volume and fluffiness of the tree depends on the number of loops used.
- The top of the tree can be decorated with a bow or a large bead.
Materials you can work with
To start working comfortably on a craft right now, you should pay attention to those materials that you have freely available at hand, or those that can be purchased at the nearest stationery store. Below we list several win-win options that will allow you to create a Christmas tree-themed craft from almost anything that comes to your mind and most suits your imagination:
- Textile
- Buttons
- Paper
- Pasta
- Napkins
- Beads
- Foil
- Threads
- Branches and natural materials
- Cones
- Matches
- Candy papers
- and much more
As you can see, there is no limit to the choice of materials, and everything else is limited only by your fantasy and imagination
Christmas decorations papier-mâché using different paper-plastic techniques
DIY New Year's toys made using mashing technology are presented below.
Snowman example:
- You can use old balls or balloons of different sizes as a base.
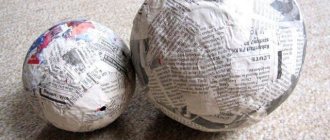
- Use your hands to tear the newspaper into small strips.
- The finished strips need to be moistened in water and pasted over the ball, previously treated with rich cream.
- Soak layers 2 and 3 of newspaper with glue and let dry.
- In general, you need to apply 10-15 layers of paper, which should be dried periodically in a warm room. The entire drying process takes from 12 to 24 hours.
- Cover the remaining balls.
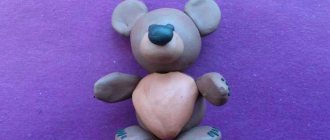
- Make handles for the snowman and a cone-shaped figure for the nose from plasticine, which are then decorated in the same way with newspaper strips.
- When the parts are completely dry, carefully cut them with a knife.
- Glue the resulting halves together and secure the seam with 2-3 layers of newspaper.
- Cut off the top of the 2 lower spheres and connect the entire product with glue.
- Paint papier-mâché with acrylic and dry.
- Draw the snowman's eyes and smile.
- Decorate the figure with a hat and scarf.
A bell made in the classic papier-mâché way:
- Cut any paper (optionally toilet paper, newspaper paper, or photocopier paper) into small pieces.
- Pour hot water over the paper stock and place it in a warm room for 24 hours.
- After the specified time has passed, boil the mixture, squeeze it out, then loosen and dry.
- Mix the resulting composition thoroughly with chalk.
- Starch paste and wood glue are gradually added to the resulting mixture.
- It must be stirred until an elastic, creamy dough is obtained.
- A bell should be fashioned from the formed raw material, and then dried for 24 hours.
- Finally, oil or acrylic paints are used to paint the New Year’s craft.
- It is advisable to first prime the product with white gouache diluted with glue in a ratio of 1 to 1.
Papier-mâché bells
The mashing method is also suitable for other crafts. The shape is made from plasticine or rolled from foil (newspaper). The bell does not have to be cut; it can simply be removed from the workpiece after it has completely dried. Another idea for the base is ready-made plastic bells and balls, which can be purchased before the holiday in almost any supermarket:
From cotton wool
Cotton wool is a suitable material for making Christmas tree decorations.
DIY New Year's toys: step-by-step execution of the Snow Maiden from cotton wool
Snow Maiden:
- Lightly sprinkle the cotton mass with water and sculpt the face. To do this, you need to form a dense oval and make small indentations for the mouth and eyes.
- Uneven areas should be brushed with a brush dipped in water. Leave the doll's face to dry.
- Make a wire loop on the head, then use the wire to create a frame for the Snow Maiden.
- Wrap the base with cotton wool previously soaked in PVA.
- Glue the made head to the body.
- When wrapping a toy figure, you should try to form the lower and upper limbs.
- Place a cotton scarf on your head, giving it the desired shape.
- Then you should form a sheepskin coat and felt boots.
- Then the drying process begins. First 10-15 minutes. The toy must be dried in the oven, then left to dry naturally.
- Finally, the figurine is covered with watercolors. The face is painted a light beige color, a blush should be painted on the cheeks, and it is better to paint the eyebrows, nose, mouth and eyes with acrylic dye.
Bunnies:
- Take cotton pads pre-treated with paste and draw small parts of the hare on them.
- Each detail must be painted with colors at your discretion, then cut out.
- For the body, take a cotton ball and draw a muzzle on it.
- Then glue the pre-prepared tail, paws and ears to the body.
- Attach a loop of thin braid to each bunny.
Cotton papier-mâché and its simplicity
How can we cope without Santa Claus in the New Year? And if the character is made with your own hands, then the feeling of celebration is increased several times.
To create a hero from cotton wool and papier-mâché, you will need wire or a plastic bottle, which will be used for the frame of the product, cotton wool, thread and PVA glue. You can mix a paste of flour or starch with your own hands, but with glue the work is simplified.
To begin with, take a wire and twist it in the form of a human silhouette, onto which dry cotton wool will be molded in layers. After applying several layers, the cotton wool on the frame must be secured with threads. Now the main stage of work begins. Cotton layers need to be glued onto the frame of the craft. To do this, you need to thinly divide the cotton wool, soak it well with glue and apply it to the figure. To make the surface smooth, you can paste the figure with thin paper. After forming the silhouette of Santa Claus, you need to start sculpting his face and other small details. The sculpting of the New Year's guest is complete!
The time to dry the figure is calculated based on its size, but not less than 3 days. The last stage is New Year's coloring of the product with acrylic or other paints.
From foam plastic
It’s easy to make New Year’s toys from foam plastic with your own hands.
For example, a sheep:
- First, you need to cut out an oval from foam plastic for the body of the desired size.
- Another piece of foam plastic should be crumbled and the resulting shavings should be placed with glue over the area of the entire cut out part.
- Sew the head for the sheep from a piece of fabric (or make it out of cardboard). Its upper part also needs to be processed with shavings.
- The legs are made from satin ribbons, which are attached to the inside with glue.
- The eyes and nose must be drawn with a felt-tip pen or made out of colored paper.
- Cover the back of the figure with cardboard or paper.
- Finally, attach a loop to the sheep using a hairpin.
Merry snowman:
- Make 3 foam balls of different sizes. To do this, crumble a piece of material and roll them using glue.
- Glue the prepared PVA balls together in descending order (from smallest to largest).
- Attach rolled foam ears and arms to the figure.
- Eyes and a smiling mouth should be drawn with a felt-tip pen or glued on with beads.
- Make a bucket for your head from multi-colored paper or sew a hat and scarf from fabric.
Various figures:
- Cut out shapes from foam plastic in the form of a heart, bell, cube or oval.
- Decorate to taste.
- Rhinestones and beads will add shine and luxury to the tree.
- Crystal half-beads can be transparent or coated, and they will help the tree sparkle under the light.
- Lace, bows, artificial flowers or floral blanks are attached to the toy using glue.
Master class or technique tips
How to make crafts using the papier-mâché technique look beautiful?
During the process of creating a Christmas tree toy, the child develops fine motor skills and creativity.
To do this you need to know little tricks:
- Do not dry figures on a radiator or other heaters to avoid cracks;
- You can give the product ideal evenness and smoothness using sandpaper or additional layers of glue;
- To preserve the durability of the craft, at the end of the work it is necessary to coat it with varnish;
- Cotton fabric well soaked in an adhesive solution will help give the product strength.
From scrap materials
Using your imagination, you can make unusual toys from unnecessary things.
Snowmen made from bottle caps:
- Use white spray paint to paint the inside of the tires, after washing and drying.
- It is not advisable to do painting indoors.
- The paint should lie tightly on the surface; if necessary, repeat painting.
- Then form the body of a snowman from beer caps.
- After the parts have dried, you should place them 3 in a row, with the convex surface facing you.
- Then you need to calculate how much narrow tape (up to 1 cm) is needed to connect all the parts together with hot glue.
- Cut off a measured piece of braid, leaving a margin to form a loop.
- Glue the tape to the caps with hot glue, first grabbing the caps together to hold them tighter.
- To decorate, take a thin brush and draw a nose, mouth, eyes and buttons on the painted side.
- For the broom, take a toothpick and crush the edge to make a mini broom.
- Tie a scarf for the snowman using multi-colored ribbons and glue a button on top.
Penguins:
- Disused incandescent light bulbs must be cleaned and degreased.
- Then paint the back black, and the belly and muzzle white.
- You can do the usual coloring or draw arcs over the eyes and flippers.
- Then dry the lamps and use a thin brush to paint the eyes, nose and cheeks.
- You can dress the penguins in doll outfits or knit a scarf and hat from leftover yarn.
- To make a loop on top of the cartridge, attach a string or ribbon with hot glue. If you are wearing a hat, you must first leave a hole in it to thread the loop through.
DIY Christmas tree craft ideas
You can use a variety of materials to create unusual crafts. In this case, the complexity of the work will be minimal.
Foamiran
This is a special type of paper that itself has an attractive appearance. Bright, beautiful and interesting sets of colors literally excite the imagination.
I just want to start combining them and playing with a variety of colors. As an option, for the simplest and most original craft, you can make paper stencils or make an applique.
Colored cutting of small ones and gluing pieces of paper will be a very interesting activity for both primary school children and older children. Moreover, filling the space with different colors of paper will create an interesting contrast!
Also note that by cutting tinsel from foamiran, you can create an interesting decoration for “rain” around your Christmas tree, and colored circles will be ideal for the role of Christmas tree decorations.
Beads and beads
Weaving with beads can be much easier than you think at first glance, but for the “lazy”, you can simply pour glue on a paper stencil and fill in beads to fill the space. Thus, the result will be an interesting, and most importantly fast and time-saving craft.
You can, of course, go deeper into beading techniques and create entire “living” masterpieces, but for beginners we recommend that you familiarize yourself with basic “mosaic” or “brick” weaving.
These schemes are quite simple and do not require a lot of time, which must be spent on completing more complex elements:
- For practice, just collect 10 beads and calculate the pattern by counting from 1 to 10.
- Thus, having completed the row in mosaic weaving, we put on beads 11 and 12 and thread them through 9 and 10 so that the tip sticks out as in the original position before the set.
- Then we thread the right edge of the fishing line or thread (depending on what you are working with) and thread 13 and 14 through 7 and 8 in the set. That's the whole principle!
Paper
Perhaps it’s not worth saying that paper is the simplest and most accessible material that everyone can find. You can make a drawing on it, you can make a mosaic or paint the sheet at your discretion.
And more advanced craftsmen manage to come up with entire embroideries and miniatures with a Christmas tree, or even a small New Year's plot.
Classic colored paper will be quite universal in this matter. Even if you don't have one, it costs pennies at the store, so be sure to buy one before you start.
Textile
Who said that a Christmas tree can only be green? Let's prove the opposite! Please note that the Christmas tree theme will not be limited to a single green color. The combination of denim and silk fabric will be very interesting:
- You can make entire fabric appliqués or toys! For example, an ordinary cone-shaped sewn piece of fabric can turn into an original craft in just a matter of minutes:
- Fill the cone with cotton wool or pieces of other fabric; even newspaper is suitable for the “filling”.
- Secure the cone with two “belts”, one just above the center and the other, closer to the top, as if the rim gives your Christmas tree “splendor”.
- You can use rubber bands or simply tighten with thread.
- Woo-a-la, a couple of movements, and the voluminous fabric Christmas tree is ready.
You can stick pins of different colors into it in an original way, and here you have a finished craft. You can also sew on various beads and decorations.
The easiest way is to simply cut out a Christmas tree from denim or any other fabric and glue it onto paper, decorating it with rhinestones, sparkles and tinsel. A quick and original craft.
Felt
A very interesting and affordable fabric. It will add volume to your craft and will allow you to work on it even with a glue gun or regular glue.
The material holds its shape perfectly and retains its attractive color for a long time. Children can be asked to make a full-fledged craft, cutting out different parts of different shapes and colors from felt, and then combining them into one composition.
Sisal and wire
A clear plastic bottle and a small piece of green sisal work well for this craft. We simply wrap the bottle with fabric, secure it, and then, working with a glue gun, we decorate our Christmas tree. Just a couple of minutes and the craft is ready!
If you wish, you can make a simple wire Christmas tree by simply repeating its outline.
- To do this, you can draw a contour on paper and, by applying wire, bend it in the right places.
- In addition, during manufacturing you can bend the edges and string beads and seed beads, which will be even more original and interesting.
Ribbons and colored threads
Beautiful colored ribbons can become a very interesting craft if you combine them one with another. Alternatively, you can fold the ribbons like origami and glue them onto a piece of paper, or cut strips and give them a Christmas tree shape.
But one of my favorite crafts is a multi-ribbon Christmas tree. For this craft we will need different ribbons, different colors and thicknesses:
- Let's connect them all into one node. We take a plastic bottle, hide the bundle under the cap and close it.
- On the bottle itself we cut out two round leaves that will form the “skirt” of our future tree.
- The ribbons are carefully secured “under” the skirt and decorated with beads, sequins or buttons.
- Finally, the entire Christmas tree can be wrapped in tinsel, and it will be quite an interesting and original craft.
Don't limit your imagination in colors. Use not only classic green colors, experiment, make a rainbow tree or a tree with other New Year themed colors.
Fatin
Oh, here it is, transparent and such a light tulle! You can do anything with it, from laying sheets on sheets to add volume, to appliqués and other types of crafts.
But one of the most original and interesting is a three-dimensional Christmas tree similar to the technique that we told you earlier in the section about fabric.
Plasticine or salt dough
So, both schoolchildren and all adults are well familiar with this material, so let’s skip the technical points and immediately proceed to the description.
You can make a three-dimensional Christmas tree in a 3D model from plasticine, with detailed decorations, or in 2D format, like dough rolled out with a rolling pin, glue it to a leaf and then decorate it further.
Moreover, we note that crafts made from plasticine can be remade very easily and quickly! This is a win-win option for those who are just starting to explore the fascinating world of creativity and train their imagination. Didn't like it or is there a mistake? We made a lump of plasticine, and we are working on a new one!
To prepare the dough, the recipe remains the same as for a simple water dough. Except, you need to add more salt there so that it dries quickly without using the oven. As a standard, 8 tablespoons of rock salt are used for 1 tbsp of flour.
Foil
Any mother and housewife always has a piece of foil in her house. This is a fairly convenient material in which you can easily use the origami technique, and most importantly, this method will look very original and will be an excellent separate decoration or craft on any surface!
Organza
A bright, interesting and quite popular fabric, which many have probably seen in the form of tulle or curtains. If you have some of this fabric left at home, now is the time to put it to use in a craft project!
Everything is simple here and you should follow the basic tips that we have previously offered when working with fabric, tulle, sisal and other similar materials.
Cardboard
A simple and convenient paper material that everyone has been familiar with since childhood! Here you can not only attach original jewelry, but also create stunning applications.
Cardboard can be any color, so use your imagination, and our cardboard Christmas tree can be decorated with any available materials, from coloring with felt-tip pens and paints to gluing stickers and other decorative materials.
Well, for the idea of the simplest Christmas tree made of cardboard, we bring to your attention a Christmas tree made from a cone. Just fold the sheet into a cone, gluing it with double-sided tape, or a stapler, glue, cut it to a flat bottom, and that’s it, decorate it with whatever your imagination wants.
Knitted
Of course, you will have to work hard for this Christmas tree, but sometimes such crafts are worth the time and effort.
You can make a voluminous toy in the shape of a knitted Christmas tree using a regular crochet hook, or you can simply use knitted fabric from an old sweater or any other knitted clothing, cut it to the shape of a Christmas tree and decorate it with threads or other decor.
You can even sew two identical parts of the Christmas tree and stuff it inside like a toy. It will come out very interesting and original, and such a gift will undoubtedly be appreciated by grandparents from their grandchildren for the New Year, since the craft will be made with their own hands.
Tinsel
We all decorate our homes with tinsel. Perhaps for a simple and original craft, this material will be an excellent option for you. Just trace or draw a counter tree on a piece of paper. Cover it with tinsel and sign it as a postcard! Easy, simple and beautiful!
From beads
New Year's toys are made from beads with your own hands.
Easy to make Christmas tree:
- Make a medium-sized cone out of cardboard.
- Wrap the cardboard base in a spiral with thin and dense wire.
- Bend the ends of the wire and string beads or beads onto it, then remove the workpiece and give the product a Christmas tree shape.
- If you do not make a base, then the metal thread with decorations strung on it should be twisted into a spiral, then pulled by one edge to form a Christmas tree.
- For the loop, attach braid.
Angel:
- You should start making toys from the head. White beads should be strung on a small piece of wire. At the end, fix it by wrapping a ring out of wire and press it with pliers.
- For the body you will need an elongated oval bead, which must be placed on a metal thread after the head.
- At the beginning of making the arms, it is necessary to fix the wire between the upper part and the corset and put beads on each upper limb in order: 1 round gold - 1 oblong white - 1 golden - 1 elongated milky - 1 gold. The tip of the wire should be threaded through the last bead.
- The skirt for the angel figurine can be made from pins, having previously strung various beads on them. Connect them together with thin wire.
- It is advisable to make the wings separately from golden beads and attach them to the back.
Bullfinch made of plasticine
Make a bullfinch craft from plasticine. First, it’s worth thinking about the basis of the figure. It will be flat or voluminous. If it’s voluminous, then also later think about the voluminous background for the bullfinch and where everything will be placed. If it is flat, then you need to choose the base and its geometric shape. You can use an old plate, cardboard, etc. as a base.
Next you need to warm up the material and start working. On a flat surface, the background must be made first and only then the bird. If you do the opposite, the background may turn out sloppy or not work at all.
From plastic bottles
To make figurines of this type, plastic bottles of any size are suitable.
New Year's ball:
- For large balls, plastic bottles with a volume of 1.5-2 liters are suitable, and for small products, containers with a capacity of 0.5-1 liters are suitable.
- It is necessary to cut out the middle part of the flask to eliminate irregularities and bends.
- The middle of the plastic container needs to be cut into rings. To do this, pierce the wall with an awl and then cut with sharply sharpened scissors. Or preheat the flask in hot water, which will make the cutting process easier.
- After this, place the plastic rings one inside the other to form a transparent ball. This will be the base of the toy.
- You can make several of these blanks at the same time and decorate them in different ways.
- As an option for snow balls, PVA glue is applied to the surface, after which it is generously sprinkled with salt.
- You can put colored tinsel, crushed old Christmas tree decorations or beads on the adhesive surface.
Christmas tree:
- To work you will need 2-3 plastic green bottles.
- Cut off the bottom of the container. The length of each cut container should be different. This is due to the future size of the tree. Each subsequent plastic tier will be slightly shorter than the previous one.
- After adjusting the size, you should start cutting the needles. They are cut into thin strips, and then slightly curled up using scissors.
- There are two methods to collect the New Year's beauty. One of them involves gluing the elements together, and the second involves assembling the tree onto a base and a rod. An even branch or thick wire, which must be stuck into a container filled with plasticine, can be used as a stick.
- A ball or star should be glued to the top of the top piece.
- You can put small beads or crushed foam balls on Christmas tree needles.
Snowman:
- Take a plastic bottle consisting of 2, or preferably 3, solid spheres.
- Paint the container white.
- The hat and scarf should be made from felt of any shade. For a hat, a fabric rectangle should be sewn along the cut line, and the upper part should be tightened with thread.
- Then you need to glue the headdress to the bottle cap, and tighten the scarf around the neck - the narrow place between the spheres.
- For the hands, it is advisable to make tight balls of cotton wool, fix them with glue and glue them in the middle of the body. Instead of eyes, attach buttons, and depict the nose and mouth with dark paint.
Making masks
Some of the most impressive papier-mâché crafts are African masks. Such handmade creations can decorate the interior of any apartment. Their size is 35-37 cm in height, 21-24 cm in width.
The mass is prepared on the basis of toilet paper. One mask will require 2 rolls. The paper is dissolved in hot water, and then mixed with PVA glue (420-440 g), and you need to take thick glue for construction work. To add plasticity, linseed oil (3 tbsp) is added. When mixing the mixture, it is advisable to use a mixer.
Some of the most impressive papier-mâché crafts are masks.
A spherical PVC food tray works well for the shape. Its configuration resembles a mask. A layer of pape-mâché is applied to this form. The main details are laid out separately - nose, eyebrows, lips. Eyes are formed.
Smoothing is provided by the fingers, as well as a stack and a knife. It will take 12-14 days for the craft to completely harden. Then the mask is puttyed with a thin layer and sanded after the putty has dried. The surface must be perfectly smooth.
Such handmade creations can decorate the interior of any apartment.
The mask is dyed in a special mode. First, a primer is applied, and then the entire front surface is painted with white acrylic paint. The next step is to apply black paint on top.
After drying, pearl enamel is applied to the desired places using a sponge. The final operation is coating with acrylic varnish. You can use glossy or matte varnish. The photo shows examples of crafts.
In addition to the indicated colors, African masks can be painted in other colors. Elements of red, yellow and blue are often used. The craft will also be decorated with special details - piercings.
Papier-mâché is rightly considered an excellent material for various crafts. Even small children can make simple products. For teenagers and adults, such creativity develops into a hobby. Their creations can decorate the interior of any apartment.
From wire
If you have pieces of wire in the house, you can create a beautiful New Year's decoration.
Wire ball:
- Inflate a balloon the size of a New Year's toy.
- Take a coil of flexible wire and cut a piece 1 m long from it.
- String beads and pebbles of different sizes onto a wire. (40-50 pcs.).
- Form a wire frame around the inflated ball in one direction and the other, like meridians. Distribute the density of the beads at your discretion.
- When the wire is wound in the desired amount, you should secure it and form a loop. To do this, in the area of the top, you need to make something similar to a hook from the remaining wires.
- Finally, you need to pierce the inflatable ball and pull it through the resulting structure. Then finally distribute the pebbles around the perimeter of the product.
- Such toys are quite fragile, but if there is any deformation, it can be easily corrected.
Spring:
- Take a small medicine bottle and make 14 wire turns on it (the material should be 1 mm thick).
- Remove the spiral from the bottle.
- Stretch the spring slightly, carefully holding its ends.
- Form the desired number of blanks in this way.
- Insert wire pieces into the foam piece according to the number of spirals.
- Paint the products with spray paint.
- Dry the springs, remove them from the model, and tie hanging threads to them.
DIY bullfinch craft - step-by-step master classes on paper, cardboard, pom-poms and papier-mâché
With the onset of winter cold, bullfinches fly to the city.
They can be observed on the branches of city trees. Red-breasted handsome men are known to everyone from an early age; they are depicted on numerous postcards dedicated to the New Year holidays and in illustrations in books. Bullfinches are recognized as a symbol of winter. There is an opinion that their number has decreased and it is very rare to see winter birds in the city. Let ornithologists deal with this issue, but for themselves, each person can make a bullfinch from scrap materials, decorate their home with it, or give a souvenir to loved ones.
From bright shreds
In order to make a multi-colored decoration, you will need bright pieces of fabric:
- Prepare your favorite fabric scraps. They must be carefully leveled and ironed.
- Cut out 16 squares with a side of 9 cm. You can decorate all the parts in different colors, or arrange 4 pieces each.
- From fabric of any color (it will not be visible in the finished work), make 2 circles with a diameter of 8 cm.
- Fold the squares in half to form a triangle and iron.
- Then fold the resulting figure in half and iron it again.
- Perform similar actions with all other squares.
- Sew 2 circles and leave a small hole for turning.
- Fill the product with padding polyester through the hole left, then sew it up.
- Place a triangle around the resulting workpiece with the corners in the middle and stitch it through.
- Repeat steps with all other parts.
- Using a heat gun, attach a button to the center, this will hide the sewing area. Place a ribbon underneath on which you can hang the toy.
Bright figures:
- You need to choose fabric with New Year's patterns or another bright one.
- Prepare different templates (star, hearts, boot).
- Make patterns using stencils.
- Sew identical parts in pairs, leaving a small gap to stuff the toy with cotton wool.
- It is advisable to push the filler with a pencil.
- If you sew crafts from thick fabric, then you should connect the parts with a decorative seam along the edge.
Advantages of this approach regarding child development
When working with a child, making any crafts is a direct path to the child’s development:
- Fine motor skills;
- Analytic skills;
- Creative skills;
- Speech development;
- Studying the world around us (colors, working with various tools, geometric shapes);
- Development of fantasy and imagination.
Working together develops and strengthens connections. The baby's trust in his parents increases greatly. Becoming a friend to a child is an important part of socialization. Teamwork and communication skills will help your child in the future.
And remember: it’s not expensive. Of course, you don’t have to worry and just buy a finished product, citing a lack of your own skills. Buy a beautiful, expensive product and become a hero for your child, capable of giving the whole world.
With such actions you risk spoiling him. Working together will instill the understanding that in order to get something, you need to make an effort. This is the development of hard work in a child.
Salt dough toys
It’s easy to make New Year’s toys from salt dough with your own hands.
To do this, prepare a batch of the following products:
| Ingredient | Quantity |
| Flour | 1.5 tbsp. |
| Starch | ½ tbsp. |
| Salt (extra type) | 1 tbsp. |
| Water | ¾ tbsp. |
| To make the mixture sticky, you can add PVA | 3 tbsp. l. |
| For elasticity, vegetable oil | 1 tbsp. l. |
The dough ends up being elastic and does not stick to your hands. Then you need to roll it out to a thickness of 1 cm and shape the crafts using various molds. Alternatively, you can sculpt toys yourself, like from plasticine. Then the products are dried, painted and varnished for stability.
When drying, please note that salted clay takes too long to dry. In the open air, this process takes 2-3 days, and in a cool oven (no more than 500C) with the door ajar, from 6 to 12 hours. If you heat the oven to 1000C, the figures will acquire a golden hue. After drying, the products will become hard (stone).
The next stage will be decorating the toys. The best option would be to use acrylic paints. If you make an ornament on clay blanks in silver, they will look like New Year's cookies. You can also use dry pigments or water-soluble dyes that are used to color handmade soap.
Children decorate crafts with gouache, felt-tip pens or gel pens. Decorative elements (ribbons, rhinestones, lace, yarn, twine) are also used for decoration.
Snow Maiden and Santa Claus under the Christmas tree
The main characters of the New Year are made more complex due to the anatomy of the figures. Despite the lush fur coat, long beard and rounded mittens, Santa Claus requires drawing of details - face, hands, collar, hat. It will take skill to portray a girlish braid, a slender figure and the face of the Snow Maiden. Naturally, the mashing method is not suitable for such delicate work.
As a basis for a papier-mâché sculpture, take a cone made of foil, plasticine, or cardboard. A small plastic bottle or its neck will also work. For the papier-mâché sculpting tutorial you will need the following materials and tools:
- base (take cardboard cones of different heights);
- modeling mass;
- plates or stands for sculptures;
- stacks;
- cardboard;
- sandpaper;
- acrylic paints;
- brushes;
- decorative details (sequins, sparkles, ribbons);
- varnish
Step-by-step instructions: glue the cones or fashion them directly from papier-mâché and leave to dry. Using stacks and papier-mâché, we make large details - the head, the lapel of a fur coat, sleeves (for the Snow Maiden’s thin neck, a long self-tapping screw is inserted into the cone):
Leave to dry and add new layers, sculpt a hat, collar, strengthen the shrunken parts:
The structure dries, and then layers are applied again, correcting the dried and deformed elements and we sculpt the Christmas tree in parts, which we then connect together:
We cut off one side of the Christmas tree and “hand it over” to Santa Claus.
After drying again, we add layers, sculpt a nose, face, beard, hair. We cut out a kokoshnik from cardboard and glue it to the Snow Maiden, “weaving” a braid. We evaluate the dried figures, eliminate the shortcomings, leave them to dry, go over the sculptures with sandpaper and cover the characters with white paint and decorate them:
We decorate the toys: decorate the kokoshnik with sequins, the lapels with sparkles, draw expressive eyes and cheeks, sew a bag with toys, etc. To decorate a fur coat, use sequins in the form of snowflakes and stars. The final stage is coating with acrylic varnish:
You can “sculpt” figures from cotton wool. A wire frame is ideal for this method. In addition to thick wire you will need:
- starch (1 tbsp);
- stand (board, plywood, foam);
- cotton wool;
- PVA glue;
- doll or figurine with a face;
- corrugated paper;
- paints (acrylic);
- brushes;
- glitter;
- varnish
The toy is made step by step: twist a frame from wire. Dilute the starch with a small amount of cold water, stir, add boiling water to obtain a homogeneous mass without lumps and disassemble the cotton wool into strips, then cover them with a thick ball of paste and begin to “bandage” the frame (apply several layers, highlight the boots, waist) and leave to dry:
Using corrugated paper, using the mashing principle, remove the mask from a doll or figurine, form a head from cotton wool and paste, glue the mask to it, sculpt hair and a hat. Connect to the body and complete the sculpture - make a fur coat, collar and muff from cotton wool:
Cover the toy with acrylic paint and paint the face. Glue sequins onto the muff, hat, lapels and varnish:
If you take the frame as a basis, you can make many different toys in the form of boys, girls, animals and Christmas trees. You will get beautiful crafts in vintage style.
Crochet toys with diagrams and descriptions
Needlewomen can easily make knitted jewelry that is also suitable as a gift to loved ones.
Skates:
- To work with a thread, it is advisable to take a medium-weight thread, a hook No. 1.75, and for the runners use 2 large paper clips.
- First, tie one side of the stationery clip with 17 tbsp. double yarn over, finish row 1 tbsp. with 1 double crochet.
- From rows 2 to 4, knit st. used yarn over.
- At 5 p.m. make 1 tbsp. less.
- At 6 p.m. skip 9 stitches (knit with connecting columns). This is how the sock is formed.
- At 7, 8 and 9 p.m. it is necessary to perform a rounded lift of the skate by not tying or skipping 1 column.
- Then knit 4 more straight tiers.
- Tie the top of the finished skate with yarn of a different shade and decorate the lacing with a needle and thread.
- Tie the second skate in a similar way. Connect a pair of shoes with a knitted chain, by which the craft should be hung on the Christmas tree.
Snowflake patterns:
Knitted ribbon:
- Cast on a chain of air loops along the desired length of the ribbon.
- Knit 1 tbsp into each stitch. double crochet
- You can knit rows in low columns.
- Make the width of the braid no more than 2 cm.
- The length will be enough to form 5 turns.
- Roll up the finished ribbon like a tiered pyramid.
- Between the tiers you can insert small knitted balls or massive balls.
Bright and unusual New Year's toys, created with your own hands, will give the tree a unique look and will also delight your guests. If you involve children in the process of making jewelry, their imagination will help add creativity to the crafts, and joint creativity will bring a lot of positive emotions.
Article design: Natalie Podolskaya
Bullfinch toy
This fake is worth doing with older kids. Introduce them to more complex and dangerous tools. For example, a needle. A bullfinch can be sewn from fabric. And the most skilled needleworkers also resort to felting wool, but this is quite time-consuming. So, through such a game, the child learns the basic principles of sewing. You can make a bullfinch craft from a pompom.
It is very good to teach a child to be persevering if you teach him to at least crochet. And you shouldn’t worry about the fact that you don’t know how to crochet a bird and won’t be able to explain it. The Internet is full of video lessons about knitting, as well as patterns on how to knit a bullfinch or any other item.
If you have more than one child in your family and among them there is a very small one, then you can create a lullaby with bullfinches with your elders. So for the youngest child, their horizons broaden, and for the older ones, in addition to improving various skills, caring for their younger brothers and sisters is instilled.
Just after creating several bullfinch toys, make a base of sticks in the form of a cross or a figure with a bunch of branches. Attach the finished toys to the base with strings so that they hang down. Make a mount for this design and you can safely hang it above your baby’s crib.
Be patient and it will pay off in your children's adult lives.
