Adviсe
Each area has its own little details and secrets.
Therefore, before starting work, it is worth studying the topic in detail. to give the cover softness and volume, you should add fleece and padding polyester; if you want the cover to close, you can glue magnets on both sides or a string; if you are using regular fabric, you should first starch it so that it holds its shape well; and of course, the most important rule not only in scrapbooking, but in creativity in general is accuracy, since in this matter sloppiness is simply unacceptable, everything should be as neat as possible; and what is important is desire, because something is worth doing only if you want it.
In conclusion, we invite you to watch a video about creating a stylish passport cover with flamingos.
Step-by-step instruction
So let's get to sewing.
Step 1: select materials and tools
First you need to choose a good piece of leather without defects (cuts, marks, holes, etc.).
Glue
To glue leather parts, you can use any waterproof plastic adhesives. You can use PVA glue. But the best glue is “Moment”. It is quite flexible and does not crack when the glued areas are bent - in general, it is ideal for gluing parts that are subject to deformation.
Marking wheel
You can buy it at any hardware store.
We cut out three parts from leather according to the diagram below. Part No. 1 is the base of the cover, parts No. 2 are pockets.
Step 3: Glue the parts together
Glue the base of the cover and pockets together.
Be sure to tap all glued areas with a hammer - this way the gluing will be stronger, which is very important in a leather product
Step 4: Mark the seam line
We draw a line along the ruler with an awl in the place where the seam will go. Using the marking wheel, we move along this line with sufficient pressure so that the dots are well imprinted. This is markup.
We use an awl to punch holes. We place a wooden strip or scraps of leather under the cover blank.
Step 6: Seam
We sew without a machine - by hand.
Get ready to spend an hour and a half on this operation.
- First needle: thread it through the first hole.
- Second needle: thread it through the second hole.
- First needle: thread it through the same second hole, trying not to pierce the thread.
- Tighten the thread tightly - simultaneously pull both ends until it is tight.
- First needle: thread it through the third hole.
- Second needle: thread it through the same third hole and pull it out on the back side. We pull on both ends and tighten it tightly. Continue sewing like this until the end of the seam.
We fasten the line: when we have sewn through the last hole, insert the needle again into the penultimate hole, pull out the thread, insert another needle into the same hole. Pull it out from the reverse side. Tighten both ends tightly. We sew three or four stitches in this way in the opposite direction of the line. We do not tie knots - we tighten the threads tightly and cut them with scissors. The ends can be set on fire with a lighter to prevent them from unraveling.
We tap the seam with a hammer to release the tension in them. The threads will not tighten the skin so much.
Step 8: processing the ends
Use your finger to apply beeswax to the ends of the cover.
Well, that’s all - the passport cover is ready!
The leather passport cover, hand-sewn according to our master class with a pattern, is ready! Use it to your heart's content.
13838 jylietta June 16, 2016
4
Why do you need a student ID?
You must obtain your student ID yourself. But why is it needed?
- The student can show the note at the checkpoint to get through the security check. Despite the fact that every student receives an entry card in October of their first year, sometimes it is lost or simply forgotten at home. As a backup, you can leave a student notebook, record book or passport in your pocket or backpack in case of emergency
- You can also present your student card at the checkout counter in a store or in a cafe to get a discount or buy something special for students
- You can also get transport benefits: bus travel in some cities is free or at a discount for students. Commuter trains are becoming more accessible to students living on the outskirts. They only pay half the ticket price. And you can buy a seat in an intercity train compartment with a 25% discount. You just need to take a photo of your student card and use it to register a Russian Railways bonus card
- Thanks to your student membership, you can visit museums in all Russian cities for free
- A student's card is necessary in order to show it to your relatives and friends. After all, you can and should be proud of your new status. Someone who can go to university on their own. must remember his new status. Therefore, he must behave appropriately on the street.
- A student's card is needed when an identification document is needed. However, this document will not allow you to buy alcohol and cigarettes, because it does not prove that the young person is already 18 years old
- The student ID is also needed to prove that the student has already transferred to another course and has not been expelled. This allows you to use the reading room, borrow books and use the university’s computer room with special equipment. And also work in the laboratory, if there is such an opportunity for students
Thus, losing a student’s card, spoiling it, tearing it up, etc. Absolutely forbidden. However, you cannot create a student ID yourself. Why? Let's tell you further.
Leatherette passport cover
When you are already tired of the same type of covers, and you want something new, then you should make them yourself using the scrapbooking technique. You can give it not only to yourself, but also to your loved ones as a gift.
What you will need:
- leatherette 20x27 cm;
- mat (to cut on);
- stationery knife;
- ruler;
- scissors;
- glue;
- needle and thread;
- thermal label;
- iron;
- sewing machine;
- hole punch (round corners).
So, after mastering this master class, you will learn how to make a passport cover with your own hands. We take leatherette, measure the dimensions with a ruler and cut out a rectangle measuring 13.5x19 cm on the mat using a knife. We repeat the procedure, only this time rectangles of other sizes: 13.5x7 cm (2 pcs.) and 13.5x5 cm (1 pc.).
Next, take a hole punch and round the corners on the large rectangle - these are all corners, and the small ones have two corners. Then we take glue, preferably transparent, and apply it to the sides where the pockets will be located. First we glue the pockets measuring 13.5x7 cm. We repeat the same on the other side. Then we take a smaller pocket and glue it onto the first one.
Now we go to the sewing machine and stitch them on it. We start stitching from the beginning of the pocket. Stitch width – 3 mm. We retreat 2-3 mm from the edge. We finish sewing in the same place where we started. Next, take the threads inside out and make a knot.
We take a needle, thread it through the hole left from the machine, and drag it between the layers. We cut off the remaining threads and hide them. The cover is almost ready, all that remains is to decorate it.
Let's start decorating. We take the prepared inscription, place it on the cover and glue it using an iron. The regime should be small. And so that it does not remain on the iron and the cover does not deteriorate, we do this through paper. Now all that remains is to “dress” the passport with a new cover.
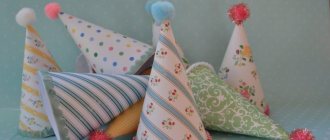
We make covers for travel cards
How often do you change your travel card cover? I think quite often. Although it is inexpensive, the appearance of purchased cases is very boring. But we really want us to have all the best, and only here!
This is how this master class was born. I have a large family, so I ended up with 4 covers at once.
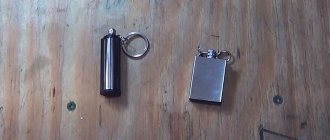
To work we will need:
1. Genuine leather.
2. Transparent plastic.
3. Threads, paints, silver gel pen, sewing machine.
4. And most importantly - inspiration !
Briefly about the materials: preferably not very thin leather, mine is furniture leather (fortunately, my job allows me not to need this material). A plastic window can be cut from transparent packaging in which cosmetic sets are sold. The threads are stronger. If the sewing machine is acting up, you can bother and sew by hand.