Carrying out electrical work at home - be it laying or completely replacing electrical wiring in a house or connecting just one lamp in a new place - is inevitably accompanied by the need to remove the electrical insulating sheath from the ends of the conductors. Let's look at how wire stripping should be done correctly and what will happen if you do it without a special tool, what types of special tools there are, what are the features of the elementary and professional approach, as well as what criteria you need to pay attention to when choosing a particular method and tool in specific conditions .
A special tool allows you to clean the wire from the sheath without damaging it Source 5watt.ua
Stripping wiring - features of using special tools
How correctly the connection of electrical wiring elements is made will determine not only the quality of the power supply, but also the safety of the home. Therefore, when carrying out electrical installation work, it is extremely important to use special devices for stripping insulation from wires.
Removing the insulating shell without the use of special tools can result in the following series of undesirable consequences:
- Damage to the electrically conductive metal core or hairs, which will inevitably result in a reduction in cross-sectional area. Subsequently, this can lead to breakage and breakage of the circuit, and in the worst case, heating and fire.
- The formation of hidden defects, which will subsequently lead to the core breaking when bent.
- Reduction in conductor strength due to defects in the structure.
- Breakage of side hairs in a multicore cable.
- Clogging of the conductor surface with insulation material residues.
Removing insulation from a conductor with a knife is fraught with the formation of core defects. Source skilljob.ru
In addition, removing the electrical insulating sheath using special tools allows you to avoid injuries to the installer himself, as well as improve the quality and productivity of work. This is especially true when a large number of connections are being made, for example, when installing wiring in a new home.
Variety of insulation materials
Insulation can be single or double.
Cables that are equipped with double insulation are the best variation. If you plan to place wires in grooves, then their use is allowed with a single insulating winding.
For the production of insulating braids the following is used:
- The protective braid serves to protect against damage.
- Protective braiding is not, in fact, insulation in the truest sense. It serves as an excellent protection against mechanical damage.
- Fabric insulation can withstand temperatures up to 400° C, maintaining its insulating properties.
- Plastics based on organic compounds, which soften when heated, and when burned, release various toxins into the external environment.
- Thermosetting plastic becomes harder when heated. In the event that increased demands are placed on the insulating material, insulation from them is adapted.
- Real or synthetic rubber hardens when heated and is capable of supporting combustion.
The selection of necessary tools for dismantling insulation depends on the material.
Types of instruments
Modern tools used for stripping wires and cables are classified according to several criteria:
- Method of removing the shell.
Two methods are used - thermal and mechanical. The first is typical for conductors with a small cross-section and a small amount of work, the second - for professional maintenance and a large number of operations.
Depending on the method of influencing the shell material, mechanical methods are divided into two types:
- Cutting. The cutting edge of the tool carefully cuts the sheath around the metal core, after which a smaller part of it is simply removed from the edge of the conductor.
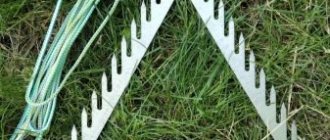
- Break. Using special teeth, the conductor is clamped in the working part of the tool, and then the sheath is forcefully torn off along the conductor.
Special teeth on the tool allow you to quickly and easily remove insulation from wires Source proraboff.rf
The choice of method and type of tool is primarily determined by the cross-sectional area of the conductor, complexity and volume of work.
- Operation speed.
According to the parameter of the number of shell removal operations performed in a certain period of time, tools are divided into 2 categories:
- Household. These include electrical knives, side cutters, and pliers. The devices are designed for stripping wires with a small amount of work.
- Professional. These are primarily strippers, tongs, pliers and pullers. They make it possible to quickly strip the conductor sheath.
A knife is most often used in everyday life due to its availability, ease of use and low cost.
- Degree of automation.
According to the degree of automation, devices are divided into manual, semi-automatic and automatic. This classification is typical primarily for professional instruments.
An automatic stripper significantly increases the productivity of conductor stripping Source remitek.ru
On a note! Cleaning tools can be either universal or special purpose - for example, only for an Internet cable or power wire. They may also differ in the diameter of the conductor. The most popular models are for cores with a diameter of 4 to 40 mm.
See also: Catalog of companies that specialize in engineering systems (heating, water supply, sewerage and others) and related work
How to make a knife with a heel yourself?
As we have seen, a repair knife equipped with a heel is a very convenient tool that has serious advantages. However, it has one serious drawback - the high cost, due to which many people cannot afford such a purchase.
However, you can make such an electrician’s knife with your own hands; this procedure does not present any difficulties. Let's take a closer look at how to do it and what we need for this.
Materials for work
To make a homemade knife with a heel for stripping wires, you first need to stock up on the accessories that are listed below:
- Blades for a stationery knife (2 pcs.)
- Aluminum profile from which the handle will be made. A piece of metal base from a mosquito net used in PVC windows is quite suitable.
- The rail is made of wood, which should be somewhat inferior to the profile in its cross-section.
- Soldering iron with POS solder and phosphoric acid.
- Diamond cutting microdisc.
- Bormashinka.
Having prepared all the necessary materials and tools, you can proceed directly to assembling the knife with the heel.
Manufacturing procedure
A homemade repair knife is made in the following order:
- Cut a spike on a stationery blade to which the heel will be attached.
- Grind off the excess sharpening so that only the edge remains sharpened.
- Sharpen the opposite side of the blade.
- Make a heel with a slot from a piece of the second blade that will correspond to the thickness of the cutting blade.
- Using a soldering iron and solder, attach the manufactured heel to the first blade. Give its edges an oval shape so that during operation of the tool it cannot damage the insulation of the cores and their metal base.
- Insert the blade into a piece of metal profile and secure it inside using a wooden strip with a cut.
- Drill a hole in the handle so that it is aligned with the one already in the blade.
- Insert a bolt into the hole and secure it with a nut on the other side.
At this point the work is completed, the tool is ready for use.
A slightly different technology for making a knife with a heel in the video:
Elementary cleaning methods
There are two main ways to quickly clean wires or cables of insulation - by heat treatment or firing and without heating, that is, mechanically. Each of them has the following characteristics and scope of application:
- Thermal.
The method involves heating the edge of the conductor to a temperature when the material of its electrical insulating shell begins to melt or burn. If the area that needs to be stripped of insulation is large enough, not the entire section melts, but only the area to which stripping needs to be done. Then the remainder is removed from the edge with pliers.
For heating, 3 devices are used:
- Soldering iron.
- A lighter or other open flame source.
- Hot nichrome thread.
To remove insulation, you can choose different types of tools Source pikabu.ru
The method is good for a small amount of work and is used to remove insulation from thin wires designed to transmit voltages of no more than 5 volts. Since such wires are easily damaged by a knife or other tool.
- Mechanical.
The method involves cutting the insulating shell with the cutting edge of a sharp hand tool - for example, a knife. A special electrical installation model or a homemade one made from a hand-saw blade can be used.
The cutting technique should be performed in such a way that the surface layer of the metal core or hairs is touched as little as possible. To do this, the tip of the cutting part is directed at the most acute angle possible with respect to the shell. The method is suitable for small or medium volumes of work, provided the craftsman has sufficient experience, and when the shell is made of PVC or rubber.
The electrical installation knife has a special handle made of dielectric - for working with live wires Source inbenzo.ru
Subtleties of cleaning insulating materials
It is necessary to take into account the characteristics of the insulating coating when choosing a method for its removal. The coating can be single or multi-layer plastic. For multilayer insulation, resin, fabrics, and fire-resistant dielectrics are used.
Cleaning involves the use of pointed tools, which risks damaging the wire, reducing the cross-section or damaging the insulation where it is not required. Inexperience in using a sharpened tool can result in injury.
A particularly vulnerable area of the wire is the end of the cable, stripped of insulation. If the electrical cable becomes less durable or its cross-section decreases, its original parameters will deteriorate.
In order to reduce all kinds of risks, a special tool and methods for it were put into operation.
Using a professional tool
For a large volume of electrical installation work, there are 4 main types of special tools that allow you to quickly and without damaging the wires strip the insulation from the wires:
- Nippers and pliers.
These are quite versatile and easy-to-use devices for cutting sheaths on both wires and cables. To strip, select the desired diameter along the conductor, then grab it and twist it around. After this, the sheath is simply pulled off the end of the wire.
Advantages of the device:
- Reliability.
- Possibility of cleaning in hard-to-reach conditions.
- Long service life.
- Working with live wires.
The disadvantages are associated with the impossibility of adjusting the tool to the length of the layer being removed and the need to reconfigure it for different diameters.
- Wiring knife.
Traditional device for quickly removing the casing. Mainly used for working with flat cables. The insulation is cut away from you with a knife. In this case, the cutting part of the tool should be directed at an acute angle to the material.
The knife for stripping cables has a specially shaped blade. Source remoo.ru
Advantages:
- Versatility - fits any wire.
- Affordable price.
- Availability of specimens with a handle covered with electrical insulation, which makes it possible to work with live wires.
Disadvantages are associated with the duration of the processing process, labor intensity for large-diameter conductors and the need for experience, without which metal conductors can be damaged.
- Stripper.
A professional tool specially designed for stripping wires of insulation. The operating mechanism is based on passing the conductor through a pair of movable semicircular working elements. The accuracy of the cut is determined by setting the device to the cross-section of the core.
Depending on the conditions and scope of work, 3 types of stripper are used:
- Manual.
- Semi-automatic.
- Auto.
Some models, in addition to the main task, allow you to crimp, trim and twist conductors.
A professional stripper is best designed for quickly removing insulation from wires Source ytimg.com
Recommendations for safe removal of insulation
Activities related to electrical work cannot be called simple. It should be remembered that a damaged wire will fail over time.
Do not forget that exposed wire in wires is too dangerous. Therefore, when removing insulating material to a greater length than it should, the excess must be removed.
To work at the household level, you should not purchase expensive products in order to use them only a couple of times. In this case, simple improvised equipment is quite suitable.
You should be extremely careful when performing electrical work. To avoid breaking the cores, the insulating braid should be pressed slowly.
To avoid big problems later, it is better to work slower, but with better quality, because microscopic wiring irregularities are not visible to the eye.
To ensure reliable and safe contact, it is recommended to use terminal blocks.
The installation of wiring and cables usually ends with their connection; the contact affects the performance of the entire system. Such contact must be reliable, the connection cannot allow electrical interruptions, it must be protected from accidental access, that is, all wiring after dismantling must be safe.
Serviceability is achieved by using special-purpose housings and junction boxes. The remaining necessary conditions are achieved by using certified clamps or terminal blocks.
If the cable consists of thin wires, it is not always advisable to remove the insulating material by disconnecting the wiring. To create contact, you can use special clamps with teeth. In this case, it is permissible not to remove the insulating layer.
By installing a piercing clamp, you can pierce the insulation. In some cases, this will be enough.
Criteria for choosing a tool and method
When choosing a device or method for stripping a cable, it is important to take into account not only the amount of work to be done, the experience of the technician and financial capabilities, but also the following features of the conductor sheath materials:
- Coaxial wire. The upper shell is removed thermally, the lower – with a stripper. Other methods may damage the load-sensitive conductors.
- Cable with fluoroplastic insulation. The shell is highly heat resistant. Therefore, mechanical methods are better suited for stripping - with a knife or stripper.
- Wire with enamel protection. When the core cross-section is small - no more than 0.2 mm² - the thermal method is used.
Advice! When choosing a tool for removing the sheath from a conductor, it is important to consider the range of working diameters and the type of handle material. If work with live electrical wiring is expected, the handle must be made of dielectric.
Stages of making a knife with your own hands
If you plan to make a serious knife, then you should use high-quality alloyed high-carbon steel for it.
Selection of knife blank steel
When choosing a domestic brand of steel for a homemade knife, many contradictory conditions are taken into account. The most popular steel grades in Russia for mass-produced knives are 65Х13, 50Х14МФ. For weapons and hunting products, 9ХС and 95Х18 are used. Kitchen tools are made from 40X12 steel. Knives are easily sharpened with musat. Steel grade 45X13 is used for the manufacture of tourist knives, as it is resistant to corrosion. Inexpensive steel grade ШХ15СГ is very popular in making homemade products. The brand is deciphered as follows: The letter “Ш” indicates in the brand that it is ball-bearing steel, “X15” indicates the chromium content and its amount (approximately 1.5%), and the letter designation “SG” indicates the content of alloying elements silicon and manganese (approximately 0.34% and 0.4%).
There are many similar foreign grades of steel.
How knives are made
Any knife, even the simplest one, consists of several parts. And there are about a dozen and a half of them in the folding product. It is advisable to have access to simple machines - an electric sharpener, a belt grinder, a drilling machine, and a high-temperature electric furnace for heat treating metal.
Each part must be made in accordance with the drawing, otherwise it will be impossible to combine them during assembly. The entire process of making a knife is divided into successive stages.
Knife and its components PHOTO: warbook.club
Parts that make up a folding knife PHOTO: clubsamodelok.ru
How to make a blade
The first step is to make a knife blade, another name for it is “blade”. The manufacturing technology is determined by what this part will be made from. As a rule, all workpieces have high hardness, making processing difficult. The hardened metal should be “released”. This is a heat treatment operation that involves heating the workpiece to approximately 200ºC and holding it for an hour at this temperature. Heating can be done in the kitchen in the oven; the part should cool down along with the stove.
The next stage is the formation of the future blade. If the workpiece is thick and of an awkward shape (for example, made from a file), then it must be forged. If the steel is not very thick sheet, then it can be cut or ground using rough sandpaper.
In the prepared blank of the future blade, it is necessary to drill holes in accordance with the drawing through which rivets will pass to attach the handle.
Now the workpiece can be refined a little - remove the burrs, begin to form bevels for the future tip. The thickness of the blade and the shape of the bevels determine the cutting and strength properties of the finished knife.
If the workpiece satisfies the master, then hardening can be carried out. Strictly according to science, the heating temperature for hardening is determined from a reference book for each grade of steel. This is approximately 800ºС. In handicraft conditions, you can use a magnet as an indicator. As soon as the metal loses its magnetic properties, it means it is ready for hardening, i.e. sharply lowering it into cold water, or even better, into a container with machine oil.
After hardening, the metal is tempered again. This procedure gives the material the necessary properties of elasticity and flexibility.
And the final stage of working with the blade is its cleaning, sharpening and polishing.
Related article:
How to make a handle for a knife
Making a knife handle is a creative process. Here you need to show artistic taste, imagination and not forget about common sense. The handle of the knife should fit comfortably in your hand.
The material for the handle can be any; the master chooses from what is available to him. Production also proceeds in stages. First, blanks of two halves are formed, then through holes are drilled, coinciding with those made on the blade. The handle parts are attached to the knife. You can coat them with epoxy glue before doing this. Pins are inserted into the holes and riveted. The final stage is when the handle is finished and polished.
Briefly about the main thing
The use of special tools for cleaning conductors from the sheath allows not only to increase the speed and quality of work, but also to avoid a number of negative consequences:
- Core damage.
- Hidden defects.
- Reduced wiring strength.
- Breakage of individual veins.
- The conductor is clogged with insulation material.
Modern peeling tools are classified according to three criteria - removal method, speed and degree of automation. Elementary methods at home allow you to remove insulation by heating or using a knife. For large volumes of work, special devices are used - wire cutters and pliers, electrical knives, strippers, side cutters and pliers. When choosing a method and tool, among other parameters, it is necessary to take into account the type of shell material.
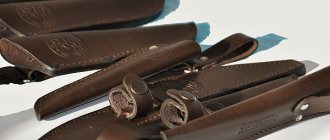
How to make a knife sheath with your own hands
The knife can be conveniently stored in its sheath. You can also make them yourself from scrap materials.
Materials and tools
Good sheaths can be made from different materials: leather, plastic, wood. Craftsmen make sheaths from birch bark and PVC pipes.
The tools you will need are strong scissors, a thick needle, an awl, spring clips, and strong threads.
Manufacturing instructions
To make a leather sheath, a piece of leather is taken, a knife blade is placed on it and an outline is drawn. The material along the edge of the pattern is folded in half, and a blank is cut along the contour with a margin of 5 mm. A seam line is marked along its edge, and holes are drilled along it. A strong thread is sewn through them. Before stitching, you can coat the joint of the leather halves with glue.
A loop should be attached to the top of the sheath to allow the sheath to be carried on a belt.
Making a sheath from thick leather PHOTO: youtube.com
Video
Coffee capsule Nescafe Dolce Gusto Cappuccino, 3 packs of 16 capsules
1305 ₽ More details
Coffee capsules Nescafe Dolce Gusto Cappuccino, 8 servings (16 capsules)
435 ₽ More details
The best headphones
Installation of thermal tubes
The advent of thermal tubes with a shrinkage function has significantly expanded the possibilities of insulating wiring not only for domestic purposes, but also for industrial scales.
The sequence of actions for installing the tube has a number of differences:
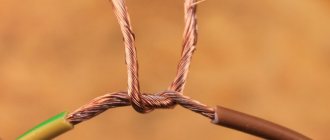
- The prepared tube is placed on the end of the wire (one of the ends to be insulated or connected).
- After this, the exposed wires are twisted.
- The dimensions of the tube used must exceed the length of the stripped area by 1 cm on each side.
- The tube is advanced along the wires, reaching the twisting point.
The next step is to heat the material using a hair dryer or an ordinary lighter. Heating is carried out in the direction from the edge to the middle of the selected area.
The criterion for the effectiveness of the measure is the narrowing of the outlet of the tube. This method is considered more practical, but deciding which wire insulation is better is quite complicated.