DIY electric stove
Homemade base for everyone!
- Homemade products for the garden
- Adaptations
- Homemade cars
- Electronic homemade products
- Homemade crafts
- alternative energy
- DIY furniture
- Construction and repair
- For fishing and hunting
- Crafts and handicrafts
- Homemade material
- Homemade products for PC
- Super homemade products
- Other homemade products
5 new crafts!
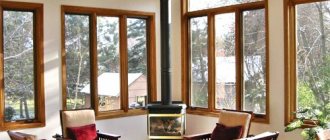
After the house was built, a rather spacious attic emerged; the idea of arranging it had been around for a long time! “An attic studio for guests, creativity, games and relaxation” is already ready. But the staircase is not all the way to the end. How to make an unusual greenhouse-breadbox with your own hands An excellent homemade device for storing tools for a home workshop. Step-by-step process for making a cool dog house with a lookout area. Beautiful key holder in the shape of a Dachshund dog for DIY production. Templates for cutting from plywood. How to make an electric stove from refractory bricks How to make an electric stove from refractory bricks
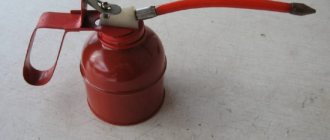
In this article I will tell you how to make a homemade electric stove from brick for just $1 and without having any special expensive materials.
And for this we will use: a refractory brick, a spiral from an electric stove, a couple of bolts with screws, two pieces of glass fabric to seal our screws and, of course, we need a fork with a cable.
Next we make the following cuts in our brick, they are needed to insert a nichrome spiral
Next, we make a couple of holes in the brick with a stone drill; we need these recesses to screw our bolts into them and connect the power source to our spiral.
Next, we insert glass fabric into our recesses to better seal the screws and screw in the screws themselves.
Next we screw the nuts onto the screws and put on the washers and now all we have to do is put on the spiral
How to make an electric stove/heater from improvised materials
Hello to all DIYers! Today in this article we will look at how to make a very useful “garage” homemade product. Why a garage? Well, firstly, you are unlikely to need such a thing at home, and we will be assembling it from improvised means, and no attention will be paid to appearance. Namely, today we will look at how to make an electric stove on which you can cook, heat or warm up anything. Surely you at least once needed a similar thing in the garage, but you were sorry for the money, since the “tool” is not entirely important. So, the budget for this homemade product is extremely small, since most of the elements necessary for assembly probably already exist in the garage. Well, well, I think there’s no need to delay with a long preface, let’s go.
For a homemade electric stove you will need: - Two tin cans of different sizes - Clay (for example, pottery clay) - Computer cooling fan - A spool of nichrome thread (for example: 20 M, 0.50mm, 7.14 Ohm/M) - Power cord with plug / Step-down converter from 220V AC to 12-24V DC.
You will also need the following tools: - Hammer. - Can opener - Plastic bag - Drill with cutting disc - Regular thread - Something cylindrical, such as glue sticks. — Pliers / wire cutters — Soldering iron — Heat shrink — Ordinary wire — Marker — Wooden stick.
Let's start assembling the electric stove (heater).
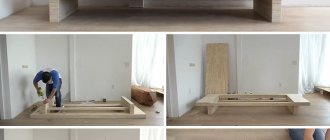
The first step is to make the most basic part of the homemade product, namely the base on which we will continue the assembly. For it you will need to take some kind of tin can, the volume of which will be at least one liter (the larger the can, the larger and more powerful the stove / heater).
In the tin can you took, you should remove the top and bottom parts so that we get a blank that resembles a pipe. To do this, use a bottle opener or a simple knife to cut out these elements. Next, you should remove the tin burrs remaining after the work done, which will only interfere during assembly. We tap them on the inside of the can with a hammer until all the burrs are removed.
After which the structure should be made more heat-intensive. And for this, the walls of the jar should be lined with clay. In order to perform this apperception, we repeat the following steps. We put a plastic bag on the table, a jar on it (the bag is needed so that the clay does not stick to the table) and evenly fill the bottom of the jar with clay. You can use absolutely any clay; the author of the homemade product used “pottery” clay, which is usually sold in vacuum packaging, already diluted, and you don’t have to knead anything.
After we have evenly distributed the clay over the bottom of the jar, take another plastic bag and a tin jar smaller than the previous one. We wrap the jar in a plastic bag, secure it to the jar with tape so that the bag is stretched over the jar, and place it exactly in the center of the large jar. The space between the walls of the two jars should be tightly and completely filled with clay. As a handy tool for this work, we will take some kind of stick with which we will hammer the clay.
After following the steps described earlier, carefully remove the inner tin from the large jar. First we take out the jar itself, and only then the plastic bag. As you can see, due to the fact that we used a plastic bag, we were able to easily remove the jar, otherwise it simply would not have been possible to do this!
The next step is to make a part of the structure in which the fan will be installed for blowing. To do this, take a jar of a suitable diameter to install your fan in it; the jar used earlier was perfect for the author. We apply a small jar to the side of the structure and outline it with a marker, and then, taking a drill with a metal cutting disc, cut a hole along the contour.
Having cut a side hole in a large jar, we observe clay, which should be carefully removed from there. In order to carefully cut out a round disk of clay, you should use a needle and thread. We insert a needle and thread through the clay and, using the thread itself, carefully cut out a round hole (see photo).
Into the already completed hole we insert the tin can for which this hole was made. Due to the fact that our stacks are clay and thick, the tin can does not require any additional fixation in the design; it will stick there well.
After that, you should make a burner in which a nichrome thread will be installed, on which the heated object will in turn be placed. To do this, we sculpt a “lid” for a jar from the same clay, that is, the outer diameter of the disk should not exceed the inner diameter of a large tin can. In the molded lid, mark a circle exactly in the center with a diameter equal to the diameter of a small jar.
Inside the drawn circle on the lid, round holes should be made for air supply. Thermal gun rods are perfect for making such holes. We insert the sections from the rods into the lid so that we have several rows of holes in the lid (see photo). We insert the lid into place and finally adjust it in size so that there is no gap between the jar and the lid. Then remove the glue sticks from the lid. We check the holes for clearance; they must be through. As a result, we should have a design similar to the one shown below. Let's move on to clay modeling again. Between the holes we should mold and lay “sausages” so that we get a groove in which the nichrome thread will be located. In short, we repeat the steps from the data images below. We stick larger clay “sausages” to the edges of the lid (the dishes will be placed on them). We install a fan on a tin can placed on the side of a large can. To do this, using a drill, we drill several through holes around the perimeter of the edge of the can. And install the fan, securing it with wire, as indicated below. Instead of wire, you can use plastic ties.
Let's move on to the most important part of the homemade product. To the heating part. First of all, you need to decide which network you will be powered from. It’s just that if you power the nichrome filament from 220V, you will have to separately power the fan from 12-24V. In order to calculate the final power of the heater, you can calculate the required length and thickness of nichrome using special calculators, which are a dime a dozen on the Internet.
Having decided on the quantity and thickness of the thread, we wind it around a screwdriver, creating a spiral. We lay the spiral itself through the gutter prepared earlier.
We connect the wires and insulate the connection point with heat shrink. We also add a little clay to the places where the wire connects with the thread (see photo). In this case, the clay is responsible for attaching the wires to the “body” so that we do not accidentally tear them off in the future. We connect the fan. The fan can be connected in parallel if you use a voltage of 12-24V.
Here is a video from the author of the homemade product:
Small portable electric stove
Electric cookers allow you to quickly prepare a delicious dinner, even if there is no mains gas in the house. And their mini-variants will also help out at the dacha, in temporary housing conditions and when constantly moving.
For a small electric stove, a regular 220 V socket is enough - you don’t even need to pull a separate cable from the panel. So weak wiring in this case will not become an obstacle to the purchase.
Otherwise, the operation of the device will depend on how successful the choice was, and for what purpose you need the mini-stove.
Basic designs
If you do not take into account the small dimensions of mini-equipment, the same classification can be applied to it as to other electric ovens.
That is, they can go in the same housing with the oven or be a hob (dependent or independent). Accordingly, compact equipment is divided into free-standing or built-in.
In the assortment of many manufacturers you can find portable or tabletop stoves, which, in principle, are the same thing.
But the main difference between electric models is the type of burners used. The ease of use of the stove, its durability and functionality depend on them. Based on this principle, we will divide the rich assortment of the kitchen appliances market in order to decide on the choice of a compact assistant.
Models with cast iron burners
This is the most budget option for electric mini-stoves; only spiral stoves can be cheaper.
However, you will have to get used to this technique, since cast iron pancake burners take too long to heat up and waste a lot of energy on it.
To save at least a little, you can turn off the dish a little earlier and leave it on the stove - such ovens also cool down slowly, and the food will have time to reach the pan. But you need to guess the right moment, otherwise the food will be undercooked.
However, not everything is so bad, and cheap mini-stoves with cast iron burners have a number of undeniable advantages, in addition to the low price:
- High strength. Unlike glass-ceramics, electric cast-iron stoves are more resistant to mechanical loads, shocks and falls.
- Easy to care for. Washing such a stove is just a matter of cleanliness and does not affect its service life.
- Versatility. On the pancake burners you can use any kitchen utensils that are, in principle, suitable for cooking. A flat bottom or the presence of special discs for cast iron pots is not necessary.
When choosing such stoves, you can only focus on the number of burners, additional functions (of which there are few), as well as power consumption. Everything else depends on the characteristics of the built-in heating elements.
By the way, before purchasing a particular model, check the availability of service centers in your city and heating elements for the stove you like.
If they burn out, you should be able to replace the failed electrical components.
Hephaestus PNS-420
Belarusian tabletop mini-stove with two burners of different diameters and, accordingly, power (1 and 1.2 kW). It’s good because it has a small oven with a capacity of 18 liters, and it’s very functional for such a baby:
- The presence of upper and lower heating at 600 and 400 W with the possibility of smooth power control.
- Grill function, plus an additional grill to achieve the desired streakiness of food.
- Timer and automatic power off mode.
Simple induction cooker
It offered the option of heating a room using an industrially manufactured induction cooker. And the thought came, why not consider how to make this very thing, a stove, yourself? In addition, the author whom I propose explained in detail in the film how this can be done. Or rather, I propose for your consideration two projects on this topic. The content of the projects is similar both there and heating. Minor differences in circuits. So, let's begin.
The proposed version of the stove is very simple, I can’t even believe that it works.
Two field-effect transistors 50N06, two resistors 220 Ohm 1 W, two diodes UF4007, 4 capacitors 0.33 uF 1000 V and two chokes (inductors) 40-100 mH.
For assembly, two pieces of wire were stripped of enamel and four capacitors were soldered to them in parallel, resulting in a monolith onto which field-effect transistors were first soldered on both sides using a hinged method.
Then we soldered two chokes, on the terminals of which a jumper was installed, as well as on the legs of the field-effect transistors.
Resistors and diodes were soldered to the bases of field-effect transistors.
Radiators were used to cool the transistors
To supply power, we solder a common wire to the source of one of the transistors. This will be the negative terminal, and the positive one will be from the connection of the chokes. The electrical part is complete, all that remains is to wind the coil and you can test it. On ordinary cardboard, after it has been pierced with a wire, on one side the wire is bent, and on the other side it is wound with a snail of 9-10 turns. To prevent the rings from bridging, they are glued to cardboard. The ends of the coil are soldered to the ends of the capacitors.
To see. how the assembly works, the author wound a coil of 20 turns with a wire thinner than the main coil and hung a car lamp on its ends. The circuit was powered by 12 v.6A. When the coil with the lamp was brought close to the main coil, the lamp flared to full intensity.
Next, a metal plate was placed on the inductor, a glass of water was poured into it and a thermometer was placed. The voltage was connected to 24 v 10A. to speed up the process. The water boiled in four minutes. At this voltage, the author used forced cooling; the coil itself does not heat up.
We boiled some water for tea, that is, the model is working, you can make soup, and what about frying, you can try to cook something. Let's return twelve volts. Put a piece of butter and as soon as it melts, pour in the broken egg. The scrambled eggs begin to scramble and give you an appetite. Everything is working. Generation is approximately 60 kHz
Well, with this assembly everything is clear, the second one is the same, only the diagram has different details.
Transistors 2 pcs. IRFZ44N, resistors 460 Ohm - 2 pcs, 10 kOhm - 2 pcs, diodes UF4007 - 2 pcs, zener diodes 10 V - 2 pcs, capacitor 0.47 μF 100v, stabilizer chip LM7812 and inductor inductance 1000 mH.
The coil is wound turn to turn with a snail, thick insulated wire 1.5 sq.. and consists of 18 turns with a tap from the middle.
I really liked the author’s statement when he whispered to us that the board was made to order, shared the top view and did not show anything about the tracks inside. And he suggested that those who wanted to assemble it using a hinged method or on a breadboard. After a set of parts we can see the completed assembly.
Powered by a powerful unit or battery. With this author, we cannot trace the assembly as in the first version, it is beautiful, neat, but not interesting. One good thing is that after ten minutes the water in the bowl began to boil.
If you believe the video stories, a thought comes to mind. What if these devices are powered directly to the solar panel, or at least through a buffer battery?
Well, in sunny weather during a hike or a car rally, you can save gas and not think about firewood. And be with hot food.
Homemade retro electric stove
This powerful electric stove, which was used for cooking and more by most of the Soviet population in the 20th century, can be made by yourself in about one hour.
Although this is already a relic of the old, who knows, maybe it will be useful to someone else. Thanks to the open spiral of high power and the minimum gap to the heated surface, heating and boiling occurs in a fairly short time, and this is already a kind of energy saving.
Point 1. Necessary materials and tools.
Materials: • Two fireclay bricks.
• Galvanized metal profile U-shaped. • Filament coil or nichrome wire D=0.5-1 mm. • Small grinder, diamond blade and metal blade. • Homemade small chisel, hammer. • Drill, drill bit D=3-5 mm, metal drill D=3.3 mm. • Riveter with rivets. • Cable with plug. • Diode 20-50A 400V. (optional). Point 2. Helix.
For the heating element, we will need a ready-made filament spiral made of nichrome wire; you can buy it at the market, hardware stores, 1000 small items, or, if you have nichrome wire, make it yourself (LINK - Device for winding a spiral). The finished spiral should be 1.5-2.5 kW.
Point 3 . Labyrinth drawing.
The incandescent spiral must be evenly placed on a platform of two bricks; to do this, first draw a drawing of the labyrinth on paper and paint over the part where the spiral itself will lie.
Then take two fireclay bricks; if they are not new and dirty, they must be cleaned and washed with a brush.
[/center We place two bricks on a flat surface, put a paper pattern of paths on top, press with our hands and bend the edges of the sheet one by one, mark all the corners of the labyrinth on the bricks. We remove the paper and use a pencil to completely draw the labyrinth as on paper. [center] In order not to get confused while working with a grinder and not to cut the wrong cut, we additionally paint over the labyrinth with chalk, now it is visible very well.
Point 4. Brick processing.
We put on safety glasses or a mask, take a grinder with a diamond blade and make cuts along the lines, 1 cm deep, trying not to go beyond the intersection of the corner lines.
After completely passing the contour of the labyrinth tracks, we begin sampling the core of the tracks, moving the disk from cut to cut, gradually deepening and widening the grooves to the bottom 1 cm. In 15-20 minutes the entire labyrinth will be ready; use the side of the disk to chamfer the edge of the bricks. Now we need to remove the core of the corner areas where the grinder did not reach. To do this, you need a thin homemade chisel, made, for example, from a piece of drill D = 10 mm. Do not hit the chisel too hard with a hammer, use small chips, and paint the brick little by little, the main thing is not to overdo it and not to split the brick. All this is not difficult, the material is quite easy to process and will take no more than 10-15 minutes. Now you can try the spiral in place to see all the remaining jambs; if necessary, we modify the tracks. To bring out the ends of the spiral, we drill two holes. Using a Pobedit drill at low speeds (without vibration), with plenty of water and very often removing the drill to wet the entire channel with water, we drill through holes. After drilling the holes, rinse the bricks well with running water and leave them to dry.
Point 5. Base-stand.
To make the base-stand, we use a metal profile, one meter will be enough, we spread it along its entire length lengthwise so that we get two identical corners.
We measure the width of the brick structure and add 5 mm. on each side, and transfer these dimensions to a piece of corner. We make cuts along the marks and bend all four sides 90 degrees. You should get a square into which both bricks can be easily inserted.
We use rivets to fasten the corners and add rigidity. We drill in the corners with a drill D = 3.3 mm. holes and fasten them with a riveter.
It is advisable to use the minimum length of the rivets, or use a hammer and anvil to further flatten them.
All that remains is to attach the legs, mark four 10 cm segments on the remaining corner, immediately drill one hole for the rivets and cut them off. We put the legs in place and drill holes for the rivets in the frame. We rivet all four legs onto one rivet.
We place the platform on its own legs and, straightening each leg exactly, drill a second hole for the rivet, install the second rivets. Additionally, we flatten the rivets with a hammer, now everything stands rigidly and evenly on its own feet.
You can lay the bricks inside, if the rivets still get in the way a little, use a grinder to grind the sides of the bricks down a small wedge and install them in their place.
Point 6. Installation of the spiral.
We straighten the ends of the spiral by 10 cm and insert them into the holes.
From the bottom we connect a wire with a plug with a cross-section of at least 2.5 mm2. By evenly stretching the spiral and distributing it in the labyrinth, you should get a slight stretch of the spiral.
Point 7. Switching on and testing.
We connect the stove to an outlet; the wiring and circuit breaker must be in good working order and designed for a power of at least 3 kW.
After complete warming up, we look at the intensity of the heating coils; it should not be very bright, but in the region of dark orange-red.
If the glow is bright orange-yellow, then you need to reduce the current, this can be done using one 20-50A diode, which will cut off one period of voltage, which is quite enough for us.
Heat reduction circuit.
I didn’t have a suitable diode, so I installed two parallel 10A diodes, which gave 20A. In principle, a radiator is not needed; the heating of the diodes is only 10 degrees. more environment. The circuit must be hidden inside an insulated housing with ventilation holes.
Now, when I’m too lazy to light a fire in the grill in the gazebo, I use this stove and quickly prepare a snack!
Become the author of the site, publish your own articles, descriptions of homemade products and pay for the text. Read more here.
usamodelkina.ru
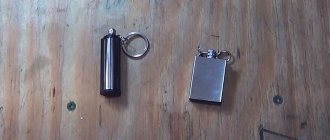
How to make a 12 V mini electric stove
A small electric stove, powered by diesel glow plugs, will help quickly heat water in nature during a camping trip or fishing. Using this device you can fry eggs or cook a small portion of soup. The stove is powered by a 12V battery, and the structure is assembled from scrap materials.
To make tiles you will need:
Making a 12 V mini electric stove
The dishes that will be placed on the stove must be thin-walled and have a lid. Thus, heating will proceed faster. A large stainless steel mug with a lid was used. The bottom diameter is approximately 9 cm.
First we make a frame for the tiles from an aluminum corner. To do this, mark 4 segments of 11.3 cm each. We make markings on both sides of the corner. These are the places where the frame for the slab will be folded. In the middle of the three markings on one side of the corner, draw a 90 degree angle with a marker.
Cut out the resulting corners. We do the last marking a little differently. We mark the corner only on one side of the marking. On the other side, along the length of the aluminum corner, mark a length equal to the width of the side. We cut the rest of the part according to the markings.
At the beginning of the frame, draw a line at an angle of 90° and also cut out the corner.
We bend the structure along the resulting lines.
We bend the end of the frame inward.
Holding the two edges at the junction with pliers, drill a hole with a drill.
Insert the rivet. We take a rivet gun and fix the frame.
Let's start attaching the legs. Drill 4 holes in the corners of the frame.
Insert the long nuts and tighten the bolts using wrenches.
The base of the structure is ready.
Now we move on to installing the heating part of the tile. To do this, we disassemble the glow plugs. Using pliers and a hammer, remove the housing and pull out the heating element. For further work on the candle design, you will need heating elements and insulating washers.
To install candles on the stove, we drill three holes on one side of the frame according to the size of the insulator washers.
We cut pieces of thermotube to size and put them on the heating elements.
We cut the aluminum plate. The length of the plate should be equal to the distance between the walls of the plate frame plus allowances for bends.
We make marks on the plate at the same distance as in the frame.
Drill holes in the plate.
We bend the plate and fix it inside the frame with rivets.
We install the candles on the stove and secure them on the outside with insulating washers. When connecting current, the minus goes to the frame, and the plus goes to the contacts of the heating elements. We drill a hole in the frame and screw in a bolt and nut. This will be the negative connection point.
We insulate the wires with heat pipes and connect them to the stove. We connect the wires with cable ties.
We connect the ends of the wires to the battery.
Place a glass of water on the stove and check the operation of the device. To turn it off, disconnect the wires from the battery. Using this diagram, you can make different types of electric stoves. For example, add heating power or improve the body of the structure.
Watch the video
How to connect an electric stove to a 220 V network
All the above diagrams were specifically for a single-phase 220 V network. To connect, you will need a three-wire cable, a three-pin power socket and a plug with a rated current of at least 32 A. Let’s say right away that connecting equipment from different brands is fundamentally no different. It doesn’t matter which stove you purchased - Electrolux, Gorenje, Bosh, Beko. Doesn't matter. The only difference is the different design of the covers that cover the terminal box on the housing and different methods of fastening it. Everything else is the same.
First, the cable selected for connection must be connected to the electric stove. On the rear panel, usually at the bottom left there is a terminal block to which the conductors are routed.
Nearby are connection diagrams for different networks.
With a 220 V network, the diagram is on the far right. On the plate, contacts 1,2,3 should be connected by one jumper - this will be the phase (red or brown conductors), the second - contacts 4 and 5 - this is neutral or zero (blue or blue), the sixth contact is ground (green or yellow -green). Electrical plates usually come from the store with jumpers already installed, but it doesn’t hurt to check.
It is more correct and reliable to crimp the conductors with contact plates, and then connect them. This connection is more reliable, but often the conductors are simply twisted around the clamping screw and then tightened. In any case, it is better to follow the color coding - this way there is less chance of making a mistake.
Plug installation
Next, a plug is connected to the cable. The power plug is collapsible. Unscrew the two mounting screws and remove the cover with contacts. The fixing bar holding the cable is also removed. The protective insulation is removed from the edge of the flexible cable (about 5-6 cm), the conductors are straightened, their ends are also stripped of insulation by about 1.5-2 cm. The cut end of the cable is inserted into the plug body.
The clamping screws on the contacts are loosened, the conductors, if they are multi-core, are twisted into a bundle. These flagella are twisted around the contacts and tightened with clamping screws.
The distribution of conductors matters and they must be connected carefully. The top contact of the plug is usually labeled - the “ground” wire (green) is connected here. When connecting a socket, you need to apply ground to a similar connector.
The other two contacts are “phase” and “zero”. Where to apply which one is not important, but when connecting the socket, the “phase” must fall on the “phase”, the “zero” must fall on the “zero”. Otherwise there will be a short circuit. So before turning it on, be sure to double-check that the wires (phase and neutral) are screwed in correctly.
How to determine the phase in an installed socket
If you already had an electric stove before, and there is a socket, you need to find in it where the grounding, phase and neutral are located and connect the wires in the plug accordingly. The easiest way to determine this is to use a voltage indicator in the form of a screwdriver. It works simply - install the indicator in the place of the expected phase, and look at the LED mounted in the housing. If it lights up, then there is voltage and this is a phase. If there is no voltage, the LED does not light up, and this is zero.
The ground is even easier to determine: is the contact at the top or bottom.
How to make a simple induction hob using two transistors
This is the simplest induction hob design you can imagine. No controllers or microcircuits. The circuit contains only 2 transistors and a few other elements. The circuit is mounted mounted without a board. Excellent for repetition by beginners in radio electronics.
Details
How to make an induction cooker
We take two pieces of wire and remove the enamel.
Use it to solder 4 capacitors in parallel.
Let's take the transistors and solder them as drains to a line of capacitors on both sides, see photo.
Solder two chokes to a line of capacitors.
Let's connect the sources of the transistors with a jumper made of thick wire. We will also connect the outputs of the chokes.
Solder the resistor from the chokes to the gate of the transistor.
Next, solder the diode from the gate to the opposite connection of the capacitors.
On another transistor we will do the same: we will solder a resistor to the gate and to the chokes, a diode from the gate to the opposite connection of the capacitors.
Let's connect two radiators to the transistors.
We solder a common wire to the source of one of the transistors. This will be the negative terminal to the power supply. Positive from the connection of the chokes.
It's time to make an induction surface. Take a wire and a rectangle of cardboard 150x200. Let's pierce it and pass the wire through.
Then we will make a curl of about 10 turns.
Secure with glue. Let's strip the ends of the coil and connect them to the terminals of the capacitors.
Let's connect to a 12 V 6 A current source.
To check the operation of the stove, we will build a coil of wire of a smaller diameter, with a number of turns of 20 pieces. And load it onto a car incandescent lamp.
If you bring this twist to the inductor, the lamp should glow.
We will definitely place a metal plate on the inductor. Pour water and put a thermometer in it.
After some time, the water began to boil.
The transistors also began to heat up; additional airflow from the computer cooler was needed to cool them. The stove is ready and checked. Now you can try to cook something. Let's put a piece of butter.
And let's try to cook scrambled eggs.
Everything is working. The generation is approximately 60 kHz.
Watch the video
ELECTRIC STOVES FROM AVAILABLE MEANS
There are several options for homemade electrical devices for cooking, made from “junk”, which is sometimes unfairly perceived as worthless trash. For example, from a metal pan that has served its purpose (or even become completely leaky). At the dacha and when there is a lack of time, this is a very acceptable basis for a simple (respectively, cheap and reliable) electric stove. Moreover, a tall pan is better suited here - 140 mm or more. Having become a body in a homemade design, it will warm up less. You can handle the handles of such a tile without any gloves, even after working continuously for many hours - burns are excluded.
To attach the burner, a hole was drilled in the center of the bottom of the pan for an M6 pin, and at the appropriate distance (depending on the specific type of electric heater used), an opening for the terminal block was cut out with a chisel. The dimensions of the opening “a” and “b” are maintained with maximum accuracy in order to reduce gaps during assembly.
To simplify the design as much as possible, it was necessary to abandon the electric regulator for the degree of heating of the burner. And for maximum power, turn on the electric coils in parallel.
Another version of a homemade electric stove has a more advanced shape. A metal casing from a magnetic starter is used as a housing for it. But it is better, of course, to weld from sheet metal with a thickness of 0.8 - 1.5 mm. And round off the sharp edges with a file. There are special gussets in the corners of the lower part of the body. Each has a hole with an M6 thread. The bolts screwed here (with locknuts) not only allow you to adjust the legs in height (and install the electric stove horizontally), but can also serve as fasteners when installing a removable bottom (the latter is not shown).
Mounting the burner does not differ from the previously discussed option. Electrical installation is best done with a single-core copper wire (cross section 1 - 1.5 mm2) in heat-resistant fiberglass insulation. For example, from old household electric ovens of the Lysva type. As a last resort, you can use an analogue with rubber insulation.
A leaky saucepan used as an electric stove in a hurry:
1 - body; 2, 3 — stud, M6 nut; 4 — burner with a power of 1 kW; 5—container with food to be prepared; 6 — brick (4 pcs.); 7 — burner terminal block; 8 — conductive core in heat-resistant insulation (2 pcs.); 9 — electrical cord with plug; 10 — elastic insulating sleeve (made of two or three layers of insulating tape on a cotton base, wound at the point where the electrical cord passes through the body); 11 — electrical and thermal insulating stand.
Hotplate with sheet metal body:
1 - welded body; 2 — installation leg (M6 bolt with lock nut, 4 pcs.); 3 — burner with a power of 1 kW; 4 — handle of the electric switch-regulator for heating the burner; 5 — indicator light (from an electric iron); 6—M4 screw with a semicircular slotted head; 7 — electrical cord with plug; 8 — switch-regulator for heating the burner (from PME-23-5230); 9 — scarf (steel sheet s 1.5, 4 pcs.); 10 — burner terminal block; 11 — M6 stud with nut; 12 — clamp (steel strip s1.8); 13 - M4 nut.
Electrical installation diagram:
1 — burner terminal block; 2 — switch-regulator for heating the burner (from PME-23-5230).
Double burner stove:
1 - welded body (steel sheet s1,5); 2 — installation leg (M8 bolt with lock nut, 4 pcs.); 3 — burner with a power of 1 kW (2 pcs.); 4 - terminal with ground connected to it; 5 — support-protective disk (from old electric stoves “Lysva” or “Tom”, 2 pcs.); 6 — light indicator (2 pcs.); 7 — M4 screw with nut (2 pcs.); 8 - electrical cord with plug.
An additional function of the PME-23-5230 power regulator-switch when used in the design under consideration is that it also serves as a kind of terminal block. To do this, you need to unscrew the screw on the terminal with number 4. Then, by loosening the fastening screw (on the side opposite from the handle fastening), remove from the cell with terminals “4” and “6” everything that contributes to the occurrence of electrical contact between them. And after tightening the fastening screw, make sure that the terminals are completely isolated from each other.
The convenience of using a light indicator from an iron (a 3.5 V light bulb connected to the ends of a small spiral in series with the burner) is not so much in signaling that the latter is turned on to the electrical network, but in the ability (by the brightness of the light bulb) to judge the degree of heating of the working surface of the electric stove ( current and power supplied to the load).
The third option for homemade tiles is a two-burner one. Here the power (the total value is taken into account) is twice as large, and the aesthetics of the design are higher than those discussed earlier. In particular, the indicator lamps are in carbolite flashlight sockets from decommissioned radio equipment. There is a terminal for connecting protective grounding. And the installation of kilowatt burners is made in the image and likeness of modern factory-made electric stoves. This completely eliminates the leakage of fat and moisture onto the terminal blocks during cooking. By the way, a similar method of attaching burners can be used in all previously discussed versions of homemade electric stoves.
How to make an electric stove from scrap materials
Homemade electric stove. How to make an electric stove from brick: photo and description.
A homemade electric stove is always useful in a country house or garage; you can use it to cook or heat food, heat water, or use it as a heater. To do this, it is not at all necessary to buy an electric stove; you can make it yourself from bricks and nichrome spirals.
Making electric stoves
To make an electric stove we will need the following materials:
- Brick (preferably fireproof).
- Nichrome spiral approximately 30 cm long.
- Wire with plug.
- Two screws and two nuts and washers for each.
We take a brick and make parallel grooves on one side using any available method; you can use a grinder with a cutting wheel or a large coarse file.
The depth of the grooves should be 5 mm greater than the thickness of the spiral, so the spiral will be completely immersed in the grooves with a margin. It is important that the spiral does not touch the pan later.
When the grooves are ready, we make holes for screws in the side of the brick; for this you will need a drill with a drill bit with a pobedit tip of the appropriate diameter.
We insert screws into the holes, they can also be sealed with pieces of fiberglass, and screw washers and nuts onto the threads.
We take a piece of thread and measure the grooves in the brick to find out the approximate length for the spiral. We take the spiral by the edges and stretch it evenly to the same length.
We place the spiral in the grooves, while stretching the spring along the edges of the brick. We connect the ends of the spiral to the terminals and secure them with washers and nuts. In places where the spiral approaches the terminals, straighten the spiral so that the terminals do not heat up.
We connect a cord with a plug to the terminals and the homemade electric stove is ready.
But it should be remembered that such tiles are a fire hazard; they should not be placed near flammable objects or left unattended.
Since there is an open spiral, there is always a chance of getting an electric shock, so you should only place and remove dishes from the tile when it is not plugged in. We put the kettle on the stove and only then plugged it in, the water in the kettle boiled - first you need to unplug the stove from the socket, and only then remove the kettle from the stove.
The tile can be used as a heater, but it should be remembered that an open spiral burns oxygen in the room and under no circumstances should the room be closed tightly, only with the window open. For the same reason, you should not leave the stove on in a small room overnight.
Pros and cons of tabletop electric ovens
An electric oven is a small oven that usually has burners on top, but may not have them. Such a device allows you to save significantly, since instead of two devices you purchase one that perfectly performs its functions.
The main advantages of this type of kitchen appliances are:
- small weight indicators, which significantly facilitate transportation and installation of the device in the chosen location;
- ease of operation;
- affordable price;
- the ability to prepare food not only in the kitchen, but anywhere where there is an electrical outlet;
- ease of storage;
- a wide range of oven models, from which you can choose the one that suits you in terms of characteristics and cost.
Like any other appliance for the kitchen and beyond, an electric oven with burners has its disadvantages:
- the possibility of heating the device body during use;
- significant cost characteristics in the case of many additional functions;
- limited internal volume, which sometimes interferes with the preparation of large portions of food;
- high energy costs. But this indicator is individual for each device and the comparison is mainly with gas alternatives.
Characteristics and equipment of a tabletop electric oven
To make selection easier, it is necessary to consider in more detail all the technical characteristics of such devices, since these indicators often become decisive in the choice of equipment.
Scope and type of control
The volume of such stoves with an oven can vary from 5 to 50 liters. Choose it depending on your needs and available space in the kitchen. It’s worth saying right away that the larger the volume indicator, the larger the dimensions and weight of the equipment.
Most often, an electric tabletop oven is controlled using rotary switches. Some mini-stoves are also equipped with a combined control option.
Power and energy consumption
The connection power indicator expresses the energy consumption that the oven has in the mode of all its components and burners turned on.
This criterion is the most important, because it happens that all the parameters best suit the buyer. But the power of the existing network is not enough. This often happens when a device is purchased for a summer residence.
In this case, you may be advised not to turn on the oven and all burners at the same time, or choose the appliance that is suitable in terms of power.
The power consumption of electric tabletop ovens varies from 600 to 3600 W. Less powerful ones will be an excellent option for installation in the country, since cooking is not the main thing there. Such devices have smaller dimensions and a cost that fits perfectly into the budget.
It’s worth saying right away that power directly affects energy consumption, so if you don’t want to pay expensive electricity bills, you should choose the appliance that will be the optimal addition to the kitchen.
To ensure that buyers are not confused about power ratings, all devices are equipped with labels that depend on energy consumption. Thus, the letter A, B or C is indicated on the packaging and in the documentation for the device. For example, class A is represented by the least powerful devices.
Number of burners and additional options
Electric oven-type appliances also differ in the number of burners. As a rule, tabletop models, due to their size, are equipped with only two burners. Floor-standing ones can have four, but this affects their size. Moreover, the burners can be either regular cast iron or induction.
Important! For greater comfort during use, burners are most often made in different sizes.
All tabletop ovens can be divided into classic and multifunctional models. Thus, the former are characterized by low cost and a minimal set of functions. Most often, ovens of this type are equipped only with a thermostat with a shutdown timer. Such stoves are purchased for certain conditions at the dacha or in another place, for example, in a workers' trailer, where food is prepared infrequently and there are no certain high requirements for cooking technology.
Multifunctional ovens with burners can have convection and microwave functions. This type of device is very convenient because it can also perform the tasks of a microwave oven. This allows you to avoid spending money on purchasing and space in the kitchen for placing several appliances.
Thus, the functionality of devices of this type includes options such as microwave and grill. In such an oven you can easily cook poultry on a spit or kebabs. Interestingly, the heating element of the device can be conventional electric or infrared.
Important! Some oven models include the ability to remove the top cover and cook shish kebab, just like on a real grill.
The presence of a microwave oven function allows you to use all its advantages combined in one device.
For example, it is convenient to use the defrosting option, which is carried out by forcing warm air into the oven, the temperature of which does not exceed +30 degrees.
Some more expensive models allow you to increase the supply air temperature for faster defrosting. Not all, but some of the devices are equipped with an extinguishing mode. If it is not there, then you can simply simmer the food inside the oven at a low temperature from +85 to 95 degrees.
To make cooking easier, tabletop electric ovens are equipped with the following options:
- Shutdown timer, which allows you to turn off the device after a specified cooking time.
- A heat indicator that allows you to determine whether the interior of the device has cooled down.
- Boiling control is a function that allows you to reduce the boiling temperature and maintain it at a given level.
- Metal object detector – an option that indicates that metal objects have been detected inside the oven.
- Self-cleaning option.
- Program memory, thanks to which you can save some cooking parameters and use them in the future.
- Brazier – the ability to remove the top cover of the device.
- Electric burners are additional features that help turn the oven into a full-fledged stove.
Electric ovens for the cottage
For a summer resident, there is simply no better option for cooking than an electric oven with burners. The miniature size allows you to transport such a device from home to the country and back, and the low cost will not particularly affect the budget.
When purchasing such a device, you should immediately pay attention to the power, since this indicator is the main one for outdated wiring, which is what is observed in most dachas.
In addition, even good wires in an unheated room in winter can quickly become unusable or partially lose their properties.
To avoid negative consequences for the dacha, it is better to choose the least powerful device, and before connecting it, check the wiring for suitability. The best option would be to supplement the power supply system with a separate cable for the oven.
Popular brands of electric tabletop ovens Nowadays, the variety of tabletop ovens for cooking is so great that it is difficult to choose the right model among the assortment. In addition, there are a lot of manufacturers that many have not even heard of. We will try to describe the features of the most popular brands of tabletop electric ovens.
Electric oven Energy
Energy electric ovens are the most budget-friendly options that combine additional functions. You can choose a simpler oven or one that is equipped with many options. This company has an undeniable advantage over its competitors - low cost of products. The range of such ovens is constantly updated in accordance with trends and customer requests.
How to make a simple mini electric stove from the heating element of an electric kettle and improvised materials with your own hands.
I came across an electric heating element from an ordinary electric kettle. It's a shame to throw it away. The size and shape of this heating element gave me the idea to make a small mini electric stove out of it, which is what I did. Moreover, I needed it for many tasks, such as heating small portions of food and liquid, drying various objects (small sizes), melting paraffin and wax, and in winter it will be a little warmer near it. The power of this heater was 1300 watts. It is designed for an alternating mains voltage of 220 volts. At this voltage and power, the current will be 6 amperes. Another point was that there was a need for smooth temperature control of the heating element.
To begin with, I gave this heating element a more suitable and compact look by cutting off the excess edge around the base of the heating element. The next task was to make a normal base that would reliably and steadily hold both the electric heater itself and the mass that would be placed on top of it. The first version of such a base was a monolithic pancake cast from gypsum of suitable diameter (about 12 cm) and height (about 2 cm). If the heating element is placed directly on this plaster pancake, it will also heat up significantly. I decided to make a small gap between the pancake and the heating element. To do this, I took 4 ordinary hardened self-tapping screws (well, whatever was at hand) and secured them both to the plaster pancake and to the heaters. They stood in the form of 4 legs, equidistant from each other.
This option with a base in the form of a plaster pancake was quite good. The mini electric stove stood stable and did not wobble. The length of the screws was about 6 cm. This was quite enough to prevent the temperature of the tile from being transferred to the substrate. In the middle of the screws the temperature was only about 45 degrees. Unfortunately, an accidental fall of the mini tiles cracked the plaster pancake. My carelessness.
Since the self-tapping screws (legs) practically did not heat up during the operation of the homemade mini electric stove, I decided to make the second version simply from an ordinary wooden board of suitable sizes. Self-tapping screws are easy to screw into such a wooden base. Their caps caught well on the lower part of the heating element, which allowed the design to be very simple and at the same time quite reliable. This version of a mini tile made from a regular electric kettle heater, self-tapping screws and a board can be made by almost anyone in just a few minutes.
Now as for the electrical connection of this mini electric stove, made quickly with your own hands. It is worth considering that when this heating element was in the electric kettle, then during its operation the water (which was heated) prevented the heating element itself from overheating. Typically, electric kettles have simple protections that are triggered when the temperature rises above normal. In our case, if you apply 220 volts to this heating element (1300 W), then the heating element will not heat for a long time; after a few minutes it will burn out from overheating. Therefore, this electric heater needs to be powered from a lower voltage.
To limit the heater power, I used the most common power regulator module (triac, which is quite cheap). I assembled a small case for the regulator board, to which I attached a patch socket and a cord with a plug. There was a knob on the body, which made it possible to smoothly regulate the voltage supplied to the heating element. As a result, I got both a power limit so as not to burn the heater, and a temperature regulator for a homemade mini electric stove. Naturally, if the regulator is turned all the way, then the voltage on the heating element will go to maximum. To do this, I made marks on the dimmer body that I should not go beyond.
Another option for limiting the power of the heating element was to introduce a conventional diode (with suitable current and voltage) into the electrical circuit. That is, as you know, when a diode is connected in series with an active load, the power decreases exactly by half. This happens because the diode cuts off one half-wave of alternating current and passes the second (opposite) one. In this case, we need only one diode, the current strength of which should be no less than that of our load (heating element). In my case, the heater has 1300 watts, which corresponds to a current strength of 6 amps (at a voltage of 220 volts). The diode can be placed on either side, it doesn’t matter. Well, it will no longer be possible to regulate the power of this mini oven. It will operate at 650 watts.
Tabletop gas and electric stoves in the NORD online store, in Yekaterinburg
When it is not possible to install a full-fledged stove, you can purchase a tabletop stove. It will become a lifesaver for a summer house, garage or hotel kitchenette. This technique is very beneficial.
Tabletop electric stoves are inexpensive, do not take up much space, and are easy to store and transport. In terms of power, they are no weaker than full-fledged electric stoves.
Unfortunately, electrical appliances cannot be used everywhere, but only where there is a source of electricity. In such a situation, it is better to buy a tabletop gas stove. Such devices operate from a gas cylinder, which can be purchased at any hardware store.
They can be used not only indoors, but also outdoors. If we talk about disadvantages, then mini-stoves have only one - the absence or a small oven, as well as a minimum number of burners.
Which garden stove should you choose, gas or electric?
Of course, technology differs, it depends not only on the energy used, but also on the material of the hob and the type of burners.
Electric stoves are:
- Induction. On such a stove, it is not the burner that heats up, but the bottom of the pan due to eddy currents. Therefore, you will have to buy new pots and pans with a thick bottom. Induction surfaces have a very high efficiency and heat water almost instantly. Most often, such tabletops are produced for one or two burners. The main reason why people choose induction cookers is the absolutely smooth glass-ceramic cooking surface, which does not heat up and prevents injuries and burns. But the price for such equipment is much higher than for conventional tiles. Eden EDY-859 induction hob with black glass ceramic surface. Has touch control and residual heat indicator. In order not to monitor cooking, you can set a timer and the device will turn off itself after a set time. Galaxy GL 3054 induction hob for one burner with touch control. There is a timer and a display where all information about the operation of the equipment is displayed.
- Infrared. Such devices use strip heating elements as a heating element; they are also called HiLight. Such a heating element can become red-hot and emit infrared radiation. They are much more powerful than simple electric stoves, but are inferior in power to induction stoves. HiLight burners are located under a glass-ceramic surface, so these stoves have a beautiful appearance and are easy to clean. Another plus is efficiency and touch control, with which it is convenient to regulate power over a wide range. A striking representative of this type is Kitfort KT-109 in a black glass-ceramic case. It has a perfectly flat working surface, under which there are heating elements. During operation, they heat up and turn red, which looks very stylish on a black surface. Each burner has its own touch control panel.
- Regular. Such tiles were in every house in the USSR. Squares made of plastic with a cast iron pancake on top or a spiral. They plug into a regular outlet, but are not very economical. Especially those with “pancakes”. True, those with a spiral are more dangerous. Electric stoves are produced with only 1-2 burners, because a larger number of burners will consume a lot of electricity and have a negative impact on the wiring. Among these models, we recommend the Atlanta ATH-1726 with two spiral burners. Each has its own rotary switch. There is a network indicator. The stove has a body made of black enameled steel. But the Sakura SA-7101S is a cheap and simple version of a single-burner stove. Controlled via rotary switch. To ensure that the device stands stable, there are rubberized feet. The heating element is hidden under a cast iron plate.
- With oven. Not everyone can refuse baked goods and dishes from the oven, even outside the city. That's why tiles with a mini-oven under the hob were invented. Externally, they are no larger than a microwave. The oven is not large, but there are options with a grill.