- June 10, 2020
- Crafts
- Tatyana Ivanova
Autumn is a wonderful time of year when nature is filled with bright colors. Fruits and berries are ripe, people are harvesting. Exhibitions of autumn crafts are organized in kindergartens and schools. Very beautiful and unusual compositions are made from pumpkin. These are not just popular Halloween candle holders. You can make many other interesting things from this fruit. Let's try to make an original carriage for Cinderella together with the children.
Choosing a pumpkin for crafts
A round, light weight vegetable is more suitable for a pumpkin carriage. It is better to choose from 500 g to 1 kg; small decorative fruits are also suitable. They weigh no more than 200 g, just right for miniature crafts. It is important what type of vegetable it is, because products from decorative species are stored for years. Cucurbita pumpkin is suitable for crafts.
It has a round shape and pronounced convexities, the color is golden brown.
When choosing a pumpkin, you need to pay attention to its appearance. The peel should be intact, without scratches or cracks. For crafts, take a fully ripened fruit. It’s good if it grew in a suspended state and did not come into contact with the ground, then the dents will not be visible.
Important! To make the craft last a long time, it is better to use a completely dried pumpkin. Fresh food spoils quickly.
Carving pumpkins: gallery of masters
Of course, you won't be surprised if I tell you that some artists are professional pumpkin carvers.
In 2004, Ray Villafane announced that, under his own brand, Villafane Studios, he was assembling a studio of young artists ready to work with non-standard materials. The guys work with sand, plastic and... pumpkins!
(Click on photo to enlarge)
Pumpkin is a wonderful gift of nature; bowls, ladles, baskets, water containers, musical instruments, and decorations have long been carved from it, says Marilyn Sunderland. — Pumpkin is universal: it can be cut into wood, burned, painted with acrylic, oil, watercolor, wood varnish, or whatever! It can be decorated with beads, precious stones, leather, or even left unpainted to show its natural color. The possibilities are endless!
(Click on photo to enlarge)
10.19.2016 Prepared by: Ekaterina Ershova about children from 7 to 10 years old, about children from 4 to 7 years old
How to prepare a pumpkin for a carriage craft
The pumpkin must be properly prepared before work. First, wash it well in soapy water using a soft sponge. Afterwards, the skin is wiped dry and treated with alcohol. Next, start cleaning the pumpkin.
How to peel a pumpkin for the “Carriage” craft:
- Using a sharp knife, carefully cut off the top of the vegetable and remove the seeds.
- You need to clean it thoroughly, leaving as little pulp as possible so that the craft can be stored longer.
- Treat the inside of the fruit with lemon juice to prevent it from darkening.
- Dry the prepared vegetable in a well-ventilated area away from sunlight.
The pumpkin for the “Carriage” craft takes a long time to dry under natural conditions. Moreover, you need to dry it with the stalk so that the juice does not leak out, otherwise everything will go down the drain. The entire procedure takes 2-3 weeks, during which time the shell should change color and become darker. You can determine that the pumpkin is ready for use by the thickness of the peel. It should harden well.
You can speed up the process with the help of modern equipment. Dry in the oven at a temperature of about 80 ° C, constantly turning the vegetable so that it does not burn. Small fruits can be placed in a 600 W microwave oven. Drying in a convection oven at a temperature of 80° is allowed.
You need to store pumpkin for crafts in a dry room, where the temperature does not fall below +10°C and does not rise above +30°C.
Another way. The pumpkin is first cleaned of seeds and pulp. Next, stuff the vegetable with newspapers and put it in a well-lit place. The paper is changed several times a day as it gets wet. Drying is continued for 2-3 days. The room temperature should not be lower than +25°C. You can put the workpiece on a kitchen cabinet, where the air is warmer. In the cold, the process is delayed.
Master class on how to make a vase and ekibana with pumpkin and flowers
It is very difficult to choose what to show you. There is always more work than can be described. Therefore, I decided to very briefly talk about several crafts. Briefly, but so that you can understand and easily repeat.
Ekibana.
- In a large flower pot (or in a small bucket) we place different autumn flowers (preferably, if possible, natural, not artificial).
- We coat a small pumpkin with varnish. Place it on a bamboo skewer and place it between the flowers.
Vase or flowerpot.
- Where the vegetable has a tail, cut a hole. We clean it from the insides literally to the walls.
- Place a vase of water in the middle and fill it with flowers. But you can put a whole pot of flowers in a pumpkin.
Ekibana "Face".
- We have already looked at how to make a vase. Cut out a circle, take out the insides and insert a jar of water.
- By the way, instead of a jar, you can put a sponge moistened with water at the bottom.
- For a real Ekiban, the bouquet is not important, but the plot is important. Therefore, we choose twigs of barberry and rose hips, painted in bright colors in autumn.
- We use two empty snail “houses” as eyes.
- We draw “pupils” on the snails. Making the mouth.
It turns out to be a real ekibana, or a bouquet with meaning and plot!
And here is also an interesting option made from a small pumpkin.
If you use fresh flowers, use a floral sponge to prevent them from wilting.
What to make wheels for a pumpkin carriage from
Wheels for the “Carriage” craft are made from various available materials. It can be:
- covers;
- thick wire;
- apple halves;
- carrot mugs;
- small squash;
- tree cuts.
To make carriage wheels from metal covers, they are first degreased, then painted with acrylic paints and varnished.
Baby food caps are used and glued to the craft with a glue gun.
Making wire wheels for a carriage is also easy. It is enough to twist a circle of the required diameter, make knitting needles, and connect them together. To make the work look more attractive, each wheel is wrapped with bamboo thread.
Start processing wheels from the spokes, then wrap the circle and hide the ends
Wooden mugs also work well as pumpkin wheels. They are pre-cleaned, painted and varnished. They are attached to the carriage with hot glue.
It is better to take birch or oak cuts
If the wheels are made from vegetables, then they are cut into circles, dried and used for further work. Papier-mâché blanks look original. The paper is soaked in PVA glue, the composition is applied to the wire wheels and allowed to dry. After this, the blanks are coated with golden paint.
Attach the finished wheels to wire axles
An example of a homemade wheel
Necessary materials:
- wire;
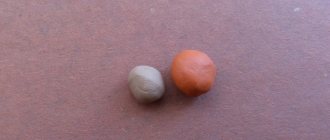
- model clay;
- glue;
- papier-mâché paper;
- thin wooden rods or bamboo sticks;
- dye;
- hot glue gun.
Twist the wire to form circles, two of them should have a larger diameter. Add spokes and a piece of clay to the center of the wheel to secure the design details.
Cover the resulting part with modeling clay, this will add volume. To strengthen the wheels, wrap them in paper coated with glue. After drying, paint it in the desired color.
We cut the wooden rods to the required length and paint them, then hot glue the wheels onto a bamboo stick.
An alternative method is to form the whole thing entirely out of clay and bake it.
DIY pumpkin carriage for Cinderella
You can make an interesting “Carriage” craft from a pumpkin in different ways. If the orange color is not satisfactory, then the workpiece is painted in the chosen shade. After complete drying, start working:
- Using a sharp pencil or chalk, draw the outlines of the windows and doors, and cut out with a knife.
At this stage, you can get the pulp if the fruit has been dried whole - Use a gold contour marker or paint to apply patterns on the sides, doors, and around the perimeter of the windows.
Let dry. Patterns can be made convex if you first apply glue to them and then paint them - Start assembling the parts into a single whole.
Attach the top cover to the workpiece. To make the wheels hold better, make the mounting axle from thick wire
You can place a doll inside the pumpkin carriage or place a lit candle to create a fairy-tale atmosphere.
Simple pumpkin carriage
You can make a simpler carriage for Cinderella in a different way, without coloring the fruit. For work you will need:
- pieces of tulle;
- safety pins;
- rhinestones, beads and ribbons;
- thick wire;
- gold color spray;
- varnish
Progress:
- Prepare the pumpkin in advance, cut out the bottom and remove the pulp.
Mark and make holes for the windows. Use a sharp tool to ensure clean cuts. - Make curtains from pieces of tulle. Attach them with safety pins. Carefully paint the windows with gold paint.
- Make the top of the carriage from a hair clip, add a crown and attach the blank with glue.
Make the crown with gold paint and decorate with beads - Make wheels from thick wire, cover them with gold spray, and dry them.
Thread a knitting needle through the pumpkin and secure the pieces to it. You can assemble wheels for a carriage from an old construction set.
Decorate the finished craft with rhinestones, ribbons, and beads. Place a doll inside and a horse in front. Make the harness from painted wire.
Let's study the technology in more detail
We will need:
- small pumpkin;
- wire;
- plasticine;
- White paper;
- PVA glue;
- gold and silver paint;
- knife.
First of all, we start making wheels for our carriage.
Note! It should be remembered that in any carriage the front wheels are always different from the rear.
We twist wheels of the required size from wire and make spokes. In order to fix the knitting needles, you can use plasticine, as shown in the photo.
We secure each wheel with plasticine, carefully.
In papier-mâché style, we cover our wheels with white paper.
We connect our wheels to each other using wire. Now you can start painting with gold paint. You can use paint from a spray can or regular paint, it’s all at your discretion.
Now let's start making the carriage cabin itself. If you are not happy with the color of the pumpkin, you can paint it too. Next, using a pencil, you should draw all the planned windows and cut them out carefully with a sharp knife. We get the pulp in any convenient way.
To make our windows look aesthetically pleasing, we should outline them with a golden outline or simply paint them with any paint, which can also be used to paint various beautiful patterns, because our carriage is from a fairy tale.
Now let's start assembling all the parts. To ensure that your craft stays in place, it is better to attach it with a wire that is stuck into the pumpkin itself along with the wheel shaft.
That's it, our fairytale carriage is ready, all that remains is to put a candle inside and light it. And just look at the beauty we made with our own hands, it’s definitely worthy of praise.
How to decorate a pumpkin carriage
Before you start decorating the pumpkin craft, the carriage needs to be varnished. It is better to use an aerosol from a can so that the layer is even and thin.
Attention! When applied with a brush, the varnish may drip.
Beads, ribbons, and fragments of lace are used to decorate the carriage. You can make a crown from wire, which is installed at the top of the craft. Then you will get a royal carriage.
Paint the crown with gold paint and varnish
Leftover tulle or parts of doll clothes can make decent curtains for a decorative pumpkin carriage.
It is better to attach the curtain with pushpins
If you get a little creative, you can add a team of horses to the craft. First they make a bench for the coachman. Any fairy-tale character is used as a cab driver: a mouse or a gnome. A rope whip and horse reins are placed in his hands.
With horses, the craft will look realistic
Autumn crafts made from pumpkin seeds
Kids love to get creative using natural materials for creativity. You can make original and fun crafts from simple pumpkin seeds.
This chicken is made from plasticine and seeds. First, we sculpt the body of a chicken from plasticine, and then stick the seeds into it.
You can make a cute hedgehog in the same way.
Chickens made from pumpkin seeds can turn out very beautiful. This chicken can be made from two foam balls of different diameters. Glue them with seeds using PVA glue or a hot gun.
DIY pumpkin owl
The shape of the pumpkin itself can tell us what kind of craft we can make from this vegetable. And the simplest craft option may be an owl. It can be in two versions - from one pumpkin, or take two pumpkins for the head and for the body.
An owl made from pumpkin and seeds is quite simple. The pumpkin can be cleaned of the insides in advance. And we decorate the outside using a variety of materials - felt, paper, seeds.
Materials:
- Brush
- Felt
- Paper
- Felt pen
- Pen
- Glue
- Scissors
- Eyes
Wash the pumpkin first. The stalk must be cut off. If you find a light-colored pumpkin, you can pre-paint it with orange paint. We make a pattern of parts from paper.
We need to make a blank for the eyebrows, face, beak, wings. Then draw circles for the eyes. We transfer the details to felt; it is better to choose a material in brown tones. For example, we will cut out the largest ones from purple felt, and two more from blue felt. Let the smallest ones be yellow or orange. We make the wings from gray or light brown felt. At the top you can attach some light details in the form of rectangles to imitate feathers. We make a beak from a diamond-shaped part. First fasten all the parts of the owl's face together.
It is better to make the beak voluminous. To do this, make a cut at the top and bend it into a gutter shape, tucking in the corners.
The owl's face is almost ready. We place the wings at the same level on the sides. Let's attach a face to the pumpkin. And at the end we glue the eyes.
You can make an owl using pumpkin and seeds, which can be used white or pre-painted.
DIY pumpkin seed panel
You can make a panel of pumpkin seeds with your own hands as a gift or for an exhibition at school.
Materials:
- Glue, twine
- Seeds
- Threads
- Leaves
- Letochka
- Sackcloth
- The basis
- Varnish
We cover a piece of cardboard approximately 30*35 in size with burlap.
Cut out circles from cardboard and cover them with seeds in a circle.
We place flowers on the base in any shape and glue them. We lay a green thread or twine between them
Glue bay leaves between the flowers.
You can use more dried flowers in creating panels.
Pumpkin seed tree: how to make a craft
Pumpkin seeds are an interesting material for creativity. You can use them to make both an applique and a three-dimensional craft. A craft tree made from pumpkin seeds is made in the form of a topiary.
For the base of the topiary, take paper. We make a ball out of it and wrap it with masking tape. We make a hole at the bottom and insert a stick or a broken felt-tip pen. Apply PVA glue to the ball and paste it with seeds to completely cover the surface. Instead of a base, you can use a foam blank in the form of a ball. You can complement the ball with other elements - beads, ribbons. Cover a jar of a suitable size with twine.
Fill the jar with alabaster and insert a stick with a ball into it.
Other DIY pumpkin carriage ideas
A simple fairy-tale carriage for an exhibition in a kindergarten can be made quickly, using a minimum of material.
The craft will not be stored for long, but will delight children with its beauty.
Royal carriage made from scrap material with translucent curtain
The carriage for Cinderella with a coachman looks interesting. This craft is suitable for a school exhibition, where it will undoubtedly attract the attention of children.
The stand for the composition is made of thick cardboard and covered with fabric
Making a carriage for the Prince
Once upon a time there lived a poor Prince (yes, such things happen), and since he had a small, small state, his neighbors did not take him into account, they did not invite him to visit him, they did not invite him to balls, so his carriage gathered dust, stood idle and grew old .
No matter how hard the Prince tried to keep it in proper shape, nothing worked, the paint was peeling off in places and its old layer showed through, horses had not been harnessed to it for a long time, because the wheels were also pretty shabby, oh. how bored the Prince was, sitting at the window of his castle, but then one day. (and come up with a continuation yourself). To create a carriage we will need:
— two types of cardboard, printing (it is very dense) and beer cardboard, which is softer;
— glue “Moment Crystal”;
- wooden sticks, round and flat;
- beads and caps for them, as well as pins;
— acrylic paints in two colors: gold and brown;
This is such a beautiful wheel.
I used the same aging technique as on the main part of the carriage and attached beads along the edges. It is best to paint the beads first, and when they are dry, attach them to the roof.
The bench for the coachman is attached to two wooden sticks, which I inserted into the drilled holes, pre-applied with glue, and the back of the back is also glued to the side of the carriage.
Source