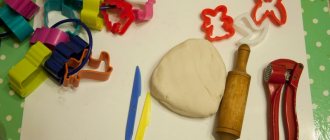
Classic recipe
The minimum set of ingredients will be the safest for small children. This test can be used for children as young as one year old. Even if a child bites off a small part, it will not cause any serious problems.
This is certainly not the most pleasant outcome of events, but anything is better than swallowing the chemical composition of store-bought products. A large number of photos of salt dough can be found on the Internet.
Preparation
Prepare a bowl for mixing all ingredients. Sift flour and add salt. Mix thoroughly until smooth.
Gradually pour cool water into the bowl in a thin stream. Stir the mixture until smooth and the dough no longer sticks to your hands.
Note. If your mixture is too liquid or the dough still sticks to your hands after kneading for a long time, you need to add flour a little at a time. If your mixture is too thick and dry, you can add a little vegetable oil.
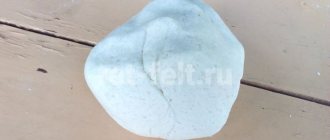
After kneading, you should have a dense and elastic mass. After cooking is completed, the finished dough must be placed in a plastic bag and refrigerated for about 2 hours.
Dough for face and body: folk recipes
A refreshing dough mask for oily skin.
To refresh oily skin, eliminate oily shine and make the skin matte, the dough is prepared according to the following recipe: beat the egg white, add 1 teaspoon of milk, ½ teaspoon of natural honey and 2 tablespoons of flour.
The amount of flour for preparing the dough mask can be adjusted so that a homogeneous creamy mass is obtained. The mask is applied to the skin for 10-15 minutes and washed off with cool water.
Toning mask for oily/combination skin.
A mask containing flour and juice of fresh berries, such as red currants, grapes or cherries, will help improve skin tone and fill it with vitamins.
offer
This mask refreshes the skin, increases its elasticity and improves skin color.
Cleansing mask for dry skin.
As already mentioned, for dry skin types it is better to use rice or oatmeal. If the finished product is not on hand, you can thoroughly grind oatmeal or rice in a coffee grinder. 1 tablespoon of flour is mixed with 12 tablespoons of warm milk until a homogeneous mass is obtained, easy to apply.
Apply the face dough in an even layer to the skin, and after 15-20 minutes, rinse the skin with cool water.
Nourishing mask for dry skin.
In this recipe, in addition to flour and milk, the mask should be enriched with egg yolk - it is this that fills the skin with nutrients. For very dry skin, you can add 1 teaspoon of rosehip oil or wheat germ to the recipe.
Apply a homogeneous mass for 10-15 minutes, rinse with lukewarm water.
Mask for the skin of the neck and décolleté. For this area of the body, a mask made from simple yeast dough, which you can even buy in a store, is ideal. The dough layer is rolled out into a thin layer and, similar to a scarf, wrapped around the neck and chest area, pressing the dough quite tightly against the exposed skin. The dough is removed after 15-20 minutes.
Double chin dough.
Just as in the previous recipe, we will need yeast dough, which intensively nourishes, moisturizes the skin and fills it with a full range of essential microelements.
To prepare the mask, completely dissolve ½ teaspoon of yeast in warm milk (100 ml), then add an egg, flour and knead a not very stiff dough, the consistency of which is convenient for application. Finally, add ½ teaspoon of vegetable oil (for example, olive) to the mask.
The dough is rolled out and wrapped around the neck and double chin. After 30 minutes, the dough is removed and the skin is wiped with water and lemon juice. Finally, a nourishing cream is applied. The mask is performed once a week.
Cleansing mask made of dough and clay.
This mask can be used for problem areas of the skin, in particular those affected by cellulite - on the thighs, buttocks or abdomen. To prepare the mixture, 1 teaspoon of cosmetic clay powder (blue or green) is mixed with 2 teaspoons of flour. The dough is kneaded with cooled green tea and ½ teaspoon of lemon juice.
The homogeneous resulting mass is applied to the skin with massaging movements, performing a massage for 3-5 minutes. Wash off after 15-20 minutes. The remains of the mask are washed off with cool water.
Dough with PVA glue
To ensure that the mass is strong after drying, PVA paper glue is added.
Note!
- Plasticine dinosaur: TOP-170 photos of creative DIY modeling solutions. Methods for making a dinosaur + simple master class
- Plasticine machine: simple diagrams and non-standard ideas for crafts made from plasticine. Step-by-step instructions for making a machine with your own hands with photo reviews
- What can be molded from plasticine - a master class on creating crafts from plasticine with your own hands. Creative modeling ideas + photo examples of the best works
Salt dough recipe for children:
- you will need 1 glass of salt (fine or coarse grind is suitable);
- 1 cup flour (it is better to take wheat flour);
- half a glass of water;
- tablespoon PVA.
Preparation: Prepare two bowls. Mix flour and salt in one, and water and PVA in the other. Gradually pour the second bowl into the first and stir constantly. The liquid should be added gradually, since different flours take up different amounts of liquid.
For preschoolers
There are many different crafts made from salt dough for children 5-6 years old, which will serve as an excellent gift for friends. Children of this age can easily color the figures and draw outlines to create an image.
Boletus mushroom
You need to have the following items on hand: dough, a light bulb, paints, a brush, foil, cardboard, tape, superglue and PVA, napkins, varnish and glass.
Master Class
- The light bulb is pasted over, dough is applied on top and dried.
- For the base of the hat, cut out a circle from cardboard and thread it onto the light bulb.
- The crumpled napkins are secured to the hat with tape and wrapped in foil.
- Pieces of rolled out dough 5 mm thick are placed on the cap.
- After removing the cap from the stem, attach the dough with stripes from below.
- The hat is returned to the stem, carefully gluing it.
- The arms, legs and nose are sculpted separately, and then secured with glue.
- Glue the caterpillar.
- Dry.
- Painted and varnished.
It turned out to be a great mushroom!
Hedgehog
You need to have: salt dough, scissors, glue, paints and varnish.
Step by step execution:
- An oval-shaped body is sculpted.
- Make an elongated nose with a glued ball.
- Small circles also appear as eyes.
- Cuts are made in rows for the needles, which are arranged in a checkerboard pattern.
- Dried, painted and varnished.
This is not a complete list of salt dough crafts for children. They don’t have to be made for the holidays.
To make the surprise truly unexpected, it is advisable to find out in advance what your relatives are interested in.
Handmade products are especially valuable and will be remembered for a long time!
Dough with starch
The recipe for salted dough with starch is considered one of the universal recipes. With the addition of starch, the dough becomes more plastic. This recipe for salted dough for crafts makes fine details (flower petals).
You will need:
- 2 cups of flour;
- half a glass of starch;
- a glass of salt;
- water.
Mix all components until smooth. If the consistency turns out to be liquid, you need to add a little flour.
Note!
- How to make slime - the best ways to make slime at home. Simple and quick recipes with a step-by-step master class for children (150 photos)
- Plasticine dog - TOP-180 photos of unusual ideas for creating crafts. Detailed master class on DIY modeling for children
- Clay products: basics of modeling, tips for beginners. Master class on making clay crafts + photo reviews
Recommendations for Beginners
- Choose only wheat flour for preparing the mixture. If you want to color the product, rye flour will not work.
- Use any salt other than iodized salt. When dried, figurines made from such salt crack.
- The dough can be colored during the kneading stage using watercolors or food coloring.
- The finished dough should not be left, as it may dry out in the air. Cover it with cellophane or cling film.
- Failed dough can be corrected: add water to thick dough, and flour to liquid dough.
- You should not add fats, either food or cosmetic, to the dough. This may affect the uniformity of coloring.
- Keep the finished dough in the refrigerator, but no more than 2 days.
- Large parts should be sculpted using a frame. For this you will need cardboard or wire.
- It is important to dry crafts at room temperature, in the oven, or near heating devices. You cannot dry the figures on the radiator; they may crack.
- It is not recommended to use watercolors for painting crafts, due to the possibility of soaking the workpiece. Gouache or acrylic are better suited for these purposes.
- It is recommended to apply colorless acrylic varnish or manicure varnish on top of the dried paint. This will extend the life of the craft and give the colors additional brightness.
DIY Play-Doh
There is a simple recipe that will replace the expensive original Play-Doh. Below is a recipe for homemade salt dough.
Recipe:
- 350 gr. Flour;
- 180 gr. Extra salt;
- 180 ml. Water;
- 30 gr. Gelatin;
- 25 gr. Citric acid;
- 50 ml. Vegetable oil.
To prepare this recipe you will need a saucepan. Put it on the fire, pour out the water and add gelatin. The dough can be colored by adding a little food coloring to it.
Pour in vegetable oil and add citric acid and salt. It is very important that the last ingredient to go into the pan is flour. To avoid lumps, mix everything well.
All this should be kept on low heat until the mass begins to peel off the walls of the pan. After this, stir the mixture with your hands and let it cool. You can wrap it in cling film or put it in a container for storage.
How to learn to sculpt from dough?
We have already figured out how to make dough for crafts, now it is important to understand exactly how to sculpt different shapes.
This process takes a little time, but perfectly develops hand motor skills and the child’s creative potential.
Every mother can devote time to her baby and teach how to make crafts from dough.
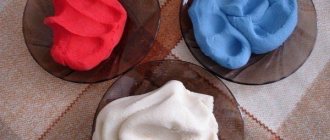
DIY colored dough
The salt dough product does not have a very attractive color. And the child will not be interested in playing with a monochromatic gray lump. Multi-colored funny lumps are another matter, and the colorful variety of dough makes the child’s imagination work.
Note!
- Animals made of plasticine - a master class on creating crafts with your own hands. Unusual modeling ideas + photo examples of finished works
- Plasticine crafts for grade 4 - reviews of creative ideas. New products, step-by-step master classes for schoolchildren + 150 photo examples
- Plasticine tank: step-by-step modeling instructions with simple work patterns. Master class for children on creating a tank with their own hands + photo reviews
There are two options:
- You can paint the finished product (acrylic, gouache, any paint will do);
- You can make multi-colored dough at once.
You can use any dyes, but for bladeless use it is recommended to use food dyes or natural juice (beetroot, carrot, spinach).
The saturation of shades can be adjusted based on the amount of addition. After drying, the product will be slightly lighter.
For uniform coloring, dry dyes are pre-diluted with water. Then you will need to reduce the amount of water added. By mixing basic colors you can get additional shades.
Craft options
Plastic material is most suitable for realizing creative ideas. Even the smallest children, who are attracted to various forms, are involved in such a fascinating process.
For babies
For beginners, it is better to make crafts from salt dough from culinary molds or for playing in the sandbox. It is very easy to make the simplest figures.
Caterpillar
You should prepare in advance: colored dough, a knife, PVA glue, a toothpick, a pendant, and varnish. The strip is divided into 6 equal-sized parts and rolled into balls. 5 of them are connected in series, and the remaining one will serve as a ready-made one.
Separately, the nose and eyes are sculpted, which are also glued. A toothpick marks the place for hanging. The work will not be considered completely finished without drying and varnishing. Finally, the pendant is attached.
Apple
The accessories are the same as in the previous version, with the exception of a toothpick for the hanging hole. First, sculpt half an apple with a flat inside, pressing the workpiece to the surface. Next, a flat center is glued to the resulting base.
At the next stage, 6 seeds and a stick are rolled up, after which they are attached with glue. Glue the sticky leaves. The product is varnished and left to dry. This apple is easy to make and then placed in the kitchen or child’s room.
Oven
Dry in an open, preheated oven at a temperature of 35-55 C. Depending on the volume, the figurine can dry for an hour or longer.
The second method is oven drying. The product must be placed in a cold oven and heated to 150 C. After reaching the required temperature, turn it off. Leave until completely cool.
How to dry a craft correctly?
If the size of the craft is small, then it will dry without additional actions. Just keep the product out of the sun to avoid cracks.
If the craft is large, then it can be dried in the oven at a low temperature (3-5 hours).
Between each hour you should take a short break and remove the product from the oven.
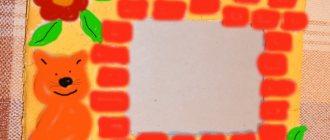
How to make pictures
You can use this material to color pictures. Such a pastime will greatly delight the children. After all, it was very exciting when, instead of boring felt-tip pens and pencils, elastic dough fell into your hands.
For work, you can take any coloring book or draw it yourself. You can completely paint over the picture with different colors, in an even layer, or you can pinch off small lumps and glue them to the picture, it will also turn out very interesting.
Three-dimensional pictures also turn out interesting and unusual, you just need to take a little more dough. This activity develops fine motor skills very well and develops imagination. You can create a beautiful panel that will decorate your child’s room.
Children are able to sculpt dough themselves; they just need a little guidance and show them how to work with the dough.
Features of the material
Salt dough occupies a dominant place among materials, despite the abundance of different types of modeling masses in specialized stores. Even the convenient air-hardening clay that was popular a few years ago is falling by the wayside. Why is the test preferred?
It is the dough that has a number of unique and time-tested advantages:
- does not leave marks on clothes and furniture, is easy to wash and does not stick to your hands;
- safe if ingested;
- does not cause allergies;
- the resulting crafts and toys are strong enough and can be played with;
- when varnished, the work will be preserved for many years;
- develops fine motor skills;
- can be prepared at any time at no extra cost and does not require specialized equipment to operate.
At first glance, it may seem that all of the above advantages apply only to children and they do not apply to those who engage in modeling at a professional level, but this is a misconception. Experts in the business increasingly prefer salted dough because of the simplified work with it, as well as the strength and at the same time ease of the final work.
How to make figures
You can make a large number of different toys from dough with salt, as long as your imagination is enough. You can use baking molds. And by making small holes and inserting a string, the toy becomes a New Year's toy.
What if you glue a magnet to the back? This makes a beautiful magnetic souvenir for the refrigerator.
The most touching version of a fake made from flour would be a cast of the hand or foot of a newborn baby.
A short master class on creating salt dough and creating a dog figurine.
You will need:
- Salt;
- Flour;
- Water;
- Foil;
- Brushes;
- Paints;
- Black marker.
Recipe for salt dough for sculpting crafts: first you need to combine flour and salt in equal proportions, gradually add water and mix the mass until smooth.
For better elasticity, you can add a tablespoon of PVA glue or vegetable oil. Leave to set in the refrigerator for about two hours; the dough must be placed in a bag, cling film or container.
After the required time has passed, take the lump and divide it into parts: 1 large (body), small ball (head), 4 balls (paws), leave a small lump (for ears, eyes, tail and nose).
In order not to waste a lot of dough and have a voluminous lump inside the body, you can place crumpled foil and cover it with dough. Make a head from a small lump, add a nose, eyes and ears. Glue the head to the body using water.
It is necessary to lubricate the two surfaces with water and connect them. Make beautiful paws from four pieces and also glue them to the body. All that remains is to crochet the tail and that’s it! The dog is ready.
For the New Year
On the eve of the holiday, everyone at home gets involved in decorating the room. The children make their contribution as much as they can by preparing New Year's crafts from salt dough. The choice is very large and you can always turn your plans into reality.
Star
You will need a minimum set of items: colored dough, a stack that is always included in the plasticine kit, colorless varnish and a toothpick. The step-by-step instructions are as follows:
- Roll up a ball.
- A flat cake is formed from it.
- Cut out an asterisk using a stack.
- To make the contours look smooth, trim the corners.
A more interesting option involves additional decor in the form of dots and a smile made with a toothpick, or small balls of different colors. At the final stage, be sure to dry and apply varnish.
Herringbone
A great idea to decorate a Christmas tree or give as a gift on New Year's Eve. Even a baby can handle it. Roll out the layer and cut out the Christmas tree in tiers. A hole is made at the top for hanging using a lace or ribbon.
After this, they are dried, painted green, and decorated with beads.
Required Tools
To create beautiful masterpieces, tools will come to the rescue. You can use any available means.
Tools:
- rolling pin (for rolling out dough);
- modeling board;
- knife (suitable from a plasticine set or a regular plastic one);
- tube (for creating holes);
- brushes (for lubricating with water or painting the product);
- a jar of water;
- various molds;
- Any available items (lace, textured fabric, beads, buttons) are suitable for prints;
- paints;
- marker (to highlight the necessary lines);
- decorations (beads, rhinestones, cereals, beans, pebbles, shells, pasta, pine cones).
What can be done
Salty play dough will help you get closer to your child and find a new exciting activity to do together.
Invite your child to stick around the jars. You can use jars that are left over from baby food. You can decorate with voluminous details, rhinestones or shells. Color with paints together with your child. In such beauty you can store pencils, markers, brushes.
You can roll balls and use a straw to make holes. Dry and let your child paint. You will get excellent beads that your child can string on a thread.
An interesting activity for older children would be sculpting letters or numbers. After drying and painting, they will become an excellent material with which it is fun to learn the alphabet and counting.
You will need a lid from a box of chocolates. Invite your child to stick to the bottom. This will be the beginning of a beautiful panel, and then it’s a matter of taste. You can depict a beautiful forest, a hedgehog with voluminous apples and mushrooms.
You can stick different animals. The child will be very interested in learning something new. Especially when he did it himself.
Roll up a ball and stick different twigs, needles, grass, and pebbles into it. Get a small island of forest right at home. And if you decorate with flowers, you will get a small flower meadow.
LiveInternetLiveInternet
Another way to sculpt your face
This is my first sculpting lesson, besides, I'm not much of a photographer, please don't judge too harshly. After numerous experiments, I came up with this method of sculpting the character's face and head. IMHO the most convenient, although most likely it will seem strange and inconvenient to many, but perhaps someone, like me, will like it. The essence of this method is that parts of the face are worked out separately from each other, and then joined together, while the face itself is gradually built from the bottom up. Sounds like complete nonsense, doesn't it? But don’t worry and don’t stop reading this topic, I’ll show you everything now and tell you with a specific example. So, let’s get started. To begin, we will need the following tools: a pin,
toothpick,
hands
Using the last tool we sculpt the lower jaw like this
Then we roll the “sausage”, which will later become the lower lip, and attach it to the jaw
Use a pin to draw wrinkles on the lip for greater realism.
Now it's the turn of the upper lip. We make a plate out of plasticine and use a toothpick to press a depression into it
Next, again using a pin, we give it a resemblance to a human lip and draw wrinkles
Important: when making lips, you need to correctly calculate the proportions and make the upper lip in accordance with the size of the lower lip in order to avoid such incidents:
So now you can connect both parts:
Smoothing the joints with a pin, we get the finished lower part of the face
Now let’s sculpt a “blank”, on the basis of which we will build the face further
Question: what prevented me from doing this in advance and attaching the lips immediately to the blank? Answer: absolutely nothing. For some reason it’s just more convenient for me to work this way. We sculpt cheekbones, forehead and cheeks
We smooth out the “seams” located in accessible places on the cheeks and forehead with our fingers
More difficult to reach, those near the eye sockets and nasolabial, with a pin
In the end we get this
Schematically designate the eyes
Note: Now you could do the neck and back of the head, it is not difficult, but personally I prefer to work with the face in the form of a mask and complete the above-mentioned parts later. So let's get to the nose. Rolling another “sausage”
and using a toothpick we give it the shape of the nose
Attaching the nose
And remove the “seams” with a toothpick
Important: keep the proportions and sculpt your nose in accordance with the size of your face, so that it doesn’t turn out like this:
Let's continue. Now comes the turn of the eyes, first we cut out the eye sockets with a toothpick
Note: you should not make huge round holes, it is better to cut small holes in the shape of the eyes, otherwise it will be difficult to later give them the required shape and disguise the eye sockets for centuries. We insert pieces of white plasticine into the eye sockets, and attach the iris rounds on top
You can depict the pupils with pieces of black plasticine, but I recommend making small holes in the center of the iris with a toothpick, so the eyes look deeper (including literally) and alive.
Since we outlined the shape of the eyes in advance, all that remains is to once again roll out a couple of thin plasticine “sausages” and secure them in the form of eyelids
Once again we smooth out the seams with a pin and make eyebrows from similar thin “sausages” of a different color
Oh yeah, I almost forgot, the neck
and the back of the head
Note: even if the shape of the skull turned out to be incorrect, and I must sadly admit that it didn’t turn out very well for me, it is easily masked by hair. If the character is bald, then it will be more difficult. We sculpt our ears like this... uh... in short, dumplings
and by finishing them with a toothpick
turn into ears
Series of messages “Salt dough.”:
Part 1 - Amulet. Master Class. Part 2 — My “salty” cats and fish Part 3 — Face sculpting lesson: plasticine, salt dough, clay Part 4 — Wonderful decorations made from salt dough. Master Class. Part 5 - DIY kitchen gift set... Part 24 - Salt dough panel. Part 25 - Home amulets made from salt dough. Part 26 - Salt dough recipe. Tips for preparing and working with salt dough.