How to make an angel out of paper - several options from Tatyana Yablonskaya for Christmas 2022.
Angels are messengers of God. They are mentioned in every religion, so they are known all over the world. In appearance, an angel is a weightless translucent entity, which is characterized by humility, insight and immortality. As a rule, these entities have neither gender nor age. Most often, angels are depicted as humanoid, wearing loose long robes, with wings and a halo above their heads.
People believe that angels protect them, so they decorate their homes with figurines of these cute creatures. You can make a guardian angel yourself, from almost any material. Figures made of clay, porcelain, fabric, threads look great (see our selection of master classes ). Today we will try to make paper angels . This is the most affordable material that is always at hand. To make the result pleasing, you will need a little imagination, perseverance and diligence. Well, today there are many variations. You can come up with something of your own, unusual and original.
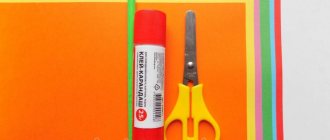
In our work we will use:
- regular napkins,
- openwork napkins,
- office white paper,
- cardboard,
- colored double-sided paper,
- special strips for quilling.
First, we will make snow-white paper angels that symbolize purity, purity, tenderness and lightness.
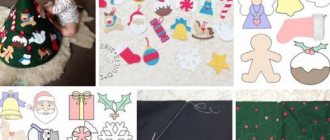
And here are patterns for the year of the tiger and New Year’s:
Three-dimensional paper angel (stencils)
Option 1
We take plain white paper and draw on it the silhouette of an angel from the front, with a pipe in his hand. Separately, draw the wings in span. These will be stencils.
Using these stencils, we cut out 4 blanks. On the wings (where the feathers should be) we make a fringe to make them look more magnificent. The bottom of angel dresses can be made openwork using a regular hole punch.
Now we make a small cut on the back and in the middle of the wings. We connect two parts.
You get these little angels with open wings.
We tie strings to each figure (either by the wings or by the halo) and hang them on the chandelier. The blowing air causes the figures to slowly move and spin on a string. It turns out very beautiful!
Option 2
On a white sheet of paper or thin cardboard, draw an angel with a fluffy skirt and high wings. You can print this template:
We cut along the contour with scissors and carefully cut out a halo and heart for the figure.
We take a figured hole punch and make a pattern on the hem of the skirt.
Glue the edges of the skirt and handles using PVA glue. Now the angel can stand.
We make a candle from a napkin and a yellow thread and glue the figures to our hands. It turns out to be a voluminous angel with flowers on the skirt.
Option 3
On a thick sheet of white paper we draw two stencils: one part with wings, and the other without wings.
Cut out 1 piece with wings and 6 pieces without wings.
We fold those parts that are without wings in half lengthwise.
Now we glue them to the blank with wings. To do this, coat the folded area with PVA glue and apply it to the middle of the central part. Three things in the front and the same number in the back. The result is a magnificent bell-shaped angel.
Another difficult option from YouTube, but very beautiful! If you manage to fold a three-dimensional angel using this form, send us a photo, we will be happy to publish your boasts.
Angels made from napkins
Option 4
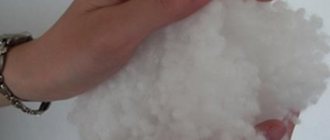
We will make this angel from three-layer white napkins.
Unfold one napkin and place a paper ball in the center.
We connect all the corners of the napkin and form the head of the future craft. We fix it with a napkin rope. Trim off the excess to make a full skirt. We make the wings from a rectangular cut, which is pulled together in the center with a flagellum.
Glue the wings to the dress using PVA glue. We decorate the head of the figurine with a paper flagellum. The napkin angel is ready!
Option 5
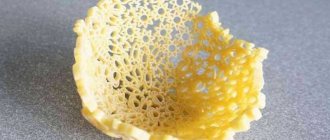
To make this craft, you need to take round openwork napkins. You will need 2 pieces in total.
From one whole napkin we form a low cone. We cut the second napkin into segments. We glue handles (cones) from 2 pieces and make wings from 2 smaller triangles. We make the head of the figurine from a napkin and a paper ball, as we did in option 4.
Glue the head onto the sharp edge of the cone. We place our arms on the sides and wings on the back.
All that remains is to decorate the craft a little with a golden thread. An openwork paper angel comes out !
Isolon wings
Izolon is used in construction as a substrate for laminate flooring. This is a relatively inexpensive translucent element. Wings made with it will be very light.
Progress
- Make a frame from wire and tighten it with isolon. Carefully seal the edges.
- Attach an elastic band to the base.
- Cut feathers of various sizes from the material so that future wings look natural. Using a glue gun, start gluing the feathers, starting from the bottom of the structure to the top. Large feathers should be attached at the bottom, small elements at the top of the structure.
- Decorative elements can be added to the top of the structure.
Craft “Paper Angel” (accordion)
Option 6
To make this angel, cut a sheet of paper in half lengthwise.
We take 2 strips and form accordions from them. The width of the side should not be more than 1 cm.
We glue them together, not reaching the edge by 3 cm. We turn these parts to the sides - these will be the handles. And on top we glue a large pink bead - this is the head of an angel.
You can make the body differently. Fold one sheet like an accordion, and then make a 3.5 cm long cut in the center.
Bend these edges to the sides, as in the first case.
Glue an oval-shaped purple bead in the center.
Now we use a figured hole punch to make pink and lilac flowers.
Glue flowers to the dress (bottom, sleeves, center). The result was angels in pleated dresses.
A similar version made from accordion paper is shown in this video:
Option 7
We will form an accordion again. You just need to glue three halves of a white sheet lengthwise.
We glue the accordion into a tube and cut out the silhouette of the upper half of the body.
Lubricate the bottom of the silhouette with PVA glue and place it in the center of the accordion pipe. We coat all the folds with glue and fix them with a napkin so that they stick together. Then you get a fluffy pleated skirt.
All that remains is to glue the handles and wings. You can also cut out a candle and make a small book out of paper. Now our angel reads a prayer or sings a Christmas song by candlelight.
These snow-white creatures will fit into the interior of any room and will become real guardian angels for those to whom you give them as a souvenir. And this is not to mention the pleasure that the process of making figures itself will bring. You can involve small children in it. They will be happy to take part in creating such beauty.
Option 8 (openwork)
Winter spoils us with magical holidays! The New Year presents an opportunity to meet with friends and relatives, please each other with gifts, fulfill someone’s cherished dream and return to childhood again. And Christmas gives an inexhaustible faith in goodness and miracles, which are sometimes so lacking in life. Let us also get a little closer to the mysterious and try to make an angel who brings peace and goodness on his wings. Be sure to tell your children the history of the great holiday and its significance for all people. Then the angel will be charged with the energy of your hands and hearts and will become the guardian of a happy life in the family!
List of materials needed to create an openwork angel figurine:
- white (colored) A4 paper;
- a simple pencil;
- scissors;
- eraser;
- glue.
Prepare everything you need for the creative process. You can use white or colored paper, depending on your wishes. The figurine made of silver and gold paper also looks original.
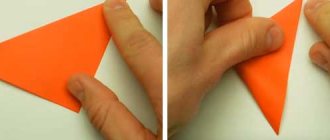
Fold the sheet in half. Unfold again and bend one of the halves inward to the fold line. Unfold a quarter of the sheet and fold it in half inward. Do this to find the width of the strip to create the paper accordion.
Do the same with the other half. After this, assemble the sheet into an “accordion”, properly ironing all the folds.
Using a simple pencil, draw various patterns on the first half of the “accordion” - this is the future attire of the angel. Make the edge round.
Draw a pattern on the top of the accordion - these are the future angel wings. Make the edge leaf-shaped (with a pointed end).
Cut out a pattern at the bottom of the paper blank. Cut carefully, without haste, otherwise you may cut off excess.
Cut out a pattern at the top of the accordion.
If you straighten the workpiece, you will get this openwork “canvas”.
Cut two identical strips from white paper. The length of the strips should be at least 20 cm, width 1-1.5 cm.
Fold one of the strips four times. Cut out a random pattern across the entire surface.
Use the second stripe to decorate the angel's head. Roll a small ring and glue the edges. Wrap the remaining length of the strip around the first ring to form a second rounded row. Make a third round row by gluing the remaining strips.
These are the details you should get from strips of paper.
Let's move on to the design of the angel figurine. Calculate the middle of the accordion. For convenience, count the gathers on both sides. In the upper part, make a cut 6-7 cm deep, bend the wings. This is how you share the angel's wings.
Glue the gathers in the middle along the angel's body to the point where the wings bend so that the figure does not fold when they rise.
Grease the sides to adhere the wings to the garment.
Spread your wings and angel robe.
Glue the head in the middle of the wings.
Glue a patterned strip from one edge of the wings to the other.
Lift the figurine by the paper loop so that the wings are properly spread. Carefully open the gathers of the robe, as if opening a fan.
The unusual figurine of an openwork angel is ready!
What a beauty! The angel seemed to have come down from heaven - so gentle and airy! And the wings seem to be woven from lace! This figurine will make a beautiful gift, interior decoration or holiday tree decoration, and is also suitable for decorating cards, garlands or Christmas wreaths. In any case, the angel will become your guardian and messenger of good news! And let happiness, love and prosperity reign in your home!
A more complex option is using the origami technique:
Angels - vytynanka (cutting according to templates)
Drawings cut out of white paper (vytynanki) look very beautiful on the windows. There are many options on the Internet for templates for cutting out angels , for example, these:
How to choose a form
Before starting work, you need to decide what the angel’s wings should be. You can make almost any product with your own hands. But whether it will serve faithfully depends on its owner and the intensity of use. So, products can come in a variety of sizes and shapes. In addition, you can use different materials. But they all have a different “lifespan”, so the nature of the party should be taken into account.
How to choose suitable wings:
- Size. When choosing a size, take into account the height and age of the angel. For a children's party you will need small wings, and for an adult party you can build real eagle fans. The size should also be taken into account so that the angel does not touch passers-by while dancing. It's unlikely that an angel would want to end the party plucked.
- Position. The wings can be folded or raised. It all depends on the wishes of their owner. For example, at a New Year's party, angels with folded wings look touching. And for a photo shoot of a baby or child under one year old, small wings spread out in a flapping motion are better suited.
- Form. When choosing a form, the only indicator is the master’s imagination. If you don’t have enough ideas, you can look through pictures on the Internet and choose the feathers you like.
Paper candlestick “Angel bringing light”
This craft looks very unusual; it seems that an angel made of thin paper is holding a candlestick with a burning candle in his hands. How to do this, see the detailed master class.
See also:
Colored paper angels
DIY angels
In order not to forget the address of the page and share with friends, add to your social network: Do you want to know news about competitions or master classes?
Tags: Angels, Christmas Crafts
Attention! It is better to write urgent questions in the comments on the website (form at the bottom of the page) or, better yet, directly by email. There are no notifications about comments from the VKontakte form! This form is more for feedback. 
Discussion: 2 comments
- Karina:
December 28, 2022 at 09:09 pmBeautiful angels, we have already done a lot. And the apartment was decorated, and even the entrance