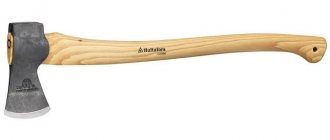
Currently, axes are often made from low-quality materials; moreover, such “counterfeits” are quite expensive, so people use tools that were made during the USSR. If you suddenly find an ax that was made a century or more than a few centuries ago, it is possible to restore the ax using available materials and tools. This will be discussed in more detail below.
Almost any ax can be restored.
The process of restoring an old ax
If you find an old or battered ax that has been preserved in fairly good condition, you can give the tool a new life, that is, repair it using the restoration method.
First, separate the old ax handle from the head. Completely clear any remaining wood and begin gathering the necessary materials.
Materials
Preparation for restoration.
For restoration you will need the following things:
- Bulgarian;
- sandpaper;
- grinder;
- metal grinding machine;
- lathe;
- pen, pencil and paper;
- wood file;
- hammer;
- metal polishing circle.
Processing the handle without removing the ax
The handle can be processed after assembly. At the same time, it is almost no different from processing a separate ax handle.
- Treated with linseed oil. That is, apply the oil in one layer, wrap it with film to create a vacuum and leave it for several days.
- Afterwards the procedure is repeated.
- Answering the question whether the glue used to fix the ax will deteriorate due to the influence of linseed oil, we can safely say that it does not affect the properties of the glue at all. It will not peel off or soften.
Making the head
To make a head, you need to know what you want your future ax to look like. To implement the idea, you need to draw a sketch.
Step-by-step production:
- Place the old head on a blank sheet of A4 paper.
- Trace the outline of the blade using a pencil.
Drawing. - Add additional elements to the sketch, such as reducing the span of the blade or adding additional notches.
- Cut out the sketch and glue it to the old head using regular glue.
- Use a grinder to cut off any excess metal.
- Treat the workpiece first with a grinder or metal polishing wheel to make the head shiny, then with sandpaper to make the color uniform. If you don’t have a grinder or a metal polishing wheel, you can use a metal grinder.
- Ready!
Placing an ax on an ax handle
We take the finished ax handle and put the prepared head on it. To make the ax handle fit in easily, you need to tap it with a hammer. The ax handle should extend beyond the eye.
- Using a saw, divide the protruding section of the ax into 4 parts to form a kind of cross.
Nozzle process. - Prepare the wedges. To do this, you will need to process a medium-density small piece of wood on a grinder.
- After this, we begin assembling the axe.
- Lubricate the outside of the cuts with wood glue.
- We plant the ax so that a small part of the ax handle sticks out.
- Insert 2 wedges into the cut.
- We hammer them into the ax handle with a hammer until they crumble.
- Now we cut off the excess wood using a grinder.
Processing the ax handle
To make your work with an ax easier, to avoid splinters and to increase its lifespan, you need to treat the ax handle. There are two stages of processing: impregnation and polishing. Both are very important and needed to produce a quality axe.
Impregnation
There are a lot of impregnation solutions in stores now, everyone will find what they need to suit their taste. You can choose chemistry, or, on the contrary, you can choose something folk. But now let’s look at the standard impregnation with linseed oil.
- The oil is applied in one layer to the ax handle and left for several days. After drying, repeat the procedure until the oil stops being absorbed.
- Instead of linseed oil, drying oil is also often used. And the craftsmen even impregnate it with ski resin, since it penetrates much deeper than oils.
The ax can be soaked in oil or drying oil.
Is polishing necessary?
Polishing is done for beauty, since after it the wood is darker. It also helps remove remaining lint, which can leave splinters on your hands, and protects against rust. There are a lot of polishing options, but let’s look at two of them. One will be a little unusual, the second standard.
- You will need solid oil and fire (a blowtorch or gas burner).
- Take an ax handle and coat it with grease.
- Warm up and burn on all sides. Be careful not to burn the wood.
- You need to carry out this procedure 3-4 times.
Restoration and artistic processing of an ax
To make the ax more colorful, small drawings, logos and any designations in the form of letters or numbers are added to it.
- To implement this idea, you need to print the desired color picture on a blank piece of paper.
- After this, the drawing with the colored side is applied to the ax and a hot iron is passed over it.
- Now remove the excess paper from the blade.
- It is important that the drawing is completely transparent!
- After this, the ax is wrapped in a protective film and the required solution is prepared.
- Water is mixed with salt. An ax in a protective film and a device that gives an electric charge are placed there.
- After this, the chemical reaction process begins.
- After 20-30 minutes, the product is pulled out of the water.
- After this, remove the protective film and clean off the remaining paper film.
- After this, the surface of the ax is treated with a metal polishing wheel.
DIY ax restoration
An old and rusty ax with an ax handle that has lost its appearance can be restored with your own hands, thereby extending the life of the tool. In this work, the ax was not only restored, but also slightly redesigned for greater convenience. Among its obvious shortcomings, it is worth noting the presence of rust on the butt, a long and narrow ax that did not fit into a backpack and was inconvenient for work, as well as a rather wide and dull blade. In addition, the surface of the wooden part was too dry and rough and could easily cause calluses on the hands while working. Your original ax may have differences, but all the main points of the restoration process are described in sufficient detail.
Materials
To restore an ax you will need:
- saw or hacksaw;
- sandpaper;
- drill and bit;
- linseed oil;
- petrolatum;
- silicone tape;
- paracord;
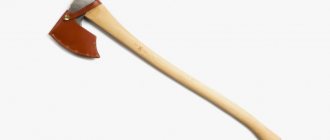
- leather case for blade and butt;
- sharpening tools;
- sharp knife;
- copper wire brush;
- isopropyl alcohol;
- paper towels;
- rags.
Step 1
. First, you should adjust the ax handle to the required parameters. To ensure that the handle fits completely into the backpack, its corners were sawn off. So, the ax handle was not only shortened, but its shape was also changed.
Step 2
. Remove the screwed in and rusted bolt completely, and widen the hole itself slightly. Sand the cut areas in this part of the ax after the work has been completed.
Step 3
. The remaining part of the ax should also be sanded with fine-grained sandpaper. An hour before, treat the handle with a damp cloth and wipe with dry paper towels. So, you will solve the problem of a rough surface.
Step 4
. To extend the life of the ax if there are already signs of dry wood, the surface of the handle should be completely treated with linseed oil. To do this, thoroughly rub the oil into the ax handle, and then rub the handle with a piece of natural fabric until it has a pleasant shine. Depending on the condition of the axe, the oil will need to be applied in 2 - 3 layers. The ax should lie for about a day or at least overnight until the next stage of work.
Step 5
. Wipe the ax handle with paper towels and make sure the oil is completely dry.
Step 6
. Wrap the lower part of the ax where you will hold your hand with silicone tape. It is needed so that the paracord used to wrap the handle does not slip off.
Step 7
. Wrap the handle with paracord. Make the turns tight.
Step 8
. Now you need to narrow and sharpen the ax a little with your own hands. Before starting work, wrap the ax handle with rags or paper towels so that the work done to restore the handle will not be in vain.
Step 9
. Use a sanding block to narrow the blade to your desired specifications. Be sure to follow safety precautions while working.
Step 10
. Sharpen the blade of the blade. For ease of use, use a marker. Use it to paint the part you are going to work with. Be sure to check how you sharpened the blade and whether it is sharp enough.
Step 11
. Before removing rust, you need to protect the sharpened blade from possible impact. It should be temporarily covered with silicone tape. After this, scrub off the rust with a copper brush and treat the area with isopropyl alcohol.
Step 12
.
The blade and butt should be protected with a leather ax case. You can make it yourself
or buy it.
Step 13
. To prevent the blade from being damaged by rust again while storing the ax, treat it with Vaseline or linseed oil. These materials will create a thin protective film on the surface.
The ax has been restored and is ready for use. If you wish, you can make a paracord mount for it by threading it through the hole on the ax handle.
3.9 / 5 ( 62 voices)
Similar articles:
- DIY soap – Blue windows
- DIY papier-mâché maracas
- DIY funny children's backpack "Minion"
- DIY drawing on a T-shirt