The benefits of sewing from fabric scraps
- Decorating and beautifying space, creating useful and beautiful things for the home;
- Saving money on the purchase of new household goods and interior items;
- Using old items will help you make a small contribution to the environment. It is known that old things are recycled in many countries, but they can also be used to create new ones.
- Creating crafts together with children from scraps and scraps of fabric will be an excellent opportunity for families.
Crafts for children made from accordion paper
There are two ways to create a paper accordion. Both of them are successfully used in children's creativity to make various paper toys and other interesting products.
- The method is simple. Small folds are created on the surface of the paper. Fold part of the paper forward, then turn it over and fold a fold of exactly the same size forward again. For convenience, young children can draw parallel stripes on paper in advance.
- Way. They cut two long strips of paper, glue their ends perpendicularly, and then by interlacing they create a small accordion, from which wonderful bodies of animals and birds are obtained.
Paper crafts with accordion
Accordion paper fruits
Bunny and sheep made of accordion paper
Crow made of accordion paper
Patchwork
Patchwork comes from the English words "work" and "patch". This type of needlework differs from other types of sewing, since here single pieces of fabric are created from individual pieces - crafts from scraps of fabric.
Patchwork has been around since ancient times, but became widespread in the United States among colonial settlers. New Americans decorated their clothes and other wardrobe items with inserts depicting national patterns, at the same time making it clear to others their nationality, that is, from which country they came to America.
As a separate type of decorative and applied art, patchwork became widespread in England in the 18th century. Old Europe in those years became acquainted with goods from the East, in particular with goods from China and India. At that time, many women became interested in sewing from colorful patches, as the country was flooded with fashionable fabrics brought by sea from India.
The patchwork style is incredibly popular nowadays, as are other types of needlework. Crafts made from scraps can be children's toys, bed linen, cute rugs, home textiles, designer clothes and more.
Crafts for children made from chenille wire
Making and inventing models from wires is no less exciting than folding origami, sculpting from plasticine, and creating from paper. You can make many interesting and funny crafts from chenille wire for friends, parents, and useful things for yourself. As a result of the work, imagination develops, children learn patience and perseverance.
It is not necessary to make crafts exactly in the presented color scheme. You can take any wire according to your own idea, mood and preference.
Fluffy wire butterfly
Chenille wire hare
Chenille wire flower
Chenille wire octopus
Fly agaric made of chenille wire
Chenille wire spider
Techniques and types of patchwork
Quilt album is an appliqué technique in which a special blanket tells about the life of a specific person or some historical event. Usually the quilt album was decorated with patriotic symbols, floral patterns, and national ornaments;
South Asian quilts are a patchwork technique from countries such as Bangladesh, India, Pakistan, etc. Craftswomen from these regions create stunningly beautiful bedspreads using the “kantha” embroidery technique. Such bedspreads are still popular in South Asian countries and among tourists;
England style - patchwork mosaic made of fabric. DIY crafts based on a geometric pattern. Typically, the British use a repeating pattern or motif made up of diamonds or squares.
List of materials needed for patchwork sewing.
- Scraps of fabric of different colors and textures;
- Chalk or a special washable marker (pencil) for sewing, used to take measurements and draw patterns on fabric;
- Centimeter soft ruler;
- Seam ripper, small and large scissors;
- Sewing needles of different thicknesses and thimbles;
- Strong threads of different colors;
- Roller knife for cutting;
- Pins;
- Iron;
- Cardboard for creating patterns and templates;
- Lining fabric;
- Stencil, carbon paper, graph paper or tracing paper;
- Padding material for the manufacture of pillows, rugs and bedspreads - synthetic winterizer, batting, foam rubber and others;
- Decorative braid and ribbons for finishing crafts;
- Accessories – buttons, hooks and other decorative elements;
- Templates for creating patterns. They can be square, diamond-shaped, triangular, pentagonal - depending on the planned product.
Paper crafts for children
Paper is one of the simplest, most accessible and easily processed materials. You can make many different crafts from it, which, moreover, can find practical application. Working with paper imperceptibly affects the overall development of the child: his fingers become stronger, sensory impressions increase - at the level of sensations he recognizes the texture, density and color of paper.
A pencil, ruler, glue, scissors and, of course, colored paper or cardboard - everything you need for exciting creativity. A little skill and patience - and you will get a wonderful character from a cartoon, fairy tales, or your own fantasies. It can be:
rat craft
paper horse
Paper crocodile
Various cardboard crafts
Paper birds
Paper animals
Trees by season
Volumetric paper tree
Paper flower - narcissus
Paper steamer
Paper reed
Rainbow made of colored paper
Paper turtle
Paper ladybug for any preference.
Paper dogs
Paper cone
Paper umbrella
An apple made of paper, as well as a pear and a cherry using the same three-dimensional technique. Popular autumn-themed crafts for children.
Moving paper fish.
Original fly agaric made of paper.
Paper clown
Paper basket
paper doll
Paper mice
Insect crafts
Types of materials for patchwork.
In order to create crafts from rags with your own hands, you need to choose the right fabric.
Note!
Quilling crafts: features of the working technique, step-by-step instructions and clear diagrams for beginners + ideas for creative crafts (150 photos)- Crafts made from corrugated paper: 100 photos of creative solutions for crafts + step-by-step diagrams and instructions for making your own
- Crafts from foamiran: ideas for creating crafts and interesting patterns for making flowers
Cotton is considered the best material for patchwork. It is dense, does not stretch during operation, is easy to sew and holds its shape well. Cotton is used to make fabric crafts for the home - bedspreads, decorative pillows, potholders, chair covers, tea warmers and much more;
Drape, gabardine, tweed are dense fabrics with a more rigid structure. Such materials are used to make wall rugs, rugs, furniture covers, and decorative panels;
Silk is an expensive, spectacular and capricious material to work with. Craftswomen use it to create stunning silk bedspreads, capes, wall decorations for the home, and clothing;
Denim fabric is convenient for working in the patchwork technique. DIY crafts made from the fabric of old denim items (trousers, jackets) do not last long, rarely become unusable and look impressive in the interior of the house. Denim fabric makes cute rugs, chair covers and even potholders.
Chintz is useful for making fabric crafts for the kitchen with your own hands. Chintz is easy to work with and comes in a wide variety of colors and prints. Potholders, aprons, tablecloths, pincushions and other beautiful and useful things in everyday life are sewn from chintz;
Note!
- Crafts made from polymer clay | Step-by-step master class on creating beautiful crafts
- DIY epoxy resin crafts - options for original crafts, step-by-step instructions for pouring and making them yourself
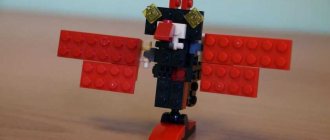
- Lego crafts: step-by-step master class on creating simple DIY crafts + original versions of Lego products (photo + video)
Velvet and moiré are spectacular fabrics for patchwork, used to create wardrobe items and accessories;
Organza, chiffon, crepe-satin, artificial silk will add zest to the product, but require careful and jewelry handling. It is quite difficult to work with these types of fabrics; experience and skill are required.
Crafts for children from bushings
The core is the remaining roll of thick recycled paper. It is also called a cylinder or tube. Thanks to the ready-made base shape, durable and stable on the surface, the sleeve can be an excellent base for creating three-dimensional crafts for children. The work also uses colored paper or cardboard, which is used to wrap the sleeve, and additional parts are cut out of them. In some crafts, the sleeve is painted with paints and felt-tip pens. In addition to toilet paper rolls, paper towel bases, parchment paper and foil will all work.
Crafts from toilet paper rolls
Patchwork techniques
There are many different quilting techniques, as well as a wide variety of patterns.
The main ones are:
- Square patterns - the easiest items to make are sewn from pre-prepared square patterns. Such patterns are available for creating crafts with children from fabric and for beginning craftsmen;
- Diamond patterns;
- Triangular patterns - “saw teeth” or “mill” pattern;
- Mixed geometric patterns are a more complex patchwork technique; with this technique, patches of different geometric shapes are sewn together according to a certain pattern.
- Appliques made of fabric of any fancy shape.
DIY crafts from pieces of fabric require perseverance and patience from the craftswoman. This is a monotonous, but enjoyable and creative activity that requires concentration and accuracy.
Note!
- Christmas crafts - how to make them yourself? 150 photos of the best themed crafts
- Crafts made from stones: creative options for crafts made from stones + step-by-step instructions for making your own, methods and schemes of work
- Crafts from disks: a step-by-step master class on how to create them yourself, creative ideas for crafts of varying complexity + simple patterns for beginners
Therefore, beginning needlewomen should pay attention to light fabric crafts. Paradoxically, one of the easiest projects for patchwork sewing is the creation of patchwork bedspreads and rugs.
You can sew a patchwork blanket from fairly large pieces of fabric, which are easier to sew together than small pieces for an oven mitt or decorative pillow, for example.
Do-it-yourself fabric crafts for beginning craftswomen are usually advised to be made from squares or rhombuses, and as you gain experience, you should move on to more complex patchwork patterns.
Amazing quilling: principles of operation
Making voluminous paper crafts is a great way to show creativity, develop motor skills, and train perseverance and attention. In the process of work, comprehensive thinking and coordination of actions develop.
If simple applique can be done with children from 1–2 years old, then volumetric modeling and quilling is suitable for children from 3–5 years old. The principle of operation is to create figures from crowded strips of paper. Create basic figures that are filled with curls. The result is elegant compositions.
It is possible to make postcards, panels, and decorative figures using the quilling technique. There are many patterns for three-dimensional crafts that are designed for both beginners and experienced craftsmen. The technique is considered a transitional option from appliqué to crafts in the form of figures.
Tips for beginner craftswomen
For products that will be subject to heavy loads, for example, rugs, furniture covers, the patches should first be sewn to the lining. Pieces of dense fabric are used as lining;
Finishing the seams with ribbon or ribbon will help achieve a feeling of completeness of the product and emphasize its unified style;
It is necessary to carefully cut out the workpieces. The neater the workpieces are, the better the finished product will be. To quickly create blanks, use ready-made cardboard templates.
Origami technique
Three-dimensional figures can be made from a simple sheet of paper without scissors and glue. To do this, you just have to fold the material correctly, using proven origami templates. It will not be possible to cope with the task without diagrams.
Step-by-step lessons that are understandable even to children are most suitable for work. The technique involves strictly following the order of addition.
Crafts with children made from fabric
A great way to spend creative time with your children is to create crafts from fabric with your own hands without sewing.
Good ideas for joint creativity with your child are:
- making a greeting card for grandparents from scraps of fabric using the applique type. The child will be happy to take part in gluing the cut-out patches onto a cardboard or paper postcard;
- decorating the Christmas tree for the New Year holidays with homemade bows from scraps of beautiful fabric;
- decorating flower pots, photo frames, boxes for storing small items or toys.
Making appliques and crafts from pieces of fabric with your own hands will allow you to decorate your child’s room, give the child a reason to show his imagination and unleash his creative potential.
Crafts made from natural materials for kindergarten
Kids love it when in their hands chestnuts and plasticine turn into toys that they can play with. Crafts made from natural materials for kindergarten are not very complicated, so any child can do it with the help of an adult. Sometimes crafts for kindergarten are made from fruits and vegetables, but most often they are applications from leaves and animals from cones and acorns.
Crafts from leaves and maple “helicopters”
The easiest and most accessible job, even for kids, is leaf applique. If this is your first time making a composition with your child, offer him a picture that will serve as a template. Don't rush to do everything yourself. Invite your child to choose leaves as desired so that the work turns out similar to the sample. This will develop your child's creative abilities.
Material for application:
- colorful leaves;
- thick sheet A-4;
- glue brushes;
- PVA glue;
- scissors;
- sample.
To make a simple arrangement, you need even, dry leaves. Place them under a press or in a book. In two days the material is ready. Cut out the appropriate pieces with scissors and lay them out on a sheet of paper.
Now you can glue it. First the background and lower layers, and then the finer details. For example, if you want to make an elephant, then first make a body and head out of leaves, and then glue on the trunk, tail, and legs. If you don’t have enough eyes, you can add them in with a marker or make them from tree seeds.
You don't have to do everything according to a template. You can come up with a picture yourself and create an original composition from leaves.
Posted by Hazel Terry
Use colored paper, felt-tip pens, and paints as an addition, so your applications will be even more interesting.
Along with leaves, maple “helicopters” are also ideal as a basis for crafts made from natural materials for kindergarten. Just look at this miracle!
Fairy wings made from maple seeds
Dragonflies from maple "helicopters"
Now you have seen how beautiful and original leaf applications can be. Use these ideas for spending time with your children.
Simple master classes on creating children's crafts from acorns and cones
At the end of summer, acorns begin to ripen, and they make wonderful crafts from natural materials for kindergarten or school. They are well preserved, and on long autumn evenings you can do a pleasant and useful activity with your children that develops fine motor skills of the baby’s hands, imagination and perseverance.
The most common crafts made from acorns are little animals and various people. You can easily make legs, arms, horns and other small elements from toothpicks, matches, thin twigs. An adult needs to help the children poke holes in the acorns.
To attach small parts, you can use a glue gun or Super Moment glue, but only adults should do this. And the safest way for kids to fasten parts together is with plasticine.
Making fly agarics from acorns is even easier! To paint acorns, you need to remove the caps from them, and after the paint has dried, glue them in place.
Acorns are very beautiful in themselves, and if you also paint them with acrylic paints or nail polish, then such crafts will decorate any home.
You can also make an original decoration for the New Year tree from hats painted with silver paint. The process of creating such an eco-toy is quite simple: we tightly glue acorn caps onto a foam ball (you can take an old Christmas tree ball). And the Christmas tree sparkled with new shiny decor.
We found another video for you, where Niki Junior tells you what a wonderful craft you can make from leaves, cones, twigs and a plastic bottle. Take a look, you will learn a lot of new things.
Fabric applications
Unlike paper appliques, fabric appliques are practical and durable. Fabric appliqués attract attention to the product, making it exclusive and unique. In addition, children really like bright and cheerful applications.
Decorate with fabric appliqués:
- children's clothing;
- children's accessories;
- textile bags and backpacks for children and adults;
- sofa cushions;
- bedspreads;
- tablecloths;
- furniture covers and covers;
- hats;
- handkerchiefs and neckerchiefs.
The materials needed to create a fabric appliqué include unnecessary fabric scraps, scraps, and old clothes.
The elements selected for fabric appliqué are cut out according to templates or stencils and fastened together.
The applique details are sewn by hand or using a sewing machine. In addition (and much more convenient), you can use a special adhesive-based lining fabric. This fabric is ironed and thus glued to the product.
Accordion stripes
Various objects can be made using unusual techniques. Strips are cut from paper. Each part is folded in small sections several times. It looks like the bellows of a musical instrument. The accordions are glued to the base by the last fold.
The upper part can be painted or decorated. The result is convex grass, flowers, animals. You can make an entire element or just a holder leg in the form of an accordion.
Tips for making fabric appliques
- It is necessary to select a sketch of the future application;
- Select scraps of fabric of different colors and textures that harmoniously combine with each other;
- Using pins will make it easier to make an applique consisting of small parts;
- When creating an applique, it is better to use thin needles and contrasting threads - this way the product will look neat;
- You should always leave a fabric allowance for the lapel (approximately 1 cm wide) when sewing appliqué parts;
- All pieces of fabric for making appliqué must be pre-washed and ironed.
Layering details
An excellent composition in the form of an applique will be obtained by layering the details. The elements are partially glued on top of each other. Particularly interesting are the parts painted non-uniformly.
Smooth color transitions maintain a three-dimensional effect. When creating flower arrangements, you can simply glue the petals not completely, but partially.
Decorating your home with fabric crafts
Textile items - bedspreads, curtains, drapes, towels, throws and furniture covers, sofa cushions, decorative panels, tablecloths - can transform a home, enliven the interior of a home and create coziness.
Such things, like other fabric crafts for the home, are easy to make with your own hands.
Polygonal geometry
From the photos of three-dimensional crafts using the polygonal geometry technique, you can see how accurate and beautiful the products are. Carefully made figures are not inferior in beauty to the prototypes. The method is suitable for older children.
To work you will need ready-made diagrams. Folds are made according to the template. This stage is similar to the process of doing origami. In places of cuts, the parts are glued together. The results are colorful, surprisingly life-like figures.
Paper crafts using three-dimensional techniques are an excellent choice for developing children's creative abilities. Working with different techniques is interesting not only for children, but also for adults. The result will definitely find application in everyday life.
Creating new things for the home from old ones
- An out-of-fashion knitted sweater can become the basis for creating a pillowcase for a sofa cushion; it can replace old chair upholstery;
- Old men's shirts are useful for creating kitchen utensils, potholders, tablecloths, curtains;
- The bright fabric of summer dresses will be useful for decorating the space at home. You can cover boxes for storing small items, decorate flower pots, sew pillowcases;
- Old jeans can become an oven mitt, a hot pad, a rug, and even a new denim bag.
Ottoman made from plastic bottles
This ottoman turns out to be very beautiful and light.
You will need:
- Plastic bottles
- Scotch
- Plywood
- Foam rubber
- Material
- Scissors
- Thread and needle
Manufacturing:
Prepare 37 plastic bottles. They should all be the same height and width. It is advisable that these bottles come from the same drink from the same company. Arrange the bottles so that they form a circle. They should stand close to each other. Then wrap them with tape in a circle. The base for the ottoman is ready.
Next, take the plywood and cut out two circles in diameter equal to the base of the eggplants. Place these circles on top and bottom of the bottles. Glue with hot glue or other adhesive. For example, "Moment".
Cut out the same circle from foam rubber as from plywood. Also cut a strip with a width equal to the height of the eggplants and a length equal to the perimeter of the future ottoman. With these pieces of foam rubber we will wrap our base made of plastic bottles and plywood. Now you can glue the foam rubber to the ottoman, wrapping it from the sides and top. Then these pieces should be sewn together along the edges so that they do not slip off the bottles.
Now you can safely sew a material cover for our ottoman. To do this, you need to measure the area of the circle from above and below. Cut them out of fabric. The same should be done with the width of our craft. Cut out and sew the patterns together. Place the sewn cover on our interesting and unusual ottoman. You can place it in your living room at home and admire your new product, or install it in a gazebo in the garden.
Photos of fabric crafts
From American classics to freestyle: what are the different scrapbooking styles?
There are as many trends in scrapbooking as in any other art form. And each master adds something special to them. Here we present a few of the most basic ones, which are always in demand and interesting to perform.
American
Since modern scrapbooking originated in America, it is the American style that can be considered basic and classic. It is characterized by an abundance of bright decorative details that seem a little “childish” - these are simplified images of flowers, “dancing” letters, butterflies, flags, stickers, multi-colored buttons and colorful backgrounds with stripes and polka dots. In a word, remember the fashion of the 80s, and everything will immediately become clear to you.
Colors:
bright, rainbow, contrasting.
European
In contrast to the American style, this style is distinguished by laconicism and severity, which are characteristic of British lords. Calm deep colors, simple shapes, moderation and a good sense of taste - this is what characterizes such works. Bright diversity, which distracts attention from the photographs, is not appropriate here, but collages of several similar frames are very common.
Colors:
restrained, most often in the same range (for example, blue and light blue or dark green, light green and white).
"Pure and simple"
Another laconic style, which is characterized by special lightness and airiness. Plain paper, a lot of empty background, a minimum of decorative details and certainly elements of journaling, that is, inscriptions. They can be quite long, but not necessarily very readable, since they are part of the decor.
Colors:
light, clean, a lot of white.
Rustic
This style can be described as “rustic simplicity” or “the beauty of nature.” It allows the use of plant decoration elements (spikelets, leaves, flowers), rough fabrics, and wooden decorations. It should also feel quite light and natural, even if there are a lot of details in the composition.
Colors:
natural, calm (sand, grass, light shades of brown).
Shabby chic
But here you can have a blast with lush floral bouquets, multi-tiered compositions, voluminous lace, buttons and decorative elements sticking out in all directions. Shabby chic is one of women's favorite styles, where you can let your inner girl out, allowing her to enjoy sparkles and pearls, hearts and birds, plaster frames and the overall impression of a “exploded cake”. The bigger, the better!
Colors:
pastel, delicate, the presence of white is mandatory.
Grunge
The complete opposite of shabby chic. There will be dark colors, "dirt", a lot of craft paper, black ink, scuffs and torn edges. In this truly masculine style, you can use gears and other flat parts from mechanisms, as well as metal or metal-like decorative elements. Many craftsmen like to artificially age some parts of the composition.
Colors:
dark, a lot of black and brown with a contrasting bright accent (yellow, orange, white).
Vintage
It is reminiscent of grunge using aging techniques, but at the same time allows the use of purely feminine decorative details. Lace from grandma's stock, old buttons, vintage frames and fonts typical of the century before last are well suited for this technique. Ink and stamps, metal fittings, paper flowers, images of cherubs and young ladies in caps are also appropriate here.
Colors:
muted warm (burgundy, brown, dark green), sepia, b/w.
Mixed media
A deliberate mixture of several styles and techniques. Lovers of this style combine grunge and vintage, shabby chic and vintage, European and “pure and simple” or any other option to their taste.
Freestyle
Down with restrictions! You can create the way you want, using any techniques and materials, alternating them, adding something of your own.
Making leaves
For each of the leaves, you should prepare a green rectangle measuring 20 by 8 cm. Next, bend the corners of the workpiece and fold it in half. Mark additional folds, then fold the workpiece like an accordion, and then in half.
Then apply glue, then connect the edges - and the leaf is ready! In the end, you just need to glue the leaves on the back of the flower. In this simple and original way you can make a decoration for a three-dimensional postcard, wall panel or applique.
Scrapbooking techniques that will help you create a masterpiece
Creating Layers
The basic technique on which the very principle of scrapbooking is based. We place scraps of paper one on top of the other, interspersing them with ribbons, tickets, lace and threads. Sometimes you need very few materials to create a beautiful composition, but for many scrapbooking styles the principle “the more layers the better” works.
We write words
The second is the most simple and pleasant technique, for which you don’t need anything other than your favorite pen. It’s not even necessary to write beautifully. We simply add our notes to the pages and hit two targets at once: inscriptions are both a decorative element and a way to perpetuate something important. But if you really want to, you can buy a real calligraphy kit and expensive ink.
We apply stamps
Another technique that does not require large investments. At first, a fairly modest set of stamps and ink pads for them will be enough for a novice master. Stamps allow you to quickly and effectively decorate any work, be it a postcard, a label or an album.
We cut and tear
This is a whole series of techniques under one heading. Here we work with a variety of hole punches (including corners and edges), and process paper with curly scissors, and even simply tear paper. To use this technique, you do not need to buy a large arsenal of tools; at first, 2-3 small hole punches, the same number of curly scissors, a pair of corner punches and at least one for the edge are enough.
Aging the details
Aging, or distressing, is another series of techniques that make it possible to make a product look as if it is already a couple of centuries old. Distress ink, coffee, dark ink pads, and even regular acrylic paint are commonly used for aging. Sandpaper and stressor will also come in handy. The technique implies that the master creates scuffs, stains, deliberate folds and torn edges on paper and fabric.
Adding shine and volume
Embossing is a technique for more experienced artists who already want variety and complexity. Usually it doesn’t come in handy as often as the previous ones, but it definitely adds beauty and professionalism to the work. In order to use the embossing technique, you need to have in your arsenal special powder and a hairdryer, with the help of which a three-dimensional pattern is created.
Another way to get three-dimensional elements on paper is embossing. And it also requires separate tools - special stencils and sticks. As a result, the paper acquires a convex pattern.
Sew
Almost all decorative elements for scrapbooking (except for solid and voluminous ones) can be sewn together on a machine. Paper, cardboard, fabric, ribbons and lace are folded into a single whole and acquire a special charm when they are held together by a machine seam. In addition, such work will be stronger.
In addition, you can always add decorative elements to the composition that are made by hand using other creative techniques: knitted flowers, buttons made of polymer clay, labels decorated using the decoupage technique, embroidery, beaded patterns, macrame decorations.