Base for plaster mask
To make a plaster cast, you first need to make a papier-mâché base.
What you will need:
- paper towels;
- Vaseline or any fatty cream;
- brush;
- PVA;
- clean container.
For the master class, it is advisable to have one more person present, since making a cast of your own face may not seem very convenient to someone. In addition, before taking an impression you need to take small precautions:
- cover the eye and eyebrow area with tissue paper;
- It is best to hide the hair under a rubber cap or bag;
- insert cardboard or paper tubes into the nostrils to facilitate breathing.
What do we have to do:
- Apply Vaseline or cream to your face. It is better to make the layer thick, especially in the eye area and along the contour of the hair, so that the impression can be easily removed.
- Pour some glue into the container. Tear the towels into pieces and soak them well with glue.
- Cover the entire face evenly with paper.
- It is important to be careful in the eye and nose area. Do not press on the eyelids so that the glue does not penetrate into the eyes. The same goes for the nose.
- To make the papier-mâché base more reliable, you can apply a small layer of glue with a brush.
- Now you can dry the mask with a hairdryer. It is important to agree in advance with your assistant on the symbols in case the air from the hair dryer is too hot.
- When it hardens a little, you can carefully remove the mask and leave it to dry until it becomes plastic.
This completes the making of the base cast.
As soon as you have a baby, be sure to make your own hand and foot prints! Time flies very quickly and the imprint of a baby’s hand will never be repeated! Try to make a panel with prints in the very first days of the baby’s life, because babies sleep much more soundly at first and have a little more free time.
Below is my
master class with photos on how to make prints of a baby’s hands and feet three-dimensional , and now I’ll tell you about all the other methods known to me.
It is best to make handprints of a baby while you sleep, and then wipe your hands with wet wipes.
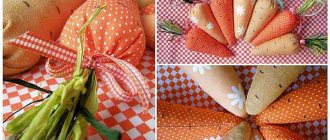
The easiest way to make prints of your baby's hands and feet is with paint. The “healthiest” thing, that is, completely harmless for the baby’s delicate skin, is to make prints on salt dough. How to make prints of baby's feet and hands on salt dough Although this is the easiest method, it is also the least durable. Keep in mind that over time you will have to throw away the dough, as it may deteriorate, for example, soften from humidity. A good layer of varnish will help the salt dough pen imprint retain its appearance, but it certainly won’t survive to reach your grandchildren.
Recipe for salted fingerprint dough: Salted fingerprint dough is made in the most primitive way! Take the finest salt and mix it with flour 1 to 1, for example, a glass of flour to a glass of salt. And add a little water, kneading a stiff dough. If it's too much, add flour. Next, you can take a plastic container, place a piece of dough there, make an imprint, if necessary, cut a circle around it and put it in a dry place. There is no need to bake, as is said in many master classes on casts of arms and legs made from salt dough! The dough will change its shape and the print will become deformed. After a few days, the print can be covered with acrylic paint and varnish on any surface (varnish is sold in hardware stores).
How to make prints from plaster with your own hands I made these with my eldest daughter, but I didn’t really like the result, because they are quite heavy and then there is nowhere to put them.
To make plaster prints of a child’s hands and feet, buy plaster at a hardware store (20 rubles a pack), dilute it according to the instructions on the package. Pour into a beautifully shaped container - a round cup, for example, previously covered with cling film. Touch with your finger - after a few minutes, when the plaster begins to harden and becomes denser, make an imprint with the child’s hand and foot, smeared with sunflower oil or very rich cream. Remove from mold. Ideally use silicone molds. And now I’m sharing my experience on how to make three-dimensional casts of a baby’s arms and legs at home!
It so happened that I made my children’s handprints from salt dough when my youngest son was born. Then I left them to harden on the windowsill and happily forgot about them for several months. When I remembered my desire to make voluminous little hands, the size of the little ones’ hands was no longer the same! But I took out the dough pieces and... discovered that they had almost spoiled - some had become soft, some had completely softened, others were somehow holding on with all their strength (here it is - minus the salt dough!). It was urgent to save the situation. And I remembered that I had the cheapest self-hardening plastic lying around for six months, bought for training in sculpting doll heads.
Here it is in the photo, the pack was a kilogram (365 rubles), enough prints for 10. I bought it in Gostinka (St. Petersburg), in the department on the first floor with brushes, paints, etc. Those who live in another city will be able to order self-hardening plastic on the Internet or buy it in large cities in stores with goods for artists. Stores with goods for making dolls will have better plastic and four times more expensive. Also in the photo - in the same department I bought the cheapest acrylic paints for any surface (92 rubles for the whole set. Enough for 10 years if my daughter doesn’t get it).
Paints and plastics
And now about how to make a three-dimensional cast of a baby’s legs and arms from plastic .
First, make imprints from the salt dough and leave them to harden. In general, you can varnish them, wash them after work and then give them as a souvenir to your grandparents. I read on the Internet that I recommend making the base for impressions from the same plastic. But, firstly, it is not very soft, and secondly, it does not smell very pleasant, so I didn’t want to touch the baby’s skin with it.
I used old prints. Next, I poured sunflower oil into the print so that the plastic would not stick to the dough, which was already ready to soften (it seems it lasted six months without varnish).
Oil
She drained the oil, crushed the pancake of plastic and pressed it into the print. That is, I pressed it in there thoroughly with my fingers so that it took the shape of a child’s hand. To prevent it from breaking later, I added pieces of plastic to the dented one. My surface is not very smooth, since this plastic also sat in my not very well closed package for more than nine months, so it was not very plastic and crumbled. Your print should repeat all the smallest folds of the baby’s arms and legs.
Click, type
I took out the print, it comes out easily after the oil.
We take it out
Since my dough was already soft, I removed the crumbs with a cotton swab and oil. If you have a fresh print, and even coated with varnish, you won’t need to do this.
If necessary, you can clean it
I cut it out with a regular knife and left it to dry on a flat surface for several days.
Hand casts are drying
You can also involve the little ones in covering children’s casts of arms and legs with paint; they will be happy to help!
Then I covered the plastic casts with two more layers of gold paint.
covered with acrylic paint
It is not necessary to coat acrylic on any surface with varnish. All that remains is to make a beautiful panel! You can glue not only casts of arms and legs, but also photographs of children, some memorabilia, first socks and a pacifier...
We try it on, cut out the photo if you want...
Ideally, glue it using a hot gun (small one in construction stores, for example in Ob I saw about 150 rubles). You can use glue moment. For the background, take very thick cardboard, or it is better to paint the thick base of the frame itself.
I don’t yet know what kind of panel I want, I made a rough sketch for you. But, of course, I want to use scrap paper, frames, etc. - in general, there is still a lot of work, but the result is worth it! And if you want to make three-dimensional casts of a child’s hands and feet as souvenirs that will remain intact until your old age, it is best to use a deep frame for three-dimensional panels, in which the distance from the substrate to the glass is about 3 cm.
Sketch of a future panel as a keepsake
Happy creativity! Even more master classes for children, with children and for yourself - in the Creativity section! And delicious master classes in the section About delicious things!
Plaster mask
Now you can begin creating the plaster mask.
For this you will need:
- paper adhesive tape;
- water;
- gypsum;
- cream;
- papier-mâché mask;
- mixer;
- a pair of deep containers;
- sand.
Sequencing:
- Along the edge of the mask, you need to make a border out of paper tape. This is done to ensure that the gypsum mixture does not leave the cast.
- Now, coat the inside of the mask well with the same cream or Vaseline that was used earlier. This is necessary so that when the plaster dries, it does not stick to it.
- Next, it is important to protect the mask from deformation. To do this, you need to take a small deep container of suitable size and cover the bottom with a thick layer of sand.
- Place the mask in the sand and pour more sand in a circle to make a kind of pillow for the cast. This is a great way to restore the stiffness lost to the mask due to the greasy cream.
- Now you can make the gypsum mixture. To do this, mix dry plaster with water in a second container. Carefully move with a mixer, trying to avoid lumps.
If using a mixer is not possible, you can use a fork or spoon as an alternative. However, in this case you will have to work very quickly with your hands until the plaster has completely hardened.
- When the mixture is brought to a state of homogeneity, you can pour it into a papier-mâché cast.
- It remains to wait about a quarter of an hour until the plaster hardens. If time allows, you can wait about half an hour for greater reliability.
- When the plaster has hardened, you need to remove the mask and carefully remove the sand with a soft brush. After this, papier-mâché can be removed from the plaster.
The mask is ready and now you can use it.
Methods for making a hand from plaster
There are two ways to make such an item:
- An impression is made using a rubber glove filled with plaster.
- A cast of your own hand.
For each of these methods, it is worth remembering the most important thing - if possible, avoid the formation of air bubbles when filling the mold with plaster, or reduce their presence to a minimum. The fewer bubbles there are, the less time you will need to sand the product and eliminate imperfections.
The photo below shows an example of bad work. Where air bubbles have formed, unsightly cavities remain that cannot be corrected by sanding.
Let's consider both methods of making a plaster hand with your own hands.
How to prepare a baby model for “work”?
It is best to carry out work on making casts of arms and legs when the small model is calm. Pick a moment. This could be a dream or watching your favorite cartoons. You can find cartoons by following the link: "Cartoons for the little ones." There are sleepy children with whom you can do anything in this state. There is an interesting article about a child’s sleep: “Does your child sleep poorly? We are looking for possible causes and finding a solution to this problem.”
If you decide to carry out the work of making a cast while the child is awake, then be sure to make sure that the baby is in a good mood, he is not hungry and joyful. Does the baby move his fingers slightly during the impression? It doesn’t matter, it won’t spoil the final result, since the mass will better get into all the folds and the handle or leg will be more prominent. In this matter, the main thing is calmness; holding someone in a position will not give the desired result.
If the baby is still very small, then during the process, in order to calm him down, sing a lullaby. You can see options for lullabies in the article: “Lullabies for babies.”
Preparation
Prepare the necessary material, accessories and tools in advance:
- Alginate mass for impressions;
- Gypsum;
- Stirrer (stirring stick), spoon and, if available, hand mixer;
- Water;
- Bucket or plastic container;
- Measuring cup, scales;
- Primer, protective varnish, sandpaper and acrylic paint for subsequent processing and finishing! (optional).
Prepare all the materials in advance because you will have very little time when you start mixing materials! The alginate mixture must be processed as soon as possible before setting time begins.
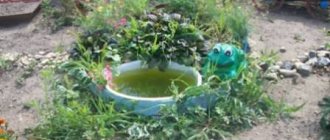
How to make casts of arms and legs from sand?
The method is quite simple and does not require any special “troubles”. Any mother can cope with this task, even if she is completely unfamiliar with the art of creating sculptures. Such a cast can be made decorated, then in addition to the tools and materials listed below, decorative elements are needed, which can be shells, chains, buttons or small toys.
Required accessories
To work on the cast you will need:
- · container, a round tin cookie box is perfect for this idea;
- sand, preferably fine;
- · alabaster, it is easy to buy at the construction market (store);
- ·a brush, usual for painting radiators.
Stages of work
1. Pour fine sand into the selected container and level it. It should not be compacted too much.
2. In the center of the prepared sand, make an imprint of your child’s hand or foot. If you want to make a decorated cast, then make decorations around the print from pre-prepared objects.
3. Now you need to work on alabaster. Don't forget that this material hardens very quickly, so you need to work quickly. The powder is diluted with plain water. The mass needed for work should be like sour cream.
4. After the alabaster is diluted, pour it in a small stream, so as not to spoil the sand mold, into the container. The thickness of the alabaster above the sand should be 2–4 cm.
5. Leave the container for at least 20 minutes. Preferably longer, but if you can’t bear it, then you can get it.
6. Carefully remove the cast and use a brush to clean off the grains of sand. Next, act as your imagination dictates: paint, decorate, decorate with drawings, write inscriptions.
Preparation of alginate mixture
Take a container and fill in the required volume of alginate. Then stir the mixture with a hand mixer (if you have one) and beat once with a beater.
Please note: small lumps in the wet mixture are not a problem.
Ratio:
- 20 ml water + 9 g alginate;
- 100 ml water + 45 g alginate;
- 1100 ml water + 500 g alginate.
Allow about 45 seconds for mixing and about 1 minute until you place the sample in the container.
The setting time of the alginate mass depends on the temperature of the water used . Warm water gives the alginate a shorter setting time.
Now immerse the sample in the alginate mixture without touching the edges of the container. When the mass becomes hard (rubber-like, elastic) and no longer sticky, carefully lift/pull the sample out of the frozen mass.
Preparatory operations
Making a plaster hand on your own is possible at home without the use of any special technologies or special equipment. However, in order for the casting process to go smoothly, you need to carefully prepare. Different batches of gypsum (especially building gypsum) may have different setting times.
To find out for sure, it is best to carry out a test batch and pour a small amount of solution into any simple form. This will allow you to accurately calculate the proportions of gypsum and water and determine the time period within which the solution retains casting properties. Ultimately, this will help save material, time and nerves.
At the preparation stage, they determine the container for the mold, and also select a suitable vessel for mixing the gypsum solution. For one-time pouring, you can take disposable dishes. If you plan to continue casting, it is best to purchase rubber plaster for mixing the working solution.
Half of an old children's ball is suitable for these purposes. Dried plaster from the walls is easily peeled off when the rubber is deformed. The skin of the hand that will be immersed in the molding mass can be lubricated with a thin layer of castor oil or Vaseline.