Fine Jewelry
Using miniature fabric flowers, craftswomen create hairpins and headbands, bracelets and brooches, necklaces and other jewelry that elegantly complement an outfit or serve as a worthy gift for a beloved friend.
Using thin fabric, you can repeat the ideal shape of a flower and make stylish and luxurious jewelry or accessories.
Making fabric flowers with your own hands brings a lot of pleasure and emphasizes the individuality of the craftswoman. To make original gizmos you will need a little fabric, but the result will exceed all expectations.
Flowers made from cotton swabs
Cotton buds are also an affordable and excellent material for creating beautiful flowers.
Using cotton swabs, plasticine and colored paper you can create cute daisies.
Willow branches from the tips of cotton swabs look very natural on an Easter card)
Using the tips of cotton swabs, paints and colored paper, you can make bright and fluffy dandelions.
You can make creative, timeless flowers from colored cotton swabs and round foam blanks. For example, such a mischievous daisy.
Or a whole bouquet of daisies! We make the stems of the resulting flowers from thin wire, which can be fixed in a simple dishwashing sponge.
Using the same principle, you can make such flower “hedgehogs”.
When you make flowers from cotton swabs with your own hands, you can choose any paint (gouache, watercolor, acrylic):
You can make mini flower beds with carnations from the colored tips of cotton swabs.
An exciting activity or a magical hobby
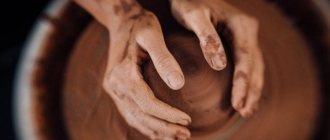
People began to create things similar to the creations of nature a long time ago. The hands of the craftswomen tried many methods and manufacturing techniques to achieve similarity with natural flowers.
To make the petals convex, they used starch, gelatin, and squeezed them out with special tools, giving them the desired shape.
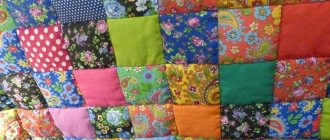
The easiest and fastest way to make fabric flowers with your own hands for beginners is to create buds by sewing strips of fabric or ribbons together.
Fabric strip rose
A long strip of any material folded in half is rolled into a tight roll. The petals are formed by turning the tape along the bias guide of the fabric. For 1 row you need to fold the tape 3-5 times. To get a lush bud you need to increase the rows.
With each subsequent row of revolutions you will need more. Carefully straighten the resulting petals and fix them with a needle and thread or a glue gun. When you receive a flower of the desired size, grease the end of the tape with glue and glue it to the underside of the rose.
Pompon
This flower will be large and lush.
You will need:
- Material to your taste;
- Glue;
- Scissors;
- Felt.
Step-by-step instruction:
- Make 25 circles with a diameter of 5 cm;
- Make the same circle out of felt;
- Fold one of the circles 4 times so that a little bag comes out;
- Glue the petal to the center of the felt circle;
- The remaining petals must be glued so that there is no free space left. Ready!!!
Modern manufacturing techniques
Over time, new directions for creating fabric flowers have appeared, one of which is the Japanese Kanzashi technique - folding petals from squares of fabric or satin ribbons.
Flowers made of synthetic textiles, made by the “hot method” - by treating the edges of the petals with a burning candle - look as if they were alive. The petals, melted at the edges, curl up and take on a curved shape.
You can create your own flowers from fabric using the method of crimping, stitching and gluing petals. Needlewomen learn the art of creating flowers using instructions, recommendations, and videos that help them learn the intricacies of this type of creativity.
Flowers of different types
Textile decor is becoming one of the original and stylish ways of decoration. Flowers can be flat, voluminous, collected in a bouquet, wreath, composition or panel.
Products can be created from felt, burlap, denim. They are suitable for decorating large objects. And cute creations made from nylon, organza, fine knitwear, chiffon look elegant, delicate and close in appearance to the original.
The choice of fabric for the product depends on the purpose of the decorative element - a flower on a stem, an element of wall decoration, clothing or a wedding wreath.
Note!
- DIY satin ribbon bows: photos of original design ideas, step-by-step DIY master class
DIY hair bands - ideas for decorating homemade rubber bands + step-by-step instructions for making them yourself
- DIY shadow theater: step by step how to do it at home! 175 real photos
Having mastered the technique of work, you can reproduce flowers from the fabric of leading masters, guided by master classes, or create an original product, emphasizing your individual style.
Ribbon flowers
Can be made from ordinary satin ribbon, which is bought in two different shades. Cut 10 cm from each, connect and bend at one edge. We twist it to make a ribbon bud that resembles a shell. We coat the end with glue and glue it so that the structure does not fall apart. Stringed for ornament in a general floral arrangement on panels, pillows, blankets, garlands to decorate the room.
Note!
- DIY vase: step-by-step photo instructions, master class for a beautiful and unusual craft
- Paintings from buttons, panels, appliques and compositions with your own hands: how to make flowers, a butterfly, a fish or a tree craft from buttons
Flowers made of wool (85 photos) - how to felt a flower from felt or a wool brooch. Step-by-step instructions for beginners
Good mood for creativity
Good taste, imagination and imagination simply encourage you to engage in this type of creativity. This exciting activity will require accuracy, patience and perseverance.
To work you will need fabric, scissors, a needle and thread, a glue gun, brushes and paints, and most importantly, a good mood! This exciting type of needlework will seem not like work, but like relaxation, which will relieve stress and help you forget about your current problems at least for a while.
To make flowers from fabric, you will need copper, steel or aluminum wire for the stems, fishing line or nylon thread to create decorated fragments from beads and beads, cotton wool to create unopened buds, as well as semolina or crushed coal to imitate stamens and pollen.
Flowers and ribbons
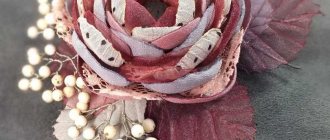
Decorative embellishments made from ribbons of different fabrics look completely natural. This is a rose twisted from a single satin ribbon, realistic bouquets, textured buds, lace specimens with leaves.
Rose
If you understand the technique of twisting the simplest product - a rose from ribbon strips - in the future you can take on more complex creations. To get roses of different sizes, buds, open heads, you need to vary the dimensional features of the selected ribbon. The composition of the tape used is selected according to the creative wishes of the manufacturer.
To work, you need ribbon fabric of the selected color; the resulting large or medium bud will depend on the width and length. To get a small rose, it is enough to prepare a ribbon 2 cm wide. In addition, prepare the necessary tools, namely scissors, thread, needle and glue gun.
How to make flowers from fabric? Everything is ready, it's time to get to work:
- Make a rose from ribbon according to the previous rolling tutorial.
- Form the petals by bending the tape outward along the bias and wrap it around the center of the flower. Hold the workpiece from below; you can secure it with thread.
- Continue growing the petals according to the scheme: bend the ribbon, wrap the bud, and then continue exactly like this
- After a few turns, it is advisable to fix the rows at the base of the bud so that the tape does not unravel. The flower is placed between two fingers (index and thumb) so that the rose is located on the palm.
- As soon as the bud reaches the desired size, press the end of the tape to the base and secure with glue.
Experienced craftswomen fix the layers of fabric tape twice, at the beginning of work and at the end, and beginners are recommended to stitch or glue the petals.
Braid is great for making flowers that can be used to decorate rings, brooches or necklaces. The product made from this material turns out to be very elegant and intricate.
Templates for creating buds
The templates are circles of different diameters. The bottom circle will be the largest. It will be 1 cm larger than the future flower. Cut subsequent circles 0.5 cm smaller than the previous (bottom) one.
The more magnificent the bud, the more circles will be needed. To create a very lush bud you need 3-4 circles of each diameter. Then transfer these template circles onto the fabric and make cuts according to the number of petals.
Usually 4 petals are made. They need to be rounded off with nail scissors and the edges burned over a candle flame. The blanks are fastened together in decreasing order - a blank with larger petals is placed on a blank with a smaller diameter, stitched or glued together.
Leave the middle free for the core or stamens. As a result, the whole process of work consists of cutting out the petals, processing them with a candle, collecting and securing the petals. An affordable and fairly simple option, and the result will surprise you.
Note!
DIY bracelets | Selection of the best models and master class on making beautiful braceletsDIY bird feeder - interesting ideas on how to make it quickly and easily from scrap materials
- Do-it-yourself cold porcelain: the best options for porcelain products, step-by-step instructions and recipes for making it yourself (photo + video)
Master class 2. Artificial flowers made of satin fabric or organza
Looking at these flowers made of satin fabric, it seems that they were created by a real master of flower making, but in fact, even a beginner can make the same realistic peonies/roses.
You will need:
- Candle;
- Satin, silk, chiffon or organza made from 100% polyester. For making peonies, white and pink fabric (all shades) is suitable;
- Scissors;
- Yellow floss threads (for stamens);
- Needle.
Instructions:
Step 1. Cut out 5 circles from fabric: 4 circles with a diameter of 8-10 cm and 1 circle with a diameter of approximately 5-8 cm. You can cut roughly and by eye, any inaccuracies and unevenness do not matter.
Step 2. Light a candle and start processing the first round workpiece: carefully bring its edge close to the flame and begin to rotate around its axis so that all the edges of the circle are melted and curled. Be careful, have a glass of water ready, and most importantly, do not bring the workpiece too close to the fire. Keep in mind that if you overdo it, the edges will turn black, which is not always desirable. However, sometimes it is the blackened edges that give homemade flowers realism or originality. Repeat this process with all remaining circles.
Step 3. Now, using scissors, make 4 cuts on each workpiece as shown in the diagram and photo below. The main thing here is to leave the center of the circle intact.
Step 4. Back to working with the candle again. This time we melt the newly obtained sections, pushing the sections apart with both hands. Repeat the procedure with all five petals.
Step 5. Set 2 large and 1 smallest pieces aside. We will return to them later, but for now let's work on the 2 remaining blanks, that is, the middle layers of peony petals. They need to be cut again according to the following pattern.
As a result, you will get twice as many petals.
Step 6. Use a candle to burn the new cut areas and set the pieces aside.
Step 7. It's time to make the peony stamens in the form of a small pompom from yellow floss threads. For this:
- Wind a whole strand of floss tightly around your index and middle fingers together. You should get about 8 turns.
- Now tie the middle of the resulting skein tightly (between two fingers) with the same yellow thread.
- Cut two loops, straighten the threads and trim the pompom if necessary.
Step 8. We begin to “assemble” the flower. Stack two large blanks on top of each other, which have only 4 petals, then put two blanks with 8 petals on them and, finally, complete the bud with the smallest blank with 4 petals.
Step 9. Hurray, the flower is almost ready! All that remains is to sew a yellow pompom to its center, simultaneously sewing all 5 layers of petals together.
If desired, glue/sew the necessary accessories, such as a pin, to the back of the bud to make a brooch out of the flower.
By changing the shape, color, size of the petals, their number and gluing principle, you can make not only peonies and roses, but also poppies (pictured), ranunculus, lilies and tulips.
Fabric poppy
And here is an example of flowers made from organza.
Organza flowers
Product painting
To make it more like a natural flower, its petals are painted. On dark fabric, the folds are painted with lighter colors. And fabrics of white, pale pink or cream shades of brightness will add color to a tone darker.
To obtain a smooth transition, the fabric must be moistened before painting. Flower painting is an incredible art, once you get acquainted with it, it is impossible to stop the flow of creative inspiration.
Within one petal, you can use several shades of a suitable color, and then the effect will be simply stunning. Such painting will add three-dimensionality and a resemblance to naturalness to the products.
After drying, bend each petal in the desired direction. They can be bent inward and twisted outward - the buds will look like a blossoming or blooming flower. The beautiful curves of the petals are given by fabric that stretches in all directions.
An airy organza masterpiece
Flowers made from organza look elegant and very beautiful. Such products usually complement and decorate the bride's outfit. They are relevant not only for a wedding celebration, but also serve as an excellent decor for other holidays. They decorate banquet halls, cars, they miraculously complement and add charm to a bouquet of living plants.
Original, unfading flowers will decorate the tables of cozy restaurants and cafes, and your home holiday table. Flowers for curtains made with your own hands according to a master class selected from the Internet will add elegance and chic to the interior of the living room.
Flower arrangements
Creating a floral composition is akin to painting: each new element is like an artist’s brush stroke. By selecting harmonious color combinations from buds and leaves, combining different materials, you create not just an interior decoration, but a real work of art. A delicate flower arrangement will decorate your home and become a spectacular gift for a birthday or wedding anniversary of relatives and friends.
Small flowers, such as violets, forget-me-nots, and small roses, can be made from purple, blue and pink silk or woolen fabrics. Leaves are made from leftover green velvet or felt.
The veins are easily marked by pressing with a hot knitting needle. To make the stem, a narrow grass-colored strip is wrapped around the wire. Leaves and petals are cut out from scraps using a bias thread.
Feminine look with floral decorations
Many workshops create flowers from light and airy textiles to decorate holiday outfits. Designer items are quite expensive and may not match the style and color of a certain type of clothing. You can make a fabric flower on a dress with your own hands.
An accessory made by yourself is much more pleasant to wear. A small rose will brighten up a strict black dress, and a lush chrysanthemum will make the dress feminine.
Flowers, which will add tenderness and femininity to the image, are created from very thin fabrics. Additionally decorated with rhinestones or small beads.
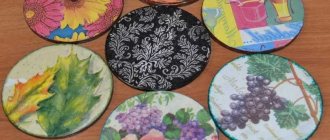
Flowers made from cotton pads
Many people do not even suspect that cotton pads can be used not only as a hygiene product, but also as a universal material for creating all kinds of inflorescences.
The surface of the cotton pads can be smooth, or maybe with a pattern applied. Depending on the type of flower, choose the one that suits you best.
Even a child can make a spring card with a primrose using cotton pads, scissors, glue, colored paper, paint or simple felt-tip pens.
If you fluff the cotton pads a little around the edges, you will get these airy roses. It looks very gentle and original!
Using cotton pads, a cotton swab and a drinking straw, you can create an elegant calla lily.
Cotton pads and a stationery stapler will help you make an original daisy) If desired, you can use glue instead of stationery staples and paint the daisy with gouache or acrylic paint.
Cotton pads are often used to make a very popular flower – roses. The roses will be decorated with pearls, which will add nobility to the resulting flower arrangement.
SunduchOK113 will reveal the secrets of creating flowers from cotton pads with his own hands in a video master class:
From a large number of roses you can create such a festive Christmas wreath. To do this, you will need a round blank, glue, cotton pads and various elements for decoration (ribbons, beads, rhinestones, sequins, etc.)
You can assemble an original topiary from snow-white roses. Decorations made from simple cardboard in the form of butterflies and leaves will add airiness and completeness to his image.
Roses can be created not only from “fluffy” cotton pads, but also made from a twisted cotton cord. The result will be a less airy, but no less original topiary.