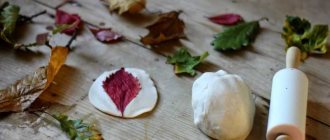
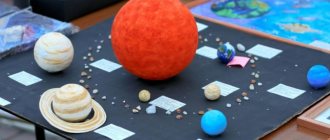
Autumn is a wonderful time, characterized by the wild beauty of nature. This is a period when in the forest or park craftswomen can find a lot of interesting material that can be used to create not only children's crafts, but also unique designer items. So, you can create an autumn composition from bright leaves, seeds, panels of branches, topiary from chestnuts.
Craft selection
There are many photos of shell crafts on the Internet. You can get some inspiration from these photos before you start making your own shell crafts. A creative approach and the presence of ideas will guarantee a bright result.
Most crafts made from shells are quite simple, but have an attractive appearance. Even children can make crafts that adults admire with pleasure.
Most often, nuts are used to make animals, insects, boats, Christmas trees and flowers, boxes and vases, Christmas tree decorations, wreaths and topiaries. And that's not all.
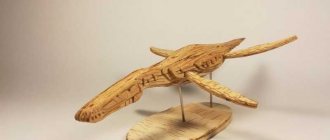
Whale
The ocean dweller will definitely delight the kids. Blue paint is chosen for it. The water fountain above his head is made of cardboard. To do this, draw a detail on a sheet of paper with a pencil, and then carefully cut it out along the contour.
This amazing walnut craft for children will definitely become part of the collection of their favorite toys. It will decorate a shelf in your baby's room.
We recommend reading:
- DIY crafts from Kinder surprise eggs - 125 photos of exclusive options with step-by-step instructions, master class and video
- Crafts made from twine - an overview of original design solutions. More than 100 photos of new products + step-by-step instructions for creating crafts with your own hands
DIY crafts from candy wrappers: 150 photos of the best ideas from craftswomen. Simple instructions, master class, diagrams and video tutorials on creating crafts from candy wrappers
Nut Beasts
The simplest crafts made from walnut shells are animals and insects, which require one or two shells to make.
To create such a craft you will need a minimum of materials. There should be shells, acrylic paints, white putty (stroke) and brushes on the table.
Animals
You can make many crafts with your own hands from walnuts. These can be almost any animal, insect or bird:
- snails;
- hedgehogs;
- ladybugs;
- kittens;
- puppies;
- ducklings;
- turtles;
- little mice;
- crabs, etc.
The manufacturing technology of all toys and the materials required for this are almost the same.
Craft materials
Among the existing variety of dyes, the following are suitable for work:
- aerosol paints;
- gouache;
- acrylic paints;
- nail polish;
- Easter egg coloring kits.
You will also need scissors, plasticine, and paper.
On our website https://dnevnikmastera.ru. you can get acquainted with many options for making crafts, but in this article we will focus only on making a cute owlet.
Ladybug
Ladybug - paint the shell with red paint, draw a black stripe running along the shell. Use black paint to paint the muzzle and black spots on the back. White eyes can be made using putty.
Bee
Bee - paint the shell yellow, draw black stripes and a face.
Hedgehog
A hedgehog can be made by adding plasticine and buckwheat to the materials used. Brown or black plasticine should be applied to the shell. Form a nose from plasticine. You need to stick buckwheat grains around the entire perimeter. These will be the hedgehog's spines.
You can stick a ball of black plasticine, a black bead or a seed on the tip of your nose. Don't forget to blind the eyes or glue the eyes.
Birds
More complex crafts made from nut shells require more careful preparation.
Materials and tools:
- PVA glue;
- Plasticine;
- Paints;
- Beads;
- Whole walnut or 2 walnut halves glued together;
- Feathers.
We paint the nut white, wait for it to dry and paint it with the color we chose for the bird. This is the body of our bird.
You need to mold the legs from plasticine. To make them more stable, it is better to make them with membranes. A small piece of plasticine is attached to the back, to which the feathers are attached. The beak is made from plasticine at the front. Glue on the beady eyes. You can make a crest from the remains of feathers.
Creating a miniature in a nut: preparing the shell
A miniature is a magical little thing in a huge world... and what should you do with it so that it doesn’t get swept away, blown away and gets lost in a dusty corner? Of course, she needs to find a house. Finding the right container can be creative and very inspiring. You can put miniatures in jars, in glass balls and cones, in matchboxes, in cups, in medallions... or in nuts. As Nikulin’s character said, “so that no one guesses.” Natural, eco-friendly and very pleasant container. A great souvenir and unexpected Christmas tree decoration. So, this material is devoted to some of the subtleties and tricks of placing a miniature in a walnut shell.
To work with nuts you will need:
- The nut itself or its shell.
- Kitchen knife, craft or stationery knife, drill or dremel, paint brush.
- PVA glue and universal glue.
- To choose from: satin ribbon, miniature loops, cord, bead and elastic thread.
- For the “interior”: acrylic paints, paper napkin or brush, cardboard, matches or toothpicks.
- For the “filling”: a lot of stuff, but we’ll talk about that later.
The indicated duration is approximate, most of the time is spent drying the glue; in autumn humidity it can take 3 days, and in summer it can be less than a day.
Task number 1 . Open the nut . Nuts come in different sizes, maturity, varieties and other “organoleptic” properties. It is best to take larger, ripe, well-dried nuts; they seem light for their volume. Wild, freshly picked, small and raw - a waste of time and effort. Wash the walnut with a brush and carefully select all the fibers from the relief. Wipe with a napkin. We leave hammers and nutcrackers on the kitchen table; they are not needed for creativity, despite various master classes on the Internet “how to carefully break a nut with a nutcracker” - I never succeeded, only soft-boiled
(In the photo on the right, the dark nut is wild, found in the park, washed, peeled, dried, but I haven’t been able to crack it for a year and a half! I’m waiting, maybe someday it will give in, it’s a tough nut to crack :))
You can cut it perfectly with a Dremel, for example, or another cutter. But since this requires additional equipment and the absence of sleeping children in the apartment (which is still relevant for my needlework :)), we will do everything manually and silently. Take a knife with a short, wide and sharp blade. We draw the cutting part “along the seam”:
We find the place where the nut is attached to the branch and thoroughly “chop” there. We drive the knife deeper into the resulting hole. We try to rotate (rotational movement around the longitudinal axis of the knife). If it doesn’t work, push the knife even deeper. We perform rotational movements again. And we repeat this until suddenly the nut clicks and quietly begins to separate into halves. Then we look very carefully at how the split went and split it into halves.
The crack may not be perfect. But we have a mysterious and natural house for microbes; all natural lines are beautiful!
It might not work the first time. Perhaps the nut will split into 3 or 4 parts or there will be a very uneven and unsightly chip. I advise you to stock up on at least 5 nuts for testing and experimentation, and you can also think more creatively: 3 parts are also good, for example, making an open diorama or opening double doors:
Task number 2. Process from the inside . We take out the core. We remove the internal partitions; they are quite easily removed with a knife.
You can rub it with sandpaper, but we still don’t need perfect smoothness, and it’s not too easy to get into all the curves. Therefore, we simply carefully cut off the burrs and excess relief.
Let the naturalness of the container still be a little visible.
Task number 3. Come up with a sketch. We place the halves of the nut on a sheet of paper (preferably in a box for scale), trace it with a pencil, and roughly draw the internal boundaries of the free space. You can make several sketches and then choose the best one. We create, we fantasize, we invent. This will be our basis, we will use it to measure the details and compare what we create with what we want. You can see the tape in the photo - I connect the halves temporarily so that they do not get lost or scatter when I take a break from work (and at the same time I store the blanks, broken empty shells, so as not to look for “where is the second one, where did the right one go?!”)
I will have an autumn nut. In one half there is a street, in the other there is a house; on the left is a forest and a fox, on the right is a kitchen with a harvest. The idea is that a window is required - you will need to mark it on the shell.
Task number 4. Connect the halves. They just broke it, and then they have to fix it back. But we need to do something so that the halves remain halves, family and friends, and not dangle on their own. Therefore, we connect them together. And we do this before we stuff them with all sorts of interesting things, because the latter may suffer in the process of rough installation. You need to: a) connect on one side, b) make a fastener on the other side, c) come up with positioning in space - a suspension or stand.
4a. Loops . Engineering options are possible here, you can connect them with pins, you can use magnets, you can use a box with hinges, etc. The options largely depend on the configuration of the nuts. Those with beveled walls are very poorly suited for hinges. And if the walls are thin, then everything is just on a string. Let's consider the classic version of the box type.
There are different types of hinges; in the miniature version of industrial production there are mainly two types: classic and H-type.
Sold in specialized stores, in packs of several pieces, complete with micro-studs.
Working with them is difficult. Firstly, the width of the wall does not always allow it, and in the H-type the walls must also be quite even vertically. Secondly, there are definitely no nails to the nut, it is very fragile, no nails can be driven in there. You'll have to glue it. Nails can then also be glued into the drilled holes (purely for beauty). The loops as in the photo on the left seem to be the most normal, but in reality they are “external”, and when installed inside the nut, the halves either will not close completely or the loop will stick out strongly or come off. They need to be pinched with pliers in order for them to work “as they should.” H-loops are more convenient, they close tightly, but are quite long - out of 5 nuts, only one of them fit the configuration.
In general, I myself don’t really like master classes, where everything is so pretentious about “prof.” level”: “order yourself specialized things and install them with a special tool on one left” I love it when there are tricks “for everyone and everyone” - to “do it on your knees”. That’s why I’m showing a more accessible, albeit labor-intensive, option. Fastening with tape. It holds tightly, reliably and requires a minimum of adjustment and alignment.
Let's try it on: mark the boundaries on both halves of the closed nut with a pencil.
We make a recess on each half for the ribbon: you can use a Dremel, or you can use a knife. I can do it more accurately with a knife.
Attach the ribbon to the nut with glue.
Fix on top with a layer of (2-3) napkins.
We paint the napkin with a mixture of white, brown and ocher (proportions are approximately 5:1:2, but it depends on the specific paints and walnut, they can also be darker and lighter) - to match the color of the walnut.
First we attach the tape to one half, we will attach it to the second after the tape has completely dried and after rough processing the second half, at the end of this master class.
4b. Let's make a fastening. The process, in general, is the same: we try it on, grind it, glue it, putty, paint over it. There are several options, a lot depends on the geometry of the shell.
A bead/button-loop and a bead-string (instead of a loop there is a thread that loosely wraps around the bead) - an option for thick walls with large “edges” when open, the knot can be easily hidden there (photo with icicles), in my nut it turned out the other way around - near the “seam” there are deep grooves on the outside (photo below), which, when open, stick out in roundness, and if you make a bead on a knot, the knot will stick straight forward and may even interfere with the nut closing:
Options with pins are possible: there is a pin in one nut, a hole in the other, an interference fit; but this is quite difficult to do - both because of the size of the nut and because of the properties of the material, and the positioning must be very accurate, and blindly. Options with magnets are possible (by the way, it is possible on both sides at once, that is, instead of loops): a small magnet in a niche on one side and a piece of paper clip on the other. But again, it’s unlikely that anyone would want to order 100 magnets for one nut, so I suggest a more “ergonomic” option with ties. And the most suitable for my particular nut.
Keep the nut closed and drill straight through exactly along the yellow arrows (as in the photo above). We get two small even holes.
We thread a string into one hole, measure the length of the thread so that it can be bent when examining the contents. We attach beads to the ends of the thread. The nut is closed with a bow. The thread will not run away because of the beads and will not get lost; closes securely.
4c. We make a loop. A loop can be made: only on one half, between the halves with fastening to only one, and between the halves with fastening different ends to different halves.
The most reliable way is to one half, although the nut will be poorly centered if it hangs, but this is easier and more reliable to do than the other two options. In one, the loop will always be on the cut - this is a weak point; in the other, the loop can interfere with viewing the filling and places excessive demands on the fastener.
We do it simply: we drill a hole in the upper part (however, it’s here in the upper part, and the nut does not have to have a vertical orientation, maybe you will have one on the side). We insert the two ends of the ribbon (wrapped with tape to make it easier to pull through). Straighten, glue, mask with a napkin, paint over.
NB: I don’t recommend holding the drill exactly as in the photo - it’s just a “still life with a drill”; drilling towards your own hand is, of course, wrong. The miniature is a toy, everything is so small and doll-like, but the tools are real and it’s easier than ever to get a real injury this way. Take care of your hands
Task number 5. Making windows. My nut has a window in mind. I don’t want props (I could stick a picture window inside) - the walls are not even, it won’t hold up well; I really want it! Draw contours on the outside. We mark holes in the corners of the sashes with a drill. Use a knife to remove the excess.
You may ask, why not drill everything out with a drill at once? Because I can’t do it that way and I don’t recommend it to you . Not only does the nut have different shell thicknesses, it also has uneven density. It is very fragile in places, unpredictable and very offensive chips form when working at high speeds. And if you’ve already decorated one half of the walnut and took on the second - the window is all full of holes - what should you do? All over again! You can’t take a new soul mate, they are unique, it’s impossible to find another pair. That’s why we do it, not in a hurry, carefully, the old fashioned way. And at the same time it’s quiet (the kids are sleeping :))
Task number 6. Making the floor . Nuts come with an almost flat “butt” and almost round ones - therefore, what will be in the lower part of the composition must be carefully assessed. Most often there is no level “shelf” there, so you will have to work a little to “level the horizon.” For the “street” half, the option is simpler: something like papier-mâché. Glue + napkin.
Several layers. Until the desired level is reached. I note that for such a diorama it is more advantageous to make the floor “on a slope,” that is, not strictly parallel to the surface of the earth (or perpendicular to the walnut axis), but so that the rear edge of the walnut floor is higher than the front. This makes it more convenient to examine and arrange the details - as if they themselves are shown to the viewer. And the area of the inclined surface is slightly larger than the horizontal one - which means more parts will fit
For home flooring, the process continues.
Place the half on cardboard (corrugated can be used) and trace approximately the outer contours with a pencil. We cut out a semicircle, insert it into the nut - carefully press with our fingers those places that do not fit. Then we cut off the excess along these marks and bends. Let's try it on - everything fits!
We do the flooring right away, then it will be inconvenient to crawl into the walnut. Here I have wooden floorboards conceived. We take a match (you can use a toothpick, but I prefer matches - they split easier, have a constant width, and also such a cozy change of shades along the edges...), split them, spread glue on the floor blank - attach the floorboards-matches. Glue it into the nut and press firmly.
Task number 7. Paint the background . We just paint the background. No details or frills yet, just a background. Sky, grass, walls...
We connect the second half and paint it over too.
Task number 8. Filling the nut with magic... Since there are a million options here, I will not continue in this master class. If there is interest, I will write a continuation separately.
I hope you enjoyed taking a look at my “nut kitchen.” I don’t claim any discoveries or any immutable truths, I just shared my experience. I would be grateful if you click the “Like” button.
Happy creativity and endless inspiration!
Home decor
The shells are suitable not only for making creative projects with children, but also for interior decoration.
The shells are turned into a stand for scented candles, made into hot coasters, and used to decorate flower pots and vases.
Topiary of chestnuts and acorns
The “Tree of Happiness” can be made from chestnuts and acorns.
For this topiary you will need:
- gouache;
- newspaper;
- heat gun;
- thick wire;
- gypsum;
- iron can or pot;
- acorns and chestnuts;
- beads, ribbons or other decor;
- colorless varnish.
Topiary manufacturing technology:
- First, a base ball is made from newspaper tied with threads. To prevent gaps between the nuts from being visible, it is recommended to paint the ball with brown paint.
- The barrel is made of thick twisted wire. Its ends are bent at an angle of 90° and attached to the stand with glue. To make the trunk look more attractive, it is wrapped with twine or twine.
- Chestnuts are glued to the crown using a heat gun. To make the product neat, you need to take nuts of equal size. The space between the chestnuts is filled with acorn caps.
- An iron jar or pot can serve as a stand for topiary. The container is decorated with twine attached to glue. To secure the trunk, plaster is poured into a jar, then the trunk is inserted and wait until the plaster hardens. After this, you can paint it to match the color of the crown and decorate it with acorns and chestnuts.
- The final stage is decorating the crown with beads, ribbons, and bows. Then it is recommended to go over the surface of the crown with colorless varnish - this step will make caring for the finished product much easier.
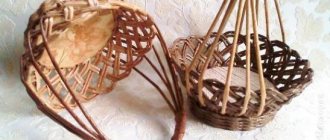
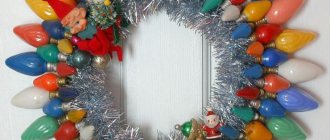
Wreath
Wreaths made from natural materials not only look great, but also spread a pleasant forest smell throughout the house.
As a basis, you can take cardboard, cut in the shape of a steering wheel, wrapped with waxed cord. Natural materials are glued onto this cord - walnuts, acorns, peanuts, pine cones, dry ears of corn, various twigs and white beads.
The finished wreath can be painted golden. The composition will look more advantageous if you place nuts and cones not chaotically, but sequentially. You can decorate the wreath with a ribbon.
How to make a caterpillar: step-by-step crafts for children
Don't know how to make a caterpillar? We bring to your attention step-by-step crafts of caterpillars from different materials. All options are simple and children will definitely like them.
How to make a caterpillar out of paper
Using paper rings
A bright and beautiful craft that even children 3-4 years old can handle. After all, all you need is to cut multi-colored strips, twist them into rings and glue them together. Then glue the rings themselves in one row and draw eyes with a smile. Older children can glue the rings so that the caterpillar has a curved back.
See the work step by step: a caterpillar made of paper with rings.
Caterpillar made from paper circles
Another simple caterpillar craft that kids can do. Circles are cut out of paper of different colors; you can make them slightly oblong. A little less than half of the circle is bent and in this area all the ovals are fastened in a row, forming the long body of the caterpillar. On the very first oval you need to glue eyes, antennae and draw a smile.
Simple steps in the article: multi-colored paper caterpillar.
Movable caterpillar
Also made from paper, but in a more complex way. Suitable for children of preschool and primary school age. The body consists of paper cut on one side into strips. Then each strip needs to be glued to the opposite side, forming something like a tunnel. The head is cut out separately and glued to the ready-made body of the caterpillar.
More details at the link: paper caterpillar.
Accordion caterpillar
How to make a caterpillar like an accordion? As easy as pie. An accordion consists of two long strips stacked on top of each other. The resulting accordion can stretch, swing and spring, thereby increasing the interest of the craft. The accordion-shaped caterpillar is interesting on its own, but even more interesting when combined with paper fruits.
See more detailed instructions: accordion paper caterpillar.
Caterpillar made from waste materials
A caterpillar can be made not only from paper, but from a variety of improvised or waste materials. For example:
Bushing track
The craft is similar to the one made from paper rings, only this option is even simpler, since the rings themselves do not need to be made, they are obtained by cutting a sleeve. The rings need to be painted, including in different colors, glued, and created the desired look.
More details in the review: caterpillar made from toilet bushings.
Pencil Caterpillar
The craft is also made from bushings, but it can perform not only a gaming function, but also a very useful one. A long caterpillar made of several bushings can collect pencils, felt-tip pens and other stationery in one place, while looking beautiful and original. The work is also as simple as possible; you need to cover the bushings with colored paper or paint them, and then glue everything end-to-end on cardboard.
A master class for such an organizer: a pencil holder made from toilet paper rolls in the shape of a caterpillar.
Caterpillar from an egg tray
The egg tray is also an inexhaustible source for various creative incarnations. From it or its cells you can make many different characters. How to make a caterpillar? It's not difficult at all. The main thing is to cut off half of the tray so that the cells are all in one row. Then paint the cells with paints, glue on the eyes, mustache and smile.
Step by step review: Egg Tray Caterpillar.
Caterpillar made from natural materials
Fruits, berries, cones, acorns, chestnuts, leaves and other gifts of nature can be used in the work.
Apple caterpillar
Chic and catchy craft. Will become a favorite of the autumn holiday at school or kindergarten. To work you will need apples, carrots, toothpicks, grapes, cranberries and leaves for the cap.
Sequence of creation according to the link: caterpillar made from apples.
Grape caterpillar
Another simple craft. How to make a caterpillar from grapes? Simply secure the dense grapes together with a toothpick, and then add the eyes and nose-berry.
See the review for more details: crafts made from grapes.
Pistachio shell
Crafts made from pistachio shells are fascinating. Glued pistachio shells form an unusual pattern that is difficult to look away from. Even necklaces, earrings and bracelets are made from this natural material.
Note!
Crafts from toilet rolls: step-by-step instructions for creating crafts. Master classes with simple work schemes (140 photos)- Crafts from corrugated paper - step-by-step master classes on how to create crafts from corrugated paper with your own hands + photo diagrams
- DIY crafts made from cereals: photo reviews of the best works made from cereals. Step-by-step instructions and diagrams for creating DIY crafts
These shells are used to decorate photo frames and paintings, and they are used to make Christmas trees, topiaries, and money trees.
Christmas tree
The original texture of natural material allows you to create amazing things from it. Novice craftsmen are often interested in how to make crafts from nuts. This will require a minimum of time and labor.
The shells will make a real forest beauty. Nuts are colored green. A cone is made from cardboard, onto which all the elements are attached one by one.
It is complemented with tinsel. The craft will decorate your office table or be a worthy addition to your home interior.
Pistachio succulent
Before starting work, wash and dry the pistachios. Divide them by size, this will make it easier to collect the flower.
Cut out a round base from thick cardboard. For gluing it is best to use hot melt glue. Make a succulent core from three small shells. Glue it to the center of the base.
Next, shells are added on all sides, gradually increasing in size, until you get a beautiful flower.
This craft is painted by immersing it in paint. You can use a spray can. If you paint these flowers in different shades of green, you will get beautiful succulents of different sizes, from which you can put together a panel.
This work can be used to make a brooch or just a decoration for your desktop.
Other nut products
Kids love to fantasize and make up fairy tales. The child is asked to make the main characters of his story out of nuts.
Thanks to this activity, the baby will develop his imagination and learn how to make crafts. A cockerel, a duck, a wolf, a hare may appear in his room.
Small figures do not take up much space. A special box or shelf is allocated for them. Next time the child can use ready-made figures for a fairy tale and create new characters.
To get funny animals, you need to be creative in the process. For work, you may need other natural materials, as well as threads, beads, and colored paper.
Adults should help the child with operations that are difficult for him. The child will be happy to collect figures and create new toys for his collection.
Eggshell
Crafts made from eggshells are usually made by children. The shell can be painted in different colors and made into a mosaic pattern.
Adults decorate vases, boxes, and frames with egg mosaics.
Ship
A craft made from a nut shell in the shape of a boat is popular among boys.
Step-by-step description of the process:
- Thoroughly clean the solid sash of partitions, paint it and, if desired, write the name of the sailboat.
- For a mast, cut a strip out of colored paper and attach it to a toothpick so that both ends of the paper blank are glued together.
- Use scissors to trim off excess paper into a rectangular or triangular flag shape.
- Make a sail in a similar way. It is made from gift wrapping, nylon ribbon, organza or 2-sided colored paper.
- Fill the inside of the shell with plasticine mass, and decorate the top with cotton wool or other suitable material (sparkles, beads).
- Next, use a toothpick to pierce the sail at 2 points and stick it into the plasticine. He must hold on tight.
- If desired, a beautiful autumn leaf can be used as a sail.