Crafts for a summer cottage or cottage plot
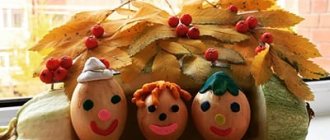
Compositions made from artificial mushrooms create an atmosphere of fairy tales and comfort in the open area. A mushroom meadow will decorate the area, and toy animals can enliven the overall look.
Mushrooms from a stump
Many owners of country houses when purchasing a plot are faced with a common problem - tree stumps stick out in several places and spoil the view. Uprooting the stump of a large tree is not at all easy. But many summer residents have found a simple solution to this problem - they create crafts on the theme of “mushrooms”, in which the stump becomes the stem of a mushroom.
To turn a large stump into a decorative element, you need to clear it of bark and sand the surface. Then you can draw a cheerful face on the resulting leg, and attach an inverted basin of a suitable shape on top. It can be painted brown with acrylic paint.
Birch stumps make wonderful fly agarics. There is no need to remove the bark from a birch stump - it imitates the leg of a fly agaric. A small red basin with painted white spots is attached to a cut of a stump, turning it into a fly agaric.
If the stump is very thick, you can turn it into a house for a mushroom family. You need to paint the cut with green paint and attach the moss to it.
Honey mushrooms are imitated by gluing small pebbles painted in different shades of beige or brown. Pebbles form mushroom stems.
The simplest paper craft
It will be interesting for young children to make a simple and cute paper mushroom for kindergarten. Such a product can be tied to both the summer and autumn seasons, if this condition is part of the homework.
In this case, you can use leaves of different colors to create a composition. Bright, bold colors and green grass can be applied to the summer theme. For work you will need the following materials:
- Scissors, pencil, paper glue (PVA) and ruler.
- A piece of cardboard for the leg. If the color does not match, then it can be painted or pasted over in the desired tone.
- Set of colored paper.
- A characteristic, beautiful leaf of oak, maple or other wood can be collected from nature and dried.
- If you don’t have a prepared herbarium, you can also cut it out of colored paper by copying a template from a book or from a monitor screen.
Progress:
- Using a ruler and pencil, draw a rectangle for the leg on cardboard, then cut it out and glue the short sides together using PVA.
- You need to cut out a circle from brown, red or orange paper, and then draw a small segment on it, limited by two radii.
- This will be useful for creating a convex cap for a mushroom-themed craft that is glued to the stem.
- The distance between the sides of the segment should be small, no more than 1-2 cm, depending on the size of the product, so as not to end up with a triangular cap.
- A hat made of red paper can be covered with pieces of white paper, imitating a fly agaric.
- For a strip of grass, you need to measure out a smaller rectangle that will be lower in height than the stem and cut it out of green paper.
- Individual stems are obtained by cutting the strip from the top side.
- The lower edge of the grass is glued to the base of the mushroom, and the entire composition is mounted on a sheet of wood, which can be glued to an oval piece of cardboard base.
- A small leaf can also be attached to the mushroom cap.
Concrete mushroom
Some craftsmen make their own “mushrooms” crafts from concrete. It is necessary to mix cement, crushed stone and sand. Standard proportions are 1:3:3. Water is added to this mixture until the consistency of mayonnaise is achieved. The solution is poured into prepared forms.
You will need one cylinder-shaped container, which can be cut after the mixture has hardened; an old basin can be used as a second shape. You can line it with a layer of polyethylene - this will make it easier to get the resulting workpiece.
In addition, the irregularities and folds that will cover the surface of the concrete workpiece will be similar to the irregularities of real mushrooms. Next, the stem and cap of the mushroom are painted with acrylic paint, connected to each other and installed in the chosen location.
What is needed to make figurines
There are several ways to make concrete garden decor. Based on the method for creating garden mushrooms from cement, you will need the following tools and materials:
- stacks or palette knives;
- sandpaper;
- metal brush;
- brushes;
- acrylic facade paint;
- primer for exterior use or on stone;
- cement M 500;
- sand;
- plasticizer
The simplest mushroom figurines are made from cement and nylon tights. The plasticity of the mixture is increased by PVA glue and liquid soap. Modern manufacturers on the construction market offer ready-made dry mixtures-plasticizers that improve the properties of concrete. PVA increases the frost resistance of the product. However, during the manufacturing process it accelerates setting. Therefore, there is a risk of missing the drying time to draw the details of the garden figurine.
Liquid glass increases frost resistance, but the mixture dries quickly. Add it no more than 1% of the total mass.
The diluted plasticizer is added in a proportion of 1 tsp. per 10 liters of solution. The cheapest option is liquid soap or detergent. It is added to 10 liters 1 tsp.
Attention! If detailed drawing of features is planned, a layer of wood putty is applied over the cement mortar. It adheres well and once dried creates a very strong coating.
Plasticizers make working with concrete much easier. They allow you to create small features and form a protective film. Add agents to concrete in small doses.
Wooden mushroom
People who know how to work with wood can easily create wooden mushrooms that can decorate not only the yard, but also the room.
To make a wooden mushroom you will need:
- Hacksaw;
- Chisel;
- Axe;
- Knife;
- Hammer;
- File;
- Bulgarian;
- Grinder machine.
The stem and cap are cut out. They can be rounded using a knife, an ax and a file. It is better to varnish the painted figurine. A sample photo of a “mushroom” craft made from wood can be found on the Internet.
Section of a log, tree trunk - transverse and longitudinal
The cuts of trunks can theoretically be either transverse or longitudinal, mostly we will talk about the former. You can get many such cuts from one log.
What they don’t do with them, what kind of crafts they do! They are suitable for room decoration - they can perfectly decorate the interior. These are countertops, floors, walls.
For crafts using wood slices, you can take different types of trees, both deciduous (birch, oak, beech) and coniferous. The leftmost one in the photo is a birch tree, as can be seen from the white birch bark on top of the bark.
Decorative vases for the interior - crafts from wood cuts
The cut pattern is generally very decorative. The end cuts can also be of small diameter - thin branches are suitable for work. I have already written about their possible use, in particular for making a large floor flowerpot that will decorate the room. To make it you need a base.
Sections with bark - material for country crafts
We have bazaars on New Year's Eve, where you can see and also buy handmade goods. So this kind of picture is not uncommon. The prices are high because this is an individual work of masters.
Wood crafts - photos of wooden castles from saw cuts and chaga
I observed such work in another place, I even took a couple of photographs in which the tool is visible, you can see them in this article about knightly wooden castles from wood cuts, chaga, and corks, follow the link. These castles really impressed me.
On the right is a photo of an ancient fortification made from tinder fungus. I even thought then that this could very well be an idea for a small small business, because the person who sold his crafts did exclusively that and nothing else. He has his own small shop. And he does everything very quickly.
Here is a cross section or cut of a birch tree, along with bark and birch bark. Human figures, Christmas trees, a house - everything was cut, naturally, not by hand, but with a special electric jigsaw.
The cut can be of different thicknesses, but for such a product it is better to take a slightly thicker one, then the folding toy will turn out to be more voluminous.
The bark of the tree does not interfere at all, but on the contrary gives a special charm to the products. Now there is a trend - the less processing, the better. A longitudinal cut of a wooden surface is good for crafts such as Christmas trees. The needles look very natural.
The product in the next photo very schematically depicts people, a goat, and a sheep.
Mushroom craft with children
Children's crafts "mushrooms" can be of different levels of complexity. Even children 2-3 years old can handle the simplest jobs. These mushrooms are small in size. It is important to choose safe materials that are easy and convenient to work with.
Note!
- How to make a rose from paper - the best ideas for DIY crafts + master classes on creating a rose from paper (160 photos)
- Craft letter - TOP 120 photo reviews of craft letter. Simple diagrams + step-by-step DIY instructions
- Crafts made from nut shells: the best step-by-step master classes on creating DIY crafts with photo examples of finished works
Applications from products and other materials
In order to make a children's mushroom craft, you can use various materials from those found in every home.
- You can paint a sheet of cardboard green and make a frame out of pasta.
- Place mushrooms in the middle, the caps of which are made from buckwheat, glued along the contour of the picture, and the legs are made from rice cereal.
- After the glue has dried, the cereals can be left in their natural colors or painted in other colors.
- You can make interesting openwork mushrooms from napkins or corrugated paper by gluing them to a thick sheet of base.
- Products made from salt dough can be quite strong and durable.
- There are several ways to make mushroom crafts from this attractive material.
- One of them is the production of mushrooms on a base, which can be used as a coil or a light bulb, since bulk products crack when dried.
- The light bulb should be covered with a layer of salted dough, and a cardboard hat should be placed on its narrow part.
- You can press strips of grass into the bottom of the stem before it dries out. When the dough becomes dry, the craft should be painted.
Plasticine mushroom
One of the crafts that are included in the mandatory curriculum in kindergarten. At home you can make a whole clearing with your child.
You will need:
- Plasticine brown and white;
- Modeling board;
- Stack for plasticine.
The child rolls 2 thick sausages (legs) from white plasticine. He must make a ball from brown plasticine, which is cut in half with a knife using a stack, forming a hemisphere. This makes 2 hats. The hats are neatly connected to the legs. 2 mushrooms are ready.
Fly agaric made of plasticine
This craft is suitable for children 4-5 years old.
Materials and tools:
- Plasticine in white, red and green colors;
- Stack for plasticine;
- Modeling board.
First, a foundation is made - a green clearing on which the mushroom will grow. To do this, the child rolls a ball of green plasticine and flattens it to make a round pancake. When the clearing is ready, you can begin to create the leg. White plasticine is rolled out into a sausage and attached to the base.
Note!
- Crafts from toilet rolls: step-by-step instructions for creating crafts. Master classes with simple work schemes (140 photos)
- Crafts from corrugated paper - step-by-step master classes on how to create crafts from corrugated paper with your own hands + photo diagrams
- DIY crafts made from cereals: photo reviews of the best works made from cereals. Step-by-step instructions and diagrams for creating DIY crafts
To form a hat, you need to take red plasticine and make a ball. The child places this ball on a modeling board and gently smoothes it from the center to the edges to form a cone.
By pinching off small pieces of white plasticine, the child sticks them onto the resulting red hat. The spotted cap is connected to the stem. The result of the work is a bright red fly agaric in the clearing.
Making crafts
Birch mushroom can be collected in any season, but it is more convenient to do this in the autumn-winter period, when there is no foliage on the trees and the growths on the trunks are clearly visible.
As the name suggests, almost 90% of chaga grows on birch trees, however, such tinder fungus is considered not the most successful ornamental material, since it;
- usually has a grayish color;
- does not have high hardness and breaks easily when making crafts;
- is often contaminated and requires additional processing, otherwise the product will become unusable within a couple of months.
On the plus side, birch chaga is easily separated from the tree and quickly processed with a simple knife. The aspen mushroom also has similar properties - it should also be collected only in the absence of stronger tinder fungi.
Durable and hard mushrooms with good coloring usually grow on coniferous trees and oak. They are often separated using a saw or axe, and processing requires more durable tools, including a hand or electric drill. However, crafts made from them will be brighter and more beautiful.
Important! Chaga is susceptible to parasites, so any mushroom should be carefully inspected. If there are holes on the surface that look like the work of an awl, then the fruiting body is infected and it is better not to use it in crafts without additional processing. All holes should be deeply filled with glue to stop further parasites from destroying the fungus.
What you need
To work with chaga, you need carpentry and plumbing tools (hand or electric):
- an ax or saw - for collecting mushrooms;
- a sharp, durable knife - for initial processing and cleaning soft parts;
- chisel - for shaping parts;
- sandpaper or grinder - to level the surface;
- a drill with a metal brush - to clean out the insides of a hard mushroom;
- an awl or screwdriver - to form the recesses necessary for fastening the parts of the crafts together;
- paints (acrylic), putty, varnish or epoxy resin - for the final coating;
- additional details: plywood for fastening, fur, threads, sticks, cones, etc.
Important Features
Basic rules to consider when working with birch mushroom:
- In order for new products to last a long time and be durable, the soft, insufficiently hardened part of the chaga should be removed immediately;
- tinder from birch is more fragile, you need to work with it very carefully and not make many holes so that the product does not break;
- Undried chaga is easier to process, but crafts made from it quickly become unusable. But masterpieces made from pre-dried chaga are more labor-intensive to work with, but they last much longer;
- smooth parts of the birch mushroom are treated with sandpaper not only to make them smooth, but also to form them into a flat base or place for attaching the product;
- to fasten the parts, carefully pierce the chaga with an awl or make indentations in it with a knife, pour glue into them (for less durable crafts, you can use plasticine) and insert sticks, wire, matches and other “fastening” elements;
- The finishing touch is to coat the craft with varnish - this will not only give the product a beautiful look and shine, but will also significantly extend its life.
Important! It is most convenient to dry the mushroom in a special dryer for vegetables and berries. Drying in the oven is also possible: 6-8 hours at 60°C or naturally - under the sun's rays, avoiding humidity.
Chaga is a natural material available almost throughout Russia. It is perfect for making various kinds of crafts. The difficulty of working with a mushroom depends on its strength, and the products are unusual and, if properly processed, become a source of pride for their owner for many years.
Cardboard mushroom
One of the simple crafts that does not require a lot of time, money and patience is a “mushroom” craft made from cardboard.
Materials and tools:
- Scissors;
- PVA glue;
- Cotton wool;
- Green corrugated paper;
- White paper;
- Cardboard in white and red colors.
Take green crepe paper and cut out a circle. Make small frequent cuts along the edges of the circle. This will be grass. It can be slightly lifted and curled upward using scissors.
Cut a sheet of white cardboard in half and roll it into a cylinder. Glue the joint with PVA glue. This is a leg.
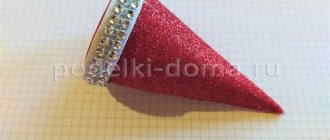
Cut the red cardstock in half lengthwise to create a long rectangle. Roll it into a cone shape and secure with glue. Glue small white circles onto the cone. This is a hat.
Fill the cone from the bottom with cotton wool. The cotton wool is glued to the base of the cone. The hat along with the cotton wool is glued to the leg.
Take a sheet of white paper. Cut a thin rectangular strip. Make even cuts on one side. Use scissors to curl them. This is a mushroom skirt. Glue it to the leg.
The result is a colorful fly agaric!
Simple applications with mushrooms for kindergarten
Working with paper
The next material that is widely used by kindergarten teachers is colored paper. To get started, children need to be given safety instructions and explained how to use scissors. For children under five years old, the details are cut out by the teacher himself.
To make a mushroom we will need:
- colored paper;
- cardboard;
- scissors;
- glue;
- crafts blanks.
We glue the finished parts onto cardboard. We decorate the mushroom with eyes, mouth, circles on the hat and attach the grass to the stem.
The number of decorations used depends on imagination and age.
Craft mushroom lantern
Any craft is especially good if you make it together with your mother and put it on your shelf. This is the kind of mushroom-lantern craft we’ll look at now.
We will need:
- cardboard;
- glue;
- scissors;
- transparent paper or file.
We cut out the silhouette of a mushroom, make a hole in the middle and attach transparent paper or file. We should have two mushrooms for the volume of the figure. Finally, we make the sides and insert a flashlight or light bulb for illumination. Choose lamps with dim light to avoid fire. This is how we made our own lamp together with my mother.