Fairy tales are limitless material for work. To awaken an interest in creativity in young children, it is better to make crafts based on the themes of children's stories.
This will hold the child’s interest for a long time, and while working, you can read fairy tales with your baby.
The child’s imagination will run wild, and it will be easier for him to make figures of certain characters.
“...Golden chain on that oak tree...”
Instructions on how to make crafts based on fairy tales may consist of several general recommendations:
- use available materials;
- fantasize;
- For compositions, choose bright, voluminous scenes.
One of the most striking compositions is a learned cat on an oak tree with a gold chain.
Step by step guide:
- Prepare a sheet of thin plywood (base).
- Glue a thick straight branch, 15 cm high, vertically onto the base. Make the crown from dry oak leaves (just attach them with glue to the top of the branch).
- Cover the base with moss, dry blades of grass and small twigs.
- You will have to buy a cat (you can look for the right size and fluffiness among decorations for keychains). We plant it next to a tree.
- The final touch is to wrap a chain around the oak tree (look at your place or buy it in the jewelry department).
If an exhibition of crafts based on fairy tales is held in a kindergarten or school, this composition will definitely not go unnoticed.
About the fairy tales of Alexander Sergeevich Pushkin
We have all been familiar with the wonderful fairy tales of Alexander Sergeevich Pushkin since childhood:
- "The Tale of the Fisherman and the Fish",
- "The Tale of the Golden Cockerel"
- "The Tale of the Dead Princess and the Seven Knights"
- “The Tale of Tsar Saltan, of his glorious and mighty hero Prince Guidon Saltanovich and of the beautiful Swan Princess,”
- "The Tale of the Pope and his worker Balda."
Alexander Sergeevich was introduced to folklore by his nanny, Arina (colloquial form of the name Irina) Rodionovna. He also listened to singers and storytellers at fairs and bazaars; notes and recordings of the tales he heard were preserved.
In Pushkin's time, oral folk poetry accompanied people all their lives. These are lullabies, folk songs that were sung during work and on holidays, epics, fairy tales, legends passed down from generation to generation. They reflected the entire life of the people, their customs, traditions, and beliefs.
Let us and our children re-read our favorite fairy tales, conduct educational activities, games, performances, or do crafts based on them.
So, the theme of the creative competition “The Magic World of Fairy Tales” in February is “Fairy Tales of A. S. Pushkin” .
gold fish
The craft is interesting because it uses several types of activities: sewing, beading and a little wood applique.
Cut out the body of a fish (2 pieces) from shiny material, sew them together, and stuff them a little. Cover part of the body with sequins and make an eye out of a black bead. At the places of the fins and tail, sew threads of different lengths and string beads on them.
To make it more beautiful, use several colors of beads. Make the tail 4 times longer than the body, it will turn out beautifully.
Stick a stiff wire into a thin piece of wood, string beads on it, and fasten the fish on top so that the wire is masked by the tail.
Note!
- DIY military crafts step by step: 150 photos of the best craft ideas for children for school or kindergarten
- DIY crafts for May 9 step by step: 150 photos of the best crafts for Victory Day
- DIY crafts for February 23rd step by step: master class with photos and descriptions of how to make crafts for Defender of the Fatherland Day
Paint the saw cut blue, pour plenty of glue on it and place shells and small pebbles on top.
Progress:
At the beginning of my work, I drew a template of the Swan Princess
Next, you need to draw out a white sheet of paper or simply cut it in half lengthwise, and then cut strips about 1 centimeter in width.
Then we begin to glue the ends of the white strips together, forming loops. This is what we do with all the prepared strips of white paper. For a wide part of the body, you can use stripes of the same length, and in the place of narrowing and transition to the neck, I suggest using shorter stripes, forming loops of smaller volume .
Swan Princess
Secure a plasticine barrel on a blue base (this can be a sheet of thick paper or plasticine). Cover it entirely with white bird down.
The neck and head are also sculpted from plasticine. Wrap a white napkin coated with glue and let dry.
Make a crown and attach it to your head. Connect all the parts.
To make the composition look complete, decorate the base along the edges with small black boulders (pieces of plasticine), and draw waves with paint.
Garden interior items made from saw cuts
Cuts from durable trees look impressive when making objects and elements of garden design.
Bird feeders
A bird feeder is one of the most traditional wooden crafts.
Birch wood is well suited for work. You can make an original bird feeder from round sections of wood, supplementing them with sticks and knots. The craft can be made from plywood and slats, and wood slices and bark can be used for decoration. It is important that the design is safe for birds.
Garden paths
Paths and paths on the site, lined with saw cuts from hardwood, will not only make the landscape unique, but will also last quite a long time if the work is done correctly.
An important step is the preparation of the material. It is necessary to obtain sections of equal thickness from the log. The recommended size is about 15 cm. They must be treated with an antiseptic.
At the site of the future path, a trench of small depth is dug, a layer of film is laid on the bottom, and crushed stone is poured. The material is carefully leveled and compacted.
A layer of sand should be poured on top of the crushed stone. To shrink the materials, the trench is spilled with water. Wooden blanks are laid in random order. The voids between them are filled with sand.
It is important to place the wooden parts as close to each other as possible.
Decorative flowerpots
Such original products serve as an excellent addition to the garden plot.
They can be made from a wide cut of wood. It is important to use healthy wood. Oak cut is not suitable for work due to its high strength. It is better to use birch or beech.
You can make a flowerpot as follows.
The size and shape of the products depends on the source material. Such elements of garden design do not require additional decoration.
Mermaid
On a sheet of thick paper, draw an outline of a girl in profile to the waist. Cut out the workpiece. Make hair from yellow silk or satin threads and glue it on. Fashion a tail from plasticine.
Prepare a medium-sized, beautiful stone. Attach the tail to it so that it hangs almost to the very edge of the stone, then carefully stick the upper part of the craft into the tail.
Small sequins attached to the tail will add naturalness to the character and further decorate the craft.
Wooden images of animals and birds
A good option for decorating your home or garden would be simple figurines of animals or birds.
Wooden owl
For a special effect, it is better not to remove the bark from the preparations.
Similarly, a bunny, a cat, a hedgehog, fairy-tale heroes and cartoon characters.
Thumbelina
In every girl's playroom there is a play that the child has already played with. What if you give the toy a second life? Let's come up with a craft!
From any bright fabric, cut out ovals with one pointed tip, 3 sets of five pieces. Let the blanks in each set be 2-3 cm smaller than the previous one. These are petals.
Note!
- DIY airplane craft: the best options for creating an airplane from paper, cardboard and plastic. 120 photo ideas
- DIY crafts for March 8 step by step - a review of the most beautiful crafts for International Women's Day (120 photo ideas)
- Diaper cake for a girl - 180 photos of ideas for original diaper cakes + DIY instructions with examples of finished products
Sew the base of the flower in the form of a round pillow, sew the petals to it so that the small ones are on top.
Sew a new dress for the doll and place it in the center of the flower. The craft is ready!
Available materials
A fairy tale is created from the world one button at a time
Everyone has them at home. If you collect all the old unnecessary things, cut off the buttons from them (preferably flat ones), and use the material for crafts, then everyone will be happy. The child will receive creative material (free of charge). And mom has a free place in the house.
The method of working with buttons is similar to the quilling technique. We also create a template outline and fill it with buttons. Here you can use different diameters together. This is especially true for the original tail of the Rooster, the hero of many Russian folk tales. The crown of Chukovsky’s “Miracle Tree” can also be created using buttons. This is where your imagination can run wild. It is possible that buttons on the legs would also work here. Then you need to take stronger glue, or sew buttons onto cardboard.
"White-maned horse clouds"
Moms always buy cotton pads. They're pretty cheap. And any mother will be happy to share a couple or three with her baby to create a unique composition. “Snowman-postman”, the same Princess - Swan, framed by feathers - beauty! And clouds in the sky!
“Let’s assemble a fairy tale from fabric”
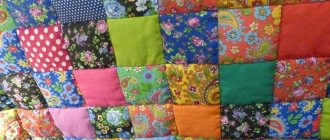
Patchwork is where the various scraps that mom has accumulated will come in handy. Yes, and old outfits (your own or a doll’s), which have not yet lost their presentation, can be used here.
The simplest technique of this style is called "well". The base is a square, which is covered with fabric in the form of stripes. If the square in the center is red, then such a block is called a “hut”. If blue, then “well”. But this is a classic option.
All craftswomen have been experimenting with color however they want for a long time. Here are “Zayushkina’s hut”, and “Winter quarters of animals”, and “Teremok”.
There is also the “Triangles” technique. With its help you can make a Hedgehog with a magic wand. “Mill” is a little more complicated. Well, here “Puss in Boots” simply suggests itself by association.
There are a great many variations of techniques. The main thing is to apply them. Remember, the best creative craft is made by the hands of a child together with his parents! It doesn’t matter how complex or simple it will be. The main thing is a joint idea and interesting creative family interaction!
Princess on the Pea
A multi-layer applique made from pieces of fabric looks best. In this case, it is not necessary to conduct a master class on creating crafts, everything is quite simple.
On a colored sheet of paper, draw a bed (railings and base) with a simple pencil. Glue twine to the outline. Glue the pea. Cut several elongated ovals (mattresses) along the length of the bed. Use pieces of different fabric. Glue them on top of each other.
Paint a princess on top.
Panel
When listing crafts based on Pushkin’s fairy tales with your own hands, one cannot forget the patchwork technique - patchwork.
From scraps you can sew a panel based on the theme of one fairy tale or combine several works with the image of a mighty oak tree on Lukomorye.
Such work will require the child to have sewing skills and perseverance, so children aged 8-14 years will be able to cope with the task.
It will be interesting for younger children to try to realize their creative ideas using simplified versions of the patchwork technique.
Option 1. Kinusaig
To work you will need:
- shreds;
- polystyrene tiles;
- collet knife;
- pencil;
- PVA glue, brush;
- scissors;
- double sided tape;
- acrylic paints.
The principle of operation is simple: a picture is drawn on a polystyrene tile. Then grooves are cut with a knife into which the shreds, processed along the edges with PVA and secured with tape in the middle, are inserted. Finished fabric applications are decorated with acrylic paints, adding color and saturation.
A master class at the link will help you make a panel using the Kinusaiga technique:
The work takes 2-3 hours.
Option 2. Application
For this work you will need scraps of fabrics of different textures and glue.
First, the child draws a base image on a sheet of cardboard. This could be the emergence of 33 heroes from the sea, or the fabulous city of Guidon, the Shamakhan queen, or a conversation between a stepmother and a magic mirror. Then you need to select fabrics for decorating clothes and backgrounds.
The fabrics are cut to the size of the original design and glued.
Characters' faces are drawn with pencils, felt-tip pens or paints. Additions to panels made of beads, rhinestones, beads, and sequins look beautiful. Such work can be entered into a school competition.
Three piglets
The plot of this craft provides wide scope for imagination. The composition will, of course, be based on three little pigs. They can be made from completely different materials. Plasticine, foam balls and even chicken eggs will do.
Paper and cardboard
“We will create a fairy tale from magical curls...”
The original process of creating crafts by rolling paper (from thin strips of paper) called quilling came from England. Since paper was a very scarce material at that time, the remains were not thrown away, but wound around the pen. This is where the name “bird feather” quilling comes from.
The basis of any craft of this technique is a module. But the modules here are different. Each one reflects its own form. They can be in the form of a drop, a star, an arrow, a bird’s paw, a petal, or even an eye.
To give the craft additional volume, fringe is used. To do this, a strip of paper is cut on both sides and then curled.
DIY crafts based on Bazhov's fairy tales
The cartoon “Silver Hoof” fascinates not only children, but also adults with its beauty.
Let's make a three-dimensional composition. Glue small pieces of cotton wool in places onto a square of cardboard sheet painted with white acrylic paint. Use small branches to build the walls and roof of the house. You can also fasten them together with glue.
Cut out the outline of the deer from silver “velvet” paper. Install it on the roof. Scatter small multi-colored glass beads along the roof and next to the house, on one side.
Crafts based on Bazhov's fairy tales, the pure embodiment of magic. If the craft is made large enough, you can use a Christmas tree garland as precious stones.
Idea No. 5. Christmas tree toys made of cardboard
A simple option to create a New Year's toy in the style of Pushkin's fairy tales is to use cardboard.
- To begin, we draw or print one of the fairy tale characters - from a fish to a hero.
- We cut out the silhouette and the design, and cardboard of the same shape.
- We glue them together.
- We make a mount on the tree and hang it.
The photo below is of a lamb, but it could very well be a squirrel.
Cat's ears
A little-known fairy tale. This is good. A craft is a great opportunity to get acquainted with the original creativity of a storyteller. Photos of crafts based on fairy tales can be found on the Internet. While looking through them, you will definitely come across “cat ears”.
The composition can be implemented in the form of an application.
Paint the base sheet with dark blue paint. Stick silver stars and a month in the upper half. Cut and paste Christmas trees and hills.
Place two triangles – ears – in the center of the sheet. To make the craft look impressive, the ears should be made of bright red silk. They can be cut into sharp corners along the edges to make them look more like lights.
Step-by-step master class oak made of beads
The sequence of formation of a mighty tree from branches
Before proceeding with the next steps, try to connect the branches together not evenly, lower the branches down a little with each fastening. We make them in this sequence, connect the branches together and secure them with tape.
We leave three branches one at a time.
We make branched branches - two out of two and two out of three; three out of seven and one out of five.
We collect the tree from small branches, wrapping it tightly with tape and beautifully bending the resulting clusters.
Upon completion of assembly, we separate the wire to the sides for stability.
Kolobok
Crafts based on the fairy tale Kolobok, a mandatory activity in any kindergarten. The kolobok theme can be played with so many materials that it’s simply dizzying.
The largest kolobok can be made from a pumpkin and placed outside (our answer to Halloween).
Find a stump of suitable size. Place a pumpkin on top of it. Glue the chestnut nose, paint the eyes and mouth.
Two long potatoes will serve as legs. You can put an old hat on the top of your head.
If you need a smaller craft, you can make a bun out of plasticine, it’s not at all difficult, and place it on a cardboard base decorated in a forest theme, with moss, dry blades of grass, acorns, and rowan berries.
Fairytale hero made of polymer clay
In order to create a fairy-tale hero, you must first decide who exactly your child or you want to make. Once decided, you can stock up on polymer clay.
However, such material is quite expensive in the store, so you can make clay at home. There are many options and recipes for this type of craft material online.
Since the New Year is approaching, we suggest you make a New Year's craft of a fairy-tale hero familiar to any child - Santa Claus.
For Santa Claus, first we sculpt a body from red clay in the form of a coat. Next, from the same color we create felt boots, mittens, a cap and a nose.
- How to sew a decorative mini bag with your own hands
- Crafts from cotton pads - beautiful ideas and tips on how to make decorations and toys with your own hands (70 photos)
- DIY New Year's crafts: 70 photo ideas and a master class on making crafts for the holiday
We glue felt boots to the bottom of the coat and mittens to the sleeves. Now we make a head in the form of a circle from flesh-colored clay and glue it to the coat in the same way.
From white clay we make sausages for collars, skirts, hats and sleeve cuffs. Carefully make small and frequent stripes across these sausages to create a fluffy effect.
For hair and beard, we pass white clay through a garlic press and attach it to the head. Don't forget to make eyes and glue on the nose.
Don't forget to bake the toy in the oven for at least 2 hours at 80 degrees. So our fairy-tale hero craft is ready for the New Year, which can become an excellent Christmas tree decoration.
Princess Frog
For this craft you will need a set of colored paper, scissors, glue and a few pearl beads.
Cut a circle from a sheet of green paper, then cut out a narrow triangle to the middle. We will get a water lily leaf. As a decoration, place beads placed on it with glue.
Roll up several narrow long bags and place them in a circle, with the sharp base on top. Make each next layer of bags smaller in size.
To make the last few pieces, use yellow paper. Use them to cover the middle of the resulting water lily. Glue it to the side of the sheet. Place a frog nearby. There are also plenty of options and frogs. Our frog princess can be made of plasticine, paper, basically, anything.
Practical crafts for the home from wood cuts
There are many ideas for using wood cuts to make room design elements and various useful things.
Crafts for the kitchen
Beautiful objects made of natural wood will fit perfectly into the interior of the kitchen. In addition to decorative functions, they can be used for other purposes.
A well-processed wide cut of wood can be used to make a cutting board.
Practical stands for kitchen utensils can be made in different ways.
The simplest of them is to take a cut of a sufficiently large diameter. Sections of branches can be connected using nails and slats in one or two layers. There is no need to apply varnish for this purpose of the product.
If you make hot stands from coniferous wood, then when heated they will fill the room with a pleasant aroma.
Decor of mirrors and photo frames
Small wooden blanks can serve as excellent design elements for a photo frame or mirror.
To work you will need a plywood base. The size of this base should be larger than the size of the mirror by the width of the intended frame. The edges must be additionally sanded; you can paint the base in the desired color.
Fastening the finished product to the wall should be thought out in advance by attaching loops or a strip to the back wall of the base.
Wooden elements are glued along the contour to the base, forming a frame.
If this is a frame for a mirror, then the mirror itself must be mounted on liquid nails.
Once dry, you can place the mirror in place.
Wall panels
Creating an interesting wall panel from saw cuts gives room for imagination. The size and shape can be any, and the material can be used in various types of wood.
The work begins with making the frame. The parts are placed in the finished frame, and the voids between them are filled with epoxy resin or painted over.
Clock made from sawn wood
To implement this idea you will need a clock mechanism, a beautiful cut of wood, a drill, paint and a brush.
Step-by-step instructions for work.
Chicken Ryaba
The main composition is a nest with a golden egg and a chicken.
Make a nest out of straw so that it does not fall apart, fasten it in several places with thin wire.
Wrap a regular chicken egg in gold foil and place it in the nest. A chicken can be easily made from plasticine or cut out of cardboard. 5 minutes, and the craft on the theme of the Russian fairy tale itself is ready!
Creating crafts develops not only attention and motor skills. During the lesson, the child learns to create, gets acquainted with the world around him, reflects, and fills his inner world.
By the way, making crafts is actually an exciting activity not only for children. Try it! Join your child and go to the world of fairy tales and magic.
Themes of fairy tales in the field of children's creativity
A child can make delightful crafts on the theme of a fairy tale himself, under the guidance of his parents or teacher. Often children under 7 years old cannot yet make things of complex shapes on their own. In this case, they have to turn to a senior mentor for help.
The teacher, for his part, can give advice regarding:
- choosing the right material;
- manufacturing technologies;
- decorating the product.
Photos of crafts based on fairy tales
Stage 3. Assembling the craft “Near Lukomorye there is a green oak tree” from the prepared parts
— Using a glue gun, we glue the element prepared in the second stage with a sandy shore and sea onto the cardboard—the basis of the entire craft—in the right corner.
— Glue on a rug with grass. Using scissors, we adjust its edge to the curves of the sandy shore.
— We attach the oak (see the first stage) to the base with grass. To do this, we pierce it through and insert a wire into the hole. We secure the wire by bending it from the bottom.
— We wrap the chain around the oak tree. We place a mermaid and a scientist cat on the oak tree. We fix everything with hot glue using a glue gun.
— We mask the shortcomings with pebbles, if there are any. The shortcomings include sloppy places and places where the joints do not match exactly. We also mask the junction of the shore line with the grass with stones.
- The ends of the cardboard - the bases of the craft - are tinted with paints.
This is what you will get at this stage (see photo - top view of the craft).
How to make a paper swan for “The Tale of Tsar Saltan”?
This skill will be useful to the child; in “The Tale of Tsar Saltan” this noble bird is one of the main characters. If you are crafting with young children, show them an easy way to make a swan.
As you can see, you need to take a square sheet, fold it first once diagonally, then along the second diagonal. Following the photo prompt, turn this blank into a beautiful bird.
There is another great option. Having made such a swan, place it in your summer cottage and perform a performance based on Pushkin’s fairy tale with your children.
Place the next trim as close as possible to this one. Decorate the entire swan in this way and paint its nose.
Insert reinforcement along the rod into the lower part of the bird, and drive their ends into the ground. But it is better to first lay a blue synthetic fabric or a substrate of this color on the soil, and cut this material in the form of a lake. Then fix the swan and flowers from plastic bottles here.
If the child is older, show him how to make a swan from origami paper. To do this, you first need to roll up a lot of blanks as follows.
Each of these triangular elements has two pockets and two corners, so they will be easy to connect together. The following step-by-step photographs show how to make a swan to illustrate Pushkin's fairy tale.
Assemble origami modules, starting from the bottom, lay them out here in a circle. After you make the body of the bird, you need to make two wings, and then make the neck, head and beak.
You can make a swan using the trimming technique.
To do this, cut strips from a white napkin, then shred them into squares with a side of 1 cm.
Each one is screwed onto a pencil and glued onto a swan drawn on cardboard. This base must first be lubricated with glue. Plasticine can be used to attach trim pieces. You need to knead it, coat the swan drawn on cardboard. If this is a painting, then using the trimming technique, folded squares of the desired colors are attached here to decorate the background.
If you have enough time, then the swan for Pushkin’s fairy tale can acquire these luxurious feathers; they are cut out of paper and glued to a prepared base. The bird's neck can be decorated with cotton pads.
Stage 2. Making the sea and the coast in Lukomorye
Step 1. Take a large box - the basis for the craft “Green oak at Lukomorye”. We cover its end with strips of paper towel using PVA glue.
Step 2. Cut out a quadrangle from white cardboard, shaped like a trapezoid. This is a preparation for the sea and the sandy shore of Lukomorye.
Approximate dimensions of this part for a box measuring 35 x 24 cm:
- the larger base is 16 cm,
- smaller base - 6 cm,
- the height of the trapezoid is equal to the width of the cardboard base (that is, equal to the width of your box).
- the right edge of the “trapezoid” is a smooth edge and is located at a right angle to its base, and the left side of the “trapezoid” is a curved line - the line of the coast.
Step 3. Draw the sea in Lukomorye.
We paint the part of the trapezoid that will represent the sea with blue or turquoise paints.
Step 4. Making a sandy beach for Lukomorye.
To complete the sandy part of our Lukomorye we will mix semolina, yellow and green bath salts with PVA glue.
Note: we take more semolina (it makes up most of the mixture). Add a little glue to the mixture to make it thick.
We apply the resulting mixture to the part of the part where we have planned the shore. We press shells and small stones into it. We dry the workpiece in the oven with the door ajar at 50-70 degrees (probably, you can dry the workpiece on a radiator - you need to try this).
Step 5. Make the sea in Lukomorye three-dimensional (with a 3D effect).
The next step is to create the sea for our craft. I discovered the technique for making it on forums among modeling enthusiasts, creators of dioramas and miniatures.
How to make a volumetric sea for Lukomorye:
- on that part of the part where we have planned the sea and have already applied blue paint, we squeeze out silicone sealant. For relief, I applied silicone in two layers.
- using a teaspoon soaked in water, we form waves running onto the shore.
- to imitate white foam, you can place pieces of cotton wool under the silicone wave using a toothpick.
Materials and tools for making crafts with children
Waste materials and natural materials, as well as various household items, were used in the making of the craft. It is not necessary to strictly use the listed materials; you can replace them with those parts that you have at home.
To make the craft “Near Lukomorye there is a green oak” you will need:
- thick cardboard from a box measuring approximately 35 x 24 cm for the base,
- paper towel,
- white cardboard (1 sheet A4 format),
- live oak leaves,
- acorns (a few leaves on a branch look interesting),
- acrylic paints, acrylic varnish,
- paper bag for coal - top layer, turned inside out (for oak),
- semolina, pebbles, shells, bath salts,
- PVA glue,
- colorless silicone sealant for kitchens and baths (tube),
- artificial grass measuring approximately 24 x 24 cm (can be purchased at fix-price stores),
- hot glue gun,
- wire, gold chain 1 meter,
- toys from Kinder Surprise,
- chest, rhinestones,
- play dough,
- skewers for kebabs,
- cardboard box, plastic,
- dried flowers for the landscape (for example, you can make shrubs from oregano and yarrow),
