How to decorate champagne as a gift with your own hands
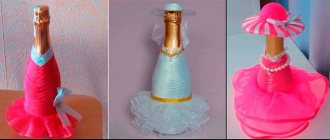
In this master class you can learn how to make a pink lady from a champagne bottle.
You will need:
- bias binding (10-11 m)
- glue (preferably construction glue)
- scissors
- fabric for bows
1.
To make the top of the dress you can use silver braid. You just need to glue it, covering the emblem on the bottle.
2.
After you have made two overlapping rows, prepare a pink ribbon. Use just a little glue to stick the tape to the bottle. Do it a little obliquely.
When you have reached the middle of the bottle, you should have something like this:
* Next, wrap the bottle completely with a whole cloth, while continuing to apply small drops of glue to the fabric.
3. After you have wound the fabric to the end, its end needs to be glued in the place where it will be approximately covered by the skirt. This way you will hide all the seams.
4.
It's time to make the skirt. To do this, prepare a ribbon for the bow and gather it onto a thread. In this example, the tape is 1.5 meters long, but you can choose it yourself, make it longer or shorter.
5.
The skirt can be attached to the bottle using glue or thread tied around the bottle.
Panel
Using colorful and different-sized plastic plugs, you can create a panel with an intricate mosaic. On a single canvas they will look catchy and impressive.
There is no particular specificity in execution, since only artistic visualization of the concept is required. From technical equipment - a board of the required size, glue or screws and a couple of dozen corks of the required colors.
How to decorate champagne. Hat for a lady.
In this example, you will be able to make a hat for the lady that you prepared earlier. The only difference is the color chosen to cover the bottle. In this example it's blue, but you can leave it pink, or choose a color that you like best.
* Prepare the bottle by decorating it as in the previous example.
Cooking the hat
1.
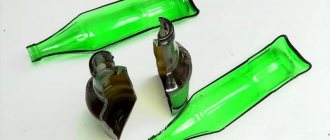
Cut a circle from a plastic bottle. The size of the hat will depend on the diameter of the circle.
2.
Inside the cut out circle, cut out another circle - you will have the part of the hat that is attached on top of the champagne. This means that you need to measure the diameter of the neck of the bottle, and make the inner circle a little larger so that the hat is a little larger.
3.
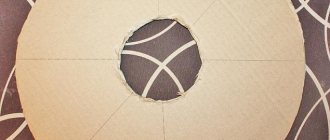
Next, cut out this shape from cardboard (the diameter of the paper circle is equal to the diameter of the hole in the plastic circle).
*Remove strips one at a time.
*Use a stapler to attach the cardboard to the plastic. Next, use your imagination to decorate the hat. In this example, satin ribbon and lace were used.
The photo on the left is a top view, the photo on the right is a bottom view.
Crafts made from champagne corks
The mushroom-shaped shape of sparkling wine corks allows them to be used in almost any product of applied design.
This element for clogging the bottle is formed in a more reliable way from compacted cortical material, therefore the scope of application is much wider than that of wine corks.
How to decorate champagne with sweets
You will need:
— silent paper (2 orange sheets, 1 green sheet)
*Tissue paper is thin paper, also known as tissue paper. You can find it at gift wrapping racks, as well as in specialized art stores.
- candies (in this example there are 48 pieces)
- raffia
*Raffia are long fibers that can be found on the leaves of the raffia palm tree. They are popular among florists and are used in arts and crafts.
- hot glue
- hot glue gun
1.
Prepare some orange tissue paper and cut it into 7 x 7 cm squares.
2.
Apply glue to the flat side of each candy. Now you need to glue the candy into the middle of the paper square.
3.
Next, you need to fold the edges of the paper towards the top of the candy. Start gluing the candies to the bottle using glue.
* It is better to decorate the bottle with candies from the bottom up in a circle.
* Try to glue the candies tightly to each other.
4.
Making leaves. To do this, prepare green tissue paper and cut out long narrow leaves from it.
5.
The leaves need to be glued together in several layers. Next, you need to decorate the neck of the bottle with them.
6.
Your bottle will look even more like a pineapple if you wrap some raffia around the neck.
The best crafts from wooden corks
This paragraph describes instructions on how to make crafts from corks large-scale and spectacular.
How to beautifully decorate a bottle of champagne
It is customary to decorate weddings with beautifully decorated bottles of champagne. In this master class you will learn about another original way to decorate a bottle. A satin ribbon and your imagination will help you.
It is worth noting that such a decoration is suitable not only for a wedding table, but also for any other holiday, such as March 8 or a birthday.
You'll need:
- silk fabric
— satin ribbons (2 colors, the width of each ribbon is at least 4 cm)
- golden braid
- bias tape
- lining
1.
Preparing a dress pattern. It consists of a bodice and a skirt.
First you need to do it on paper. Take the dimensions of a champagne bottle as a guide and then transfer it to the fabric.
* It is best to use thick satin and silk.
2. Sew along the edge of the satin ribbon, loosening the thread tension on the sewing machine in advance.
Next, pull one end of the thread to tighten the ribbon and create a ruffle.
* It is advisable to put fasteners at each end so that when working with ribbons, the tightened edges do not come apart.
3. Using tailor's pins, you need to attach the ribbon to the bottom edge of the skirt. Make a zigzag stitch using a machine.
4.
Decorate the entire skirt by alternating ribbons of two different colors (in this case, white and burgundy).
* Leave no more than 3 cm between rows.
5. When you sew the ribbons, you should make sure that the top row completely covers the joint seam of the bottom row.
*If you want to hide the stitching on the wrong side, you can use a lining. It is worth placing the skirt on the fabric, drawing the outline of the part and making a lining.
6. Fasten all the parts using pins. It is also worth securing the edge with machine stitching (see picture).
7.
Now you need to edge the edge of the product with bias tape.
8.
Decorate the bodice with ribbon. To do this, you need to put the tape on the bodice and then grind along the edge, i.e. fasten the two parts together and then twist them out.
9.
The seam must be hidden by sewing the bodice and skirt with ribbon.
10.
Start decorating the dress with a bow (brooches, sequins).
Removable felt cover
The original decoration is reusable felt covers in the shape of Father Frost and the Snow Maiden.
Felt covers for champagne bottles
Take:
- a bottle of champagne;
- paper;
- bias tape in red and blue colors (sold at any sewing store);
- silver ribbon;
- glue;
- sushi stick;
- a little padding polyester or cotton wool;
- needle, thread;
- wide red satin ribbon;
- decor (white beads, lace, sparkles).
Making a cover
Draw 2 rectangles on a sheet of paper, one with sides 14 and 30 cm, the second - 8 and 30 cm. Cut them out. Attach the wider one to the bottle, glue the ends of the part so that the resulting pipe can be easily removed. Now glue the second rectangle at an angle, cutting off the excess parts. You need to act carefully. Try to make the part even: all small folds and irregularities will be visible on the finished product.
Felt case in the shape of Santa Claus
When the glue dries, start decorating the case. Apply silver tape to the top of the paper piece and cut enough to make a full turn. Place the tape on the paper. If it is wide, then one strip is enough; a narrow one will have to be glued in 2-3 rows.
Christmas bottle covers
Take bias tape and cover the entire cover with it, all the way to the bottom. Proceed in the same way as when gluing tape.
Christmas bottle covers
Take the lace, attach it at the junction of the trim and the ribbon - you will get a collar. Do not rush to cut off the lace by wrapping it around the bottle: use it to disguise the junction of the trim. You can also trim the bottom of the cover with lace.
Satin champagne case
Try removing and putting the cover on the bottle again - is it easy? If no difficulties arise, then everything was done correctly.
Staff
Start making the staff: take a stick, coat it with glue, and then wrap it with red bias tape. Decorate with silver ribbon, securing the ends with hot glue gun.
A bag with presents
Take a wide satin ribbon and cut a small strip. Fold it in half and sew it together using a sewing machine or needle and thread. You need to leave 2-3 cm unstitched on each side. Turn the finished bag right side out and put a piece of cotton wool or padding polyester in it.
New Year felt and wool decoration for bottles
Cut a small strip of narrow silver ribbon and tie a bag. If desired, you can decorate the bow with a bead.
A cap
Cut a strip of paper slightly longer than the circumference of a champagne cork. Glue the ends of the part. Attach it to the paper and draw a circle. Cut it out and glue it to the cylinder.
Knitted bottle covers
When the glue dries, decorate the workpiece by covering it with a wide red ribbon or bias tape. Secure the tape with hot glue.
"Clothing" for New Year's bottles
Decorate the bottom of the hat with lace or sew sequins in the shape of snowflakes onto the hat.
New Year's apron for a bottle of champagne
Assembly
Christmas Bottle Decor
Attach the bag to the staff, and then glue the entire structure to the case.
A bottle of champagne decorated with Christmas tree decorations
Make a cover in the shape of the Snow Maiden, just use blue bias tape rather than red.
Champagne bottles decorated for the New Year
How to decorate a bottle of champagne with your own hands
You will need:
- satin ribbon (1 chocolate color, 1 white color; length 2m, width 3cm)
- white satin ribbon (length 60cm, width 6cm)
- fabric for base
1.
First you need to cut out a dress, focusing on the size of the bottle.
2.
You need to make shuttlecocks from satin ribbons. To do this, sew a stitch along the edge and pull it together to create ruffles.
3.
Sew ruffles onto the skirt.
4.
The first row should consist of the widest strip that needs to be stitched.
5.
From the center of the waist line you need to draw an isosceles triangle (see picture).
6.
Sew white ribbons, 3cm wide, around the perimeter of the triangle.
* In order for everything to work out neatly, you should secure the product with pins, and only then start grinding.
7. Cover the edges of the triangle with a frill made from chocolate-colored satin ribbon.
8.
Next, drape the skirt with chocolate ribbons as shown in the picture.
9.
Use wide white tape (6cm) to cover the gaps in the drapery. On top of this ribbon also apply a narrow chocolate ribbon (3cm) and stitch.
* If you pull the end of the thread, you will be able to tighten the ribbon and distribute the folds beautifully and neatly.
* With this detail you can hide undraped areas.
10. Prepare a satin ribbon (6cm) and sew it onto the bodice of the dress. You can add sequins for beauty and sew on ties.
11.
At the bottom you can decorate the dress with white ribbon bows.
Chair upholstery
Making crafts from corks with your own hands is especially interesting if the result of creation will be useful in everyday life.
When designing chair upholstery, measurements of the dorso-isciatic distance will be required. Then, using compacted wire, the upholstery fabric is woven according to the mesh principle.
Passing through the corks with mutually perpendicular stitches, string them close and tightly, securing with wire knots. The remaining tails are wrapped around the chair frame.
How to decorate a bottle of champagne with ribbons
For a wedding or anniversary, the following champagne bottle decor will also suit you.
You will need:
- satin ribbon (3.5 m)
– gold brocade ribbon (1.5 m)
- glue (preferably instant)
- scissors
- a bottle of champagne with gold foil
1.
Prepare a bottle and tape and measure its approximate length for the first layer. To do this, attach the tape to the neck of the bottle.
2.
When you have measured the length, cut the desired piece of tape and mark several points on it with glue.
3.
Next, wrap this piece of tape around the bottle to cover the champagne wrapper. It is advisable to tighten the tape well, thereby preventing unevenness.
4.
Measure out the second piece of tape. It will be longer.
5.
Proceed with the second piece as with the first piece of tape, i.e. Mark the dots with glue and glue. It is advisable that the ends of the ribbons be positioned equally, this will ensure a beautiful and neat pattern.
6.
Continue gluing the next two layers (3rd and 4th) in a similar manner.
7.
Now prepare the gold ribbon. It also needs to be measured and glued. Make 2 rows (see picture).
8.
Another piece of gold tape needs to be glued to the bottom of the bottle.
9.
Prepare the blue ribbon again. Measure and glue to the bottom of the bottle so that the seam is at the back.
10.
Now we cut 7-8 blue ribbons of the same length and glue them in the same way - so that the seam is at the back.
11.
Here's the rear view. A not very neat seam has formed that can be easily closed. To do this, prepare a stationery knife and use it to make a slot for the end of the tape, which needs to be inserted there.
12.
Apply a little glue to the tip of the blue tape and push it through the gap.
13.
Next, you need to apply glue to the entire tape and press it tightly to the bottle.
14.
Pay attention to the middle of the bottle, there is an open space there. This is where we attach another piece of golden ribbon. The corners that stick out from the front need to be cut off.
15.
Now you can decorate the front of the bottle - add bows, lace, beads, etc.
Corrugated paper
This bottle decoration option is one of the fastest and most budget-friendly. For decoration, you only need glue and several sheets of corrugated paper in the desired shades.
Flowers
Making paper flowers is easy and interesting, but this decoration of a champagne bottle for March 8 should be used with caution. Not everyone likes to receive artificial flowers as a gift. Therefore, this method of decoration can be chosen only if there is one hundred percent confidence that the lady being gifted will be happy with such a gift.
If this style is suitable, then there are practically no restrictions for imagination. Roses, peonies, carnations, orchids and daffodils - whatever your heart desires.
After making the blanks, decorating the bottle by March 8 follows the standard scheme.
The container is wrapped or covered with corrugated paper, on top of which decorations are glued.
Not only artificial flowers, but also ribbons, beads, bows and candies can be used as decoration.
This method of bottle design is much safer than decoupage. Of course, you shouldn’t involve children of kindergarten age in decorating, but a teenager will be able to decorate a bottle for March 8th with his own hands in this way.
Dress
“Clothes” for champagne can be made either removable or securely glued to the glass surface.
The set of materials and tools for making a “dress” for a bottle is similar to flower decor:
- paper;
- glue;
- champagne;
- scissors;
- ruler;
- pencil;
- other decorations (if necessary).
If the outfit will be complemented by a playful hat, then you will additionally need a piece of thick cardboard or plastic (for the base) and a compass.
The scheme for making the outfit will depend on the final type of decoration of the bottles on March 8th.
In the simplest version, the neck is covered with shiny paper, and the bottom is covered with a cover with a high “collar”. To do this, it is enough to glue an even cylinder of the required diameter. The edges of the cylinder are glued two-thirds, and the remaining part is folded back and decorated (with beads, sequins, lace, etc.).
If a straight “skirt” is not suitable, then the bottom can be decorated with additional flounces or frills.
For the cap, a disk of the required diameter is cut from the base. A hole is made in the center for the neck (you should get a flat donut). Next, the workpiece is wrapped with corrugated paper tape.
The central part can be simply decorated with flowers and bows. Or you can make a full-fledged crown, walls and bottom, also by first wrapping them with paper of the desired shade. To do this, you will need a cardboard ribbon (its width should be equal to the height of the future hat) and a circle with a diameter equal to the bottom hole (for the bottom).
After decoration, the blanks are glued together in such a way that all joints remain inside the hat. All defects are hidden under the decor of beads and flowers.
No one forbids combining several ways to design bottles for March 8th. A dress made of corrugated paper can be combined with candy decor or decoupage of the open part of the glass surface.
champagne bottle design. decor of bottles
How to decorate champagne for the New Year
You will need:
- thick aluminum foil
- medium thickness wire
- glue
- decorations (artificial or natural spruce branches, tinsel, small New Year's toys, ribbons, beads)
1.
First you need to wrap the bottle in foil. It is advisable to cover in several layers (from 2 to 4 depending on the thickness of the foil). Try to press the foil tightly against the bottle.
2.
Now you need to attach the wire. Wrap it around the bottle, but not tightly, so that you can then remove it when you want to open the champagne.
3.
Proceed to the most important thing - the actual decoration. In principle, there are many options and they depend on your imagination and available materials.
You can take a few Christmas tree branches and use glue to attach them to the foil. This can be done in a spiral (see picture), and it is advisable to start from the base of the bottle.
In those places where the foil is visible, you can attach ribbons, fabrics, wide braid or decorative paper. Places where glue may be visible can be hidden with tinsel.
4.
Add beads, pine cones, toys, candies, small Christmas tree decorations, etc.
Crafts from wine corks
There are plenty of ways to make a unique, practical or one-time creation using wine corks. Below are the most useful and attractive ideas for creating them.
Bottle preparation
Both empty and full containers must be properly prepared for the procedure. First, remove the label and any remaining glue along with it. There are two methods for performing this procedure:
- Soak the label paper in hot water and then quickly tear it off. The method is not considered the most effective, since often the glue remains on the glass and has to be scraped off.
- Heat the label with dry, hot air and slowly tear off one centimeter at a time. A hair dryer turned on at full power can act as a source of flow.
After cleaning the glass, it is thoroughly washed and dried. Then the surface of the bottle is wiped with a cotton pad soaked in alcohol. This way the glass will be degreased, which will ensure good “adhesion” to the glue. Tapes are usually pre-cut after measurements are taken.
We decorate wedding glasses and other attributes
Decorating a wedding table is not limited to decorating bottles with your own hands with ribbons. Most often, they are decorated in the same way with other decor - boutonnieres, candles, etc.
It is better to buy glasses separately rather than take them from a set. Most often, they are stored for many years as a memory of the wedding, without washing away the decoration. Next, we decorate the glasses, like the bottles, with satin ribbons with our own hands so that they form a single set. Decorative elements may differ, but it is worth tying bows from the same ribbon that is woven around the champagne on the stem of the glass. Next, the small decor is attached with transparent glue.
In addition to wedding bottle decor with satin ribbons, we offer a master class on making a basket (based on soap and pins).
See alsoLarge paper flowers in hall decoration
Wedding bags for brides
Having a bridal bag is very important at a wedding. You can put various small but necessary things there, such as a handkerchief, lipstick, mirror or comb. It is very convenient to make such bags with your own hands using the kanzashi technique. In this case, you can choose a fabric for the bag that will perfectly harmonize with the bride’s dress. Wedding bags can be made in the Pompadour style. This is a very simple, but very beautiful and elegant model. For needlework we will prepare the following materials and tools:
- a piece of white fabric measuring one meter by sixty centimeters;
- white cord, one meter;
- thin lace one hundred and sixty centimeters long;
- large beads and sequins;
- safety pin;
- thread and needle.
We begin making a bag by cutting out two circles from fabric, each of which has a diameter of fifty centimeters. We will also need a flower to decorate the bag, and for it we will cut out six small circles. The diameters of these circles should be eight centimeters. In addition, we will make two stripes thirty-five centimeters long and two and a half centimeters wide, which can be clearly seen in the step-by-step photos. We begin by folding large circles, placing them facing inward. We sew the common edge at a distance of five millimeters from the edge, but leave a piece of the circle free so that later we can thread the lace inside. Having finished sewing, turn the circle right side out and iron it well.
The handles for the bag will be made from the two strips that we prepared in advance. We fold the strip, sew seams along the edges, and iron it. We sew each handle to the bag. After the handles, make two parallel seams, adding lace to the bag. The distance between the seams should be sufficient to insert the cord. We leave unstitched the area that is intended for inserting the cord. We thread the lace using a safety pin, and then put a bead on each end, tying knots. All that remains is to make a flower from the small circles that were made earlier. From each circle we make one petal, folding it three times and collecting the bottom with a thread. All the petals need to be sewn, and the central part of the flower should be decorated with sequins. All that remains is to sew on the flower, masking the cords, and the work is finished.
Baskets for wedding table decoration
Wedding baskets are a very important attribute necessary for table decoration. To make such a basket at home using the kanzashi technique, prepare the following materials in advance:
- wicker basket;
- artificial flowers, three pieces;
- satin fabric and wide satin ribbon;
- thin lace.
Read
A lesson on creating beautiful bows from ribbons using the kanzashi technique
The weaving of the basket does not matter much, because the bottom and handle will be decorated with satin fabric. To make such a decor, you will need a piece of fabric of sufficient size. We place the central part of the fabric in the basket's container, leaving the ends to cover the sides. We glue artificial Orchids to the side of the basket, near its handles. To decorate a kanzashi wedding basket, give preference to white, green, gold and silver colors. Wrap the handle of the basket with a wide satin white ribbon, which will give it a delicate and wedding appearance. We straighten the fabric well, and where necessary we make frills and folds. We help ourselves with this with a glue gun. The last step is to glue a piece of thin, beautiful lace along the top of the basket's border. It is customary to place such wedding baskets in the center of the table and fill them with petals of beautiful flowers to give the wedding a festive and solemn look.


