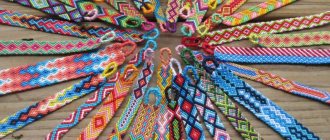
Yarn pompoms. What are they needed for
As an independent product, they are very cute and cute. But the need is not limited to this - after all, with their help they make a huge number of wonderful things! They decorate hats, scarves, mittens, booties, blouses, etc. with pompoms. Craftswomen have not limited themselves to clothes and create interior items to liven up rooms - they sew them onto pillowcases, bedspreads, blankets, make warm and cozy rugs for children's rooms, decorate ottomans, decorate postcards. And how many interesting soft toys are created from fluffy pom-poms! So, once you start making pom-poms from yarn, it will be difficult to stop! This is a very fun, interesting and useful activity!
Try to keep your child busy and create some interesting thread crafts together. This brings us closer together and joint creativity will be beneficial!
Fun fleece hats
What kind of hat should a baby have? Of course, soft, warm and comfortable. It’s even better if, in addition to all of the above, the baby’s hat is fashionable, bright and different from others. And where can I get such a hat? I suggest you sew a fun and bright children's hat from fleece with your own hands.
Why is it better to sew a fleece hat? Fleece is a lightweight, soft, pleasant to the touch, anti-allergenic material, synthetic “wool” made from polyester. Fleece Products made from this fabric are light, durable and retain heat well, thanks to the large amount of air contained in the so-called “air chambers”. We can say that fleece is specially designed for babies. Fleece does not absorb moisture, but conducts it well. Children do not sweat in clothes made from this fabric because fleece “breathes” and retains heat perfectly.
The fabric washes well and remains soft after repeated washings. In addition to all of the above, fleece is sold in a very diverse range of colors, and most importantly, sewing from fleece is a pleasure. The edges of the fabric do not need to be further processed, the fabric does not fray and is easy to cut.
This is interesting: Alexey Vorobyov and Polina Maksimova
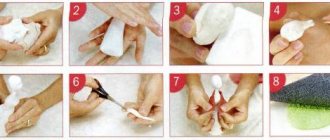
To sew a baby hat, we first need to measure the circumference of the child's head. How to do this is shown in the photo on the right. We use a centimeter to grasp the head so that the measuring tape passes through the forehead and the back of the head - this will be the circumference of the head. Then we measure the distance from ear to ear through the top of the head - this will be the depth of the cap. For a simple hat, these measurements will be enough.
The art of making pompoms
Few people realize how easy it really is to make a pompom from threads with your own hands.
Nowadays there are many easy options for creating fluffy balls. You can make a pompom of any color and size, you just need to choose the right manufacturing method.
Below you can see step-by-step instructions for creating pompoms with your own hands and choose the one that suits you best.
How to make a pompom from corrugated paper: step-by-step instructions, design ideas, photos, videos
multi-colored crepe paper pompoms suspended from the ceiling
- The technique for making a pompom from corrugated paper is similar to that discussed in the previous section.
- The difference is in the preparatory stage. Cut the corrugated sheets into identical rectangles, for example, 20x30 cm in size.
- Be careful when securing the center of the sheet with thread or wire. The paper is thin and may tear from excessive pressure.
- To make pom poms more interesting, fold 2 or more colors of paper into an accordion shape. Alternate them at your discretion.
step-by-step instructions in pictures for creating a pompom from corrugated paper
Tools and materials
To create beautiful, smooth and attractive balls, check out some secrets for making them. The correct course of your actions helps in your work and eliminates unnecessary stress in case of failures.
So, how to make a pompom for a hat from yarn? First, you should acquire all the necessary materials and tools.
The most important thing, of course, is the selection of yarn. It is better if it is dense, porous and voluminous - this will give the pompom airiness and volume.
The shade should be chosen based on the color of the product itself and match it.
The pattern for work directly depends on the creation method - it can be a ring, square, horseshoe, cut out of thick cardboard.
Naturally, the sharpness of scissors is very important - with dull scissors you will not cut thick layers of thread.
The threads used to secure the pompom must be different, much stronger than the main yarn. How you secure the pompom depends on them. A weakly tightened middle will not allow it to be even, the threads will fall out and the product will very quickly lose its shape.
You will also need thick cardboard for patterns.
Darning needle or crochet hook - for pulling the wound thread.
Wool
The most suitable yarn for pompoms. It makes crafts especially lush and soft. The thickness of the thread is selected depending on the diameter of the ball. For large ones - thicker, for small ones - thinner.
The threads may not be new, such as an unraveled scarf or sweater. In this case, they should be wetted and dried to level them.
IMPORTANT! From “curly” yarn, pompoms will turn out unattractive and unkempt.
Pattern
It is necessary to take care of the patterns. Craft stores sell ready-made ones, but it’s not difficult to cut them out yourself from thick paper. The width of the ring is half the diameter of the craft. The greater the width, the larger the ball. The smaller it is, the more miniature it is.
Stationery
For this work you will definitely need pointed, well-sharpened scissors. Depending on the chosen method of completing the craft, you may need a stapler or office clips , a compass, a ruler, and a pencil.
Fleece hats for women and girls
- Features of the material
- Models of fleece hats: fashionable and original
- What to wear with beautiful styles of fleece hats
Sports models of hats are most often made from high-quality material. These products include fleece hats for women. Modern fashion should not only be practical, but also stylish. These hats are worn to create modern casual and sports outfits. Do not forget that fleece has gained popularity quite recently, so there are not so many models of current styles in 2019.
Features of the material
In 2022, there are many models of fleece hats, all of them are warm and look very good when combined with appropriate things. It is worth talking about what features the material has. By highlighting its pros and cons, you can easily understand whether such a purchase is worth the investment.
We also note the flexibility of fleece. Hats made from it fit the head well and, with proper care, do not lose their original appearance. Softness and flexibility protect the product from severe wear. Modern models remain the same as when purchased - for long seasons.
Fleece is considered a hypoallergenic material. This is one of the reasons why it is very popular when creating sports models. Some girls face the problem that pimples appear on their forehead and face if they wear woolen hats. Such an illness will not occur if the hat is made of high-quality fleece. But you shouldn’t skimp on your purchase. It is best to choose a hat that is not only practical and comfortable, but also made from expensive fabric. It will last much longer than low-quality fakes.
Models of fleece hats: fashionable and original
Fleece sports hats are very popular. All thanks to the advantages of the material. These include a helmet-hat, earflaps and items with a scarf. But, they are not suitable to complement a business or office look. Therefore, this season it would be worth noting not only sports styles, but also those that are suitable for everyday life. Let's look at the photo to see which fleece hats will be fashionable in 2022 and how fashion designers decorate them with original details.
For lovers of an active lifestyle who cannot imagine themselves without constant movement, we advise you to pay attention to sports styles. The most successful option for those who love skiing is a hat-helmet. This product covers the head and neck. The hat is often used as a warm lining on a ski. In everyday wear, the product looks good with sports jackets. By the way, in the spring you can wear them with windbreakers that are fashionable in 2022 for women.
Sports styles include a fleece hat-mask. She is the one who is very popular among active girls. In modern fashion, such a model is considered not very stylish, but it provides good protection from strong gusts of frosty wind when descending from a high mountain on skis or snowboards. Today, styles with various prints are considered popular. The folk print - Khokhloma or Gzhel - is especially relevant in 2022. Hats decorated in this way look attractive, even when creating an everyday look.
Modern models are best divided into two groups. The first and most popular are casual fleece hats that can be worn to create original looks. Stylists include hats with a veil, as well as berets and caps. The soft material lends itself easily to experimentation. Therefore, fashion designers are presenting very bold products in 2022. A style with ears will look good in an everyday street look. The animalistic style looks attractive with casual jackets and original fur coats. For example, in winter, a fleece hat with ears or a veil can be worn with a blue fur coat.
In winter, try wearing insulated fleece hats. In frosty weather, beautiful styles with a warm lining would be appropriate. Don’t forget that a hat, even in a terrible snowstorm, should be first and foremost protection for the head, and only then a stylish attribute.
What to wear with beautiful styles of fleece hats
Beautiful styles of fleece hats look good with other things. To understand what is best to wear it with, it’s best to look at photos of the most successful looks of 2022. The most universal are simple models. For example, this could be a beanie hat or stockings. They look easy and relaxed in everyday looks. They can also be safely used as sports headgear.
Modern fashion does not dictate the rule that was widespread last season: that everything should be combined in color. Of course, if this is a business outfit for work or you urgently need to attend an important event, then the look should have no more than three shades. Such restraint is not appropriate in everyday life. Therefore, many girls are happy to wear beautiful bright hats, namely berets, beanies, stockings and caps with other equally original things.
Fleece hats look best with casual jackets. The question of whether the models can be combined with sheepskin coats is controversial. It is possible if the product is in a casual rather than formal style. But, with tanned leather, bright and original products will not initially look good. It is best to choose a simple style of gray fleece hat, decorated with a veil or crystals, to combine with a winter sheepskin coat.
Bright and original models look best with equally unusual outerwear. For example, casual jackets and down jackets, which will be fashionable in 2022, would be appropriate. Don't be afraid to experiment and combine a brightly colored hat with gray fur coats. Young fashionistas can wear the style with windbreakers, and in the summer with sportswear.
Making Tips
It is recommended to adhere to the following tips to make a high quality product:
- The porous and dense texture of the yarn gives pompoms pomp and volume;
- if you plan to create a product with a multi-colored design, you must use a pre-printed diagram;
- It is advisable to have special rulers or patterns for ease of creating a template. Shapes such as circle, horseshoe, square or rectangle are used as templates;
- scissors must be sharp;
- the colors of the decorated item and the pompom should not conflict with each other;
- Each of the pompoms included in the product must be tightly tied with threads in the center. This is necessary to maintain the neat appearance of the product for a long time.
Yarn selection
For making pompoms, stiff yarn with the addition of natural wool is more suitable.
It is best if the yarn is porous in texture. The finished products are voluminous, fluffy, and hold their shape well. However, they can be made from any yarn, for example, with the addition of synthetics or acrylic. 100% cotton yarn will not work as the pompoms will not be fluffy.
You can combine pompoms from any yarn into the finished product - this will give the item a unique look. Thick yarn gives the pom-pom texture. The more wool there is in the thread, the softer the product will be. To tighten the yarn more tightly, you can use strong threads, such as silk, when making a pompom. They will be invisible on the finished product.
Products made from pompoms require delicate hand washing at 30 degrees. Dry on a vertical surface. Then carefully comb it and trim it with sharp scissors.
How to get a product dense and round
How to make a yarn pompom neat, dense and round, and in such a way that it does not take much time, is described below. The greatest difficulty is to ensure that it remains dense and round and does not lose its shape over time due to the gradual loss of threads. To make the pompom tight and round, you need to tie a constrictor - a special strong knot.
To obtain the desired result, it is necessary to make a constrictor. This is a special type of knot, which is characterized by high tightening force. This knot is used to secure the thread workpiece.
The strength of the pompom can be ensured by tying it with wet thread and tying it several times. The more threads in the workpiece, the denser the pompom will be. In order for the pompoms to retain their shape for a long time, the yarn must be aligned. If using threads from unraveled products, they must be placed wet under the press.
If the yarn is thin
Pom-poms made from fine yarn are usually used to decorate items knitted from the same material. Although it will not turn out to be large in diameter, small products will look neat. It is best to make such a pompom on a fork. You will get small fluffy pompoms. They are not highly durable, but will look beautiful as decoration for things that are not subject to heavy loads.
How to get loose
To get a loose pompom as quickly as possible and without special preparations, you need to do the following steps:
- Threads are wound on the fingers To make the pompom loose, the threads need to be wound on the fingers
- The size is determined by the number of fingers on which the yarn is wound.
- The disadvantages of this option include the fact that the finished pompom does not retain its shape well.
How to make a pompom from faux fur: step-by-step instructions, design ideas, photos
rows of ready-made faux fur pompoms
- Take a cardboard blank with a slightly larger diameter than the future pompom.
- Place it on the inside of the fur piece and circle it.
- Cut out the result and sweep the edges of the future pompom from the inside so that the fur does not fall apart.
- Pull back the thread you used to sew. You will get a fur ball.
- Fix the thread so that it holds the edges tightly. If you plan to hang the pompom from something, leave it long, otherwise cut it off.
step-by-step photos of making a fur pompom
Yarn pompoms
They are often used to decorate knitted items (hats, scarves, mittens). They can be used for crafts with children. They are used to make cozy rugs, blankets, and chair covers.
There are four manufacturing methods:
- On a round base;
- Using a fork;
- On the hand;
- Fast way.
Making buboes using a template in the form of two donuts
Step by step instructions:
- Two rigid pieces are wrapped together with yarn. The more layers of strands there are on the templates, the more magnificent the bubo will be.
- The thread must be cut along the outer edge.
- Stretch a piece of thread between the layers of the workpiece and tightly tie the resulting pieces of yarn.
- Carefully remove the template.
- Fluff the “ball” and trim it with scissors.
How to make a pompom on a fork
This could be an ordinary table fork, or a cardboard blank in the shape of a horseshoe.
- Wrap the yarn around the tines of a fork.
- Pull across the middle and tie tightly.
- Remove from fork.
- Cut the resulting loops.
- Fluff the product.
- Trim with scissors.
How to make a small bubo
Fluffy pompoms of the smallest size will be obtained if the thread is wound not on four, but on two tines of a fork.
On a cardboard rectangle
This method is easy to implement. With the help of such cardboard rectangles it is easy to make smooth, fluffy buboes of different sizes.
How to make a large, lush bubo
A large bubo can be made using improvised means. For example: two plastic bottles or cardboard tubes.
How to make a pompom on your hand
By winding a strip of yarn around your hand, you can quickly create this fluffy miracle without any additional equipment.
- Wrap the thread around four or two fingers on the palm.
- Tie the winding in the middle.
- Remove the workpiece from your hand.
- Cut the loops.
- Fluff and trim.
A quick way to make pompoms
Sometimes you need to make a large number of buboes. For example, in order to make a rug or a chair cover from them.
To quickly make a pompom, it is best to use this method:
- Turn the stool or coffee table upside down.
- Having tied the thread to one of them, wind it between two supports, trying to position it horizontally and pull it evenly.
- Using a measuring tape, divide the entire strip into parts.
- Tie the wound threads crosswise, tying them tightly in the designated places.
- Remove the yarn from the support and cut between the constrictions.
- Fluff the “balls”.
- Trim with scissors.
Round on a fork - easy and simple
If you don’t have thick cardboard on hand, and you don’t want to bother with the blanks, then you can make a pom-pom on a fork. An ordinary table fork does the job just as well as plastic horseshoes for making pompoms.
Step-by-step action plan:
- Wind the thread around the tines of a fork;
- Using a piece of thread, pull the bundle in the middle;
- Remove the fork from the teeth and cut the resulting loops on both sides;
- Fluff, trim ends.
- The pompom is ready.
Made using a fork, it will be small in size. “Balls” are used to decorate children’s mittens, scarves, bacti, blankets, rugs, stool seats, and toys.
Mini rounds can be made on two fork teeth. The principle is the same as with four teeth. The work is not easy and requires perseverance and patience. The result is cute miniature pompoms.
Pompom from a bunch of threads
The last method is quite easy. Take a bunch of threads. Next, you need to tie it with a thread in the middle. After this, the bundle is folded into two identical parts.
Taking a couple of centimeters, you need to form several turns around the folded bundle of threads.
We tie the ends well and hide them inside. Next, you need to trim the ends of the threads in the bundle so that the pompom is neat and beautiful.
How to make a fabric pompom: step-by-step instructions, design ideas, photos
three fabric pompoms on the table
For such a pompom, prepare pieces of fabric 1.5-3 cm wide and 2 cardboard crescents.
- Between the latter, place one piece so that its ends hang freely.
- Wind the fabric in the same way as discussed in the yarn section. Be careful not to over-tighten the winding.
- Secure the remaining end with glue or a stapler.
- Using scissors, cut the strips between the crescents and carefully remove them.
- Pull the thread and tie tightly.
- Trim the fabric in a circle to give the pompom a nice shape.
- Hang it either from the ceiling, or create original bouquets, or attach it to the “wishes” tree.
step-by-step photos of making a fabric pompom
Pompom using a chair
If you need to make a lot of pompoms quickly, then this option is for you. All you need is scissors, thread and a chair. How to make a pompom from yarn?
The essence of this method is that you first need to form a sausage from threads. Next, cut it in half.
This is done by going through the following steps:
- We take a chair. Gradually wrap it with threads.
- Carefully remove them and tie them with pieces of thread. Be sure to ensure that they are at the same distance.
- After this, we cut the threads in the empty spaces. This way you will have many identical pompoms.
- You can also wrap the threads around the chair and only then cut them. It's much more convenient.
Material and tools for making pompoms
The main material for making pompoms is new wool yarn. It can be a natural thread or with synthetic admixtures, such as acrylic. A simple sewing thread can also serve as the basis for a pompom, but making balls from it will require more time and perseverance. Balls are also made from embroidery threads - multi-colored floss. You can also use dense and soft fabric, such as crimplein or fleece, as the basis for the pompom. Very often, multi-colored bows or tulle are used to make decorative balls in order to create beautiful children's girls' hairpins. Very beautiful pom-poms, often used by youth cheerleaders at sporting events or as Christmas tree decorations, are made from shiny foil ribbon.
We make pompoms from threads with our own hands step by step based on a cardboard circle template
To make a pompom you will need the following materials:
- Threads;
- Needle (it is advisable to take a large one with a large eye; a needle for threading an elastic band is perfect);
- Cardboard (for templates).
First of all, it is necessary to prepare templates for the future product. It is necessary to prepare two identical circles from cardboard, and then cut out the core in the center so that the width of the rim, and in the future the radius of the pompom, is approximately 0.5-0.7 cm.
We thread the needle, maybe in two layers. We apply two blanks to each other and begin to wrap the paper blanks with threads. The thread should not be too tight, but should not hang. We wrap in one layer, then the next, until the thread runs out. We make enough layers so that it is enough for a fluffy pompom. You can make layers of different colors, therefore the pompom will be colored. When changing the thread, the one that has run out should not be cut to zero from the workpiece; in the future, all the excess length of the threads will be cut off.
We continue to wind the threads until the required density of the threads located on the workpiece is felt. We fill the workpiece with threads until the empty center of the circle is completely covered, then the pompom will definitely be tight and dense, and therefore fluffy.
The next step is to cut the threads along the edge of the circle between the cardboard blanks. We cut evenly so that the length of the threads is the same. Most likely, you won’t be able to cut all the threads at once; we do it gradually, and then you’ll end up with a pom-pom like this.
Now let's start fixing the pompom. You need to move the cardboard a little and tie the center between the paper blanks with thread. The main thing is not to move from the middle. After this, the templates can be removed. Cut them and carefully pull them out. The pompom is almost ready, but its circumference is not even. Use scissors to trim the length of the threads. It’s better to grab a little bit at a time so you don’t suddenly cut off too much. We get such a wonderful pompom.
How to make a pompom from threads
Step 1
Cut out two rings from cardboard. The outer radius is 3 cm, the inner radius is 1.5 cm. Buy a compass (a goat’s leg is more convenient), teach your child how to use this useful tool, and at the same time explain how the radius of a circle differs from the diameter.
Step 2
We cut the wool into 4-8 threads, about 2 meters long
Step 3
We connect two cardboard rings together. We hold the beginning of the thread tightly with one hand, and with the other we begin to tightly wrap the ring in a circle.
You can first secure the threads to the ring using a loop. Fold the threads in half and insert the rings into the holes. Pass the loose ends through the resulting loop and tighten.
STEP 4
We wind the thread around the ring. It is convenient to use a crochet hook to pull the thread through the hole. We wind the threads until the hole closes. The more winding, the more magnificent the pompom.
Step 5
Using scissors, cut the threads along the outer edge of the rings.
Step 6
Spread the ring a little and tie the pompom with thread. It is convenient to wrap the tying thread around the pompom several times and then tie it.
Step 7
Remove the rings and shake the pompom so that the threads fluff up. If necessary, trim it with scissors.
The pompom is ready.
How to make a multi-colored pompom
To make a multi-colored pompom, you need to collect several threads of matching colors in a skein. Then we do the same as a regular pompom.
Pompom made from halves of different colors
We wrap one part of the ring with a thread of one color, the other with a thread of a different color.
Pompom with a spot of a different color
We wind a piece of thread of an alternative color around the ring.
Then we take the main color and wind it further, to the end, closing the winding from the first thread.
How to make a pom-pom from garbage bags and T-shirts: step-by-step instructions, design ideas, photos, videos
ready-made pom-pom from polyethylene T-shirts on the table
These rustling pom-poms are often used for dances, support groups for sports teams, and decorating festive costumes. Therefore, one side is always a handle, which is convenient to hold the pompom.
- Place the bags with equal sides facing each other. Cut off the handles and cut the sides.
- The remaining glued bottom will be the handle of the future pompom.
- Cut the fabrics of the bags into fringes up to a centimeter wide. Leave 2-5 cm to the edge intact.
- Roll the result into a tube and secure the handle with tape or thread.
- Straighten the fringe. If desired, add a layer of glitter tinsel along the outer edge.
- If the pom pom is made for cheerleading, attach a plastic handle inside it to prevent your hand from slipping while dancing.
step-by-step photos of collecting pompoms from garbage bags
How to make a beautiful pompom for a knitted hat?
- For a dense 8cm bubo you will need about 20 grams of yarn. For a smaller one - correspondingly less. The most common and correct method is to use a template made of thick cardboard (for example, from a shoe box). A stencil for pompoms can be made in different ways: rectangular and round. A rectangular one is, of course, easier to make, but a circle template will help you make the perfect bubo. Take a compass and draw a circle. Inside it is another one of a smaller radius. Cut a small hole between these circles for easy winding of wool threads. Now, using this blank, make another one of the same kind. How do you know what size the pumpon will be? The distance between the circles is half the pompom. The larger this measurement is, the larger the bubo you will make. Let's imagine that the radius of the larger circle is 6cm and the smaller circle is 2cm. 6-2=4. This means that half of the boom box will be 4 cm, and the whole one will be 8 cm. Try to make a small circle no more than 2cm to make it easier for you to form the cone.
Place the two circles together with a thread between them.- Make a circle with yarn around the smaller hole and clamp with a second template. Wind the yarn by pulling the thread through the slit.
- Hold the templates so that the loop sandwiched between the circles does not jump out.
- The more turns you make, the fluffier the pompom will be. When you're done wrapping, take your scissors and cut along the outer edge.
- The lower blade of the scissors should be between the circles - this will make it easier for you to cut and the pompom itself will turn out more correctly. Carefully pull the beginning and end of the thread, slightly moving the circles apart, and tie the bubo. Remove the template, shake the donut.
Using this method you can easily make a loose and large fluffy beautiful pompom. You can also make a colored pompom. To do this, wind threads of different colors. Shape the color distribution as you like. Either evenly throughout the bomb, or focusing on one side.
The cardboard template is not durable.
You can make a blank from a plastic jar lid. It is more elastic, so it will be much easier for you to wind. And such a template will serve you for a long time. Knitters often ask: how to sew a pompom to a hat . How can I make sure it doesn't wobble from side to side? Very simple! Those ends of the yarn that you used to tighten the pompom, always leave them longer. Pull the hook to the wrong side, tie tightly. Then pull them out to the front side again. Thread a needle through one of the threads, pierce the bubo again and pull it out again to the wrong side. If you do this, the pompom will stay firmly on the hat. Double fastening will ensure a beautiful position of the pomp.
Constructing a pattern for the lining
So, before you sew the fleece onto your knitted hat, you will need to take a few measurements. It is easy to remove them directly from the hat that you plan to insulate.
- First, measure the circumference of the hat. Here it is necessary to take into account that the lining is fixed at some distance from the edge of the product, leaving a neat edge or hem for the lapel.
- Secondly, it is important to determine the height of the headdress.
- Thirdly, mark on the pattern those places where the hat narrows or has some design features.
Fleece fabric is quite bulky - do not forget to take this into account when sewing.
How to make small pompoms from yarn quickly
The next described option for creating balls of thread is the fastest and, perhaps, the simplest! It is used when there are no accompanying devices, but a pompom needs to be made!
So how to make a small pom pom?
You just need to take a ball and wind the yarn onto your palm. Having collected the required volume, you need to tie the resulting skein in the center, cut the yarn along the edges and straighten it.
The only disadvantage with this option for making a pompom may be that it is quite difficult to tie the yarn with one free hand.
Artificial flowers made of gelatin fabric
Fabric treated with gelatin is ideal for handicrafts. It is from this material that simply perfect crafts are made. And work also brings a lot of positive emotions.
- white chiffon;
- yellow and green fabric paints;
- gelatin;
- scissors;
- pliers;
- glue;
- wire;
- pencil;
- cardboard;
- gauze;
- newspapers;
- white corrugated paper;
- awl;
- beads.
Fabric treated with gelatin is ideal for handicrafts
- Draw templates of future petals and leaves on cardboard.
- On another sheet, draw a circle, and in it there are five cloves, visually reminiscent of tongues of fiery flame.
- Cut out all templates.
- Dilute the gelatin in water and place the cloth in it, place in a water bath and leave for about five minutes. After this, remove from heat.
- Dilute the paints in a separate container and place the gelatin-treated fabric in them, immediately remove and place on newspaper, dry.
- Cut out all the necessary parts from the dried material.
- Fold the petals in half, and the prepared piece of gauze diagonally.
- Place a petal in the gauze, then hold this structure with one hand and with the other, move the gauze clockwise, twisting it a little.
- Repeat this manipulation with each of the petals.
- Pierce the backing with an awl in the central part and make a cross-shaped cut.
- Cut the corrugated paper into strips and wind it onto a wire.
- Bend the paper-wrapped wire at the tip into a loop and wrap the first petal around it.
- Coat the workpiece with glue.
- Attach all the petals to the stem one by one, twisting each of them slightly.
- Wrap the upper petals on a match to give the flower a neater appearance.
- Pull the gluing through the stem and secure it with glue.
- Glue the leaves a little back from the top.
Decorate the product with beads and straighten all the petals.
Making colorful pompoms
I want to make pom-poms for children's things not just fluffy, but also bright and memorable! Therefore, often for such purposes, several shades of yarn are taken, and the turns are alternated depending on the pattern that should be obtained on the pompom.
How to make a pompom from yarn, small or large - it doesn’t matter! The main thing is that it is unusual!
To work, you will need to cut out two circles with holes in the middle, as we described above.
The thread is wound along the pattern - first comes the shade that is located in the middle, then the yarn of the next color is taken and thus continue to wind the turns until one part is completely filled.
The next side is done similarly to the first, and the thickness, degree of tension of the turns, and color change must be absolutely identical!
You will have two parts - two pompoms. After you cut the threads along the edge, fold them together and secure with strong threads, tying a knot.
At the last manufacturing step, you will need to straighten the ball, fluff it and, if necessary, trim the edges.
This is how you can make a pompom from yarn - small or large, but bright and wonderful! They can be used to decorate children's things, interior items, or you can simply glue them to a carabiner and get a keychain!
How to make a pompom from napkins: step-by-step instructions, design ideas, photos, videos
several ready-made pompoms from blue napkins.
The more magnificent you want the pom-pom to be, the more napkins you take to make it. For example, for the middle option, 3 napkins are suitable.
- Trim the edges of each with scissors.
- Stack them and arrange them like an accordion.
- Secure the middle with thin wire.
- Carefully go through each layer, leveling it.
- To make the napkins as fluffy as possible, level the layers only in one direction, leaving the other flat.
- Then you can glue it with another similar napkin.
In addition to processing with curly scissors, you can trim the edges in a semicircle or house. Fold the straightened napkins on top of each other, 10-15 pieces at a time, if your goal is large and delicate pom-poms. Such products are a good solution for decorating children's parties, as well as events involving children.
Pompoms made from napkins are hung from the ceiling or other objects, or glued to thin twigs or clothing.
A method for the laziest
This manufacturing option is best used when you need to make a very large number of pompoms.
How to make pom-poms from yarn - small and large at once? You will need to use a chair or table.
We perform the following manipulations. The threads need to be wound around the legs of the auxiliary object, and then simply make the dressings at different distances from each other. The distances shouldn't be too different, otherwise you risk some of the pom-poms being sparse. After the entire length is tied, you can remove the entire tourniquet and cut the threads between the constrictions.
We make calculations for the wedge
The main part of the hat is the bowler, it consists of 6 wedges. To correctly calculate the base of the wedge, you need to take into account how thick the insulation of the cap will be. If the insulation is thick, you should add 6 cm to the circumference of the head, that is, you get OG = 48 + 6 = 54 cm. Now you can find the width of the wedge 54: 6 = 9 cm. The height of the wedge is found by dividing the distance from the eyebrows to the back of the head in half, that is 34: 2 = 17 cm. Now you can make the first part for the pattern of a children's hat with earflaps - a wedge pattern (1 part in the photo). We get a rectangle whose sides are 9 and 17 centimeters. Mark the center on the top side (9: 2 = 4.5) and build an isosceles triangle. From the middles of the sides of the triangle, we put 1 cm perpendicular to the side, then we connect the top of the triangle and the points of its base with a smooth line.
The easiest way is on your fingers
This method is known to every craftswoman. It is very simple and does not require any extra tools or equipment except yarn, sharp scissors and your hands. Moreover, the size of the accessory depends on the number of fingers being wrapped. Four is a large ball, three is a medium ball, and two or one is a tiny “bambon”, as the children call it. You will need it for baby booties, blouse buttons and other crafts.
- Choose wool of the desired color. Cut a small piece of thread from the skein to tie the finished product.
- Wind as much yarn around your fingers as needed for the accessory.
- Pull the prepared thread through the turns and tie the workpiece with a strong knot to form a bow. Carefully cut the sides of the bow with scissors.
- Fluff the finished product and trim, forming an even ball.
How to insulate a knitted hat?
So, for the header to perform its functions, the following conditions must be met:
- Convenience and ease.
- No accumulation of static electricity.
- Be strong and wear-resistant.
- The fabric must be free of any allergens.
As a rule, fleece is excellent for the cold season. This is practically the most convenient material to work with, it has excellent stretch, is easy to wash and dries quickly.
Fleece has gained wide popularity due to its relatively low cost, increased heat conservation, and softness. Its processing does not require specific skills and knowledge, or complex equipment. Machine washing is sufficient to maintain product hygiene.
The most important advantage of fleece material is that it does not produce a frayed edge when cutting, which means it does not require any additional processing of the seams.
You can choose absolutely any color - everything will depend only on desires and preferences. Some people like a plain background, while others are interested in a contrasting one. But sometimes a fabric that is too thin or a large knit reveals the shade of the lining. In this case, it is necessary to select a similar shade of fleece.
Tiny pompoms on a toothbrush
The process is the same: we wind, tie, cut, trim.
It’s very quick to make pom-poms on a toothbrush; they turn out small and neat.
As a result of my experiments with how to make pom-poms from yarn, I got these different pom-poms, which you can see in the photo.
How to make a pompom from tinsel: step-by-step instructions, design ideas, photos
a girl holds pompoms made of tinsel in her hands.
The tinsel is quite voluminous, it is quite difficult to collect it like yarn to create a pompom. Available means will come to the rescue, for example, straws, foam balls, and the figure-eight folding technique.
- In the first two cases, you should attach the tinsel so that there is no free space.
- If you took a foam ball, stick it in rows, starting from the middle.
- To give the pompom extra volume, wrap another row of tinsel on top. It will look especially beautiful in a different color.
- If you plan to hang the pom pom, use a glue gun to attach the string between the strands of tinsel.
Tassels, as one of the varieties of pom-poms
Tassels unobtrusively decorate knitted items, be it an accessory or a piece of clothing.
To get a beautiful tassel, you need to read the step-by-step instructions for creating pom-pom tassels with your own hands.
We place the thread across the template, and wind the rest of the yarn perpendicular to it. Upon completion of the winding process, we tie the tassel at a distance of 1-2 cm from the beginning with the original thread left. We trim the ends to the required length.
How to make a pompom from crepe paper: step-by-step instructions, design ideas, photos
Multi-colored crepe paper pompoms hang in the room.
Take a lot of crepe paper to create a pompom. Due to the thinness of its sheets, the required volume is achieved by their quantity.
- Lay out the sheets and cut them to standard A4 size.
- Fold with an accordion 1.5-2 cm wide.
- Secure in the middle with strong thread or thin wire. Leave a long tail if you plan to hang the pom pom from the ceiling.
- Cut the ends of the accordion on both sides with scissors, rounding them or giving them the shape of a triangle.
- Connect the ends of the accordion and begin to level the sheets layer by layer.
- Do this without haste, carefully so as not to tear the paper.
Instructions in pictures for creating a pompom from crepe paper
Pom Pom Crafts
Using yarn pompoms you can make such wonderful crafts and things for home comfort!
This:
- flower arrangements
- wreaths
- pendants
- Christmas decorations and Christmas trees
- toys
- panel
- coasters for mugs
- keychains
- bookmarks
- pillows
- rugs
- curtains
- and much more.
I really liked the idea of making letters with pompoms. If you remember, I once talked about knitted three-dimensional letters and later received a letter from my reader, a teacher, who, according to my descriptions, knitted an entire alphabet for children. I am delighted with such a needlewoman and creative teacher! And children would really like letters made from pompoms, and you don’t need to know how to knit.
I posted only a few photos of crafts, but you can see even more amazing ideas in my video.
Panel of pompoms in a hoop
Finally, my boast: how I made a panel from pom-poms.
I liked this idea on a hoop; I’m not indifferent to such fashionable things lately. I already have one panel in the hoop - with crocheted sunflowers.
- I secured a thin mesh in the hoop, stretching it well.
- I trimmed the edges and glued them with Moment glue on the back side.
- Using a hook, I pulled the strings from the pompoms through the mesh and tied the ends.
- But this was not enough, since in a vertical position the pompoms hung down. That’s why I also planted them with glue.
- At the bottom I attached a ribbon bow.
- I learned how to make a flower from a paper napkin and decorated my composition with it.
I tell and show how to make a flower from a napkin in my video in the publication “Simple topiaries from coffee and napkins with your own hands.”
This is the kind of coziness and crafts made from pompoms that I offer you, and we figured out how to make pompoms from threads for knitting with your own hands, large and small, using various devices.
Original fleece hats with ears
For those who like original ideas, I suggest sewing a funny and bright children's hat from fleece.
Original fleece hats with ears
You can sew several of these hats and change them at least every day. The pattern for a hat with ears is here
In the video from Angel Nickman you can see all the details of how you can quickly sew such an original fleece hat for your baby.
How to sew a baby fleece hat with ears
Manufacturing secrets
- the denser the yarn, the more magnificent the product;
- scissors should cut well;
- the color of the pompom must match the color of the main product;
- the thread for tying must be strong;
- you need to tie knots well, several knots;
- The more layers we wrap, the more magnificent the accessory will be.
Simple version of the product
It is recommended to iron the fabric before cutting. If the knitwear has a pattern, it is necessary to position the pattern so that the objects are placed centrally or symmetrically around the center line.
A knitted hat for a child, the pattern of which can be created in just 10 minutes, can be single-layered or with a lining.
First you need to decide on the size of the hat: measure the volume of your head and choose the desired height of the product.
Next, to create a pattern you need:
- Divide the head circumference measurement by 4 and make a deduction for the stretch of the product (for dense fabrics, subtract 0.5 cm, for thinner and more elastic ones - 1 cm).
- On a sheet of paper, construct a rectangle with the following parameters: the width is equal to a quarter of the circumference of the head, taking into account the necessary deductions, the length is the height of the hat with an increase of 5 cm for the lapel (optional).
- On the left side, move 2.5 cm from the corner to the left, and down ¼ of the height of the cap. Connect the dots to get a dart.
- Round the upper left corner of the rectangle.
- The resulting part is ¼ of the cap.
Knitted hat for a child, a simple pattern. - To create half of the hat pattern, attach the resulting piece to a sheet of folded paper so that the side line with the dart coincides with the fold line, trace the template and cut it out.
Preparing fabric for cutting
The length of the fabric cut for the hat depends on how it will be cut:
- If the product is single-layer, then a fabric size equal to 1 cap length plus an increase for the lapel will be sufficient.
- For a two-layer model without a seam on the bottom fold, you will need double the length of fabric.
- If the hat is double-sided, made of knitwear of different colors, you need to take 2 pieces of fabric, equal in length to one size of the length of the hat.
Sequencing
The main characteristic of knitted fabric is its elasticity. It can stretch in one direction or in two. When cutting products, you should pay attention to the main direction of stretching and place the pattern strictly perpendicular to the direction of the stretching line.
For correct cutting you need:
- Fold the piece of fabric across the stretch line with the right side facing inward.
- Attach the hat pattern, trace it with chalk or pencil and cut out the resulting parts, leaving a 1 cm seam allowance.
- When cutting out two-layer products, the fabric needs to be folded across and separately cut out 2 parts with a fold at the bottom.
- To sew a hat with a lining, cut out 4 identical parts or 2 parts with a side fold.
Recommendations
Connecting threads of two colors when winding will help achieve the melange effect.
Take leftovers that are unsuitable for knitting: this way you will not only recycle the material, but also diversify the color. With careful winding, you can combine several relatively short sections.
Use thick yarn: this will allow you to complete the work faster, and the decoration will look more voluminous and dense.
For extra fluffiness, comb the product with a special comb for animals: each thread will break up into separate thin fibers.
Some useful tips
To simplify the sewing task, we will reveal some subtleties that need to be taken into account:
- When constructing patterns and subsequent cutting, no seam allowances are left. The lining, as a rule, is slightly smaller in size than the caps.
- If you take a dense fleece of great thickness, which stretches very poorly, you need to try it on several times.
- When sewing the lining of a hat with ears, be sure to add 0.5 cm for seam allowances in this area.
- Fleece fabric has a front and a back side - this must be taken into account when sewing. Even with apparent similarity, you can check - just stretch the flap slightly, and it will turn to the wrong side.
- The degree of elongation of the fleece is also taken into account in order to avoid deformation during subsequent use of the item.
- When ironing seams, you must remember that this must be done from the wrong side. Fleece really does not like heat treatment, and it must be done extremely carefully!
That's all! We told you how to sew fleece to a knitted hat! It's up to you - get creative and warm yourself!
Video
How to make donuts directly on your fingers is shown in detail in this video.
You can see how to make a small bell on a fork in the following video.
We make a balabon using cardboard rings using this video instruction.
Sources
- https://handskill.ru/431199a-kak-sdelat-malenkiy-pompon-iz-pryaji-poshagovaya-instruktsiya-sovetyi-foto
- https://svoimirukami.guru/pompon-iz-nitok-svoimi-rukami/
- https://tkaner.com/tkan/sherst/kak-sdelat-pompon-iz-sherstyanyh-nitok/
- https://handsmake.ru/kak-sdelat-pumponchik-iz-pryazhi.html
- https://trudogolikam.ru/master-klass/zabavnye-pushistiki-kak-sdelat-pompony-svoimi-rukami.html
- https://camodelkin.ru/dlya-doma/pompon-iz-pryazhi.html
- https://comfort-myhouse.ru/rukodelie/masteritsyi/kak-sdelat-pompon.html/
- https://vsesvoimirykami.ru/pompon-iz-nitok-svoimi-rukami/
- https://kaksdelat.guru/kak-sdelat-pompon-iz-pryazhi/
- https://sharm.click/rukodelie/pompon-iz-pryazhi.html
[collapse]
Fleece hat pattern
When sewing various models, a basic fleece hat pattern is used. It is adjusted based on your own measurements.
To determine your size, you need to take two measurements: the first is the circumference of the head, the second is the depth of the hat. How to correctly take head measurements is shown in the photo below.
The main part is one-piece, or is divided into an upper part - the crown and a lower part, which covers the ears.
By the way, there are models with elongated “ears” that turn into ties, and there are others without them at all. In this case, this part of the pattern is simply removed.
Winter fleece hat
In order to get a particularly warm headdress, a layer of insulation is inserted between the outer and inner layers.
Attention: when using insulation, the parts increase additionally on all sides by 1 - 1.5 cm. Otherwise, the hat will turn out to be small.
The ear areas are reinforced with a piece of jacket fabric, this will prevent blowing.
This manipulation is carried out as follows:
- Cut two circles from a piece of raincoat fabric, about 7 cm in diameter.
- Place the circle to the ear area between the layers of the cap and secure them with running stitches.
- Sew in circles.
An interesting video will show you how to sew a men's hat with your own hands.
Knitted fleece hat
An ordinary knitted hat may not be warm enough, but this situation can be easily corrected by making a warm lining.
How to sew fleece into a hat
- Draw a chalk outline around the headdress that needs to be insulated. The direction of the grain thread must be observed - the material must stretch in breadth. This is necessary so that the product can be worn freely.
- Make darts at the top of the head, about 10 cm long, and about 3 cm at the base. Sew the edges with a zigzag or overlock.
- Close the darts and finish the bottom edge. But this is optional: since fleece does not fray, it is not necessary to process it.
- Connect the hat with the lining. Hem the bottom using hand stitches.
Choosing a model and fabric
Hats with ears are suitable for girls, as well as teenagers and children of both sexes.
Wide models are suitable if you have a round or oval face . Widely spaced ears will look harmonious on those with a narrow face.
For comfortable use of the product, we need to choose a fabric that has good stretch:
- Knitwear, elastic in one or two directions.
- Stretch denim.
- Various types of fleece.
- Natural fur.
- Faux fur on a knitted base.
- Used knitwear.
Advice! If you decide to use a sweater or T-shirt on a hat, then the material must first be prepared. Wash it with a detergent suitable for the fabric. If it is natural wool, then a good hair shampoo will do just fine. Expand the product. Iron through a damp iron. You can start cutting.