For various festive events or just a themed photo shoot, certain costumes or accessories may be required. Many of thematic attributes can be purchased in specialized stores. However, you can always build certain things yourself, while saving a fairly large amount of money. In our article, we will introduce readers to the process and technique of making such an accessory as bunny ears, which we will make with our own hands.
There are a large number of different techniques for making a bunny accessory with your own hands. We will try to look at the most popular and affordable ways to create animal ears.
Volumetric ears crocheted or knitted: patterns for knitting hats for women with descriptions
A fashionable headdress is a hat with ears. An ideal option to emphasize coquetry, playful mood and capricious character.
It is enough to simply knit such a hat yourself. For this you will need yarn. It is better to choose wool. Knitting needles No. 3, elastic band, thread with a needle.
Knitting pattern for a hat with ears:
- For an adult girl's head you will need 96 loops.
- We knit 4 rows of elastic.
- Next comes the knitting pattern.
- Rapport is added twice in each row.
- When the height of the hat is connected, close the loops.
- We turn out the ears in the upper corners.
Important! The pattern is chosen according to taste; there are quite a few options for knitting patterns. The crochet pattern is not much different from the one described above.
Crochet:
- We cast on 88 loops and knit 57 rows.
- When finishing the 57th row, we put the designations of the descent lines on each 22 loop.
- We fasten by knitting the first two loops into one, grabbing the top yarn.
- We do the same for the front loops, excluding the three extreme ones.
- We tie the loops tightly.
- In the 59th row the loops are not decreased.
- Knitting continues according to the pattern: every even row we decrease the loops according to the pattern described above.
- Each odd row is knitted unchanged.
- Upon completion, the thread is separated, leaving a small section of it.
- It is threaded through the loops that remain.
- Tighten and secure on the wrong side.
- On the tenth loop from the top point, they begin to knit the eyelet.
- The ears turn out better if you choose knitting needles of smaller thickness.
- The first two rows are knitted in the round, forming the ear.
- Subsequent ones - decrease every second loop.
- Knitting is carried out with tightening.
- We remove extra loops when there are no more than three left.
- The thread is cut, tightened and fixed. Ready!
- The second eye is knitted according to the same pattern.
Felt ears on a hoop
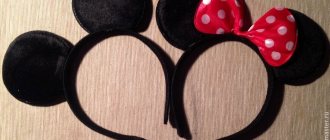
It’s enough to simply make a craft for a holiday or for a theatrical production on a plastic hoop using a glue gun. Using the template, the hare's ears are cut out of felt sheets. The photo below clearly shows what the original shape of the parts should be and how they are attached to the plastic of the hoop.
In order not to burden the craft with an additional layer of felt, you can paint over the pink inner parts with any cosmetics, such as lipstick or lip gloss using a brush.
Attributes for the game
If you are wondering how to make bunny ears out of paper to entertain a child, then you will undoubtedly like the next option. You can cut out ears from a disposable paper plate in a couple of minutes, using a template or drawing two pointed ears with a pencil.
All that remains is to lift the paper parts up so that they are perpendicular to the rim. The middle can be filled in with a pink marker. While playing his role in the game, the child simply puts the plate on his head. She'll be just right for him.
The article describes in detail several options for making ears for a bunny costume for a holiday or for children’s daily games. Choose the one you like and do everything according to the instructions. Good luck!
House on the Internet
Once again, kindergartens are preparing another series of children's matinees with fancy dress costumes.
Parents will once again have to prepare a mask for the matinee. It is better to do this with your child together.
The topic of today's post is a master class that answers the question of how to solve this difficult problem.
We need to turn mask making into an educational game.
The mask should be the most beautiful and cool one in the kindergarten. This requirement requires an extraordinary approach on the part of parents.
Instructions
Let's look at how to sew a bunny costume with your own hands. To do this you will need:
- plain white pajamas;
- fur pompom;
- a piece of felt for the ears and tummy;
- a piece of satin;
- wire;
- threads, needle;
- scissors, glue;
- disposable plate.
The procedure is as follows:
- Take a plate and cut out a felt piece on it.
- Glue it to the pajama top, and for strength, baste it around the circumference with thread. The top part of the outfit is ready.
- Take your pants and sew a pompom to the back. Use a blind stitch.
- Make a pattern for the ears and transfer it to the fabric.
- Cut out four elements from felt, and two smaller ones from satin. Sew the satin blanks to the felt base of the ears.
- Connect the elements of the main material facing inward and sew.
- Turn out and iron the workpiece.
- Insert a wire along the edge and secure it with a stitch. This will allow you to give your ears the desired position.
- Turn the bottom edge of the part inside out by 10 mm. You should now have holes. Pass the headband through them and secure the ears on it with hidden stitches.
What colors to use
If you decide to buy or make your own New Year's bunny costume, decide what shade it will be. The traditional option is an exclusively white outfit, although for a girl it is quite possible to use elements made of pink fabric, for example, the inside of the ears, mittens, and decor. A combination of white and gray is also suitable. Often such hare costumes can be found on sale. In addition, decorations in orange and green shades in the form of carrots are quite appropriate. They will add brightness and will look contrasting and impressive against a white background. As you can see, even in the color scheme there is a choice.
How to make bunny ears for a New Year's costume with your own hands?
A traditional attribute of a bunny costume—ears made with your own hands—can not only save the family budget, but also decorate the outfit in an original way. Bunny ears made from guipure with your own hands will simply look amazing and unusual.
The process of making them is quite simple:
- Draw and cut out the ear stencil.
- Take white guipure fabric and outline the eyelet.
- Carefully cut out this beauty. Four such blanks are needed.
- Take a pliable wire and repeat the contour of the ear with a tolerance of 1 cm.
- At the base of the ears, step back a centimeter and bend the wire.
- Attach the skeleton to the hoop.
- Adjust the second ear to the first so that they are the same.
- Place and secure the second ear on the hoop, cutting off the excess wire.
- Apply hot glue to the wire and glue the guipure, only so that it extends slightly beyond the wire by about 1 centimeter.
- When you glue the second side, don’t forget to stretch the fabric well so that it doesn’t fray and looks beautiful.
- Trim off the excess, leaving approximately 0.5mm. Do the same with the other ear.
Faux fur bunny ears
If the matinee is planned for a bunny costume made from fur, then you simply need to make the ears in the same spirit. Moreover, such an outfit will look very believable. Rabbit ears are made very quickly and have a flexible frame.
For this you will need:
- white wool or faux fur;
- pink suede fabric;
- glue seconds or hot glue;
- pliable wire;
- golden rim.
Making such ears will take a couple of hours, but will bring a lot of pleasure to both the mother and the child in an original costume. These ears are perfect for both girls and boys. The manufacturing process is quite simple and at the same time complex.
Manufacturing:
- Cut out 2 ear shapes from wool fabric.
- Mark the outline on the inside of it. To do this, retreat 1 cm from all edges of the workpiece and draw a line. The wire frame will bend.
- Using pink suede, cut out the inside of the bunny's ears to be 1 cm smaller than the wool blank on all sides. There should be two such parts.
- Glue the wire frame to the wool base.
- To hide the wire, you need to fold the edges of the bunny's ears inward. To do this, place a suede blank on the inside of the fur.
- Wrap the woolen fabric and glue it with a layer of suede. Be careful not to damage the suede, as it can easily be pierced with wire or fingernails.
- Do the same with the other ear.
- To attach the ears to the headband, wrap the bottom of the ear around the headband as tightly as possible and tape for security.
- The ears can be combed and given the desired shape.
How to make bunny ears with your own hands: using fabric to create an accessory
You can make bunny ears for a boy or girl with your own hands. The simplest and most affordable way is to sew from small pieces of fabric. The very diagram and model of hare ears can be completely different. You can form ears with protruding directions, you can lower them down.
In the case where you need the density and elasticity of the animal's limbs, you should choose the right techniques and methods for creating ears. To give the hare's ears the necessary rigidity, you will need a fairly dense material and two wires of equal length, preferably made of aluminum alloy. Bunny ears sticking up or in different directions are best created using three parts. The front part of the ear is formed from white fabric material, the back part is from the same fabric from which your entire carnival costume is sewn. Between them it is necessary to place a part that will match in size with the parts of the hearing aid, but it must be cut out of very dense fabric, such as drape or cloth.
One of the wires should be fixed to the central part of this part. Thanks to this, you can bend at the angle of inclination you like.
Having cut out all the necessary parts of the ear, connect two of them with the front side inward, then you need to sew them, turn them inside out and insert the third part - the frame - into the resulting oblong bag. The hare's ear is ready, it is advisable to attach it to a headband, which can be disguised on a hat in the folds of the fabric. The headband can be decorated with a satin ribbon or silver tinsel if it differs too much from the color of the carnival costume itself.
You can also sew animal ears that will hang down freely. You only need two fabric pieces. Sew them together with right sides facing inward. Turn the design right side out through the unsewn piece of fabric. The resulting bunny ears can be sewn onto the cap of a carnival costume or simply onto a ribbon.
Interesting facts about Eared Ears
You may not know, but:
1. The burrows of these eared animals look like real labyrinths.
2. These are herbivorous representatives of the animal world.
3. A rabbit's foot is believed to bring good luck.
4. Their habitat is North America, Australia, Southwestern Europe, Southeast Asia, parts of Japan, Africa and South America.
5. Little bunnies and bunnies are born without fur and with their eyes closed.
In this article we looked at options for a hare mask that you can make with your own hands.
Making carrots
Various accessories will perfectly complement the bunny costume. There are many photos and videos on creating accessories. The easiest way is to make carrots from foam rubber. Create a shape and cut out the product along the contour with sharp scissors. Thin emerald-colored material is sewn on top. The carrots themselves are painted with paints. It is necessary to choose paints from natural ingredients. They do not affect human health. The use of food coloring diluted in water is allowed. This paint is not harmful and does not stain the fabric when wet. The most difficult method is to make carrots using a pattern. Cut out 2 triangular shapes. They are stitched and turned right side out. The empty space is filled with batting. The wide edge is hand stitched. Scraps of green fabric are attached to it.
List of required items
To create a bunny costume with your own hands, you will need:
- thick cardboard;
- wire;
- ties or laces;
- decorative eyes and nose;
- scissors;
- ruler;
- glue;
- iron;
- sewing machine;
- needle and thread;
- foam rubber or batting;
- paints;
- rubber;
- headband;
- lightning.
Creative process
The selected workplace should be well lit. The surface must be flat. When making an outfit, it is better to involve a child. This will make the process much more fun. The baby will have a craving for creativity. The child will know that he made the exclusive, festive or New Year's bunny costume himself. At the same time, young children develop fine motor skills. She is responsible for speech, behavior and thinking. Children with whom their parents engage in creative activities develop much faster than their peers. In a costume made with your own hands, the baby will feel much more confident and joyful.
Hoop sheathing
How to make bunny ears with your own hands? This question arises before parents of children during the preparation for holiday matinees. The craft on a hoop, additionally trimmed with satin or plush fabric, looks impressive. The ears are brighter and shinier. To sew bunny ears from fabric you need to make a pattern.
To do this, also use the prepared hare ears template, but leave 1 cm on the fabric around the perimeter of the workpiece for sewing the parts together. Pink fabric is sewn onto the front of each ear, and then the pattern pieces are sewn together with stitches along the back side. All that remains is the inlet hole for the wire rod. To keep the ears in the correct shape, the wire is raised to the height of the ears and bent in half at the end with a loop.
To cover the hoop itself with fabric, you will need a strip of fabric, the length of which is a couple of centimeters longer than it. Then, along the front side of the fabric, the two edges are sewn together in the shape of the letter “P”, leaving only an opening for pulling the hoop and ears. Make hidden stitches so that they are not visible from the outside. At the end of the work, all that remains is to sew the parts of the ears and headband together.
Tail, paws and other details
So, the ears are ready. From the remaining fur you need to make a small round tail.
You can complement the look with fur paws in the form of short mittens. You can sew them from purchased fur, or you can buy ready-made mittens and decorate them with fluff. Alternatively, you can use white, elbow-length gloves. In combination with a fluffy skirt, the image of a bunny looks very romantic.
This edge also looks good on shoes. You can choose low boots, or you can perform in shoes or slippers. You can complement the image with aqua makeup by adding a funny face with a mustache and a curious nose.
Cardboard ears
They can be made in a couple of minutes. To make ears on your head you will need:
- cardboard;
- paints;
- scissors;
- base (rim).
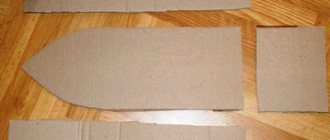
Take cardboard and cut out two rhombuses from it. Fold them in half and insert a headband between them.
Bunny hat
To create a bunny costume, you need a hat with ears sewn on it. The cap is made of 4 wedges. It is necessary to measure the circumference of your head. The bottom of one wedge is calculated using the formula: (Head circumference + 1) / 4 = AB. The segment is bent in half. It will be equal to the length of the hat. A perpendicular segment SD is constructed. It must be equal to the length AB. Then the points AC and BC are connected. The resulting segments are divided into 3 symmetrical parts. Then at these points it is necessary to place perpendiculars. The lower perpendiculars will be equal to 1.3 cm, the upper ones - 1.6 cm. The pattern is connected by a smooth curve. 4 wedges are cut out according to the sample. It is necessary to leave a seam allowance of 1-1.5 cm.
The wedges are connected together, stitched on a sewing machine, and turned right side out. The ears are sewn into opposite seams. There is no need to make separate holes for the rim. It is best to place the headband 3 cm from the center. Then a strip of dense material is cut out. It should be 3-5 cm wide. The length depends on the circumference of the head. It is measured around the circumference of the hat. An allowance of 4 cm is added to the circumference. The strip is folded in half and sewn to the bottom of the product. It is important that the rim is between the two layers of the strip. An elastic band is sewn into the inside, which should be 2-3 cm shorter than the circumference of the head. You can sew ribbons, laces or ties to the edges of the cap.
Sewing overalls
The Bunny carnival costume can consist of a turtleneck and shorts or a jumpsuit. In the first option, you can use ready-made things. The second option is the most difficult. A jumpsuit outfit seems much more impressive. To create a suit, you need to measure a person's height from shoulder to floor, waist circumference, length of legs, arms, and back width. It is necessary that the overalls fit loosely. Therefore, more than 10 cm are left for allowances. The patterns of the shelf and back should be identical. You will need 2 shelves, 1 folded back, 2 sleeves, 2 front halves of pants, 2 back halves of pants. All cut products are ironed with a hot iron. Shoulder seams are made using an overlocker. The neckline and sides must be processed. The back halves of the trouser legs are ground down by 10-20 cm.
All remaining allowances are carefully ironed. The back halves of the trousers are sewn to the back. Then the sleeve sections are sewn down. All products are carefully sewn on a sewing machine. The outfit is turned right side out. To make the bunny costume more comfortable, a zipper is sewn into the middle. It is recommended to use iron zippers, as plastic ones break quickly. There must be darts on the chest. If they are missing, then the outfit will be uncomfortable to wear. The bottom of the trousers must be tapered so that the edges of the trouser legs fit into the shoes. The edges of sleeves and trousers can be finished with a tapered overlock stitch.
Entertaining ideas
There are a lot of different variations of making ears with your own hands. Here, for example, are fabric ears. They are cut out of fabric, fastened to obtain the desired shape and sit on the hoop. Felt is a perfect material for implementing this idea. The easiest way to secure the shape is with glue.
And use regular shadows and a brush to indicate the darkened areas, for greater resemblance to real ears.
Cute little cardboard ears are just as quick to make.
The drawn shape on paper is transferred to cardboard and cut out along the contour. Next, it is attached to the fabric and cut out with a small seam allowance. We sew along the edge of the fabric, turn it right side out, and attach it to the hoop.
To create festive costumes, involve children in the work, then it’s nice to see how proud they will wear their ears, knowing that they are also involved in the making.
Interesting activity for children
Children really like to transform and try on a variety of roles. Often these can be animals. The most favorite are, first of all, such representatives of fauna as the tiger, dog, giraffe, rabbit, panda.
Sometimes these can be pirates, monsters, cartoon characters. Both older children and preschoolers are able to cope with such an interesting task as creating a paper mask with their own hands, even if they need a little help from adults at the initial stage. Sometimes kids get so carried away that they want to try on their creation even before the glue dries.
