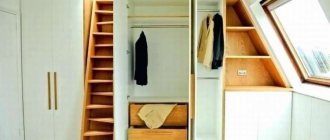
A box for tea bags is a way to preserve their integrity, protect them from damage, accidental wetness and exposure to foreign odors.
A beautiful and functional box can be a pleasant addition to the tea drinking ritual, and even decorate the table decoration.
An option for craftsmen is to make a box for tea bags yourself.
Schemes for tea houses
This kitchen accessory can be made according to your design.
You just need to think in advance about all the details of the future home, its size and appearance. Then you should draw a model of the product on paper and indicate its parameters. It is also possible to use ready-made diagrams, which will save time when making crafts.
The following scheme is suitable for the manufacture of both one-story and two-story houses. The length of the base, roof and wall is the same for both options. The height depends on the number of storeys.
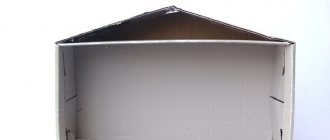
The presented sketches can be adjusted: to simplify or complicate the projects. The following photo shows a finished craft with a simple design.
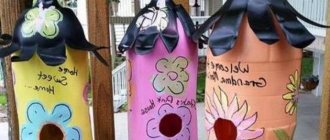
More complex designs consist of several buildings and include windows, balconies, and fireplaces. It is convenient to store different types of tea in such houses.
You can place not only tea bags in the house, but also sweets. A fenced yard with a fence that is attached to the side of the house will serve as a bowl of candy.
In addition to choosing the design of the product, you need to decide on the material. The most suitable materials for crafts in the kitchen are cardboard and wood.
Tea bags
Traveling with them is much easier and more interesting. You can make a convenient organizer for storing bags (so they don’t tear or get lost in your bag) using Grosgrain tape (as described in the instructions above). You can also try the option with latches (buttons, Velcro). You can use the method that you like best. The main thing is that it is convenient for you to work with, and production does not take too much time.
A student at the Vietnam Police Academy shared how she takes care of her facial skin.
A Brazilian travels 36 km by bike every day to take his loved one home.
“We are still friends”: Derevianko commented on the breakup with his wife
As for the type of tea, today its range is simply huge. Take the one you drink most often. You can choose black or green, or perhaps varieties with added fruits or flowers. This organizer will fit several bags, so you can make a kind of assortment - take several types of tea to drink according to your mood.
Required materials and tools
A large tea room can be made from almost any available material. It can be cardboard, paper, newspaper tubes, plywood. However, the size and shape of the boat may vary. Many craftsmen recommend making a tea house with your own hands from cardboard, since this material is the easiest to work with. What you will need to create this craft:
- a simple pencil for drawing;
- manage;
- waste paper;
- vinyl glue;
- stationery knife.
- scissors;
- thick cardboard (you can take sheets from a regular box);
To glue the main elements of the craft, you will need waste paper or thin cardboard. When all the tools and materials are ready, you can start making a cardboard tea house.
Original kitchen with your own hands. Knife holder.
- Prepare a regular, empty glass (metal or wooden) container.
— Bamboo sticks (can be replaced with skewers)
– Spray paint (or acrylic paint) – optional
— Scrap paper — optional
- Additional decorations - optional
1. Fill the container with chopsticks so that they can tightly hold several knives.
2. The container can, if desired, be painted with spray paint or acrylic paint.
* If you use spray paint, it is better to do it outdoors.
3. You can wrap the container in scrap paper and decorate it with additional elements (glitter, stickers, ribbon).
Master class on weaving a tea house from newspaper tubes
If you like weaving from newspaper tubes, then this master class is just for you. A wonderful gift can be made literally in one evening.
Look what masterpieces the craftswomen create!
Below we will offer a detailed master class on making an exclusive tea house.
What do you need for work?
Any work begins with quality preparation; in this type of creativity, the basis is straws. To do this, you will need to study the technology of their creation. Enter the search engine “how to roll newspaper tubes” and find a master class. The length of the pipes varies: 45 and 55 cm. In our case, we will cut strips 7 cm wide; if you need a larger texture, then 10cm.
For those who don’t have time to look for instructions, we offer a small master class in this video:
Manufacturing instructions
After the material is prepared, it is important to choose a base for weaving. Let's start from the bottom.
| Illustration | Description of the promotion |
We turn the tubes around the base
We glue the joints with PVA. Next, insert the tubes one at a time.
Don't forget to choose the correct shape of the tea house around which you will weave.
When you decide that the foundation for your house is enough, you need to raise the side posts.
You can not raise all the racks, but leave a part for weaving the base, for example, to create an additional platform.
Finishing can be done in a different color scheme
Let's move on to weaving the base. Please note that at this stage it is important to leave the windows to place the tea bags.
The closer to the neck, the denser our “top” becomes
Let's pay attention once again to weaving technology!
We make tea houses with our own hands in a step-by-step MK
A tea house, or rather its frame, can be made from many different materials.
You can get very beautiful results from polymer clay. Such a house will look very beautiful. You can get the most unusual results from newspaper tubes. The craft can be made from the cheapest and most common material. The essence of production is gluing tubes of equal size made from newspaper.
We made a tea house out of cardboard - this is one of the easiest ways. It does not require a lot of time and special skills. If you want to make a really good and beautiful craft that will delight you for a long time, then it is best for you to make it from plywood. The result will be approximately the same as from cardboard. In addition to cardboard, we needed the following:
- PVA glue.
- Colored paper.
- A ruler and a simple pencil. An eraser won't hurt if you draw erroneous lines.
- Cardboard.
- Scissors or utility knife.
Creating a frame is quite simple, but decorating will cause difficulties for many. Here you have to use your imagination a lot.
Let's make a house.
Our master class will begin with the manufacture of parts. Let's start by cutting out the walls. To do this, we took rectangles twenty centimeters wide and ten centimeters long. On one of the walls we need to make a semicircular hole that serves as the entrance to the house.
Cut out the roof. We make two squares with a side length of ten centimeters. We cut out the upper insert with a length of six and a height of ten centimeters and a lower one with dimensions of ten by 13 centimeters. Now we take on two triangles, the height of which is nine centimeters and the width of the base is six.
We make the foundations of the house in the form of a 10 by 10 square.
We definitely need to make four parts that will hold the walls of the house together. Cut out four strips twenty centimeters long and three centimeters wide. We bend them in half. We should have four corners.
We make similar parts, only for attaching the bottom. You need to make three of them, measuring ten by three. And also bend it in half.
Assembly.
First we glue the walls. We use our corners to glue the walls together. Then we glue the base, which will be glued using three smaller corners.
We install the roof. We bend the bottom insert and mark two centimeters on it on both sides. Glue it to the bottom of the roof with a slight indentation from the edges. First, we try it on and make sure that it fits into the corner between the slopes. Make sure that all folds are on the outside. If they turn out to be a little longer, they can be trimmed.
At this point the assembly can be considered complete. It's time to move on to decorating.
Trying to decorate a finished tea house with improvised materials
We started decorating from the walls. For this we used patterned paper with lace and colored feathers. You can use whatever comes to your mind. The main thing here is creativity and uniqueness. Imagine, don't be afraid! If it seems to you that you can’t come up with anything interesting, then just look at the photos of tea houses, perhaps you will find inspiration.
One of the most popular techniques for decorating tea houses is decoupage. The essence of the technique is that the master fixes pictures or ornaments cut out of paper on the surface, that is, the walls and roof of tea houses. This technique was used by Chinese craftsmen to decorate furniture.
Cardboard house
This option is the simplest. For work, you can use both sheets of cardboard and a box of products or household appliances. The main thing is that the material has a density of at least 200 g, since the product must hold its shape well.
For work you will need materials and tools:
- manage;
- stationery knife;
- vinyl glue or “Moment”.
- thick cardboard;
- pencil;
Master Class:
- Using a pencil and ruler, draw all the details of the diagram on cardboard, strictly adhering to the given dimensions.
- Using a utility knife, cut out the parts along the drawn lines: base, front and back walls, 2 side walls and 2 roof parts. In the front wall of the future house it is necessary to make a round window and a semicircular door from which tea bags will be removed.
- Additionally, cut 4 strips of cardboard 3 cm wide, their length should be equal to the height of the walls, that is, 16.5 cm, make a cut along each strip so that they can be easily folded.
- Glue 4 walls of the house with folded strips. Each strip must be attached to the edges of two walls according to their height. This will strengthen the structure in the corners. Let the glue dry.
- Cut 3 more strips of cardboard 3 cm wide, but their length should be the same as the walls - 9 cm. Make cuts along the strips and fold them.
- Glue the walls connected to the base using folded strips. Cardboard strips must be attached to the base and bottom of the walls, excluding the facade.
- Make a removable roof. Glue 2 pieces at an angle so that the roof fits exactly into the box of the house. It is not necessary to glue the roof to the walls. It should be removable for easy placement of tea bags around the house.
Recommendations
use boxes as rationally as possible :
- Tea, regardless of the packaging form, must be stored in a dry room.
- The optimal storage temperature is room temperature.
- The sun's rays should not reach the product.
- Air access is required.
- Tea should not be combined with foods that emit a strong aroma - fruits, spices, etc.
- The bags, which are in a foil sachet, are protected from moisture and foreign odors.
Some tea manufacturers produce gift options - beautiful wooden boxes that are already filled with tea bags.
How to make a big house out of paper and cardboard
A non-standard tea house is one of the crafts with a low degree of manufacturing complexity. You will need to devote only 2 hours of your time to creating it.
Step by step assembly
How to make large houses out of cardboard with your own hands - master class:
1. The first step is to find suitable options and templates for the template. You can choose them from our gallery.
2. When the pattern is chosen, you need to cut out the parts of the desired size from cardboard. A standard DIY kit consists of 4 side pieces, 2 roof pieces, 1 cardboard for the bottom of the house and 1 piece for the roof insert. In order not to get confused by the dimensions, it is better to focus on the indicators presented in the diagrams.
3. It is best to cut out the parts with a sharp stationery knife. If you use scissors, the cardboard may bend and the cut will be uneven.
4. Cut pieces of paper (or thin cardboard) 20 cm long and 3 cm wide to glue the walls of the tea house.
5. Connect the base of the boat with PVA glue. If the parts do not hold well, you can use Moment glue.
6. Now you can go down. To glue it, you will also need to cut strips of paper 9 cm long and 3 cm wide and use them to attach the lower part of the house to its walls.
7. To make a roof, you need to take a part with a length and width of 10 * 6.
8. It needs to be folded in half to form a triangle.
9. Using paper or thin cardboard, attach the roof pieces as shown. If the cardboard doesn't fold well, you can push it along the seams with the beveled side of a utility knife.
DIY kitchen crafts
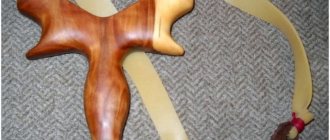
If you have an old rake, you can use it to make a handy glass holder. You just need to get rid of the wooden part (the handle) and attach the rake to the wall or cabinet.
Wooden house
Working on a wooden house is a more labor-intensive process. Processing of structural parts takes longer. This can be done with either a manual or electric jigsaw, as well as a special computer-controlled tool.
As a material for the house, you can use a natural wooden board or a sheet of high-quality plywood. The second option is more common. The optimal thickness of the walls and roof is 6 mm, the base is 10 mm.
To make a wooden house you will need:
- manage;
- puzzle;
- fine-grained sandpaper;
- paper;
- vinyl glue or Moment joinery.
- pencil;
- file;
- pieces of plywood;
Master Class:
- Draw on paper drawings of the product parts according to the given dimensions. Transfer the image onto plywood. To do this, you can use a carbon copy.
- Cut out each part along the contour, but do not overlap it with canvas by 0.5-1 mm. Remaining material will be removed later with a file. The house consists of 7 parts: a basement, 4 walls and 2 roof parts.
- Sand the parts and sand the inside and outside surfaces with sandpaper.
- Assemble all parts of the product using vinyl glue. Apply glue to the ends of the parts to be joined. Then press all the parts together and secure for 3 hours with an elastic band or tape. Remove excess glue with a napkin. Without glue, you will have to leave the roof or base of the house so that the tea will pierce the hole.
- After complete drying, the house should be freed from rubber bands or tape. If there are glue residues or uneven surfaces on the product, it must be sanded thoroughly.
DIY crafts for the kitchen. Convenient organization of things.
To properly organize things in the kitchen, namely under the sink, you can use a tensile rod. Install the rod and hang all the spray bottles.
You can also screw shelves to the wall of the drawer for small items such as gloves, sponges, brushes.
A bag for different things can be hung on the door.
Place a few extra drawers downstairs, and install hooks on the cabinet doors to hang towels and/or brushes.
How to make tiles?
In order for the teahouse to have a beautiful finished look, its roof needs to be landscaped. Houses with tiled roofs look original. There are several types of material for its manufacture, each of which has a specific effect.
From putty
To work you will need:
- toothpick;
- fine-grained sandpaper;
- soft brush;
- metal spatula;
- brown acrylic paint.
- construction putty or construction paste;
Manufacturing process:
- Using a spatula, apply a thin, even layer of putty to the roof surface.
- Using a toothpick, draw “flakes” of the tile onto the wet mixture.
- Let the solution dry completely.
- Sand the dry surface with fine sandpaper, carefully removing all irregularities. Use a brush to remove dust from the grooves.
- Paint the roof brown.
Made from corkboard
Required materials and tools:
- manage;
- table;
- brush;
- cutting board knife;
- black and red-terracotta colors.
- pencil;
- wood glue "moment";
- cork sheet;
Manufacturing process:
- Make marks on the roof of the rows where the shingles lie.
- Cut out the cork tiles using a utility knife, following the marks on the cork sheet. Before starting work, place a cork board under it. The size of the shingles can vary depending on the size of the roof, the installation method (cantilevered or flush with the roof) and your preferences. Approximate parameters: width - 1.5 cm, length - 2.5 cm.
- Round the edges of the cork rectangles using a pattern knife or pliers.
- Glue the tiles to the roof. Apply adhesive to the bottom edge of the roof and lay the first row of shingles. Continue the pose, overlapping, moving upward. Glue must be applied to the horizontal marking line and to the top edge of the main line. This way he attaches the shingles to the other side of the roof. Give it time to dry.
- Paint the roof. First, carefully paint the tiles black, not forgetting the ends and gaps. Once dry, lightly coat the tiles with red terracotta paint, allowing the black color to show in the pores. If desired, the roof can be aged a little and covered with moss. To do this, use a semi-dry brush to mark green spots on the tiles. Dry the product.
Shingles can also be made from ordinary cardboard, for example, from pieces left over from working in a tea house. But a cork roof is very similar to real shingles.
From eggshell
To make a roof you will need:
- vinyl glue;
- brush;
- acrylic paints.
- eggshell;
Manufacturing process:
- Break the shell into small pieces.
- Using vinyl glue, fill the entire roof space with egg fragments. Glue the shell with the concave side inward. The size of the fragments and the distance between them may vary.
- After the glue has completely dried, cover the roof with brown paint. It should be applied in a thin layer so as not to fill the gaps between the egg fragments. Once dry, apply another thin coat of varnish. You can add other shades to the roof: beige, orange, red, green.
how to make a hot stand with your own hands:
You will need: about 30-40 round wine stoppers, silicone (for gluing), a long flange belt with a clasp, a sharp knife, a wooden cutting board, a pencil, a ruler.
What to do: choose the shortest cork, cut off the uneven part, measure the resulting height. Using the same measurement, cut the remaining plugs. Starting from the middle, glue them together with silicone, forming a circle. Once the stand is ready, wrap it with a flange belt, secure the edge, and cut off the excess part of the belt. The eco-style hot stand is ready.
Ready-made tea boxes
Sometimes manufacturers immediately sell tea bags in elegant boxes. By the way, this is a great gift.
A fairly affordable option is a Greenfield wooden box, which contains 96 tea bags of 8 varieties. But you can’t buy Ceylon tea BASILUR for less than 7-10 thousand. But there are also many varieties, and there are many more than 100 bags.
Almost all well-known and well-known brands have different types of boxes: from Ahmad to Lipton, search and select online, in specialty tea and coffee shops and in large supermarkets.
It was in vain that we did not pay attention to such a gift from civilization as a tea bag. And don't think that tea bags aren't worthy of it. In such a box, the tea is protected from anything that spoils its properties. It is also convenient to take on the road in a durable packaging. On the Internet you can choose a ready-made box, with or without bags. And if you want to do it yourself.
How to choose?
When buying a tea box, it is important to remember that it should not only be attractive, but also fulfill its main purpose - to maintain the correct storage conditions for tea bags. You can buy a box at a tea store or order online.
Defining Moments:
- size;
- form;
- design;
- material;
- price;
- workmanship;
- design.
Before choosing any model, you need to study all the types of boxes.
Box from the store
These cute boxes are often sold in specialized souvenir and tea shops, and you can easily choose something that suits your taste and interior.
Tea boxes are made from wood, tin, plastic, cardboard and in general - all types.
- For example, Aliexpress offers you a bamboo box with six compartments and a small drawer at the bottom. It is suitable for both tea and jewelry, but not at the same time, but so that you decide how you will use it. And since we are talking about tea here, and not about beads, it means that everyone has figured it out. The price of this box is about 2600 rubles. Bamboo has a reputation as a valuable antimicrobial tree. But as someone who naively bought a Chinese bamboo bread basket in hopes of keeping the bread mold-free for as long as possible, I say this is nonsense. There's nothing antimicrobial in there. Plywood and plywood.
- Maybe a good quality bamboo box will have great properties, but I don't think you'll find it on Aliexpress at that price.
- Therefore, let's move on to more democratic versions. For example, the same bamboo box, but for 800 rubles. It is not only cheaper, but also smaller: only five branches.
- Even cheaper: the acrylic box has no compartments, but will protect your bags on the go. And it costs a little more than 600 rubles.
- And here is a very cheap tin box in the shape of an English telephone booth. Only 70 rubles!
- If you need something more artistic and cozy, let’s look at RuNet and find, for example, a box for tea bags in the shape of an old house - a little more than 500 rubles. This is still the same China, but now cheap porcelain - not bamboo or cardboard.
Have you stopped at nothing? So, make your own box. Now we will explain how to do this.
Decoupage technique
It appeared in the Middle Ages and consisted of fixing pictures or ornaments cut out of paper onto the surface of any objects - from plates to furniture, and due to its cheapness it was considered “art for the poor.” Later, decoupage masters began to produce fakes of expensive inlaid Chinese furniture, which in our time has acquired antique value. The modern passion for appliqué has spread to decorating everything a housewife can get her hands on: kitchen utensils and vases, book spines and hair clips. Souvenirs were not left out either. Master classes teaching how to make tea house decoupage with your own hands are becoming increasingly popular.
What you will need:
- ready-made parts for the house, cut from plywood (cardboard, even the thickest, will not work!);
- primer for decoupage, acrylic paints;
- PVA glue, special glue for decoupage, water-based varnish;
- skin – fine;
- brushes, spatula, scissors;
- napkins with pictures (you choose the images yourself).
What we do:
We assemble the parts of the house, gluing them with PVA, leave for 40 - 45 minutes so that the glue completely hardens, do not attach the base yet - put it aside. If you rush, the “walls” will not lock in properly, and the house will simply fall apart in your hands. We cover the house (and separately the base) with a primer; the layer should be thick enough and completely cover the plywood. We wait until the soil dries. To speed up the process, you can use a regular hairdryer. We work with fine sandpaper, carefully smoothing out all the irregularities. Paint with acrylic paint. Choose from a set of six basic colors or mix and get the desired shade. It is important that the color of the house and the tones of the paper applications complement each other. Let the paint dry, it will take about 15 minutes, but a hairdryer will again help save time. From napkins we very carefully cut out the flowers, patterns, and ornaments drawn on them. We separate only the top, “drawn” layer of paper, fix it on the surface of the house with decoupage glue or PVA, half diluted with water
The drawings are very delicate and can easily be torn if handled carelessly, so try to work more delicately. It is better to glue images from their center to the edges, this way it is easier to straighten them without the formation of “wrinkles”. Again, leave the product to dry for 20 - 30 minutes, then using a brush and varnish (in a few words) we finally fix the result
It is better to leave the varnished house alone all night, let it dry completely and rest. Finally, we glue the “floor” to the house, again using PVA.
It turns out to be a cute and practical little thing, all that remains is to put bags of aromatic tea inside and invite your friends to visit.
Tea coasters for table setting
The tea bag holder is designed to serve tea bags beautifully and neatly. These are small containers similar to napkin rings, boxes or boxes. The width of the dish is equal to the width of an individually wrapped tea bag.
The tea is placed directly into the packaging or without it and placed on the table so that guests can choose the desired variety and prepare the drink in a cup. It is convenient to store tea in a drawer in a closet; you can make an assortment of different varieties and gradually add new tea bags from the bags. Convenient: you don’t need to open the box every time, the names and varieties are clearly visible.
Stands for serving tea bags are made of ceramics, clay, majolica, porcelain, glass, crystal, wood, and metals. Well-known brands produce tea “boxes” and “houses” in accordance with existing tableware collections. For example, the famous Geese porcelain from a Czech manufacturer. Or the recognizable Gzhel from an old Russian factory.
Craftsmen create original jewelry in the spirit of national traditions and places, turning useful little things into souvenirs worth taking with you from your trip. Economical, useful and pleasant!
When choosing an accessory for yourself or as a gift, allow yourself to be guided by the tea sets available in the house. To go with the ceramic group mugs, you can buy white porcelain vases with neutral or openwork decor. Baskets with an eloquent teapot look beautiful.
If you can't find a tea set template, a wooden tea bag stand will work. Raw wood pairs beautifully with ceramics, and fine carvings can also harmonize with delicate porcelain.
Wooden tea boxes are made of natural wood and plywood. For those who like to make designer things with their own hands, they sell blank organizers and houses in bags. The blanks can be painted, decorated using decoupage technique, and freshly decorated.
Metal coasters also easily match any utensils. This line features modern stainless steel organizers, gold-plated drawers for classics, or wrought iron storage drawers for country and antique styles. The most luxurious choice is silver. By the way, a great gift for a silver wedding.
Gauze as a base for a tea bag
When tea drinking culture was just beginning to develop in England, similar things began to appear in every home. The box, which more often resembled a beautiful box, was a mandatory attribute of tea drinking. It was forgotten for a while, but now the tradition is returning.
DIY tea box - gold, clever, designer
Principles of the idea
Wooden. Wood is an excellent material, it is durable and does not allow foreign odors to pass through. The naturalness of the breed allows you to maintain a natural microclimate in the box. Such a box can be decorated to your liking, painted with any designs and patterns.
Sometimes we wear a bra incorrectly: ways that are harmful to health
Decoupage of the product
Decorating a tea house using the decoupage technique allows you to apply any image to the product without drawing skills. To decorate the product, you will need simple materials, the main one of which is a paper napkin with a pattern.
Decoupage of a product can be done in two ways.
Simple
This version of decoupage is considered simple. It does not require any special technical skills, so even beginners in this field can handle it.
Materials and tools needed for simple decoupage:
- primer;
- sponge;
- stationery file made of polyethylene;
- vinyl glue;
- brush;
- acrylic paints;
- water;
- paint for decoupage.
- home preparation;
- decoupage napkin or decoupage paper;
Performing decoupage:
- Remove any irregularities on the part with sandpaper. Cover the product with primer or white acrylic paint using a sponge. It is impossible to achieve such an even application of primer using a brush.
- Prepare a napkin with a photo. Do not cut, but carefully remove the necessary elements from it. A napkin with torn edges will “blend” better with the surface of the house; the transitions from paper to empty space will not be visible. Remove the lower white layers from the fragment, leaving only the top part of the paint.
- Apply the image to the product. Place the tissue face down on the file. Wet the image with water and gently smear it with your fingers or a damp brush. Then take a file and glue the front side of the picture to the wall of the house. Smooth the surface of the file with your hand and remove it, leaving the napkin evenly glued to the wall. Using a brush, coat the image with vinyl adhesive diluted with water and let it dry. Continue working with other elements.
- Cover the walls of the house with decoupage paint.
If desired, the design applied to the house can be supplemented with acrylic paints - make the image on a napkin brighter or add your own strokes to the walls. After drying, the product must be coated again with finishing varnish.
DIY little things for the kitchen. Clothespins.
Sometimes when you buy shorts or a skirt in a store, you may be given a hanger like this.
Remove the clothespins and use them in a similar manner. You can also use regular clothespins that you don't need yet.
DIY tea box - gold, clever, designer
To make a tea bag box, use the decoupage technique.
You need:
- paint;
- stucco.
- acrylic paints;
Then take:
- napkin for decoupage;
- empty wooden or plywood box;
- PVA glue or even specifically for decoupage.
- stencil;
And I also need a tea bag. The box is easy to find in art stores.
First, sand the surface of the box with fine sandpaper and prime it with putty. We immediately prepared a tea bag to wet the inside of the box to give it a noble shade. But then it must dry well.
Treat all joints well on the outside. Once the primer is dry, sand it again to smooth out any rough edges. Then apply the stencil, then putty again. Then we remove the skin again - after everything has dried.
We glue a decoupage napkin on top and paint the walls any color. Use a sponge to give the threads and edges a good coat. And when everything is completely dry, cover the box with a layer of paint.
If all this bothers you too much, take an ordinary tin box from under cookies or sweets, place cardboard partitions inside - they can be glued for strength. This is all!
In this video we will teach you how to make an incredibly beautiful box for tea bags with your own hands so that you can admire it at home.
Beautiful things
If you are a person with a good imagination and like to make things with your own hands, then by all means try to make something out of tea packages.
In order to make a basket with a secret, you need to remove the image from the front of the lid. This can be done with sandpaper. When the paint is removed, the lid will take on the same appearance as the walls of the box from the inside. The sides of the lid are removed, and the lid itself falls to the bottom of the box. This creates a double bottom under which you can hide important letters and money.
Original DIY tea wheel for tea bags (photo, master class)
Do-it-yourself original tea wheel for tea bags (photo, master class)
by Elga 1. Everyone in our family has different tea preferences. I have long wanted to collect all the tea bags in one place, in the end it came to my mind and I got this “tea wheel”, it takes up little space, easily fits 100 tea bags, it is very convenient to use - the inner wheel rotates, the desired bag can be easily removed from window. Maybe my idea will interest someone else, so I want to share the main steps in creating this wheel.
Ambient technique
Three-dimensional images are in demand not only in cinema. Designers all over the world successfully apply the laws of perspective in interior decoration.
Ambiente is a technique for “deceiving the eyes,” that is, creating a composition that has optical depth. This is a purely visual technique that provides the effect of a three-dimensional image in the painting. Of course, such images look more interesting because they look “alive.”
3D drawings will transform your product
The image created using the ambient technique looks amazing
Ambient decoupage is available to more experienced craftsmen, since creating a three-dimensional image is much more difficult and will require some effort and special materials.
The creation process follows the same pattern as in previous master classes. The main difference is the creation of a three-dimensional image, for which relief paste is applied using a palette knife under the edges of the picture. It turns out that one drawing is in different planes: the center is slightly removed, and the edges move forward, beyond the surface of the house.
Some details in the drawings, for example, a street lamp or flowers, are processed with 3D gel. Using the paste, you can not only make a tiled roof, but also draw brickwork on the house using a regular toothpick.
Tea drinking should bring not only taste pleasure, but also aesthetic pleasure. Therefore, a box with tea bags should be replaced with a beautiful home accessory - a tea house. You can make it yourself. To make it yourself, you will need simple materials, a couple of hours and a little imagination. And the result will be an original product that will harmoniously combine with the design of the kitchen and decorate the tea ceremony.
Tea drinking should bring not only taste pleasure, but also aesthetic pleasure. Therefore, a box with tea bags should be replaced with a beautiful home accessory - a tea house. You can make it yourself. To make it yourself, you will need simple materials, a couple of hours and a little imagination. And the result will be an original product that will harmoniously combine with the design of the kitchen and decorate the tea ceremony.
Step-by-step instruction
When you have a rough idea of the type of finished product and the basic materials are prepared, you can begin.
If a wooden blank is used, it is necessary to carefully but carefully “sand” and sand it, eliminating all unevenness. On a smooth surface, all subsequent layers will lie smoothly and aesthetically. It is important to pay attention to all surfaces - external, internal, work all the corners, the roof. Carefully coat the house inside and out with a thin layer of primer. Usually it is easily washed off with running water, but you should not leave a dirty brush for a long time. It is convenient to apply the primer gradually, so as to lay the workpiece on different sides to dry. Experts recommend making broad strokes from top to bottom along the entire height of the wall. Peel off the top layer from the decoupage napkin, cutting out the required elements with nail scissors
It is important to remember that the paper is very thin and tears easily, so it is advisable to carry out all further actions carefully, without haste. According to the instructions, attach the drawing to the workpiece. Make a solution of PVA glue and water, the consistency should be close to cream or milk. Apply the adhesive mixture with a brush, gently smoothing it out. It is necessary to ensure that no bubbles, folds, or tears form. You can remove excess by blotting with a clean napkin. After drying, coat the acrylic product with clear varnish. Paint the remaining details with paints.
How to make?
Before you start making a tea house from plywood, you should make drawings, according to which the plywood parts will be cut out and the workpiece assembled.
Experts do not recommend drawing all the diagrams on plywood sheets at once, since marks and inaccuracies along the lines are possible. It is best to make your own template from thick paper.
When everything is in order with the dimensions, it can be transferred to plywood, then cut along the contour of the part. To cut more complex lines, you need to use a circular saw or jigsaw as a cutter. It is not advisable to bring the tool close to the contour of the parts; it is necessary to leave a few millimeters, which can then be removed with a file.
All details of the future tea house should be carefully processed with a file, then the corners should be finished using a file. It is important to ensure that the ends of the parts are strictly perpendicular to their plane. Then you need to sand the internal and external surfaces using sandpaper. First, this should be done with medium-grain sandpaper, then with fine-grain sandpaper.
The next stage is the assembly of finished parts. To do this, select a diagram drawn up earlier with drawings. You can assemble a tea house from plywood using polyvinyl acetate glue. It is applied to the ends of parts that need to be connected to each other. The glued parts should be pressed firmly and secured with hair bands or masking tape. In this case, it is worth paying special attention to the assembly of the roof - it is performed depending on where you plan to place the tea bags: usually either the base or the roof is left without adhesive fastening.
To avoid accidental displacement of parts, it is recommended to use detachable tongue-and-groove fasteners.
After finishing work with glue, all excess glue must be carefully removed using a rag or a regular napkin. If this is not done, streaks will remain that will require additional sanding.
Then you can start puttying; it will hide all visible seams and irregularities at the joints of parts. For puttying, you need to use a narrow steel spatula, since a rubber one can leave errors in the depressions. As soon as the putty has dried well, the corners of the house are sanded again, and painting with acrylic paint begins (it is advisable to prime the surface with PVA glue diluted in water before painting). Often, when applying water-soluble paints to plywood, a problem arises - the material “leads” it. To avoid this, it is necessary to paint the fully assembled structure with the base installed and the roof on.
When painting a tea house, you can use several original artistic techniques.
- Create a simple relief pattern. To do this, just fix a special template on the surface of the roof or walls, then apply several layers of putty, and after it dries, paint everything with paint using a stencil.
- Create an “old wood” effect. Thin strips are applied using a semi-dry brush. The paint color should be contrasting to the background.
Tea houses coated with varnish also look no less interesting. To decorate an accessory for tea drinking in an original way, you need to apply varnish to its surface in two or three layers, using a soft brush. It is advisable to varnish the structure in a horizontal position, separately on each wall, to avoid the appearance of drips. It is important to ensure that no excess varnish remains on the sides of the house - if this happens, they can be easily removed by sanding.
After varnishing is completed, the grooves of the removable roof (base) and the tenons may not align with each other, since they have become a little thicker.
In order for the decorative product to look neat when assembled, it is not recommended to grind off the tenons. This problem can easily be eliminated by widening the grooves using a needle file.
If a paper pattern is pasted onto a varnished surface, you will have to varnish at least 5 times, with intermediate sanding of every two layers. As a result, you will get a perfectly flat surface, and the design will not stand out in relief on it.
About the size of the house and the selection of material
In principle, any type of plywood will do; in general, they are divided into grades depending on the number of defects on the face layer of veneer. In our case, it is absolutely not important whether, for example, there will be knots on the outer surface, except that it will be easier to saw plywood without defects.
The photo shows a comparison of different types of plywood
But usually even on plywood (of the lowest grade) you can find the desired area without defects. As for the sheet thickness, 4-6 mm is enough, no more is needed.
Despite the simplicity of the house, one cannot do without drawing up drawings, then the outline of the individual elements will simply be transferred to plywood and the walls, base and roof can be cut out with a jigsaw.
When choosing the dimensions and drawings of a plywood tea house, you need to consider the following recommendations:
- The dimensions of the house (length and width) must be sufficient so that the bags do not get stuck in it. Therefore, we simply measure the tea bag and add 0.5-1.0 cm on each side, we get the minimum dimensions of the house;
Life-size drawing of the main elements
Note! A hole must be made on the front wall in the lower part so that the bags can be taken out as needed.
- There are no special restrictions on height; the higher the height, the more tea bags will fit into the house;
- but the base under it must be quite stable, so it is made of thicker plywood, and its dimensions must be larger than that of the house itself. You can take a piece of plywood 10-12 mm thick, go around the perimeter with a router and glue the house onto it.
The drawing of a plywood tea house is made in full size; it is best to draw it manually on graph paper, or simply print the finished drawing on a regular printer.
Making a tea house
In order to cut out the necessary parts from plywood, it is convenient to glue the printed drawing onto a sheet and go around the perimeter with a jigsaw. Considering the small size of the parts, as well as the presence of small holes, a manual jigsaw is also suitable; it is not necessary to use an electric one.
A tool like this will do
Note! There is no need to press hard on the tool; the blade should be held at right angles to the plywood sheet. Thanks to this, there will be no chips on the edges of the sheet.
When working with a jigsaw, you should not cut flush with the marked contour; you need to take into account that some of the material will be removed during grinding; it is best to step back from the line by 1-1.5 mm. You also need to take into account in advance the type of connection of the walls, given the simplicity of the design, you can connect them end-to-end using only glue or use a tongue-and-groove connection.
The tongue-and-groove connection option is more reliable, but since there will be no loads on the house during operation, you can get by with a simpler option. If you still decide to choose a more reliable joint, then the drawings of a tea house made of plywood with your own hands will be a little more complicated, the edge of the walls will have a stepped profile.
In this example, a tongue-and-groove wall connection is used
After cutting out individual parts from plywood, you can proceed to their preparation and assembly; work is carried out in the following sequence:
- the edges of the parts are processed with a file, both surfaces of the plywood are sanded with fine-grained sandpaper;
- Then the joint is coated with glue and the parts are pressed tightly against each other. It is better to remove drips immediately with a cloth than to try to chop them off with a knife later. First, the box from the walls is assembled, and the roof and installation of the house on the base is done last;
Gluing of elements in progress
Note! Depending on the design, either the lid or the base is removable. Otherwise, it will be impossible to replenish the supply of tea bags in the house.
- Next, the plywood needs to be primed (a regular acrylic primer for wooden surfaces will do);
- After the primer has dried, all that remains is to decorate the almost finished house.
All that remains is to give it a more elegant look
As for the decor, the instructions allow for different options; you can simply paint the walls a nice color, use a stencil to apply an intricate pattern to the plywood, or simply glue paper with a beautiful picture and apply several layers of varnish on top of it.