Table setting is a whole science. It is important not only to provide delicious food to your household or guests, but also to beautifully arrange and present all dishes and snacks in the most appetizing way possible. Such simple, at first glance, things as napkins play an important role in the elegant design of the table.
What kind of original things are not made by skillful housewives from simple hygiene products? It can be:
- lotuses;
- roses;
- lilies;
- irises, etc.
Let's take a closer look at how to make an elegant flower using the origami technique from a regular napkin.
Spectacular options for origami napkins
Fold the origami napkin in half vertically.
The fold goes along the right side. Fold the napkin in half from bottom to top. Then you need to take the top 2 layers in the left corner and bend them towards the center. We do the same with the right corner. We bend the upper triangle to the bottom edge of the origami napkin. For the remaining 2 layers below, do the same. Fold the paper napkin face down. Then we bend the corners to the center as in the picture. We turn the structure over and bend the corners to the center again. At the bottom of the origami napkin there are unbent edges in the form of triangles. We hold the corners in the center and pull these edges up. You get cute petals.
Animals and insects
Often butterflies or swans are created from this material. Anyone can learn the art of origami.
Butterfly
Progress:
- You need to fold the napkin to form folds.
- Fold the material in half to form a rectangle.
- You need to create a triangle from the rectangle: you need to straighten the right and left sides.
- Bend the corners up and turn the product on the reverse side.
- Then fold the bottom corner up and straighten the folds.
- Repeat step number 4.
- There will be a corner at the bottom that needs to be folded up.
- Fold the resulting figure in half, and bend its top towards you.
- Repeat steps. The product is ready!
Swan
- The napkin must be folded 4 times and placed at an angle towards you.
- Next, bend the right corner to the left and straighten it. This will help you find the center.
- After this, the right and left sides should be directed towards the center.
- Then put the figure on the reverse side and repeat step No. 3.
- Next, you need to turn the product so that the corner is facing you, and bend it - this is the future swan’s beak.
- The product needs to be bent and the bird’s head straightened.
- At the last stage, you need to open the bird's tail, carefully pulling out the layers of the napkin.
Our master classes have come to an end. Good luck!
How to beautifully fold napkins diagrams with descriptions
There are many ways to decorate your table with paper napkins. Let's look at the step-by-step processes for creating small paper masterpieces.
Origami from napkins for every day
This “case” for cutlery is easy to make every day. Moreover, you can use materials of different colors, which will allow you to diversify the serving
Original origami for cutlery is very easy to make. In addition, it not only looks beautiful, but also makes it possible to present cutlery in an unusual way. The step-by-step process for creating such origami is as follows:
- First, take square paper napkins folded in four layers.
- Then we begin to wrap the ends diagonally in centimeter strips: fold the first layer almost to the middle, the second – a centimeter less, the third – even less.
- All that remains is to turn the product over to the wrong side to wrap its halves.
This creates an envelope into which you can put a knife, fork, or spoon. And if necessary, the design can be easily expanded to use the product for its intended purpose.
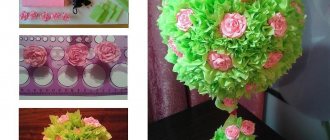
Graceful flower on a plate
A little practice - and in just a couple of minutes you can fold these festive napkins for table setting
This composition is very reminiscent of a flower. To create such origami, you can use both colored and plain products; the latter contrast perfectly with multi-colored plates.
Let's consider a step-by-step algorithm for creating such origami:
- Take square-shaped paper napkins folded in four layers.
- Then we fold them into a triangle and again into a triangle.
- Fold the halves of the resulting triangle in half so that the lower ends hang down a little.
- The next step is to wrap the hanging ends inward.
- And then fold the resulting triangle in half again.
- All that remains is to pull out the core from it - it should look like a boat with a mast. And then you should separate the layers from each other to create volume and a beautiful flower shape.
Tender rose
This rosette is suitable for serving both a festive table and a family tea party.
It will take a few minutes to create such a flower. You can make such roses even with children - it is such a simple and quick way to create origami for serving.
The step-by-step process for creating a rose is as follows:
A square napkin must be folded in half to form a triangle. Then we begin to roll the fabric into a roll. When a small triangle remains, you should move on to transverse twisting - as if forming a rosebud
The last step is to carefully remove the side petals so as not to damage the twisted bud.
Tall flower cone
When the hostess is preparing a festive dinner for guests, table setting using tall cone-shaped compositions will look especially beautiful
Creating tall compositions seems difficult. In fact, it is enough to understand the basic principles of folding three-dimensional origami and, as they say, get better at it. The algorithm for creating such a cone is shown in the figure:
- First, fold the paper napkin into a large rectangle. If it is initially packed in packs of squares, then completely unfold the product and then fold it into a rectangle. We wrap the ends of the resulting rectangle.
- Then, as shown in the figure, we also tuck the bottom of the figure.
- Then we unfold the composition on the other side and roll it into a cylinder, putting one edge into the resulting “pocket”.
- The final touch is to shape the product to place on plates during serving.
flat flower
Folding such a figure is very simple - you can master the technique literally before the guests arrive. But it looks very impressive on dishes
Folding such a flower from napkins for table setting is quite simple. If you make it from products whose color contrasts with the tone of the plates, then the composition will look especially advantageous. Step-by-step instruction:
- We unfold the napkin into a diamond shape and fold all four corners in the center.
- After this, we again fold 4 corners of the resulting figure towards the center.
- Then we turn the composition over to the other side up and again fold the corners towards the center.
- All that remains is to make the flower petals, for which we hold the figure in the center and carefully draw out the ends.
The simplest options
Using a couple of simple movements, you can create a very original craft that will decorate a festive feast and give it a rich look. Such elegant items include napkin products called “cone” and “pocket”.
Cone
To create this geometric figure, you will need a square-shaped textile napkin. The following actions will be required:
- From top to bottom, the square base is folded in half.
- Now the napkin is folded to the widow from left to right.
- The workpiece is rotated, and the top layer is folded in two.
- We turn the product over and bend the left side approximately two-thirds towards the center.
- The right side of the workpiece is aligned with the edge.
- We tuck the free corner into the left pocket.
The napkin cone is ready. It has a free pocket in which you can place cutlery.
Getting started is similar to the steps of making a napkin-cone:
- fold the square napkin in half from top to bottom, and then from left to right;
- bend the nearest section of the workpiece diagonally;
- turn the napkin over and bend the right side towards the central part by a third of the width of the square;
- We cover the left side with the right side, and tuck the bottom corner into the resulting pocket.
A convenient place to place cutlery is ready.
Unusual vase with three-dimensional ornament
If you urgently need a tall vase for your favorite flowers, but the store does not have products that match the interior of the room, you can easily make it from scrap materials, spending a small amount of money. Materials for making a vase:
- PVA glue;
- Can-opener;
- Scissors;
- Paper towels that match the color of the wallpaper;
- Three or four cans of peas;
- Napkins of a contrasting color to the main background;
- A simple pencil.
Step-by-step master class
- First, empty jars are prepared. One remains with the bottom, and for the rest it is cut out.
- Next, the prepared jars are placed one inside the other, forming the desired height of the future vase.
- Using PVA glue, the structure is covered with paper towels. You will need at least three layers.
- After complete drying, a drawing is applied with a simple pencil. It is more convenient to make it from large geometric shapes that make up an interesting abstract composition. It can also be hearts, flowers, butterflies in accordance with your own creative ideas.
- From squares cut from napkins, balls are formed, which are filled with the depicted figures by gluing.
Spectacular Rose
Crafts made from napkins in the shape of roses are very beautiful and unusual. To make them yourself you will need:
- Single-layer napkins;
- Scissors;
- Decorative ribbon or thread;
- Soft wire;
Manufacturing Guide
- One of the napkins needs to be cut into four equal parts. One of them is folded in half and twisted along the short side into a loose cylinder. On one side it is pulled together with a thread. This will be the base of the flower core.
- The remaining squares are cut diagonally. The right corner of the resulting triangle is bent, and the remaining ends need to be wrapped loosely around the core, securing the resulting petal with thread. Their number may vary and is determined during the work.
- To make a bouquet, stems are made. This can be thick copper wire wrapped in a strip of napkin of the desired color. You can attach a piece of paper during the wrapping process.
Rose is a symbol of love and perfection. This is an excellent decorative item that can become an original decoration for your interior.
Alternative to paper napkins
Fabric items will cost more, but will last much longer than paper ones.
You need to understand that paper napkins are a single-use product. In addition, their size and paper density do not always allow you to create such compositions as you would like. Therefore, fabric products look more appropriate on the holiday table. When choosing the latter, the main emphasis should be on quality:
- It is advisable to choose linen or cotton. In any case, the percentage of natural threads should be maximum. Synthetic thread may be included, but in small quantities and only to facilitate fabric care.
- The color of the fabric can be universal - white, light green or with a light floral print so that they match different dishes.
- A special chic are napkins that are thematically suitable for various holidays and family celebrations. For example, these could be embroidered products or napkins with a print suitable for a specific date - children's, Christmas, or, for example, a Halloween theme.
In a word, the main thing is the desire to elegantly decorate the table. There are a lot of options for beautiful serving. If the hostess really prepares the dishes with love and sets the table, then any type of folding of napkins for table setting will be appropriate.
1. In the initial position, the napkin should be folded into 4 parts. Place it so that four separate leaves are at the bottom.
2. Now fold the left side towards the right to find the middle of the napkin. 3. And rotate it to its original position.
4. Fold the right side of the napkin to src=”https://tvoitrener.ru/wp-content/uploads/d/1/a/d1a8272edc8d9109ba51dfb4c80fe414.jpg” class=”aligncenter” width=”400″ height=”280″[ /img] 5. And also bend the left side to src=»https://tvoitrener.ru/wp-content/uploads/5/7/3/573effd49b7a2dab4419acb9a5157708.jpg» class=»aligncenter» width=»400″ height= "273"[/img] 6. Place the napkin with the back side up.
7. Again bend the right and left sides to src=»https://tvoitrener.ru/wp-content/uploads/1/a/9/1a924b11b4b2ae9bf0a6f451cd577c01.jpg» class=»aligncenter» width=»400″ height=»279 ″[/img] 8. Turn the napkin over with the sharp end facing you. 9. Bend approximately along src=”https://tvoitrener.ru/wp-content/uploads/4/d/6/4d6160cd19e4b515ccf26f643a2be0cb.jpg” class=”aligncenter” width=”400″ height=”290″[/img ] 10. Approximately so that the sharp end of the napkin reaches the top edge. 11. Fold the narrow end of the napkin as in the photo. You will get the head and neck of a swan. 12. Bend the swan in half.
13. Straighten his neck and head. 14. It will turn out something like this.
15. All that remains is to fluff the swan’s tail. To do this, pull up one layer at a time from the napkin.
16. There will be 4 layers in total.
17. A swan made from a napkin using the origami technique is ready. Just keep in mind that it is not very stable, so it is better to place it on a napkin with one corner bent inward, as if creating a bump that will prevent the swan from falling.
For table setting you can make this or that.
Many people enjoy spending their leisure time folding paper using the origami technique, a popular hobby for many people. The use of this technique extends to many areas, even to children's crafts.
When thinking about the holiday table, many people pay attention to its appearance. The art of origami will help you decorate your holiday table.
In everyday life, you can also often find origami on the table, which is folded from beautiful soft napkins. Such a simple decoration makes the table setting original.
This lesson will help you create a simple origami decor for any table. For needlework, use additional tools.
Buy an origami ring from a napkin in advance, or make it yourself. To do this, select colored cardboard that matches the tone of the paper. Make an oval figure out of it, as in the photo. A length of 7 cm is enough. Using a hole punch or awl, punch a hole on both sides of the cardboard.
Thread a beautiful ribbon through the holes in the workpiece. Fold the napkin itself like a regular accordion. Bend the corners of the paper material from the middle. Repeat folding as in the photo below.
Such napkins will decorate the holiday with their sophistication.
Wedding table decoration
Beautiful snow-white swan birds are perfect for an event such as a wedding. They are no less in demand in table setting than flowers.
For the base of the blanks, it is best to take thin woven or two-layer paper napkins. In this situation, experts do not recommend working with three-layer material - it is too dense and it will not be possible to make elegant folds.
Scheme of work
- Place the square napkin so that one end faces the person working, and then fold it diagonally. Press the folds with your fingers a couple of times to prevent them from straightening out.
- Open the product, and bend the top and bottom sides (on the left side) to the line marked in the center. You will get a triangle.
- Bend the corners of the workpiece.
- Repeating the first step described in the diagram, turn the workpiece over and form the next triangle.
- We bring the upper acute corner to the very end of the workpiece and “fix” it several times by running our fingers along the fold line.
- We remove the sharp corner from the end of the workpiece and bend it.
- We fold the resulting blank in two.
- We lift the upper part - the “neck” and “beak” of the bird appear.
- From the bottom side of the workpiece we take out part of the napkin, forming the “back” of the swan.
- We perform a similar operation with another lower part of the napkin.
The beautiful bird is ready. You can make similar swans from napkins of different colors and place them on a plate for each participant in the feast.
As they say, it is better to see once than to hear a hundred times. If the diagram proposed above seems unclear to you, type “origami swan” into a search engine, watch the video, and you will understand that making a bird is very easy.
Beautiful flowers
It’s easy to make a festive decoration for a table or gift box in the form of flowers from paper napkins. For work we will need the following materials:
- Scissors;
- Glue stick or PVA glue;
- Strong thread;
- A tube that acts as a stem if you plan to make a bouquet.
Step-by-step master class
- The napkin is folded into an accordion with the width of each fold equal to one centimeter. To make the product neat, it is advisable to make markings on both sides.
- Without unfolding the accordion, you should place its flat side on the table and fold it in half to find the middle. Along this line, the folded napkin is tied with a strong thread.
- The free ends of the accordion are rounded off using scissors.
- All that remains is to fluff the flower and glue the folds together to create a spectacular corrugated circle.
You can fasten together several flowers of different sizes. The resulting terry version will look great as a decoration on a box, photo frame or in a bouquet, especially if you attach the flower to an improvised stem - a tube.
Origami napkin holder made of modules
For those who want to use origami for daily table decoration, there are many options for creating napkin holders. Triangular modules of 3 different colors were used for the lesson. Choose shades to suit your own taste. This is what an origami napkin holder can look like.
- The assembly diagram for such a napkin holder for a table is simple. For the first and second row you will need 8 turquoise and 7 coral modules.
- The third row consists of 8 coral-colored pieces.
- To give the napkin holder an ornament, make columns from the modules. Place 3 small “towers” in the middle and 2 larger ones at the edges.
- Combine the central protrusions with corners of 11 elements. Close the outer columns with chains of 8 modules.
- For brightness, add 1 more color in different parts of the napkin holder.
- The second half is formed in a similar way. The only difference is the color design.
- Connect the halves to each other using regular toothpicks.
Thanks to such simple creative solutions, table decoration is accomplished.
When is it appropriate to decorate the table with crafts made from napkins?
A little “magic” - and ordinary paper will turn into beautiful butterflies
Literally any meal - from tea with the family to a dinner party - can take place in a completely different atmosphere if you beautifully fold napkins in a napkin holder. Although there are certain rules of etiquette in this matter:
- for tea or lunch, it is enough to put napkins on the table on plates or make neat compositions under cutlery or a bowl of fruit;
- for dinner or a holiday table, you can think of more sophisticated compositions - for example, a complex flower, a figurine of a swan or a horse;
- if you are planning a get-together with friends or a picnic in nature, then you can fold the composition like an accordion or fan and tie it with rings for serving - simple and beautiful.
It’s especially chic if the paper napkins harmonize or contrast with the color of the dishes or tablecloth.
Floral decor
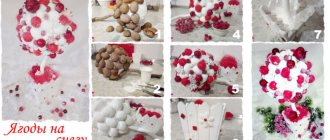
Handmade floristry is always beautiful, no matter what material is used for it. Origami flowers are most often made from paper napkins, although there are also textile varieties. The most popular model is, of course, the rose. For the “queen of flowers” you can use both textiles and three-layer paper analogues. But fabric, with its ability to drape, would be more appropriate in this case.
Rose
Depending on the purpose of the flower, different textiles can be used for it. For example, textured cotton is suitable for an afternoon tea with the family, while wedding decor requires luxurious silk fabrics with their soft shine and beautiful tonal tints.
An origami rose is easy to make and will be an excellent reason for a table conversation. It can be folded right in front of the audience, especially if there are many children among them.
Step-by-step instruction:
We place the original square with its vertex down. Fold in half. The free end of the triangle should be at the top. We bend the lower part. The shape of the rose depends on the height of the fold. For a goblet bud you will need a narrow hem, for a lush one - a wide one.
We continue to roll up our triangle until a very small fragment remains at the top. We turn the structure over backwards, top down. And now we begin to roll up the resulting bundle from left to right. We carefully level the product along the top edge; the accuracy of our bud depends on this.
We tuck the end under the outer layer. You can help yourself with a narrow tool, such as a butter knife. Now let's turn the rose upside down. Carefully separate the protruding end of the two layers. And we straighten it in different directions. It is important not to pull too hard, otherwise the rose will fall apart.
The loose ends now need to be turned into leaves. To do this, the fabric is turned inside out, laying it in the shape of a bud. The second sheet must first be twisted so that it better holds in a given position. We slightly curl the tips of the leaves. The rose is ready.
This is what it looks like in the end:
Lotus
A three-layer paper napkin produces a spectacular lotus flower using the origami technique. The decor can be disassembled at the end of lunch to be used for its intended purpose. Although who would raise their hand to encroach on such beauty?
In their structure, cellulose napkins differ from ordinary paper used for origami, primarily office paper. They have greater plasticity and drape almost like fabric, but they can tear from awkward movement. In addition, they hold creases worse.
Therefore, you need to work with them without undue haste, carefully straightening and smoothing each fold. It is better to hold a large number of folds with your hand so that they do not fall apart. The paper thickness must be at least 18 g/m².
Step by step instructions: The flower is based on the basic pancake shape.
Usually the napkins are already folded in four, so by unfolding them we get a finished longitudinal and transverse axis. If for some reason there is no division, you should perform folding operations in half in both directions.
Bend one of the corners towards the center, aligning it with the vertical axis. You need to make all the folds as accurately as possible to achieve the best result. Bend the remaining corners towards the center. We fold the resulting “pancake” again in the same way.
Carefully smooth out all folds. Turn the workpiece over to the reverse side. And again we make the basic “pancake” shape. Having folded all the corners towards the center, we try to fix them in this position. However, the workpiece will still open, so you will have to hold it with your finger.
Bend the corners approximately 1/3. There is no need to smooth them out. Holding the folded corner, take the top layer from the back and fold it forward. Thanks to the elasticity of the material, it will be easy to turn the part out. Let's straighten the petal, giving it a characteristic shape.
Repeating the operation three more times, we completely decorate the future flower. We lift the previously folded corners that were inside up, they will give the lotus additional splendor. Now all that remains is to fold forward the last layer of triangular petals, which are located on the back side of the workpiece. The “bottom” of the lotus should become completely smooth, without wrinkles.
We give the petals a picturesque shape by beautifully arching them and slightly twisting the ends. The flower cup can be folded a little stronger or, conversely, fully opened.
Such lotus buds are often used to serve sweets without wrappers or portioned baked goods: buns and muffins. The origami flower is placed in the center of the plate, used as a decoration.
Examples of creating paper flowers
Step-by-step instructions for making crafts from a regular napkin:
- A green napkin is laid out in the shape of a triangle;
- Place it in the glass, leaving both ends outside the glass;
- The yellow napkin is folded in the same way and twisted to form a tube;
- The underside bends and the flower straightens;
- The resulting rose is dipped into a glass with a green napkin.
Pocket for various cutlery:
- The napkin is rolled into a tube from any angle to the center;
- The tube is bent into two equal parts so that the holes remain in front;
- On the opposite side, the edge is bent towards the front.
Where to start
Origami from napkins is a full-fledged branch of the art of origami; it also has its own characteristics and nuances, recommendations that should be followed. First of all, you need to adhere to the rule from simple to complex.
In this art, it is imperative to first comprehend the basic figures, after which only you can move on to more complex ones. Let's look at several methods of origami from a napkin for beginners.
Refined spring vase
Crafts made from napkins are not limited to just flowers. From this wonderful material you can make or decorate almost anything, for example, a decorative flower vase. To make an unusual vase, you will need to stock up on the following materials:
- Napkins with elegant plant or animal patterns;
- Can – tin for coffee or juice;
- Acrylic white paint and putty;
- PVA glue;
- Stack;
- Brushes.
detailed instructions
The jar is coated with paint on both sides, and then dried in a well-ventilated area. The top thin layer, where the pattern is located, is carefully peeled off the napkin. Fragments of the picture necessary for the composition are cut off with your fingers
It is not advisable to cut them with scissors, as in this case the edge will be too smooth. The next one-color layer is glued to the outside of the prepared jar, tearing off small pieces according to the papier-mâché principle. Acrylic putty is applied in uneven strokes along the upper cut of the can, masking it. Next, on one side of the future vase, from top to bottom, a trunk and branches are formed using putty using a stack. The adhesive composition is diluted from one and a half parts PVA glue and one part water. Fragments with leaves, birds, butterflies, forest animals are placed on the surface of the jar in accordance with the compositional design and are carefully coated on top with a brush with an adhesive solution. During gluing, it is important to apply movements from the center of the fragment to the edges, carefully but carefully smoothing it, trying not to tear it. Having covered the entire surface of the vase, paint the neck to match the main background. To paint the branches and trunk, use brown paint to fill in all the irregularities. After the trunk has dried, decorative protrusions are highlighted with golden paint using a sponge. To do this, the sponge is lightly pressed onto the desired area of the improvised trunk without indentation. A slight golden effect can be created over the entire surface of the vase.
A DIY vase is a beautiful and affordable accessory that allows you to transform your interior.
To secure the decor, the dried surface is coated with colorless varnish. Bouquets of wild and garden flowers will look great in such a vase.
Master class 4. Angels made from openwork napkins
Another idea for a New Year's craft made from openwork napkins is angels for decorating a Christmas tree or for a festive table setting.
What you need:
- Openwork napkins;
- Scissors and stationery knife;
- Paper glue;
- Markers;
- Chenille wire or pipe cleaner (available in tobacco stores) in silver/gold color.
How to do it:
Step 1. First we need to make the body of the angel. To do this, cut the napkin in half so that you get two semicircles. Then, using a utility knife, make small slits for the wings in one of the semicircles. Glue the edges of the semicircle to form a cone.
Step 2. Now we will make the wings. Take the remaining semicircle and cut it into two parts. Insert the resulting quarters into the slots on the angel’s back (with the corners).
Step 3. Finally, let's make the angel's face. Draw two identical circles (determine the diameter by eye and to your taste), cut them out, then draw closed eyes and a mouth on one of the circles. The second circle will become a cap; it needs to be glued behind the face and slightly above it. By the way, if you have shiny silver or gold paper, then it is better to cut out the angel’s cap from it.
Step 4. The angel is almost ready, all that remains is to make the halo. To do this, take a chenille wire or pipe cleaner, make a round loop at one end and tilt it slightly. Next, glue the angel's face to the wire and finally insert the wire into the top of the cone (body) and secure it with glue or tape (on the inside of the cone).
Here are a few more ideas for crafts made from openwork napkins in the shape of angels, which are not difficult to make with your own hands even without instructions.
Angels made from openwork napkins and plastic balls
The crafts were made from openwork napkins, wooden beads and chenille wire
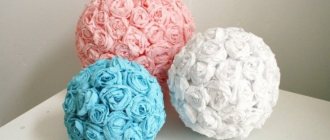
Original topiary
You will need: multi-colored paper napkins, scissors, a stapler, cardboard or a foam ball, a sheet of green paper, a satin ribbon, double-sided tape, glue, a wooden stick for the trunk, a small pot, woolen threads or twine, decorative butterflies, a piece of foam.
Master Class
- Print out the ball template, transfer it to cardboard and make a tree crown. You can also use a ready-made ball.
- Fold the napkin in half twice and fasten it in the center with a stapler.
- Cut out a circle and assemble the bud, lifting each layer of napkin up.
- Make 36 flowers in the same way.
- Cover the ball with flowers using double-sided tape.
- Wrap threads around a wooden stick.
- Glue the flower ball to the trunk.
- Place a piece of foam in the pot and insert the stem into it.
- Make grass from a strip of green paper and glue it at the base of the trunk.
- Cut out the leaves and decorate the crown.
- Tie the pot with a ribbon and decorate the topiary with butterflies.
The napkin topiary is ready!
Bouquets for the holiday
To set the table for a holiday, make each guest an individual rose in a glass. Take napkins of two colors. To make a semblance of leaves, fold the napkin diagonally into a triangle and place it in a glass. For the bud, fold the triangle of the napkin in half, and roll the note into a roll, as in the instructions in the figure below, and insert the “leaves.”
You can decorate the table with a rose from a napkin, although you won’t be able to use it. We cut the napkin into 4 parts, take a pencil and begin to wrap the napkin roll onto the pencil, but not all the way, leaving a piece. We crumple it with an accordion, remove the pencil, roll it into a tube, take other parts of the napkins and repeat the procedure, wrap our rose bud with petals.
When you think there are enough petals, twist the ends that we did not change into a spiral, take a napkin, carefully make a hole with scissors right in the center, pinch the napkin near the center. And insert the rose stem there.
About the material
Paper napkins are made from wood cellulose fibers. They are pressed from woven web, this gives softness and increased hygroscopicity to the final product. During the production process, only natural ingredients are used to ensure high environmental friendliness.
Paper napkins are divided into several types according to:
- shape - square, rectangular, polygonal, round;
- structure - one-, two- and three-layer;
- design - white, colored plain, multi-colored, with a pattern;
- type of surface – smooth and embossed (with embossing), openwork;
- size - standard sizes: 10x10, 24x24, 33x33, 41x41 cm.
The following categories of paper napkins are distinguished:
- Economy class. The cheapest, single-layer option measuring no more than 24x24 cm.
- Premium class. Higher quality raw materials are used. Characteristics: single-layer, plain or patterned, standard sizes.
- Luxury These are 2- and 3-layer napkins, plain or multi-colored, with decoration. The most common sizes are 33x33 and 41x41 cm.
Any of these products can be used to create crafts. Napkins differ from stationery or craft paper in their softness, pliability, and airy (loose) structure. They clump easily. It is pleasant to work with such material, and the creative process has a calming effect. You can master it at any age. Crafts are varied, but to gain skills you need to move from simple to complex.
Creativity as a learning process
The creative process is unique: its result is the creation of a unique product. There are many types of creative activities - drawing, music, making arts and crafts, etc. Making any products with children is a fascinating activity for an adult and especially important for children.
For an adult, this is a reason to be proud that a child did this. For a child, making crafts means gaining knowledge and skills in a playful way, such as learning the shades of colors and their combinations, honing fine motor skills, and developing imagination.
Classes are mainly held in kindergarten, because the child of working parents spends a lot of time there. But at home, mom and dad, together with the baby, can also make some products, and thereby contribute to the formation of the child’s personal characteristics.
Any type of creativity gives a child positive emotions, which in turn has an invaluable effect on personality development.