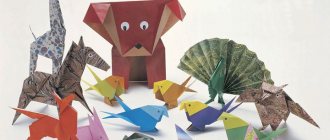
In origami you can find a diagram for almost every dinosaur. The giants that lived on earth 200 million years ago still excite our imagination and present surprises. For example, not long ago, scientists suggested that dinosaurs were mostly covered with feathers, reminiscent of the color of pheasants and peacocks. This is consistent with the theory about the origin of modern birds from these formidable lizards. If scientists' guesses are correct, winged descendants of dinosaurs still live among us. It will be all the more interesting to make figurines of ancient mysterious lizards and add them to your origami collection.
Diplodocus
Diplodocus is the largest lizard-footed dinosaur that lived during the Late Jurassic period. Its length was 25-30 m, and its weight reached 20 tons. For comparison: the height of the African elephant, which today is considered the largest land animal, is about 3 m, and its weight does not exceed 12 tons.
Diplodocus ate plant foods, preferring young shoots of deciduous and coniferous trees. Herds of these giant lizards roamed the west of the North American continent, choosing swampy areas or floodplains. The swampy lowlands were rich in vegetation and provided good protection from predators, making it difficult for them to pursue.
Despite their massive body, diplodocus was distinguished by its mobility - it could travel long distances in search of food. These dinosaurs are among the most recognizable due to their characteristic body structure - with a long neck and a powerful flexible tail. Origamists have dedicated several models to Diplodocus, and each of them deserves attention.
Option #1
For this model you will need a standard square of 15x15 cm. The origami dinosaur pattern is suitable for both experienced craftsmen and beginners.
Step-by-step instruction:
- Let's start working from the inside out. We outline the diagonals. We open all the folds.
- Bend the right and left edges towards the central axis.
- Turn the workpiece over.
- We combine the lowest point with the top, making a fold along the dotted line.
- We turn the figure over again.
- Fold the right side diagonally, simultaneously opening the bottom part in the direction of the arrow. Flatten the valve.
- Repeat step 6 on the left side.
- Raise the triangle from below.
- We lower the back layer of the workpiece in the direction of the arrow.
- Fold the figure in half into a “mountain”.
- We outline the fold along the dotted line.
- We open the workpiece.
- Raise the lower triangle along the line from step 11.
- And bend it in the opposite direction with a slight indentation. Fold the sides as shown in the diagram.
- Turn the product over.
- Using small side folds, we form a triangle at the bottom.
- Bend the figure in half like a “mountain”.
- Unscrew the triangular valves in the direction of the arrow.
- We lower the part highlighted in dark color using a reverse fold.
- We raise the same fragment, making a zigzag.
- We fold the sharp end at an angle - forward and backward.
- Make an outer reverse fold, highlighting the dinosaur's head.
Assembly complete:
The figurine can be used for any hanging decor - from jewelry to children's mobiles:
Option No. 2
Another easy origami paper dinosaur model that depicts a diplodocus. The expressive silhouette makes this lizard very decorative. In modern symbolism, dinosaurs are associated with power, endurance and archaic strength. Therefore, a postcard with a diplodocus is an original and appropriate congratulation on a “men’s” holiday. Moreover, you can fold the figure in just 5 minutes.
Step-by-step instruction:
- We start assembling from the white side of the sheet. We outline the diagonal. We bend the edges of the figure back, connecting in the middle.
- We fold the same sides to .
- At the same time, the flaps located at the rear open on the sides.
- We fold the edges again towards the central axis.
- We open the top layer from the inside along the arrows and flatten it, focusing on the dotted lines.
- We bend both edges towards the center. Open the fold.
- And repeat step 5 for new fold lines.
- Fold the workpiece in half into a “mountain”.
- Bend the triangular flaps from steps 5 and 7 in half.
- Using a reverse fold, we raise the long corner to 90°. This is the animal's neck.
- We lower the sharp end at a right angle, making a reverse outer fold. It turns out to be a head.
- We bend the protrusion inward. Thus, the dinosaur's head takes on a rounded shape.
MK folding dinosaurs for children
Origami dinosaur patterns will certainly interest kids.
Detailed instructions for the second method assume the availability of the necessary material. This is a square-shaped sheet of paper on which lines are drawn in advance:
Step by step execution:
- Fold the sheet along the marked dotted lines, fold it back, and then towards the middle. First, remove the corners from the back.
- Fold the layout first to the center, as in the photo above, and then along the lines and bend it down, then again to the center. Tuck the corners into the inside.
- The figurine is folded in half, turned, bent down and bent on both sides, wrapped inward, turned out.
- To make the head, remove the layer, then assemble the head and paws.
- Your prehistoric beast is ready.
Allosaurus
Allosaurs are predatory theropod dinosaurs, contemporaries of diplodocus. For a long time it was believed that these two-legged lizards were not inferior to tyrannosaurs in aggressiveness, but recent research suggests that, most likely, they fed on carrion. Swift, aggressive allosaurs have become the heroes of many science fiction films, for example, the action film “A Sound of Thunder” based on the story by Ray Bradbury. But Steven Spielberg's Jurassic Park brought real fame to fossil predators. Of course, allosaurus in movies do not evoke sympathy, but folded using the origami technique, they are quite attractive and can even decorate a nursery:
Step-by-step instruction:
For the Allosaurus model you will need a standard square of 15x15 cm. Fold it into the basic “Bird” shape.
- We lower point A, indicated in the diagram, down.
- Combine it with the opposite vertex.
- Fold the workpiece in half along the long axis.
- We position the resulting triangle with the vertex facing us.
- Corner B is brought to a vertical position using an external reverse fold. Thus, we form the neck of the Allosaurus.
- We lower the sharp end, making another reverse outer fold. It turns out to be a head.
- Bend the top inward.
- Now you need to form the legs. First, lower point C at a right angle.
- We repeat the same action on the reverse side.
- We bend the lower part of each leg inward diagonally. The figurine can now stand on its own.
- We fold the lower part inward, giving the allosaurus additional volume.
- Assembly is complete.
You can use an origami dinosaur made according to this pattern in different ways. For example, for a place card.
Or for a panel.
The jewelry looks unusual.
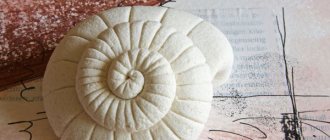
Step-by-step sculpting of a brachiosaurus
Materials for work:
- plasticine brown, beige;
- grains of black and white.
How to sculpt a brachiosaurus step by step
Stage 1 . Prepare 2 blocks of plasticine of different shades for work. The main block will be brown. Look at the picture of this dinosaur. He has a very large body, thin legs, as well as a thin neck, like a giraffe, and a disproportionately small head.
Stage 2 . Knead the brown plasticine in your hands. Make a big ball.
Stage 3 . And on one side, extend a very thin tail.
Stage 4 . Also prepare 5 small balls for sculpting the limbs, neck and head.
Stage 5 . Pull 1 ball into a thin long sausage and glue it on the opposite side to the body, smoothing the joints. You can put a toothpick inside, bend the end slightly to get a head, but it should be very small. Glue small white, black grains, showing the eyes.
Stage 6 . Beige or orange plasticine can be smeared in thin strips on the body, tail and neck, showing the characteristic color. Just randomly distribute the soft mass. Make cylinder legs from four small balls.
Stage 7 . Glue the legs from the bottom. Glue 3 small toe balls to each leg.
Stage 8 . The brachiosaurus dinosaur craft made from plasticine is ready.
Stage 9 . The result was 2 collectible models, which were made by hand. They are easy to mold, so you can also make other representatives of the ancient fauna that inhabited the Earth a long time ago.
Pterosaur
“Born to crawl, cannot fly” is not said about pterosaurs. These lizards of the Late Jurassic period had powerful wings that easily lifted them into the air. Paleontologists believe that pterosaurs, despite the ability to fly, have nothing to do with birds. They completely lacked feather cover, even the wings were leathery membranes with a span of 3 to 9 meters.
There is mention of giant flying creatures in the mythology of many ancient peoples. The supreme god of the Aztecs, Quetzalcoatl, is most similar in description to a pterosaur. He was depicted as a huge feathered serpent. The largest pterosaur, the fossilized remains of which are still found in North America, is named after Quetzalcoatl. The size of the fossil giant was not inferior to a small passenger plane. Scientists continue to debate how Quetzalcoatlus managed to rise into the air and stay there for a long time.
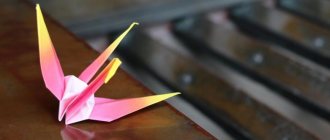
The origami pterosaur is much easier than its historical prototype. It can float freely on the mobile suspension:
This origami dinosaur pattern is suitable for both adults and children - it only has 11 steps. However, there is a slight deviation from the classic algorithm, since you have to use scissors.
Step-by-step instruction:
- We outline the diagonals.
- Fold the top and bottom edges towards the center.
- Turn the product over.
- Make a zigzag fold along the dotted lines.
- We bend the workpiece in half “mountain”.
- We lift the left side, making a reverse fold.
- Using a similar technique we lower the top.
- Move the dinosaur’s “head” back.
- Cut with scissors in the place indicated in the diagram.
- We bend the released fragment. It is indicated by an arrow.
- We open the wings of the model at an angle of 180°.
Velociraptor
Velociraptor was a relatively small Cretaceous predator that walked on two legs and was probably covered in feathers. With a small height of up to 70 cm and a weight that did not exceed 30 kg, this dinosaur had powerful jaws, literally tearing its prey apart. When attacking, he started from the most vulnerable places, which ensured victory even over larger animals.
Velociraptor belongs to the family of dromiosaurids, which are considered to be the ancestors of birds. Scientists recently started talking about the presence of plumage, after which the appearance of the predator in the reference literature has noticeably changed. The traditional velociraptor can still be seen in the same “Jurassic Park”. We can also recognize it in an origami figurine.
Step-by-step instruction:
- Fold the square sheet from top to bottom.
- Place the triangle with its apex down. Bend from right to left.
- We reveal the figure from the inside.
- Flatten it to make a square.
- Turn the product over.
- Repeat steps 3 and 4 on the back.
- We outline the folds along the dotted lines.
- Reveal the top layer.
- Press the side flaps.
- Turn the workpiece over.
- Repeat steps 7-9 on the reverse side.
- Move the left valve to the right.
- We place the vertical rhombus horizontally.
- We move the extreme point on the left to the right.
- Fold the figure in half “valley”.
- Make a reverse outer fold.
- Forming the head. Details can be seen in the diagram.
- We lower the first layer of the free end at a right angle. We do the same from behind.
- Bend the lower part of the legs.
- We make an incision.
- We bend the dinosaur's front legs. We remove the sharp corner on the head.
- Ready.
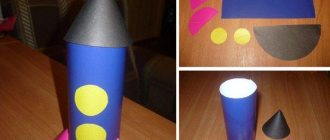
Miniature model “The Age of Dinosaurs with a Volcano”
In kindergarten, a child was asked to make a miniature - a model of a volcano in the era of dinosaurs. Since I am a creative person, I decided to approach this with all seriousness. 
The material we will need: a sheet of plywood to the size of your layout, a piece of coarse thick fabric, PVA glue, flour paste, acrylic or gouache paints, miniature dinosaur figures, artificial plants, multi-colored sand, pebbles, silicone plants for an aquarium, everything that allows you to use your fantasy.
First, we need a sheet of plywood on which the layout will be located. I currently have a sheet of chipboard. But it is very heavy for this type of creativity. You place either cardboard cones on the plywood, or put jars and cups as you did. The highest mountain I have is from a 3-liter jar. Then jars and cups of varying heights, glasses. Pre-wrap all dishes in plastic bags to prevent them from getting dirty. Place it the way you think your mountain range will look.
This is roughly how I imagined my ridge. Then the fabric was completely immersed in a pan with paste, which it had previously boiled. We soak the fabric completely so that it is saturated with the paste.
And we put them on our jars (cones) pre-wrapped in plastic bags so that the fabric does not stick to them. Here's what I got.
Squeeze fabric for the volcano crater into the neck of the jar. (you can then insert a jar or bottle there to imitate a volcano later). Form folds most similar to the mountain surface. We also make sure that the fabric covers the edges of the plywood. When all the folds are formed, leave it to dry for a day. When the paste has set, I cover the top thickly with PVA glue for greater strength and leave it until dry. I don’t spread a lot of alabaster, I insert a jar into the crater or maybe half of a Kinder Surprise. I coated the edges of the junction of the crater and the edges of the jar with alabaster and a little of the slope, since when you use the volcano, liquid will get in. Also leave until dry. Now you can remove the jars and cups from under the dried layout. Now it should hold its shape tightly.
Next, we paint with paints and gouache, not forgetting to paint over all the folds. We take colored sand and begin to decorate mountain peaks, ridges, and give free rein to our imagination. I left it on a flat surface for the lake and fill it with blue sand.
Once the sand has been decorated, you can begin planting artificial plants. I used hot glue.
Well, as a result:) Good luck in your creativity. If my work helps you, I will be very glad :) And you can also ask your questions.
In order for the volcano to function, pour soda and red or orange dye into the crater and pour vinegar on top :) A spectacular eruption is guaranteed :)
Other dinosaur models
The origami technique is the best opportunity to create paper dinosaurs for your own Jurassic Park. There are many simple models for beginners. A dinosaur park is a worthy alternative to a home zoo, because immersing yourself in the Earth’s past is incredibly exciting.
Stegosaurus
Spinosaurus
Megalosaurus
Triceratops
Joe Nakashima Dino Collection
A Brazilian origamist has dedicated an entire collection to giant Mesozoic lizards. Simple and at the same time spectacular models will become a real decoration for your home:
Brachiosaurus
Brachiosaurus is a herbivorous dinosaur, the closest relative of Diplodocus. True, it is inferior to it in size and with more graceful forms. This species is considered endemic to North America. The main feature of the brachiosaurus is its long neck, which it could raise vertically, eating leaves from the tops of trees. Diplodocus, who had a less balanced body, according to scientists, was deprived of such an ability. Most likely, it moved with its neck extended parallel to the ground and fed mainly on low plants.
Nakashima's Brachiosaurus has a characteristic elongated upward silhouette. The designer tried to accurately convey the proportions of the ancient giant:
Tyrannosaurus
What origamist can ignore the legendary T-Rex? Tyrannosaurus rex became famous as one of the largest and most ferocious land predators in the history of the planet. His image is actively exploited in culture as a symbol of total destruction. However, it is possible that if we went back in time and saw the real T-Rex, we would be very surprised.
Already today, ideas about the vertical gait of the lizard have been revised and it has been proven that it bent strongly to the ground, balancing its equally powerful head with its heavy tail. Now there is debate about the presence of feathers and lips on the predator, so in the near future its images in textbooks may change dramatically.
In the meantime, Joe Nakashima suggests making a classic T-Rex using origami technique:
Photos of beautiful dinosaurs made of plasticine
Plasticine sculptures, if you develop skill, turn out to be very realistic
Children's crafts made from airy plasticine are far from realism, but quite cute
Fossil animals are sculpted not only separately, but also with elements of their habitat
Herbivorous ancient reptiles are depicted as brighter, with spots, multi-colored ridges, plates
Black, brown gray - colors traditional for depicting fossil predators
After acquiring the necessary skills, you will be able to make a sculpture of any complexity
Antlers often require a frame, such as small pieces of wire