0
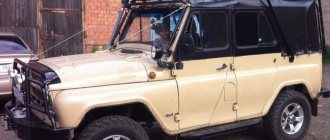
An old friend of mine had a “real” problem - a new trunk, bought at a car dealership along with a UAZ, fell apart after the first fishing trip!
It was a collapsible version made from rectangular and square pipes. The ears of the side pillars are made of steel with a thickness of only 1 mm. The arrangement of the luggage area tubes is longitudinal, with M10 bolts mounted through the main transverse beams, which completely weakens the latter. The support nodes of the transverse beams turned out to be 20 mm wider than the places of attachment to the roof of the UAZ.
In the process of disassembling the trunk into components, I became convinced that it needed to be completely rebuilt. An improved trunk design using all original components is shown in the figure. The procedure for converting a purchased collapsible trunk into an all-welded one is as follows.
1. Cut off all threaded bushings welded to the tubes. 2. Assemble U-shaped main transverse beams from original parts 1,2,3 using a tack, maintaining the size between the supports - 1520 mm, and then weld the seams and straighten them to size. 3. Connect the transverse beams with the longitudinal ones and, controlling the diagonals, weld the joints. 4. Weld the side and rear sides (parts 4,5,6,7,8,9,10). 5. Having joined the original tubes in pairs, cut them to size and weld the intermediate cross members (part 12) and longitudinal inserts (part 11). 6. Weld support rods (item 17) to the flattened support ends (item 3). 7. After final welding of all seams, carry out final straightening of the product and clean the welds. 8. Prime and paint the finished trunk. If you have the necessary materials and experience, you can make a trunk for HUNTERa from scratch according to the drawings.
Ps Save the enlarged picture for a more detailed view of the drawing.
The trunk installed on the roof of the UAZ Bukhanka will allow you to place most of your things, ensuring the comfort of passengers.
If the trunk is used irregularly or you don’t want to spend money on buying it, you can make it yourself from scrap materials that every car enthusiast probably has in his garage.
Do-it-yourself trunk for UAZ loaf, drawings
Thanks to its spaciousness and high cross-country ability, the Bukhanka is considered an excellent expedition vehicle. However, during long trips, expeditions or travel, a comfortable stay for passengers in the cabin is only possible when there is a minimum of things in it.
An expeditionary trunk can not only transport a large amount of cargo, but also accommodate oversized cargo that exceeds the dimensions of the cabin. It should be noted that the trunk on the Bukhanka also has a protective function.
The trunk protects the roof of the car from impacts from branches.
The trunk is installed on mounts that are placed so that the pressure from the load on the body becomes minimal. Therefore, even when fully loaded, the weight of the load does not deform the roof. You can also install additional equipment on the expedition rack: a spotlight to illuminate the road, an antenna, etc.
To make a trunk for a loaf with your own hands, you will need drawings, which you can see below.
Luxury or necessity
The automatic trunk opening feature is found in many new cars. Drivers like this feature, because you quickly get used to good things. To open the luggage compartment in a car, just press a button in the cabin. The lock comes into operation as a result of the operation of the electric drive.
This feature may seem like a small thing and an insignificant addition until the cold weather arrives. In cold weather, the lock on the trunk often freezes, making opening the compartment a difficult task. You have to spend time defrosting the mechanism. In the case of an electric drive, such problems will not arise. Also, such a mechanism makes car hacking more difficult, which is also an important advantage.
Mostly imported cars are equipped with this function, and not all of them. Domestic manufacturers have only recently begun to equip their models with such functionality. Every car owner can equip his car with an electric drive for the trunk. This will not be difficult to do, but you will still have to tinker.
Dimensions
When starting to make the roof rack, you need to measure the roof and mark where the supports will be placed. Only after this can you think through the design of the future accessory, draw a drawing, and calculate the weight of the trunk.
That is, by the time the work begins, the master should have in his hands:
- measurements taken;
- calculated frame weight;
- total weight of all trunk parts.
The overall weight of the rack is important for design. It depends on the material used.
- Aluminum
is an excellent material for making structures: it is durable, lightweight, strong, flexible, etc. - As another option, you can use profile thin-walled pipes
, which also weigh a little. - Another simple option is stainless steel or plain metal strips
. These materials are heavy, but easy to process.
The standard dimensions of the trunk for a loaf can be taken as follows:
- total length of the structure - 3650 mm;
- rear width - one and a half meters;
- front width - 1400 mm;
- a longitudinal rib runs through the center of the structure;
- transverse stiffeners can be installed with an equal distance between them of 566 mm.
Some people make a trunk with dimensions corresponding to the roof, for others it is more convenient to make a smaller structure: for example, 2160 mm in length, 1200 in width both front and rear.
The distance between the stiffeners in this case is calculated differently. In order for the load to be evenly distributed over the roof, you need to make at least 8 supports.
Connection Tips
Before doing any wiring or electrical work, you must first remove the battery from the vehicle. It is advisable to prepare the required connection diagram for the electric trunk lock in advance before starting installation work. In factory kits, it should already be available or included in the car’s operating instructions. On the Internet you can now also find many similar schemes with detailed recommendations for their implementation. Most car models have a 12-volt power supply, but it is better to clarify this nuance.
Much attention should be paid to wiring. The correct operation of not only the electric trunk drive, but also the entire electrical system of the car as a whole largely depends on this. If you treat this issue negligently, then at best there will be malfunctions, and at worst a short circuit may occur, after which it will be difficult and expensive to restore the vehicle’s functionality. For already proven routes, try to use the standard places for laying wires provided by the manufacturer. For additional protection, you can use corrugated tubes and plastic cable ducts of the required size.
Step-by-step manufacturing instructions
As an example, let’s take a trunk being manufactured from a metal profile.
We measure the length and width of the roof. We need to find out the weight of the future structure, taking into account the material and measured parameters. How to do it? Microsoft Excel is here to help you. The weight of the structure will be shown immediately after recording all the characteristics.
We will weld the perimeter of the future trunk, and at an equal distance inside the perimeter we will weld two jumpers that will “hold” the structure. Railings will be installed to these jumpers, and the platform will be connected to the railings. After the main intermediate jumpers, for greater strength. This brings the assembly of the supporting frame to an end.
Next, the profile pipe comes into play. It will serve as a connecting element between all jumpers. For aesthetics and aerodynamics of the trunk, an arch is installed in the front part of the structure. In the places where it bends there should be a sector, and at the edge there should be an overlap of 5 cm. We weld the arc to the front part of the surface, and also add jumpers.
What is an expeditionary trunk without sides? It is advisable to make removable sides in order to change them as needed. The sides will be attached to holes that need to be welded and plugged with bushings. This will prevent the profile from deforming when tightening the bolts.
Now about how to make the sides themselves. We will need 8 racks, each about 6.5 cm long. The fastening pin can only be welded between two holes, which is what we will do. After drilling two holes, we will weld the stud.
Kit selection
Installation will not be possible if you do not have at your disposal a set of equipment necessary for installation. Buying it is not difficult, but you need to think about which specific option is best for you.
In total, 2 solutions to the current situation are being considered. Namely.
- Factory set. Purchased from trusted and reputable manufacturers. The kit contains almost everything you need, so you don’t have to assemble different elements. But the price is naturally higher;
- Amateur kit. Here we are talking about independently preparing all the necessary components. The motorist is faced with the question of where exactly to get them and how to choose a set so that everything fits. It is difficult to do this without relevant experience and certain knowledge. But you can save a lot of money financially.
I don’t know what exactly you will choose, but I want to give one piece of advice. Buy an electric drive equipped with an inertia mechanism. This will allow you to turn off the drive when an obstacle appears in the path of the luggage compartment lid. Roughly speaking, the drive will not pinch your hand or head when you poke around in the trunk.
So the inertial mechanism is a very useful thing.
If we talk about assembling a homemade kit, then it is important to collect several basic elements. These include:
Side top bar
Have you forgotten how we bent the front arch? We also bend the side upper crossbar. One, another. Next, we weld the bushing to the bend point of the crossbar on the side so that the upper part of the front crossbar is securely fastened.
Now all the work is almost done. The hour has come for creative motorists. We need to paint the entire structure and give it a little style. To avoid rust, we recommend applying a coat of primer and only then thinking about paint. Among soil solutions, the most resistant to salt influences is soil containing zinc.
After applying a layer of primer, you should wait at least a day, and then use regular enamel and apply the desired color. Many people don’t like the way the bolts look at the joints of the structure. To avoid an unsightly appearance, you can place decorative nuts in these places. Here's a modern trunk for you.
What else could I add?
The main function of a roof rack is to save space inside. By installing additional equipment, you can expand its functionality.
- “ ” - lanterns that will illuminate the road even better.
- There is space for a hijack and a shovel in the inner and outer sides. Oh, how the gardeners will be happy.
- If you often drive through overgrown areas, such as forests, you can install branch guards. They will protect the glass from damage.
Don’t forget also that the expedition vehicle protects the roof itself well from dents. As you can see, such a trunk can serve as a good way not only to save space, but also to install useful equipment. In addition, in addition to the racks themselves, other structures can be attached to the roof rails for transporting fishing or hunting equipment.
As you can see, it’s possible to make a trunk with your own hands. Larger Mitsubishi L200s will require a side ladder. For small foreign cars, a reinforced frame will be sufficient.
The SUV from the Ulyanovsk plant is equipped with longitudinal arches or roof rails. But not every UAZ Patriot model is equipped with such a device. More details about roof rails on the UAZ Patriot can be found here (link to website). Today we will pay attention to the roof rack of the UAZ Patriot SUV. There are four types of trunk for an SUV:
- sports;
- tourist or expedition;
- country house or household;
- autobox.
Today we will pay attention to the expeditionary trunk for an SUV. What is it, how is it installed and is it possible to do it yourself at home? These are the questions we will consider in this material.
The expedition trunk is intended, first of all, to be able to transport cargo primarily of an expeditionary nature. Such cargo includes various tools, devices, tents, etc. The expedition version must have a structure in the form of a lattice bottom with sides. Why is this necessary? The lattice bottom will allow you to transport things or objects on it without additional securing them. The sides are also designed to prevent the cargo from falling out of the trunk, so these conditions are mandatory for this version of the product.
Today, car markets are crowded with various options for expedition vehicles for the UAZ Patriot SUV. You can find domestic types, and foreign, and home-made, and factory-made. But which ones to choose? The choice of product should be based on the following criteria:
- the material from which the product is made;
- product shape;
- build quality. If the welds are clearly visible or the steel from which the trunk is assembled is too thin, then it is better not to buy such a unit, as you will suffer more;
- installation method. Based on the installation method, the following options for luggage racks are distinguished: Mounting on roof rails. The simplest and most common installation method. It is enough to install and secure the product. There is no need to perform any additional work: drilling, cutting, etc.
- Installation on gutters. This fastening option is also one of the simplest, but less reliable than the next one.
- Installation in roof mounts. To do this, holes are made in the roof of the car and a trunk is installed. This mounting option is the most reliable, but requires drilling the roof, which negatively affects the structure of the car.
So, fastening to the roof rails is carried out using special brackets. This option is acceptable for those who do not want to spoil the structure of the car and try to avoid drilling the body part. The disadvantage of this type of fastening is the design - the trunk, which is attached to the roof rails, does not look very nice.
Installation on roof rails
Installation of the product on gutters
The UAZ Patriot SUV, however, like many domestically produced cars, is equipped with special grooves on the roof, called gutters. Foreign-made cars have long moved away from such a device, but the essence of these gutters is that it is in this groove that an expeditionary trunk can be completely freely secured.
Fixation is carried out using special L-shaped brackets. This mounting option also does not require disruption of the roof structure, which is why it is also popular. But there is also a downside to this fastening option, which is the unreliability of fastening. That is, the possibility cannot be ruled out that the trunk will not rip out under the influence of a large load. Therefore, it is very important not to overload it.
DIY expedition rack for gutters
If you can’t find a trunk that attaches to gutters or the options for such products are not at all what you imagine, then you shouldn’t despair. You can solve the problem by making the unit yourself. Of course, you will need the help of a welder, but first you should sketch out a rough diagram on a piece of paper. The resulting drawing should be handed over to the welder along with the material. So, let’s not dwell on the type of product itself, but consider what the brackets for an expeditionary roof rack for gutters are.
To begin with, select the thickness of the steel brackets. It is desirable that it be at least 2mm and no more than 4mm. You only need three different elements:
- Base plate;
- Pressure bar;
- L-shaped bracket.
The photo below shows an example of these parts.
Once such parts are ready, you will need to connect them to the main structure of the trunk and install them in the gutters. The result will be this version of an expeditionary trunk for the UAZ Patriot, which is fixed into the gutters.
Everything is very simple, but the only thing that is important to consider when installing it yourself is the installation of rubber spacers between the trunk brackets and the roof. This is necessary in order not to damage the car body.
The most popular version of the “expedition vehicle” is the RIF expedition trunk for the UAZ Patriot, which also has a method of installation using gutters. The quality of RIF is quite high, it even withstands the maximum permissible masses, but as practice shows, gutters fail. The dimensions of the RIF are 1200x1900mm, which perfectly places the product on the roof. Additionally, lighting can be installed on the trunk.
Roof mount
Attaching the rack to the roof of the car is the most reliable option, since there is practically no chance that the product can get lost while driving. The only drawback is the need to drill holes in the roof. If you had standard roof rails, then many luggage racks are designed specifically for these mounts. But if the standard crossbars are not installed from the factory, then the fixing option is solved by making holes with your own hands. This process is simple, but requires removing the roof trim from inside the cabin.
After removing the roof sheathing, holes in the roof of the required diameter are marked and drilled. Holes are drilled from the inside (in the internal frame) using a cutter. This is necessary in order to secure the product with nuts. Before installing the product on the roof, be sure to install rubber spacers at the fastening points so as not to damage the paint and prevent corrosion of the roof.
Disadvantages of expedition racks
So, we looked at the main purpose of this unit for the UAZ Patriot SUV, how it is installed and what mounting options are available. In addition to all the advantages, “expedition vehicles” also have some disadvantages, so driving with it on the roof without use is simply irrational. The disadvantages include:
- Reduced aerodynamic characteristics. The trunk, with its massive structure, is simply an obstacle to the oncoming wind, so it slows down the car and reduces its aerodynamic properties.
- Deterioration of aerodynamics leads to increased fuel consumption. The larger the volume of cargo transported, the greater the fuel consumption.
- If the fastening is done poorly, this leads to deterioration of sound insulation.
- Poor vehicle handling due to improper weight distribution.
Therefore, based on all of the above, it should be concluded that it is best to install the trunk when necessary. Therefore, its fastenings must be mobile, that is, easily and quickly removed. The best mounting options are:
- through roof rails;
- into drainage grooves.
Thus, by making the right decision, you will protect yourself from unnecessary and unnecessary additional costs for gasoline and spare parts.
How often does your Patriot break down?
A car roof rack has a huge number of advantages. The main tasks it performs:
- Creates places for transporting additional things and accessories.
- Provides a base for installing additional lighting fixtures and also protects the roof from damage.
Speaking about the advantages, it is impossible to note the disadvantages of this design:
- The aerodynamics of the car deteriorate significantly, which leads to fuel consumption.
- In some cases, when serious mistakes are made, noise insulation and controllability deteriorate.
Roof rack
What is the trunk made of?
To make a luggage base with your own hands, you will need material for its manufacture. The best solution would be metal, the weight of which is insignificant but durable. For the design, the best option would be:
- Aluminum.
- Stainless steel.
- Profile tube.
Many car owners believe that aluminum is a suitable material for making their own trunk frame. It is lightweight, weather-resistant and rust-proof. Using aluminum you can make the most daring designs.
Strong and flexible steel sheets - what else is needed to implement a high-quality design? The disadvantage is the weight, which significantly exceeds the weight of aluminum and the profile tube.
Profile pipe
A profile tube with thin walls is often used as a material for a “domestic type” trunk.
After choosing the right material for the structure, we move on to the stage of measurements and calculations with our own hands. Here the weight, dimensions, necessary elements for the future design and approximate cost are determined.
Taking measurements for the roof rack
First, measure the width and length of the car roof. Then we can use serial ones or make our own drawing, which takes into account:
- The basis of the design.
- Frame.
- Amplifiers for the structure (jumpers).
- Boards.
Trunk diagram
Manufacturing stages:
Attention: to avoid damaging the body paint during installation and operation of the structure on the roof, we glue special rubber bands under the mounting posts.
If desired, you can make additional parts for the Hunter that you will need during operation. For example, a streamlined front body that will provide better resistance when driving at high speeds.
Required tools:
- Drill.
- Bulgarian.
- Measuring equipment.
- Scissors.
- Welding equipment.
- Rubber.
- Cardboard.
- Adhesive composition.
- Dye.
Trunk for UAZ Hunter
Second manufacturing method:
- We take measurements on the Hunter roof with our own hands, using a grinder to make blanks for lintels from angle steel.
- We create a template of cardboard stands for installing the structure. First, we place the cut out template on a metal sheet, then we cut it along the edging.
- We install the cross member using welding. We take measurements on the roof to determine the stability of the trunk.
- Using cardboard, we create a new template that will reflect the shape of the side mounting holes of the trunk.
- We attach the structure to the roof for measurements. We mark the holes for the end fastenings of the trunk to the Hunter support struts. We take a drill and drill the previously marked places on the structure and use the drawing for verification. Install the mounting bolts.
- We use sandpaper to clean seams and other metal parts. Clean and allow time to dry after degreasing. To paint the structure, you can use either simple metal paint or a spray can, which will speed up the painting process itself, as well as the drying time.
The main purpose of the UAZ vehicle is to operate in difficult road conditions. Hunting or fishing always requires a lot of necessary things, in which case an expeditionary trunk becomes indispensable. Its main advantage is easy installation; it is also worth noting its long service life. At the same time, the car takes on a more modern look thanks to an additional chandelier.
Peculiarities
The one-piece frame of the element provides significant load capacity. The supports are fixed to the drainage parts, and the trunk itself on the UAZ “Patriot” covers the entire roof of the car and comes complete with 10 racks.
The structure consists of transverse parts with a pitch of 20 cm and can withstand weight up to 150 kg. The top of the side is made of a round pipe, which is also carried along the bottom. In the front part there are fasteners for additional optical elements. Surface painting is usually done using a powder method with anti-corrosion protection.
Assembly of the finished structure
After all the above steps, the skins can be installed back in place in the sequence in which they were dismantled. Such manipulations performed with the trunk of a VAZ 2114 and its lid can significantly reduce the penetration of sound that enters the car interior through the rear wall of the vehicle, as well as from the rear wheels.
Radio with monitor Pioneer AVH-3100DVD for 2990 rubles!
A high-quality, stylish and multifunctional device that makes the driving process as comfortable as possible and prevents the driver and passengers from getting bored in boring traffic jams! More details at the link.
Source
How to choose
There are many different options available, allowing you to find the right option for any car. To reduce noise from the air flow, an additional plastic spoiler is installed at the front. You can purchase a luggage rack for the UAZ Patriot from companies involved in their manufacture, in stores and on online platforms, as well as from official dealers. Although there is a wide range of models to suit different needs, customization is ideal when specific requirements need to be met. In this case, you need to pay attention to the manufacturer, he must inspire trust and have positive recommendations, because the quality of the design affects safety while driving.
First of all, you need to take measurements and select the desired dimensions of the element. If the UAZ roof rack is to be manufactured individually, a schematic drawing of the desired result is first drawn up and, if necessary, finalized together with specialists. You just need to choose a ready-made version in the store along with the accompanying fasteners.
Traffic controller in pictures and with explanations: how to easily understand signals and gestures
- power window module 2 pieces;
- 2 mechanisms for lifting glass;
- wires;
- diodes;
- electromagnetic relay;
- five-pin relays;
- four-pin relays;
- Relay connection block;
- springs for the lid lock;
- power tools;
- wiring;
- nuts, bolts;
- Bulgarian, etc.
As you can see, the set is quite impressive. Therefore, consider whether it is worth trying to assemble the kit yourself. Sometimes it is much easier and even more economical to purchase a ready-made factory kit with a guarantee and all the associated benefits. Price does not always play a key role.
Installation
Before installation, the vehicle must be thoroughly washed. The structure is usually fixed for a long time, and dirt and dust can lead to rust on the body.
If there are no roof rails, the trunk on the UAZ is fixed to the roof. Fastening with bolts or welding is possible. In the latter case, the appearance will not be aesthetically pleasing. When bolted from the inside of the machine, two steel strips about 5 mm long with holes are placed on the ceiling. Special mastic is used for tighter fixation. Suitable holes are drilled on the outside of the roof and treated with a special agent to prevent corrosion.
Plastic elements are laid between the roof and the supports themselves, then the pre-treated parts are tightened using bolts. In this case, it is necessary to use keys for better fastening.
Trunk on UAZ: additional elements
There are various plugs that cover the holes, which is especially important for the appearance of the interior. Additional lighting devices can be mounted on both sides of the axes; they will be useful not only on the road, but also when setting up a camp, as well as when overcoming difficult obstacles. You can attach a hijack to the sides using special slats. In addition, it is possible to attach a spare wheel.
A ladder is often mounted on the back door in order to simplify the use of the structure. This will make it convenient to climb onto the expedition trunk to load it.
It is worth noting that certain rules must be observed: objects must be placed evenly and carefully secured, since the car changes its center of gravity when top loaded. Accordingly, special care is required when moving.
Finishing work
After fixing the homemade element, it must be painted.
Thus, creating a roof rack on roof rails on your own is, although quite labor-intensive, but not such a difficult process. In return, it provides solutions to many problems. For example, a self-made expeditionary roof rack for roof rails allows you to take everything you need with you on long journeys and tourist trips without any problems.
Every car owner once feels too cramped in the car - for example, when he starts repairs and carries tiles and plaster in the car or rushes to the dacha in the spring with seedlings. The most effective way in this situation is to place luggage on the roof of the car using a special device. However, prices for high-quality luggage racks range from several thousand to two to three tens of thousands of rubles. A simple and practical solution is to make a trunk yourself.
Self-production
First you need to decide on the material used; these can be profiled pipes, aluminum profiles, elements made of metal or stainless steel, which are carefully welded around the perimeter. Welding is not able to provide sufficient reliability, because of this the trunk on the UAZ can become deformed and move. Therefore, it is necessary to supplement the base with jumper posts located every 15-20 cm.
Profiled pipes or steel sheets are perfect for forming sides. The design of the side can be made in two variations - collapsible and cast. Depending on the selected type, fastening parts are manufactured.
For removable sides, it is necessary to create a mounting base, which includes vertical posts and clamps that ensure their connection to the frame. During the work, you cannot do without a drill; it is used to drill holes in the fastenings and edges of the side.
The last stage is grouting the joints, painting the structure and installing additional elements. Now you can try on the trunk on the UAZ “Bukhanka”, but you may have to make some changes and use a straightening tool.
Cutting and welding
Cross members for roof rails are sold in specialized automotive stores. If you cannot find the cross members of the required length, they will need to be cut. The set of crossbars, like the sidewalls, consists of two products. To distribute the weight over 8 support points, it is best to buy two sets.
The crossbars are attached to a frame consisting of the same profiled pipe and repeating the perimeter of the roof of a particular car, using welding. This creates the lower base that a do-it-yourself roof rack (VAZ-2111 or any other model) should have.
After which the upper platform is performed in exactly the same way. It is very important that both structures exactly match each other in size. It is most advisable to fasten the two halves of the trunk together using the same welding. It is important to clean the welds immediately after the metal has cooled.
What you need to know
The frame is painted one day after applying a special primer composition, and it is advisable to use products containing zinc to provide additional anti-corrosion protection. Ordinary enamel can be used as a paint coating.
It is worth noting that the frame can be mounted on gutters or on the roof of the car itself. In the latter case, considerable effort will be required to remove it, although the need for such a procedure arises extremely rarely. Fastening to drainage elements will ensure easy dismantling of the structure.
In order to make a trunk for a UAZ, you will only have to spend money on the materials used. And learning to work with plumbing tools and welding does not take much time. Moreover, the cost of such a frame in a store is several times higher than the cost of making it yourself.
My friend Valery had a problem - a new roof rack, bought at a car dealership along with a UAZ Hunter, fell apart after the first fishing trip! Without stopping by home, Valery threw this “ruin” into my workshop with the words: “Please do it when you have time!” A few days later I examined this miracle of technology and became convinced of its complete stupidity. It was a prefabricated trunk made of rectangular and square pipes. The ears of its side pillars are made of steel sheet only millimeter thick.
The arrangement of the luggage area tubes is longitudinal-transverse, with M10 bolts fastening them together through the main transverse beams, which completely weakened them. The support nodes of the transverse beams turned out to be wider than the places of attachment to the UAZ roof by as much as 20 mm.
In the process of disassembling the trunk into components, I became confident in the need to completely remake it from a collapsible one to an all-welded one...
To do this, I cut off all the threaded bushings welded to the tubes and straightened the tubes themselves. Then I first assembled the supporting transverse beams with racks using welded “tacks” from standard parts, keeping the size between the last 1520 mm, and finally welded the seams. I connected the resulting beams with spars and, having precisely checked the rectangularity of the frame (or base) of the future trunk using “diagonals,” welded one to the other. Having received a strictly rectangular frame, I welded additional cross members between the beams, and along, in the middle between these elements, I also installed spacers using welding.
1 – outer support transverse beam (pipe 40x20x2.2 pcs.); 2 – middle supporting transverse beam (pipe 40x20x2); 3 – additional cross member (pipe 20x20x2.2 pcs.); 4 – spar (pipe 20x20x2.2 pcs.); 5 – spacer (pipe 20x20x2.4 pcs.); 6 — inclined support (pipe 40x20x2, 6 pcs.); 7 – vertical support (pipe 40x20x2.6 pcs.); 8 – high side wall (pipe 20x20x2, 2 pcs.); 9 — inclined stand of the high side wall (pipe 20x20x2, 2 pcs.); 10 – low sidewall (pipe 20x20x2, 2 pcs.); 11 – inclined stand of the low side wall (pipe 20x20x2, 2 pcs.); 12– tailgate (pipe 20x20x2); 13 – rear rack (pipe 20x20x2.3 pcs.); 14, 15, 16 – M10 bolt with flat and spring washers (6 sets); 17 – support rod (circle 5.6 pcs.); 18 – threaded bushing M10 (circle 16, 6 pcs.); 19 – clamp (steel sheet s3.6 pcs.)
I made the side and rear sides from suitable pieces of purchased “construction set”. I welded support rods to the flattened ends of the vertical posts on the side. After the final welding of all the seams, I made a final straightening of the frame and cleaned up the welding seams. The clamps were made without modification, however, they could have been made independently.
In conclusion, the new trunk should first be coated with a gray primer and then painted with silver, but the owner himself took on this work, so the “memory photo” shows the trunk without any coating.
A car roof rack has a huge number of advantages. The main tasks it performs:
- Creates places for transporting additional things and accessories.
- Provides a base for installing additional lighting fixtures and also protects the roof from damage.
Speaking about the advantages, it is impossible to note the disadvantages of this design:
- The aerodynamics of the car deteriorate significantly, which leads to fuel consumption.
- In some cases, when serious mistakes are made, noise insulation and controllability deteriorate.
Roof rack