A little history
This creativity came from the Land of the Rising Sun. There are many historical facts and myths associated with the art of creating paper crafts. However, there are specific life situations related to origami.
50s - the whole world was shocked by the story of a little Japanese girl who was stricken with radiation sickness. Doctors did not give a single chance for her recovery.
But the little girl not only knew the old legend about a thousand cranes, but also believed that the paper cranes would fulfill her wish - she would definitely become healthy. In different countries, children started making figurines.
Unfortunately, Sadako (that was the girl’s name) managed to fold only a little more than 600 cranes. And after her death, her friends completed the work.
Since then, the paper crane has been a symbol of peace, along with the dove.
Apart from paper birds, origami flowers are also very attractive and in demand.
Multilayer paper rose
For another variation on the theme of a multi-layered rose, you will need not individual petals, but entire layers at once. Cut out three or four flowers from red paper, gradually reducing their size. Twist the petals in different directions and assemble the entire structure with glue or a pin. All that remains is to glue the flower into a backing of leaves, which can also be made in two parts.
Photo: podelunchik.ru
DIY corrugated paper flowers: 9 ideas
Origami roses
Magnificent gifts of flora with a wonderful aroma, roses are recognized as the queen of flowers. Poems and music are dedicated to them, they are awarded the brushes of great artists.
Florists often make them the accent of flower beds, the main decoration of plots, and the central element in a bouquet. Paper roses look no less beautiful. These amazing creations are used as interior decoration and can also serve as a chic addition to a gift.
Quite simple techniques are used to create a miracle. It will take some time and care to master them. Then making a wonderful rose using the origami method with your own hands will not be difficult.
spiral rose
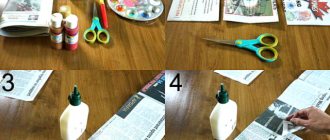
To make such a beauty, you need to prepare colored paper (it is better to use double-sided material), a sheet of white paper, as well as the most common tools and tools for work - scissors, wire, glue gun, pencil.
This option is characterized by ease of manufacture and an interesting flower shape.
Step by step execution:
- draw a rose template - a spiral flower (the product will look beautiful if cut out with wavy lines);
- cut the blank - you get a spiral;
- transfer the resulting sample onto colored paper, trace it with a pencil and also cut it out;
- a piece of wire wrapped in green paper will serve as a stem;
- Apply a drop of glue to the tip of the stem and carefully wind the spiral workpiece; it turns out to be an elegant bud;
- secure it with glue.
Similarly, you can make several roses (of the same color or different colors) and create a beautiful bouquet. The addition will include beads, satin ribbons and other decorative elements.
The next option for creating a rose from paper in origami style will be an excellent gift design. Her sophistication will bring a lot of joy and admiration.
Original rose
Necessary materials:
- paper of various colors and shades;
- pencil, skewer or thin stick;
- scissors;
- any adhesive substance.
It is possible to achieve the desired result if you adhere to the recommendations of specialists and strictly follow their advice.
Master class on creating a product:
Prepare a square sheet of paper of the planned color. Fold it in four.
Then fold the resulting small square diagonally to form a triangle, cut off the extra piece.
Cut the top into a semicircle (the future petal) and cut off a piece at the bottom of the triangle.
Unfold the resulting workpiece. If the actions are performed correctly, a flower is formed with eight petals. You need to make four blanks.
Next you need to carry out the following procedures:
- in the fourth base, cut off one petal, seven leaves will remain;
- leave six petals in the third blank;
- the second flower should have five petals left;
- the first base has four petals.
- Give each base a cup shape by gluing the petals together.
- Using a stick, slightly bend the petals on all blanks.
- Fold all the elements into a beautiful bud, gluing each part.
- Cut out the green leaves to give them a corrugated look, folding them like an accordion.
- Connect the leaves to the bud and stick them on a long strip of paper. With its help you can complete your holiday gift wrapping.
This way you can make several roses of different colors. At first, flower arrangements may seem very difficult to make.
Don’t despair, even beginners in the field of origami can do such crafts.
Option 2. Blooming bud
Once the origami technique has been mastered, you can move on to more complex models. But there is no need to immediately jump from simple to complex. Make the task more difficult gradually.
Note!
Origami tank: step-by-step description and simple manufacturing instructions. 125 photos and video master class
- How to make an origami car - step-by-step instructions for assembling a simple car, Cadillac, retro cars. 60 photos of cars using papercraft technique
How to make an origami owl? The symbol of wisdom made of paper is a three-dimensional owl, modular. Master class on folding origami owls for beginners
Making a bud bloom can be quite simple. Schemes for folding roses are presented in a wide variety, you need to try to find a simple and understandable one and you can get down to business.
After that, bend it again, but longer. You will get an isosceles triangle.To fold a blossoming bud, you will need colored paper. Choose the color yourself. So, cut a strip of 40-50 centimeters from the leaf. Fold the corner towards you and secure it.
There is no need to cut anything. Now mentally divide the strip into triangles. One should be a little larger - about 2 centimeters, the other should be 1 centimeter. Let's roll it up.
Now we begin to twist the rose, try to make the bud tight so that it does not fall apart. As for the tape, it needs to be bent to the end in a similar way.
Roll to the last centimeter.
Note!
- Origami boat from childhood. We collect materials, make a classic boat, a motor ship, a sailboat. Step-by-step photo instructions for folding a boat with your own hands
- How to make simple modular origami? Module assembly diagram, fastening modules to each other. Step-by-step instructions for modular origami for beginners
Origami crane - how to make it yourself? Materials for creating a crane, step-by-step instructions with photos. Application of Cranes made of paper
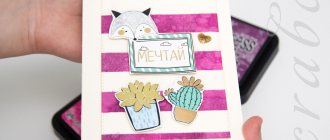
You will get a pretty cute rose that can be used to decorate a card or any other craft.
Expert advice
- It is better to use thicker and two-color paper.
- You can use colored or corrugated cardboard, as well as crepe paper.
- When making various origami roses, use sharp scissors and glue (it is advisable to use a glue gun).
- You may need wire cutters and thin brushes.
- You can enhance the effect of the product by using metallic spray paint.
Any modifications are possible
It is not at all necessary to make all the roses from one sheet of paper. It is enough to give free rein to your imagination, and in a homemade bouquet, next to elastic, durable buds, the most delicate flowers made from tissue paper or napkins will appear.
A novice master should conduct a dozen or two experiments, changing the size and density of the sheets, their color and texture. It is advisable to add some variety to the outline of the bud, making its petals wavy and slightly bent.
Bouquet of gorgeous roses
To create beautiful flowers, you need to prepare corrugated paper of different colors, green adhesive tape, scissors, and a base for making a stem (this can be a thin stick or wire).
Creation stages:
- Cut out two types of petals (for one copy you will need five drop molds and fifteen hearts).
- Lightly stretch the petal blanks (corrugated paper stretches well).
- Form a bud. To do this, all the petals (first droplets, and then hearts) are attached to the stem in a circle, securing them with adhesive tape.
- Cut out the leaves and attach them to the base of the bud with the same tape.
- Make several roses and form a bouquet. You can make a single-color bouquet, or give multi-colored roses if you wish.
Often, to embellish the appearance of the table, ordinary paper napkins are folded in the shape of a rose. This amazing transformation of a napkin is associated with the name of Stephen Voiss.
A rose made from a napkin using the origami method has firmly entered the list of decorative components when creating a festive mood, since products made with one’s own hands have always been valued and are valued very highly today.
Amazing art
Modular origami is the amazing art of creating three-dimensional figures. This technique originated in China. Thanks to small folded triangles, you can make various variations of houses, animals, plants, cars. Adults and children create unusual souvenirs, garlands, and Christmas tree decorations with their own hands. It all covers The color scheme is very simple to create. Its peculiarity is that the crafts are made up of various small modules. Such flowers are almost impossible to distinguish from real ones. They are decorated with rhinestones, sparkles, foil, and varnish. Finished works are used to decorate the premises of houses, apartments and offices. Bouquets are hung in flowerpots, placed in vases, on bookshelves, and window sills.
Blooming rose element
You need traditional colored napkins and regular tools.
Execution sequence:
- Cut two square napkins (20cm x 20cm) into four pieces.
- Fold the resulting eight elements of future petals into an even stack and secure with a stapler in the middle.
- Cut a semicircle on all layers at the same time.
- Gather the resulting ribbon (with a flat bottom and a semicircular top) into a blooming rose.
- Wrap the bottom of the flower with green thread and cut it shorter so that it lays beautifully on the tablecloth.
- By scattering roses between dishes, you can achieve an original decoration for your holiday table.
Rose made of paper petals
Cut out an octagon-base from a thick sheet of paper on which you will attach the petals. Cut more pieces, make a bend in the middle of each and wrap the edges with a toothpick. Glue them to the bases from the edges to the center, placing one petal on top of the other - it will take about eight pieces.
You can make the next layer a little smaller or wrap it tighter. To form the middle of the bud, glue two petals together and wrap one around the other. Then wrap them with the same blank crosswise and place them in the middle of the flower.
Photo: journal.homemania.ru
White Rose
Beginners who like to create paper flowers are advised to familiarize themselves with the step-by-step instructions for constructing a paper rose in the origami style with an additional viewing of photos of the finished products in our photo gallery.
The materials for work are still the same - white paper, pencil and scissors.
How to make a white rose:
- Take a square sheet of paper. If there is no ready-made copy, you need to make one, which is not at all difficult. Fold the rectangular sheet diagonally and cut off the excess strip.
- Fold the resulting square with a clearly defined diagonal when folded so that an identical diagonal appears.
- Fold the square in half (twice on different sides). The resulting lines resemble the rays of a snowflake.
- Next, move the sides of the workpieces
- in the upper lobe from right to left;
- the bottom element is the opposite:
- a triangle is formed.
- Carefully fix the folds resulting from folding the four vertices to the middle of the product.
- Expand the workpiece to the previously obtained double triangle.
- Bend the upper corner of the figure slightly back.
- Spread the resulting bud thoroughly.
- Assemble the double corner and secure the fold lines.
- Raise all corners to the top of the product.
Half the work is done. But the product is not ready yet, since now it is necessary to do the following manipulations to complete the work:
- flip over and fold each side of the workpiece. The result is a bud with a small hole at the bottom;
- blow well into this hole and the folded bud will straighten out, forming a three-dimensional figure;
- Gently twist the petals outward from the center with a skewer;
- make a stem out of green paper;
- insert the stem into the bud;
- make several of these roses. Apply at your discretion (either collect in a lush bouquet, or use each flower separately).
Origami - a rose can be made not only from paper. One of the main materials is fabric towels. When setting the table, this is a wonderful option, since a fabric rose can be used for its intended purpose, you just need to unwrap it.
It is necessary to prepare fabric towels in green shades and several products of different colors (optional), threads, wide glasses.
Execution order:
- Fold green fabric into an accordion shape.
- Place the resulting part in a glass.
- Place a colored towel in front of you. Fold one side of the fabric slightly (no more than one centimeter), and then wrap it around your finger to form a small cylinder.
- Secure the base with thread.
- Pull a few petals out slightly.
- Place a colored rose in a glass on green leaves.
- Add serving glasses with fabric roses in front of the cutlery.
At first it may seem that such folding is a very complex and difficult to remember process. But once you get down to business, it turns out that this activity is not so difficult, but very interesting.
Step-by-step flower assembly
- Take a piece of paper and fold it into a rectangle. Draw along the fold line several times so that the outline remains, and unfold the sheet.
- You have formed a fold line, let's call it central and during further folding we will focus on it. Now you need to make one more bend. We bend the paper from the bottom of the sheet, but not to the middle. We retreat 5-7 centimeters from the center line.
- You also need to fold the top part, retreating the same distance.
- Expand the sheet. Now you need to turn it over and place it vertically towards you. All previous actions are repeated, as has already been done.
- Again, fold the sheet in half along the center fold line.
- Now, without unfolding the sheet, you need to bend it into a third. But you can do more. The width of the bud depends on this fold line.
- Unfold the sheet again and turn it over. We repeat all the steps that were done again.
- Now you need to mentally draw a line and fold the sheet into a regular triangle.
- Unfold and fold the triangle again on the other side.
- We continue to form folds and do it in such a way as an airplane.
You should get distinct folds; we will use them to assemble the rose.
This is not difficult, because each fold will independently bend in the desired direction.
Note!
- Origami vase made of triangular modules, assembly diagram for beginners. A selection of diagrams and instructions for folding origami vases
- Origami flowers: step-by-step instructions for creating tulips, lotus, irises, roses, daffodils. TOP 80 ideas and master classes on creating modular flowers. Interesting kusudama and modular bouquets
- Origami cat: simple and accessible master classes for beginners. Assembling an origami cat, a wise cat using the origami technique, futuristic cats
If you look at the rose from below, you will get an even square, but in the open form it will be an irregular diamond.
Be sure to smooth out all the folds and try to bend extra corners.
- You can already clearly see the petals. They need to be bent inward.
- Forming the edges. To do this, you just need to twist the middle of the flower with your fingers, but try not to crush it.
- Now take scissors or tweezers and try to carefully twist all the petals.
Rose is ready!
Photo of origami roses in different techniques
Materials
To learn more about non-standard materials for origami, you can find photos of origami roses on the Internet. Of course, the main component of origami is paper.
But people’s imagination is limitless and there are variations of crafts made from the most non-standard components. Fabric, napkins, glitter, corrugated paper, various natural decorative elements. Anything you can imagine.
Simple but atypical model
There is a scheme, thanks to which a simple rose for beginners, step by step, turns out not only similar to the original, but also quite non-standard, which favorably emphasizes its aesthetic qualities.
To design such a flower, you need to take thick double-sided paper. A square should be cut out of its sheet, which should then be folded into a three-dimensional triangle, that is, a typical blank for an origami figure.
Magic cube
Origami is an amazing art. But some models are able to amaze doubly, not only with beauty, but also with unexpected transformation, more reminiscent of magic. The rose-cube made using the origami technique, created by the American master Joel Sampson, is one of these varieties. A seemingly simple geometric figure “blooms” before our eyes through simple transformations.
The toy consists of modules of two colors - pink (red, orange, white) and green. They are made from squares, traditional for the Japanese art of papermaking, measuring 10x10 cm. You will need three modules of both shades.
It is advisable to use thin but durable paper, such as colored coated paper. It should easily withstand repeated bends, since the cube will close and open.
You can consider the process of creating a magical rose from paper step by step in the following diagrams:
But for beginners it will be much more convenient to follow the video instructions.
Combination
Modern designers suggest combining artificial origami roses with something natural and making a beautiful bouquet out of it.
An artificial bouquet of origami roses in combination with lilies of the valley or sakura branches will look very organic and unconventional. Guests who see such a set in your home will obviously be pleasantly surprised.
Origami for children
Not only is origami an activity that adults can do, but it is also great for children.
Origami develops fine motor skills and creativity. These qualities are very useful for the subsequent development of children.