For home creativity and exciting handicrafts, you can use all kinds of materials with different textures and textures.
Soft and easy to process felt is suitable for making children's, decorative and useful crafts of various shapes and sizes, with additional decor and decorations.
The creative process includes activities for the preparation and processing of material, and various technologies can be used.
Thanks to the unique characteristics of the material and the ease of processing, all crafts made from felt are visually attractive, especially if an original idea is chosen for their implementation.
Types of felt
Felt is one of the varieties of felt, being a non-woven and fairly durable material that is made from different fibers. The quality and origin of fibrous materials determine the classification of felt, which can be of several types:
- natural felt can be down, wool or down-wool, as soft and pliable as possible, it is best used for needlework if children are involved in the creative process;
- synthetic material is available in two types, acrylic and polyester, this felt is flexible and easy to process, it has a denser structure that ensures long service life of finished products;
- mixed felt is made from a pre-prepared mixture of synthetic and natural materials; it belongs to the middle price category; it is used for sewing durable and useful crafts.
All types of felt are soft and pliable; they hold their shape well in finished products and are relatively inexpensive.
Most often, the material is sold in sheets of different sizes, and you can choose different colors and shades, which is convenient for creating bright and colorful crafts.
Materials and tools for crafts
When choosing what to make from felt with your own hands for beginners, it is better to opt for simple and easily implemented ideas.
To organize the creative process and involve children or household members in it, it is enough to select the right materials and decide on the techniques for processing them:
- cutting and preparing the necessary parts and elements, in accordance with a pre-selected scheme or idea, the design of a future craft;
- stitching (sewing) or gluing, both of these techniques are suitable for processing artificial or natural and even combined felt;
- decorating finished crafts using bright accessories; they can be sewn and glued using buttons and sparkles, sequins and beads or seed beads.
Useful tools that will definitely come in handy for creativity include scissors, threads of different sizes and thicknesses, and needles.
To glue individual parts, use a glue gun with silicone rods (multi-colored, plain and transparent or with glitter).
Preparation of materials
Before preparing the material itself, a beginner is recommended to figure out what exactly he would like to do first and look on the Internet for diagrams of the proposed product. Thus, the author of the needlework will get an idea of approximately how much material he will need, and will also be able to estimate the colors.
Then you will need to prepare the following tools:
- scissors.
- threads of the same and different felt colors depending on the chosen color.
- needles of various thicknesses.
- multi-colored pieces of felt.
- 4 pencils (2 light shades, 2 dark shades).
- glue gun
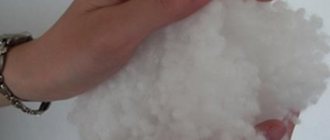
- holofiber or other material for stuffing, in the case of voluminous crafts.
- decorative components.
As for the last item on the list, everything depends on the ideas of the needleworker and can be selected according to the template of a specific work. As a rule, buttons, rhinestones, decorative stones, coins, etc. are chosen for decoration.
Having prepared the necessary atmosphere and materials, you can begin to create a pattern.
Felt phone case
Sewing a case for a smartphone or tablet is quite simple; for this you need to prepare two parts from dense material.
An original craft will be created by using different methods of decorating the cover, and it is better to sew the prepared parts with an external seam.
Dense wool threads are used for stitching, which will create the illusion of volume and further decorate the case.
Additionally, you can decorate the case with beautiful embroidery, felt overlays of a different color, elements in the shape of flowers, leaves and animals, and geometric shapes.
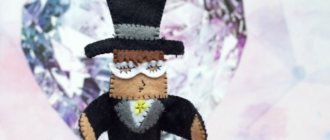
Brooches
A bright brooch draws attention to your outfit, so many women carefully select this accessory for a particular look. Make a felt brooch using the step-by-step instructions below, and you will see that it is quite possible to create them yourself using scrap materials.
Snail patterns (click on the picture, it will enlarge and then download it):
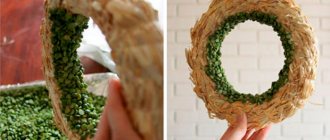
Felt pincushion
A soft pincushion made of multi-colored pieces of dense material will help distribute the equipment used in needlework. This felt craft is made from pre-cut segments (multi-colored felt is best) and sewn together to form a circle.
Such a blank is glued to a cardboard circle; before gluing the last section, the craft is stuffed with cotton wool or padding polyester.
Certain colors are used to place needles with thin and thick eyes, decorated with beads or special cutting needles with protective elements.
Painting with a horse
The proposed painting of a horse is perfect for children. They will be able to do most of the work on their own; adult help will only be required when sewing on the parts.
Related article: TOP 5 best polymer clay producers
Necessary materials:
- felt;
- scissors;
- beads;
- sequins;
- pencil;
- needle and thread;
- photo frame with glass.
The work process consists of the following stages. First stage. Let's disassemble the photo frame; it's better to put the glass aside for now. According to the size of the cardboard base included in the frame, we cut out the main background of the future painting from yellow felt. Using PVA glue or a glue gun, glue the felt and cardboard.
Second phase. We make templates from paper for all elements of the composition. Using the template from red felt, we cut out the body of the horse. Next, we cut out the mane and tail from blue felt. From orange - horseshoes, harness, and from white - a dove, a circle and the eye of a horse. Then make a cloud out of blue. We make several more circles of different colors for the Olympic rings.
The final stage. Now all the parts need to be sewn together, using yellow beads for fastening and decoration. All received parts must be glued to the main background.
The finished painting just needs to be placed in a frame under glass.
Felt hairpins and elastic bands
Multi-colored felt is often used to create beautiful accessories and high-quality, inexpensive jewelry.
Soft material is used to cover beads, form flowers from individual petals, cut from colored fabric and other elements that will decorate style accessories.
Prepared decorative ornaments can be used to decorate accessories for hairpins, creating original masterpieces.
Soft elastic bands can be easily created by sewing a rectangular piece along the length with an internal seam and threading a regular elastic band into it; such elastic bands do not damage the hair and always look elegant.
Algorithm for sewing a fashion accessory
For sewing, you will need not only felt, but also prepare cotton fabric, it will be used to create an applique and handle.
Cut out a long rectangle from felt of a color that suits you and on one side round off both edges; this will be the flap of the future handbag.
We fold the bottom side to the top, like a regular envelope, and chop off the side sections and grind them to a width of about 5 mm from the edge.
Along the edges of the flap, sew a decorative stitch 3 mm from the edge. The thread for sewing buttonholes on the front side can be contrasting with the color of the felt.
Cut out an applique from the fabric and sew it along the contour to the top of the bag.
If you have special pliers, install two blocks to fix the handles of the handbag; for this you will need to step back one centimeter at a time. If you don’t have this tool, then you can cut a hole to attach the handle and trim the edge with thread.
Cut the handle of the future handbag out of fabric; it should be a strip about four centimeters wide. Fold it in half and sew along the length of the strip.
Pull the ends of the handle into the pre-made holes in the bag flap and secure it with knots. A beautiful handbag for a fashionista is ready.
Felt brooch
Of course, brooches are not worn often, but this is the kind of accessory that will perfectly complement a festive costume at a themed party.
From felt you can cut out such holiday symbols as openwork snowflakes, Christmas trees for New Year and Christmas, spiders and pumpkins for Halloween, Easter eggs or tulips for March 8th.
To secure small parts or accessories that complement the brooch and the entire composition, use glue.
A pin is glued to a round base made of thick felt on one side, and a selected decor from which a certain composition is formed is placed on the other.
Felt roses
Let's make the base first. To do this, you need to cut out a circle measuring 10 centimeters. We make rounded petals along the edge, moving in a spiral towards the center of the circle. When twisting, starting from the center, you can get the middle of the future rose. To secure, you need to apply glue using a heat gun. After the glue has completely hardened, we wrap the remaining part of the felt strip onto the resulting center of the flower, so that the bottom of the flower is completely covered with felt. The rose is ready.
Such a rose can be made part of a picture, used as a hair clip or as a brooch for a dress. To do this, just sew or glue a pin or hairpin to the bottom side.
Flowers and floral arrangements
Beautiful DIY felt products are used to decorate the interior, and flower bouquets can be used for this.
Sufficiently dense material is used for cutting elements from which flowers are collected, white daisies with a yellow center, lush pink or white peonies, red roses.
Green felt can be shaped into leaves and blades of grass by wrapping strips of material around flexible wire and securing with glue.
Felt soaked in PVA glue can be used to form a beautiful basket or stand for a flower arrangement, and such a basket can be additionally decorated with felt decor.
How to cut and sew a felt panel yourself
Sheet felt has recently appeared on the market, but is already enjoying great success. People who do handicrafts appreciated it. It is dense, holds its shape well and has different colors, and will be the same shades on both sides. Felt does not wrinkle or deteriorate, so when creating a picture you do not need to waste time deciding which material to choose.
Felt panel “Seasons”
A DIY wall panel made from fabric is easy and quick to make.
Painting "Seasons"
Materials for work:
- cotton;
- upholstery fabric;
- velveteen;
- double sided tape;
- compressed seal.
The elements will require:
- sheet felt;
- flannel;
- household napkins;
- padding polyester;
- decorative braid;
- buttons and yarn;
- scissors, thread, needles, regular pencil.
Draw tree trunks on the upholstery fabric and cut them out. Apply double-sided tape and cut to shape. Also cut out tree tops. To create the ground, you can take corduroy and cut out small hills so that each corresponds to one of the four seasons (summer, autumn, winter, spring). The parts should be sewn with a zigzag on a machine and padding polyester should be inserted into them.
You might be interested in Clothing patterns for newborns: what you can sew yourself
To frame the panel, strips 6 cm wide and 50 cm and 60 cm long are cut out. They need to be sewn together at right angles and sewn to the base. Four strips of 2 cm each, 45 cm and 55 cm long, are cut out of the seal. This is necessary to form the frame. Sew the strips so that the seam is on the inside, then turn the frame inside out. Then you can insert the cut seal. The side is sewn by hand, and loops are sewn on the back side.
White and pink flowers, 8 orange, yellow and green leaves, 5 red apples, 1 green and yellow leaves are cut out from sheet felt. Then you should cut out white circles - these are snowflakes.
Note! Apples are glued onto the finished picture. The sun is cut out from a napkin in several layers and glued together. The clouds are made from blue felt or flannel. The picture is ready.
Children's room decoration
This is a simple fabric panel for a children's room.
Necessary materials:
- felt of different colors (pink, white, beige, coral);
- synthetic fluff;
- satin ribbons of the same colors as felt;
- rhinestones;
- buttons, needles and threads;
- scissors;
- hot glue;
- fabric glue;
- self-disappearing marker.
Note! First you need to make a pattern. You can draw it by hand and make blank balls.
There should be six yellow balls, seven light yellow balls, seven light pink balls, seven beige balls, eight pink balls and seven coral balls. There are 42 parts in total.
Panel for children's room
It is recommended to start sewing the balls from the right edge using an overcast stitch. There is no need to sew the tail of the ball.
Note! When most of it is sewn, the element is filled with synthetic down.
Having reached the end, two stitches are made with a simple running stitch to the place where the ball was originally sewn and tightened. You need to make two turns around the base and finish.
The balls should be arranged according to color. The same colors should not stand next to each other. Next you need to glue the balls together. You need to start gluing from the top so that the balls are layers on top of each other. But you can’t squeeze them too hard so that they don’t lose their shape.
For the cloud, cut two parts from felt. Also sew and fill them.
Next, you have to cut out the letters of the name from felt; the color is taken to match the color of the balls. The size of the letters is 3 cm. If the name is long, then the size can be reduced, but then the craft will be lost in the interior.
You might be interested in this: How to sew a beautiful bow from fabrics yourself
Use glue to attach the letters to the cloud.
To cut out the booties, you need to draw them by hand. Carefully sew the back of the slippers, and sew the sole with a blanket stitch. For volume, the booties need to be filled with synthetic fluff.
Now everything comes together (balls, cloud and slippers). This can be done using satin ribbons, sewing a bow from them at the base. You can add rhinestones to the booties. The product is ready.
Personalized panel ring made of felt
This felt panel is a little more complicated to make with your own hands. First you need to cut out a ring with a diameter of 45 cm, and then, according to the same pattern, two rings from fabric with an allowance of 5 cm. The example describes a panel for a boy, so cars, ships, etc. will be used. To do this, you will need to cut out templates of the corresponding toys.
Personalized work
Now the base is made - the ring. Fabric cuttings are folded on the wrong side, and a decorative braid is laid between them. First, you should sew around the inner circle, and then turn it right side out. Then put a ring of cardboard inside and sew the remaining sides, also filling the ring with fluff. At the end, the letters of the name and toys are sewn on. The panel is ready.
Step-by-step description of making a felt panel “Autumn” with children
Necessary materials:
- wooden frame;
- blue felt for the background;
- felt in red, green, yellow colors for leaves;
- colored paper in yellow, brown and green colors;
- rhinestones;
- glue (since children are involved in the work, it is better to use PVA glue).
Panel “Autumn”
Step-by-step description of the work.
- Using the stencil, draw and carefully cut out the leaves. If it is not there, you can trace and cut out living leaves, which you first collect with your children on the street. This will increase interest in the work.
- Attach leaflet templates to colored paper. But they should be a little larger in size than the felt leaves, because the next step is to glue the paper leaves onto the felt in layers.
- For the background, cover cardboard with felt and secure with a frame. It is advisable to entrust this work to an adult.
- Glue a felt sheet of the same shape, but smaller, to a sheet of paper on top. Draw leaf veins on felt.
- Place the leaves on the background as you wish: around the perimeter, in the center, in a circle, after asking the children what would look best in the picture.
- At the end, decorate the picture with rhinestones. The panel is ready.
You may be interested in: Patterns and sewing of beautiful women's Panama hats with your own hands
Panel paintings made of felt
Necessary materials:
- felt;
- fabric glue;
- pins;
- needle and thread;
- details for decoration (beads, rhinestones);
- It is advisable to take embroidery threads in the same color scheme, but in a slightly different shade to obtain a contrast with the color of the fabric.
Floral panel
To cut out flowers, you first need to make patterns. You can find them on the Internet by choosing any template, or you can make them yourself.
Note! If the flowers are made using several layers of felt, the same or different colors, then they will look even more original.
Felt flowers
The edges of the leaves can be decorated with a beautiful stitch of embroidery thread or left as is. Fold each part of the flower, starting with the largest one, making a bud, and pull the center together to form the core. For it, cut out a small circle from felt and glue it in the center. You can glue a bead into the middle of the flower. You need to cut out leaves from green felt and glue them to the flower.
How to decorate a teenager's room
Necessary materials:
- colored paper;
- scissors;
- PVA glue, brush;
- thin felt for the base;
- big heart template.
Heart for a teenager's room
A large heart is glued to the base. Next, you need to cut out three hearts of different sizes from colored paper and glue them to the felt. First large, then medium and finally small. The decoration for a teenager's room is ready.
Children's crafts made from felt
Together with your children, you can make interesting three-dimensional and flat felt crafts using appliqué, stitching and gluing techniques.
The soft material is ideal for developing creativity and fine motor skills, imagination and perseverance in children of all ages.
Toys
Sewing toys with your own hands together with children is a lot of fun, and before that you can give your child the opportunity to draw a sketch of the craft.
Such designer products help the child to express himself and realize his abilities in crafts, depicting his favorite character or hero of fairy tales and comics.
Letters
Three-dimensional letters are not difficult to make; to do this, you need to draw a letter on a sheet of felt and, duplicating it on the second one, cut out two identical blanks.
The elements are folded together and sewn along the edge, with an outer seam, for which dense, colored threads are used; at the end of the work, the letter is stuffed with filler and completely sewn up.
Using the same technique, you can make numbers and any figures (punctuation marks) that can be used in the learning process, turning classes into a game.
Educational books
An interesting solution to diversify home activities and broaden a child’s horizons in accordance with his age are educational books. Pages made of soft felt are stitched and you can place magnets in them or sew one of the pieces of Velcro onto the surface.
On the pages of such fascinating and educational books you can place various flat figures cut out of thick felt with attached magnets or second parts of Velcro.
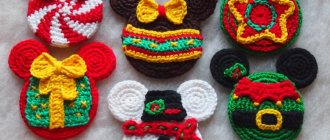
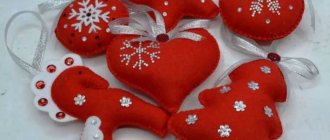
New Year's crafts
Using felt it is easy to create beautiful and themed crafts that are suitable for holiday decoration.
When creating felt souvenirs, the main thing is to choose an interesting idea, such as mittens for cutlery, felt Christmas trees decorated with beads, from which it is easy to form garlands.
You can make envelopes with invitations and cards from this material by gluing snowflakes and snowmen, mistletoe sprigs or pine cones from the same material on them.
Soft and voluminous felt crafts can be of different shapes and embody all sorts of ideas and the most original projects.
To decorate a children's room, you can make toy pillows or beautiful appliqués created together with the children, and flower arrangements will look great in the living room.
Hairpin assembly sequence
By following the algorithm below, you can easily and quickly make a hairpin:
- Find a pattern on the Internet or draw it yourself and transfer it to felt.
- Cut out two halves of the flower.
- Sew it, first stuffing it with padding polyester.
- Now all that remains is to glue the resulting product onto a hairpin that you previously bought in the store.
All that remains is to decorate the decoration with rhinestones or beads.